Implementing scanning techniques
Exercise 1 - Scanning Networks using Nmap
The Nmap utility allows you to scan networks for identifying live hosts and the services they offer. This utility supports a wide variety of scanning techniques. Some of the scanning techniques supported by Nmap are:
- -sS (TCP SYN scan): This is the default and most popular scan. This scan sends a SYN packet and then waits to receive a response. If the ports are open, this scan receives a SYN/ACK flag or a SYN packet in response. This scan is also known as half-open scan.
- -sT (TCP connect scan): This scan type demands the underlying operating system to establish a connection with the target machine and port by issuing the connect system call.
- -sN;-sF;-sX (TCP NULL, FIN and Xmas scans): These are the NULL, Stealth FIN, and Xmas Tree scans. All the three scans sends a FIN packet to ports, however, each uses different flags. Closed ports respond with an RST. The open|filtered ports ignore the packets and provides no response.
- -sA (TCP ACK scan): This scan never determines open ports instead determines the firewall rule sets that are being used.
In this exercise, you will perform TCP SYN, TCP connect, TCP ACK, TCP NULL, FIN and Xmas scans. Please note though all the scans produce similar results, each scan uses different implementation internally as described above.
Please refer to your course material or use your preferred search engine to research this topic in more detail.
Task 1 - Enable Web Services on PLABSA01
In this task, you will enable apache web service (port 80) on PLABSA01 to aid this demonstration.
Step 1
Ensure you have powered on the required devices and connect to PLABSA01.
Close the Server Manager window.
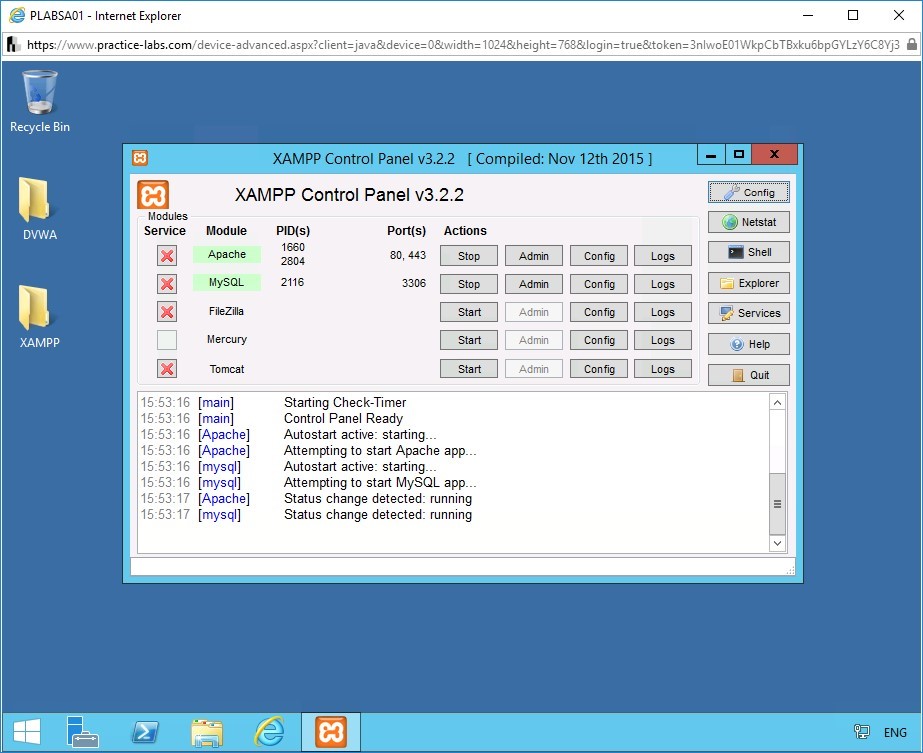
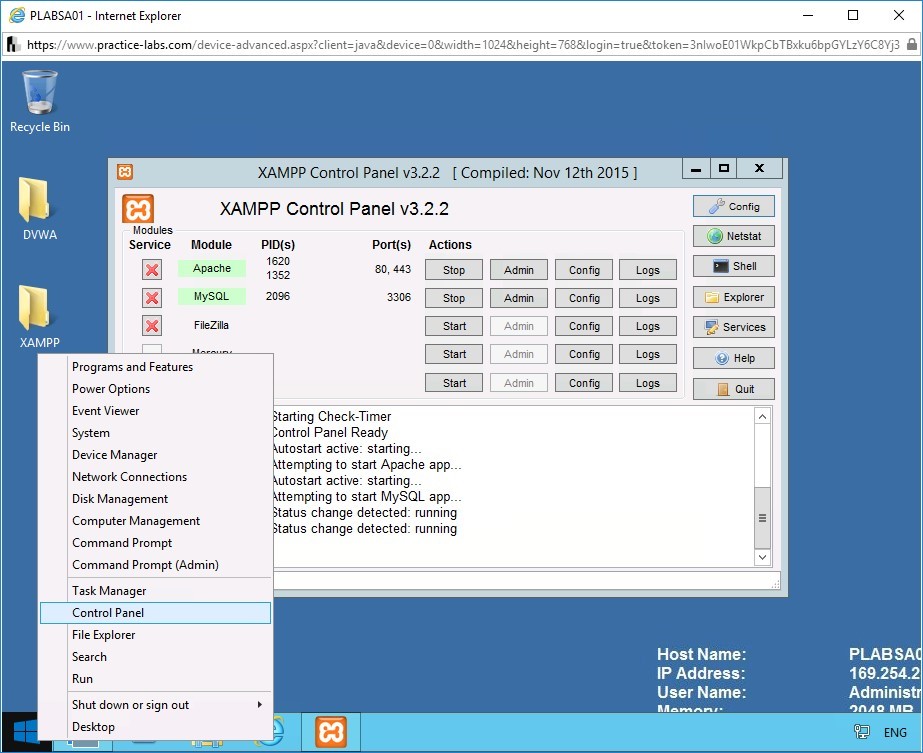
Click the XAMPP application icon from the taskbar.
The XAMP Control Panel v3.2.2 opens.
The apache web service with Damn Vulnerable Web Application (DVWA) running on port 80 is enabled.
Step 2
Minimize the XAMPP Control Panel v3.2.2 console.
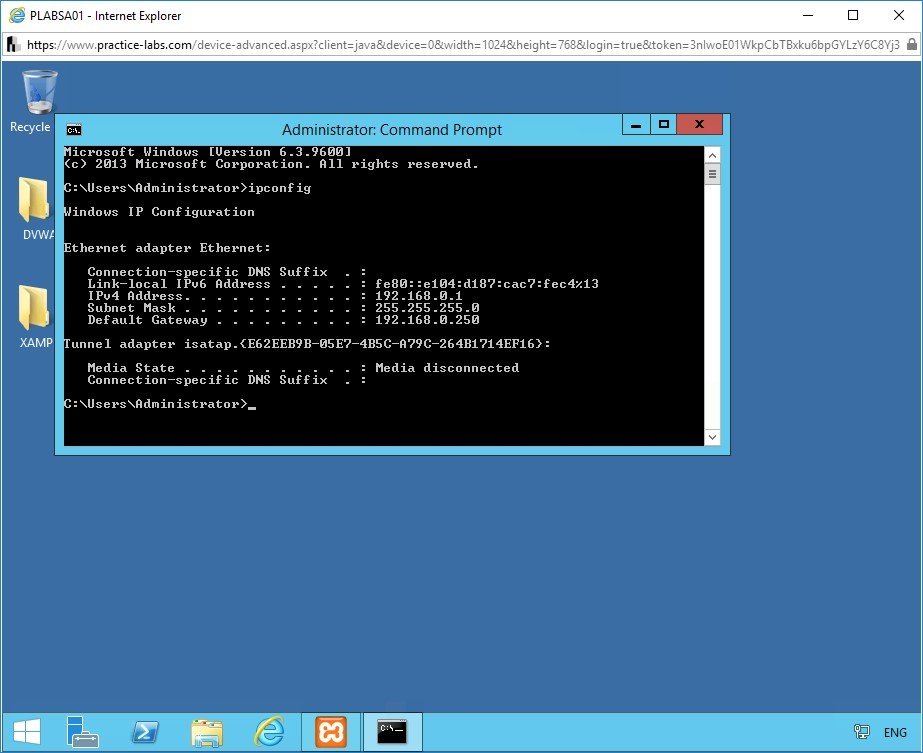
Identify the internal IP address of PLABSA01 by running the ipconfig command at the command prompt.
Right-click Start and select Command Prompt (Admin).
The Command Prompt window opens.
At the command prompt, type
ipconfig
Press Enter.
Notice the IPv4 Address of PLABSA01 is 192.168.0.1.
Task 2 - Perform Half-Connect Scan using Nmap
In this task, you will perform SYN scan also known as half-connect scan using Nmap. You will perform the Nmap scanning techniques using the Kali Linux machine. Therefore, as the first step, you will connect with PLABKALI01.
Step 1
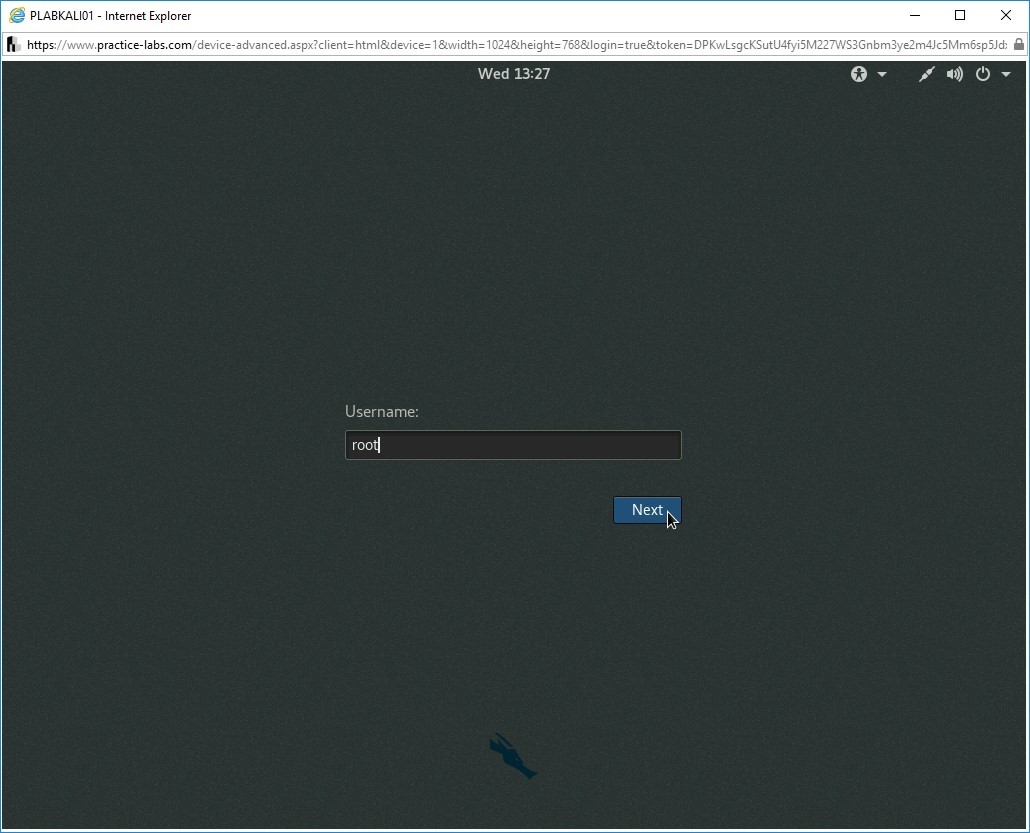
Connect to PLABKALI01.
In the Username: field, type:
root
Press Enter.
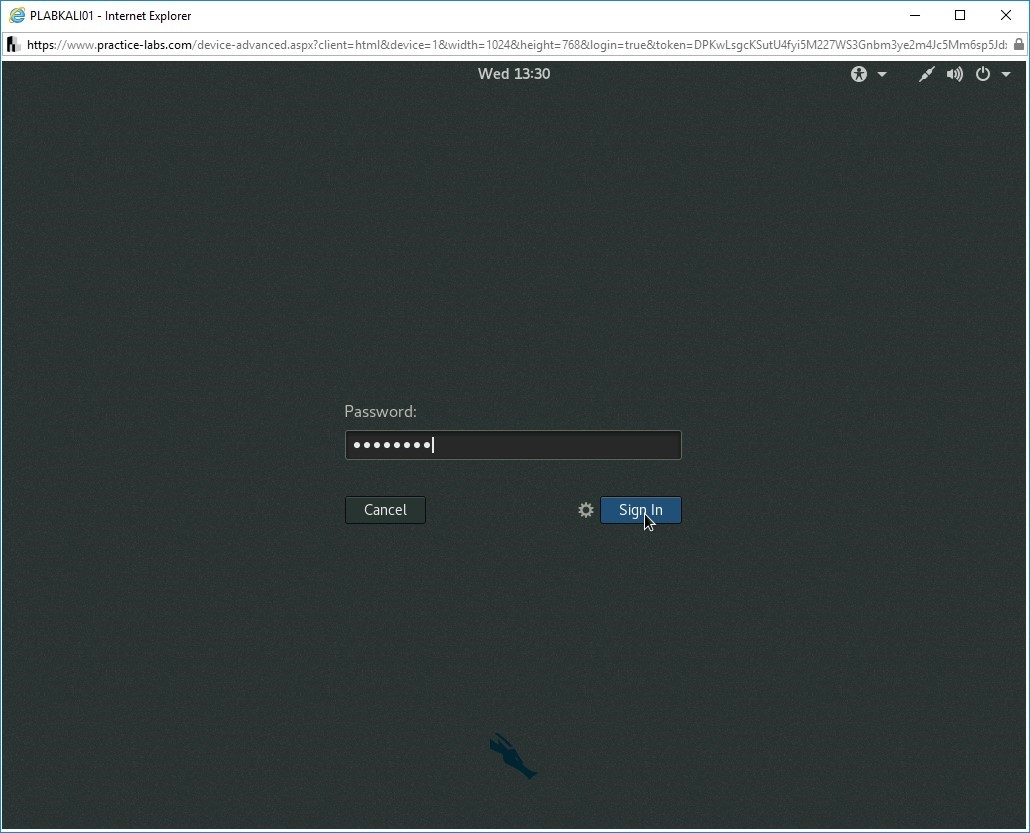
Step 2
In the Password box, type
Passw0rdPress Enter.
Step 3
The connection to PLABKALI01 successfully establishes.
Step 4
From the desktop of the PLABKALI device, double-click the Root Terminal icon to run root terminal.
The root terminal window opens.
Step 5
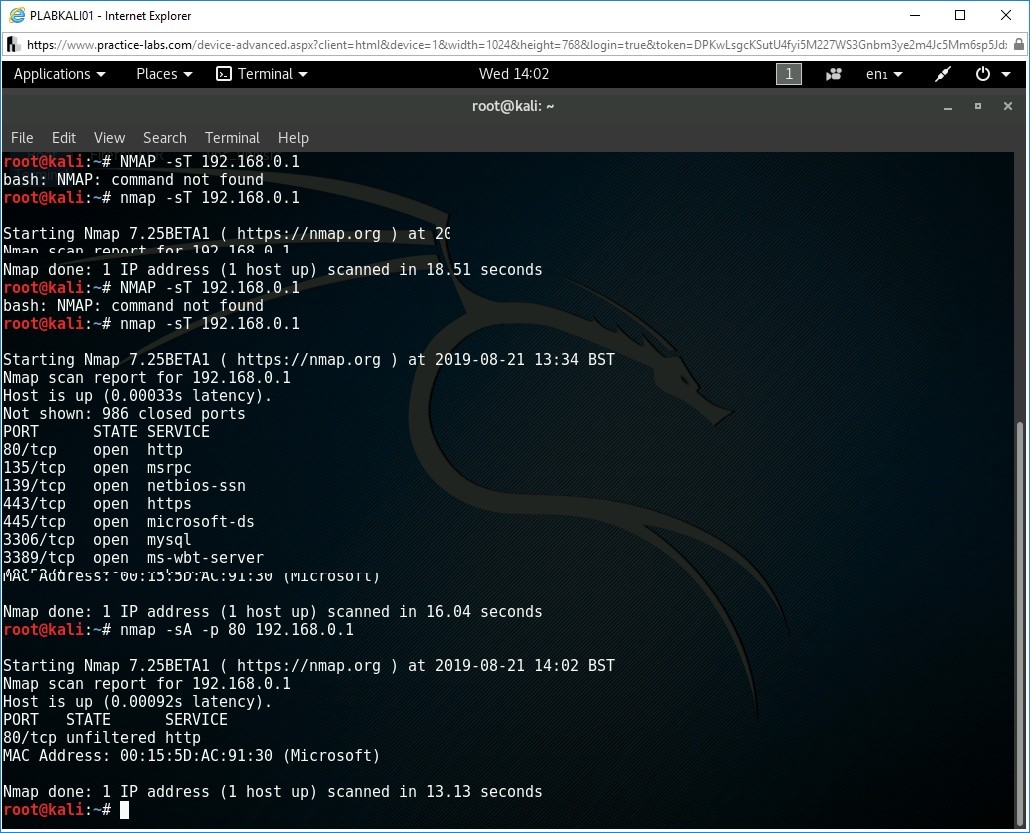
To identify open ports on PLABSA01, type the following command at the command prompt and press Enter.
nmap -sS 192.168.0.1
The given command uses the -sS switch, which is the TCP SYN scan switch.
The output lists the details of the open ports on PLABSA01and the services that uses them.
Note: If no port range is specified, the command nmap -sS <target> performs a SYN scan on well-known 1,000 TCP ports on the host <target>. Nmap scans can be specifically crafted as desired. Detailed information about all the switches supported by Nmap can be found in the help section of the tool.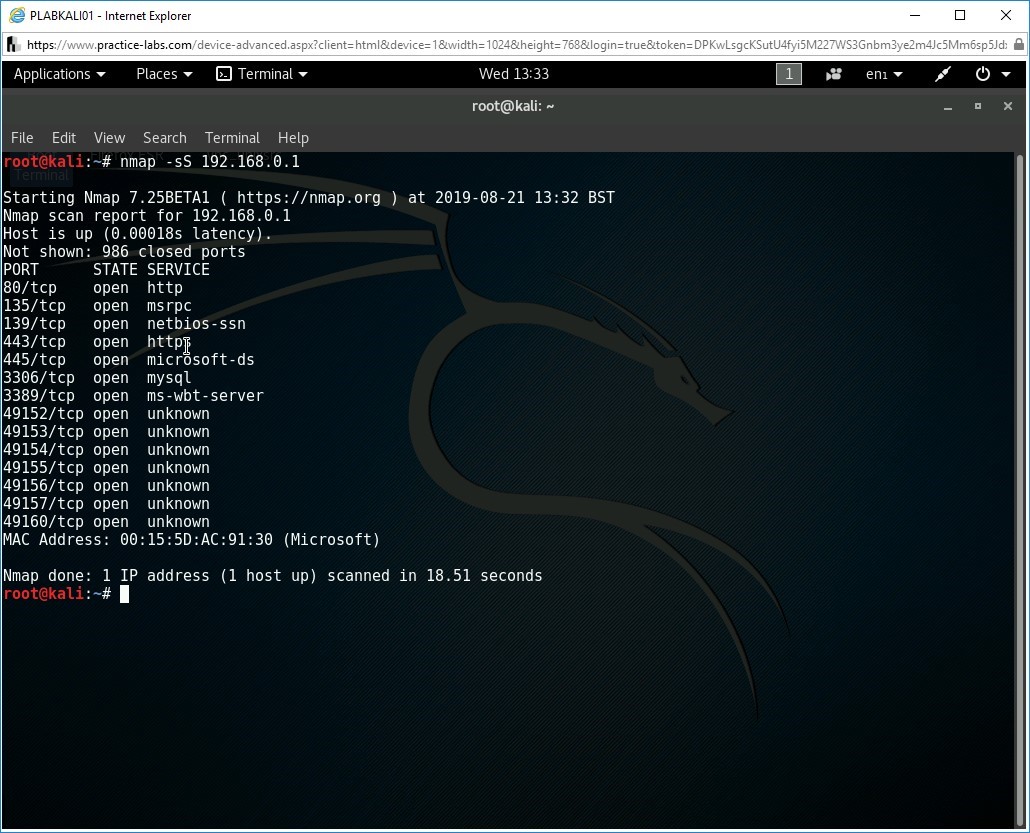
Task 3 - Perform Full-Connect Scan using Nmap
In this task, you will perform full-connect scan also known as TCP connect scan on PLABSA01 using Nmap. As already determined, the IP address of PLABSA01 is 192.168.0.1.
Step 1
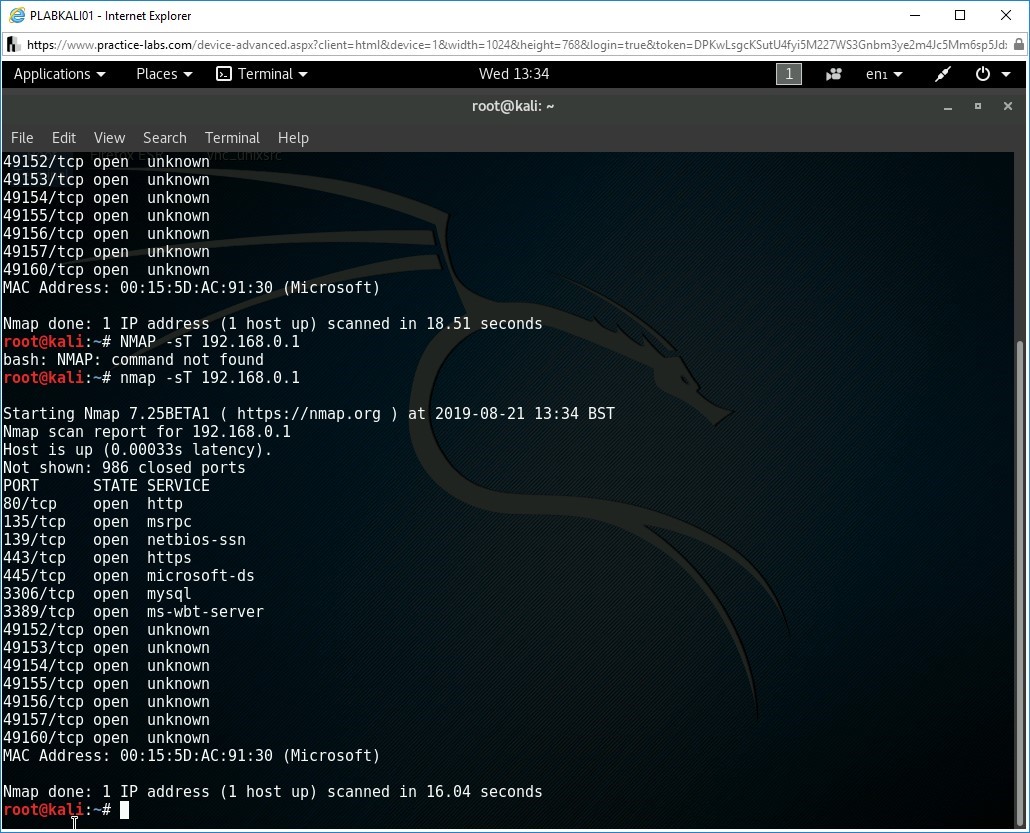
At the root terminal of Kali Linux, execute the following command:
nmap -sT 192.168.0.1
The given command uses the -sT switch to perform full-connect scan on the target machine PLABSA01. If no port range is specified, command nmap -sT <target> performs a TCP Connect scan on well-known 1,000 TCP ports on the host <target>.
Task 4 - Perform Xmas Scan using Nmap
The Xmas scan types work against systems such as Linux-based whose TCP/IP implementation follows RFC 793. Microsoft Windows does not follow the RFC and hence ignores these packets even on closed ports. Hence, you will scan PLABKALI01 machine using Nmap from PLABWIN10 machine. Notice the IP address of PLABKALI01 is 192.168.0.3. As the first step, you will download and install Nmap on PLABWIN10.
Step 1
Minimize PLABKALI01 and connect to PLABWIN10.
Open Internet Explorer.
In the address bar, type the following link:
https :// nmap . org / dist / nmap - 7 . 60 - setup . exe
Click Run.
The nmap-7.60-setup.exe downloads.
Wait for the setup to run.
Nmap Setup dialog box opens.
Close Internet Explorer.
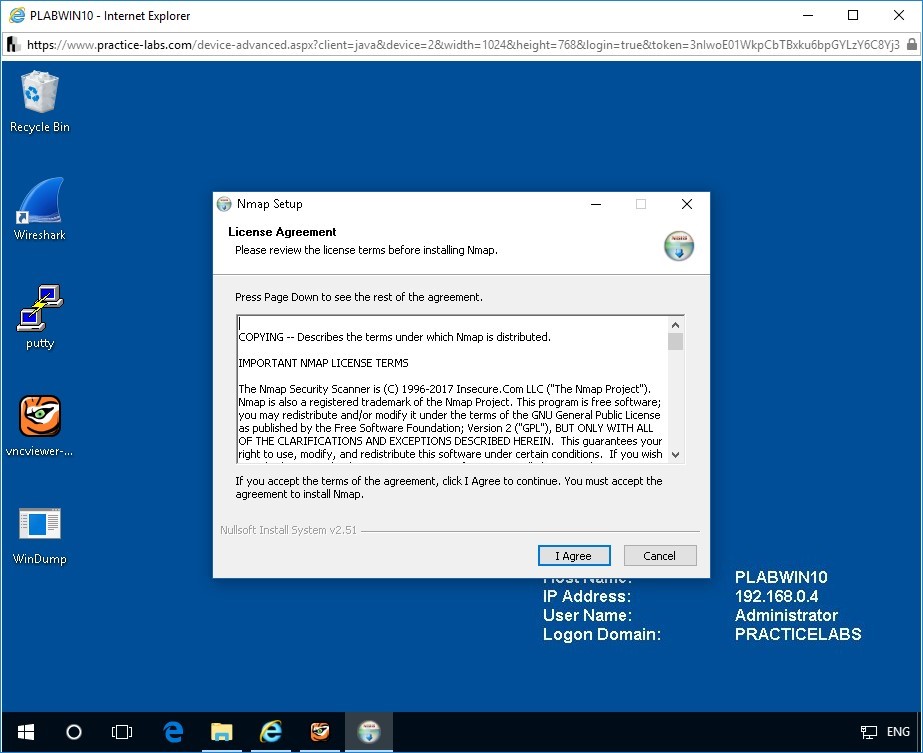
In the Nmap Setup dialog box, on the License Agreement page, click I Agree.
Step 2
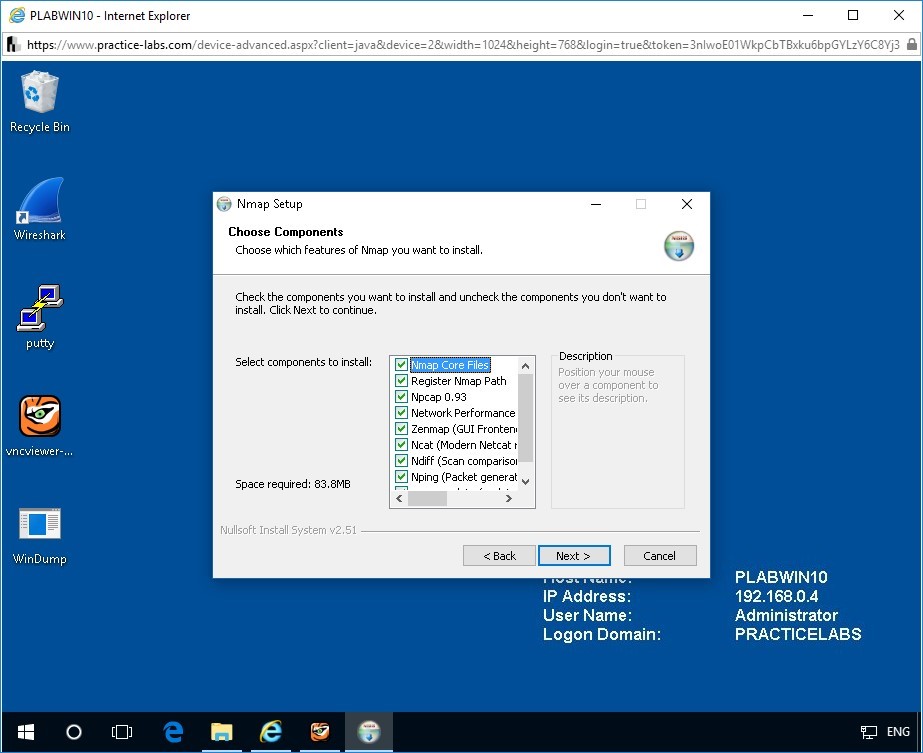
In the Choose Components page, click Next.
Step 3
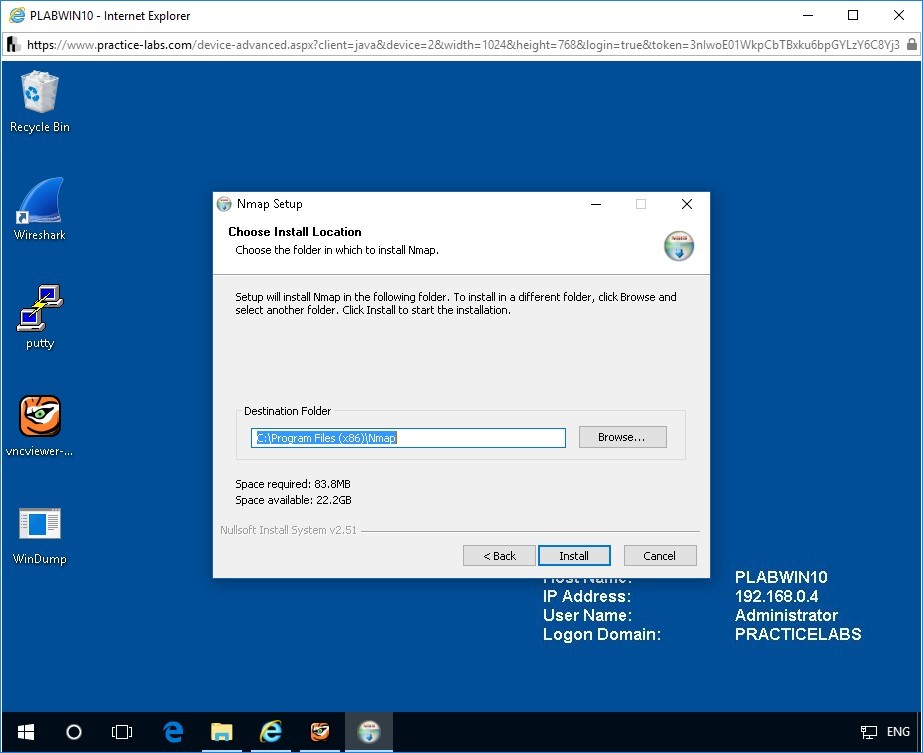
In the Choose Install Location page, click Install.
Step 4
The installation process begins.
Wait for the process to complete.
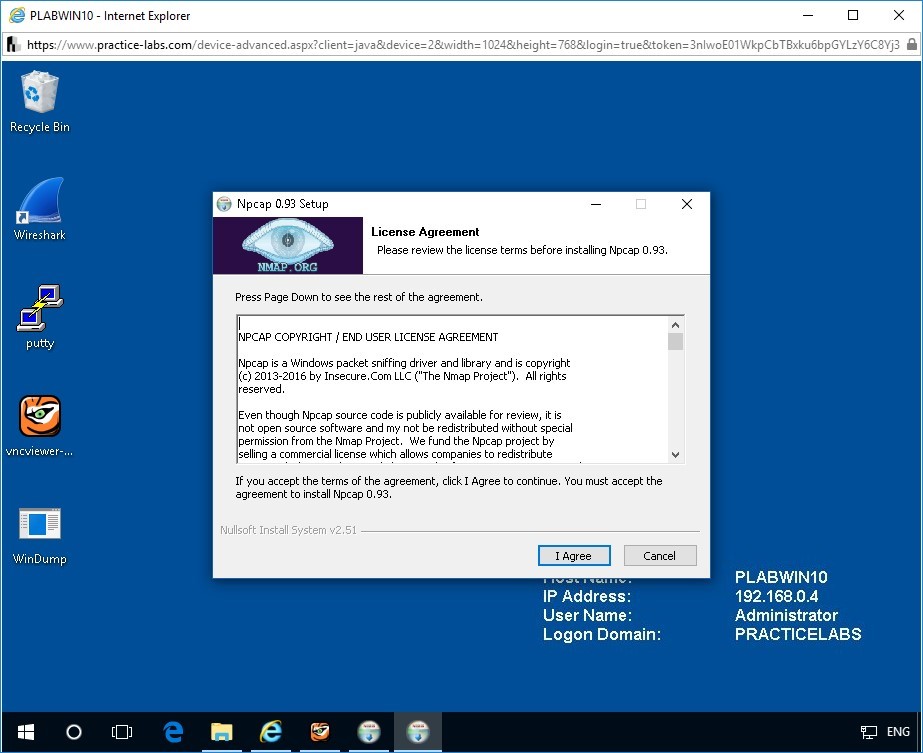
The Npcap 0.93 Setup wizard opens.
On the License Agreement page, click I Agree.
Step 5
On the Installation Options page, click Install.
Step 6
Wait for the installation process to complete.
Step 7
On the Installation Complete page, click Next.
Step 8
On the Finished page of the Npcap 0.93 Setup, click Finish.
Please wait while Nmap is being installed.
Step 9
On the Installation complete page of the Nmap Setup, click Next.
Step 10
On the Create Shortcuts page of the Nmap Setup, click Next.

Step 11
On the Finished page, click Finish.
Step 12
From the desktop, click the shortcut to Nmap-Zenmap GUI.
Zenmap is the GUI version of Nmap.
Zenmap window opens.

Step 13
In the Command textbox, type the following command and click the Scan button.
nmap -sX 192.168.0.3
The given command identifies open ports on PLABKALI01.
Find the Nmap scan report for the Kali Linux machine in the Nmap Output box. The output shows the number of closed ports and the details of the open/filtered ports. Notice that all the identified ports are marked as open | filtered. This means that the Xmas scan performed by Nmap is not certain whether the port is open or filtered.
Note: The -sX switch performs Xmas scan. This scan sets the FIN, PSH, and URC flags and does not set the SYN flag. It lights the packet up like a Christmas tree. The Xmas scan marks a port as closed if it receives a RST packet from the respective port and it marks a port as open | filtered if there is no response.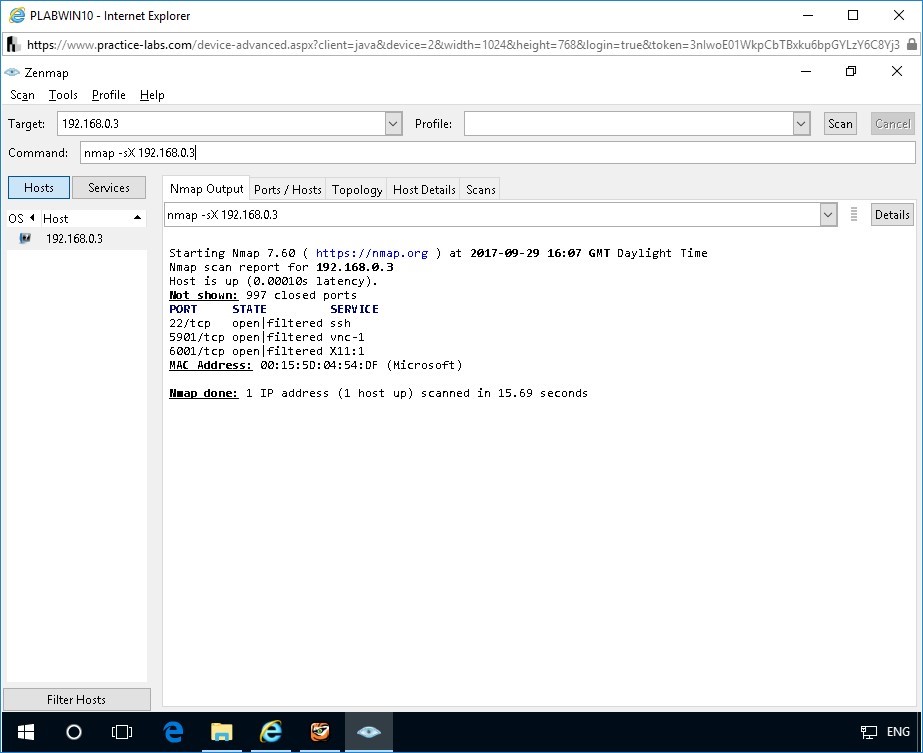
Step 14
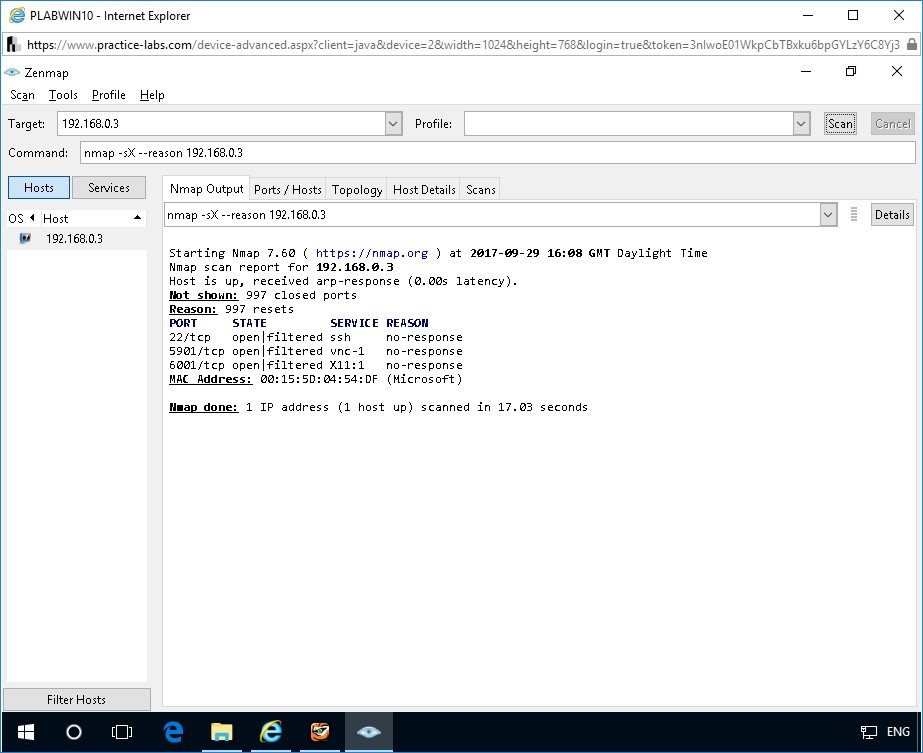
Perform the same Xmas scan with the -reason switch to display the reason a port is in a particular state.
Type the following command in the Command box and press the Scan button.
nmap -sX --reason 192.168.0.3
Notice the output displays the reason a port is in a particular state. For the ports whose state is open|filtered, the reason specified is no-response. This indicates that if a port is open, the Xmas scan receives no response because the open port just drops the Xmas scan packet as the port is listening only for SYN packets. Hence, the reason parameter for each open|filtered port is set to “no-response”.
Nmap marks the ports as open|filtered as it cannot ascertain the nature of the port like it does for SYN or TCP connect scans. This Xmas scan technique might be useful for scanning secure firewalled networks and intrusion detection systems.
Close Zenmap without saving the changes.
Task 4 - Perform ACK Scan using Nmap
ACK scan cannot be used for scanning ports. This type of scan will never show ports in the "open" state, and hence it should be used in conjunction with other scan types to gain more information about firewalls or packet filters between your source machine and the target machine.
If used for port scanning, ACK scan will provide meaningful result only if the target OS flavour is Solaris.
ACK scanning is mainly used to discover the rules of a filter. ACK scanning can help determine if a firewall is stateless (that blocks incoming SYN packets) or stateful (that tracks connections and also blocks unsolicited ACK packets).
As the name indicates, ACK scan sends ACK packets to the target host. If the target response with an RST packet, then the port is classified as "unfiltered" i.e. the port is allowed to send its RST packet through the firewall that is in place. If no packets are received, the port is said to be "filtered" i.e. the firewall prevented the RST packet sent from the port.
In this task, you will scan PLABSA01 machine using Nmap from PLABKALI01. The IP address of PLABSA01 is 192.168.0.1.
Step 1
Open up PLABKALI01.
Ensure the root terminal window is open.
At the command prompt of the root terminal, type the following command and press Enter.
The given command identifies if the port number 80 is filtered or unfiltered by the firewall on PLABSA01.
nmap -sA -p 80 192.168.0.1
The following are the switches used in the given command:
- -sA : ACK Scan
- -p : Specific port number to scan (port range can also be specified)
In the output, notice that port 80 is unfiltered i.e. the firewall allowed the port to respond with the RST packet.
Step 2
To understand ACK scan better, enable the firewall to block all connections on PLABSA01 and then try to perform the ACK scan from PLABKALI01.
Connect to PLABSA01.
Open Firewall Settings.
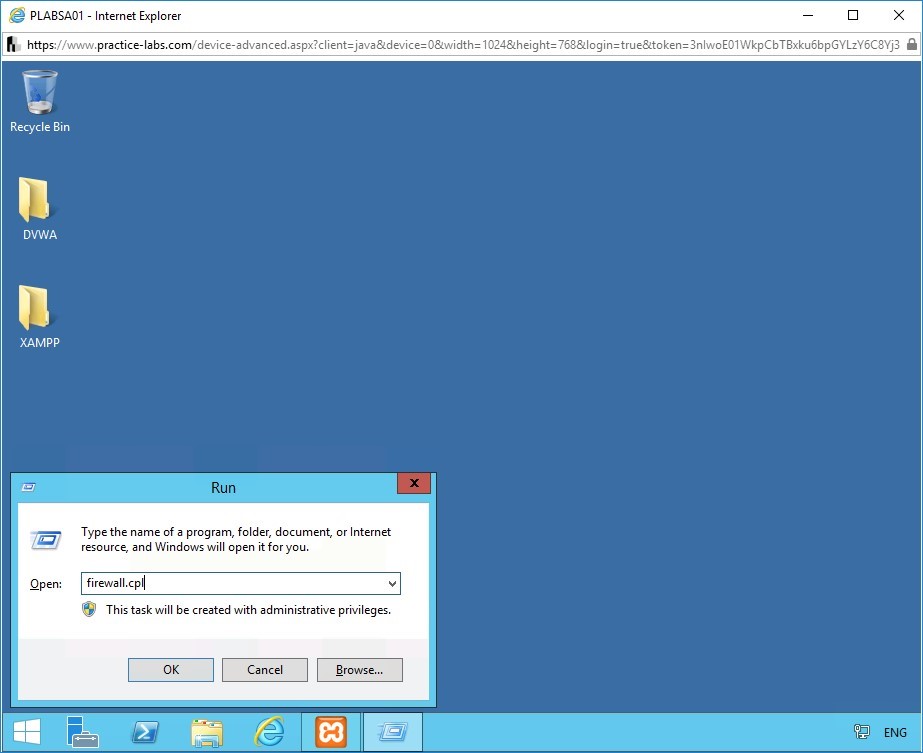
Open the run window by pressing Windows+R keys on the keyboard. Alternatively, right-click Start and select Run.
In the Run dialog box, type
firewall.cpl
Click OK.
Step 3
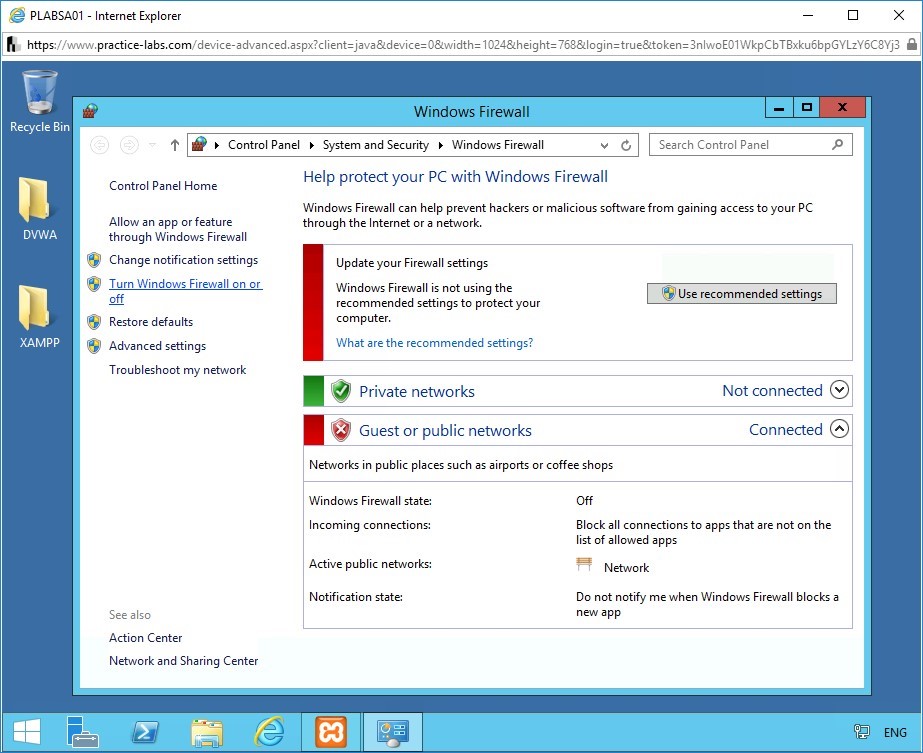
Windows Firewall opens.
Click Turn Windows Firewall on or off.
Step 4
The Customize Settings page opens.
Find the default firewall settings. The firewall settings for the private network is turned on, however, it does not block the incoming connections. The firewall settings for the public network is turned off.

Step 5
Modify the firewall settings.
In the Private network settings section, under Turn on Windows Firewall, check Block all incoming connections, including those in the list of allowed apps.
In the Public network settings section, select Turn on Windows Firewall and check Block all incoming connections, including those in the list of allowed apps.
To save the firewall settings, click OK.
Note: Accepting this will cause you to lose connection from this device. This is because blocking all incoming connections will also block your remote desktop connection. This is intentional for the sake of this task.
Step 6
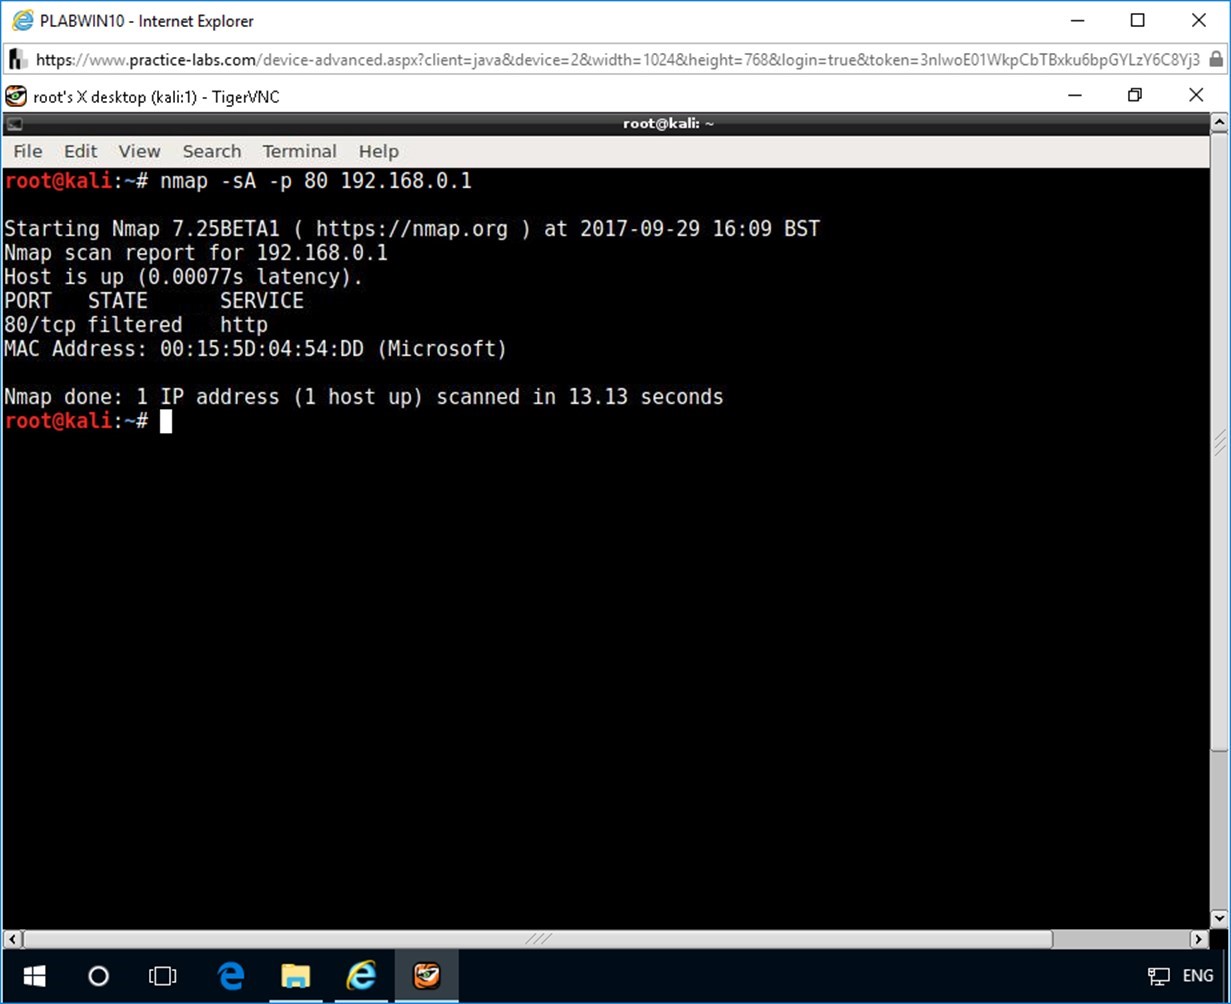
Switch to PLABKALI01 device.
To determine the working of the modified firewall settings, type the following command at the command prompt of the root terminal.
nmap -sA -p 80 192.168.0.1
Press Enter.
Notice the output lists port 80 as filtered. This shows that the modified firewall settings on PLABSYS01 have prevented port 80 from responding to the ACK packet with the RST packet.
Thus, ACK scanning helps determine if a firewall is stateless (that blocks incoming SYN packets) or stateful (that tracks connections and also blocks unsolicited ACK packets).
Reset Your Lab
Use the Reset function on PLABSA01. This will restore the default configuration, once the process has completed then proceed to the next exercise.
Exercise 2 - Scanning Networks using hping3
In this exercise, you will scan the network in the Practice Labs environment using hping3.
Please refer to your course material or use your favorite search engine to research this topic in more detail.
Task 1 - Perform Half-connect Scan/SYN Scan using hping3
In task, you will perform SYN scan on PLABSA01 using hping3. The IP address of PLABSA01 is 192.168.0.1.
Step 1
Switch to PLABKALI01.
Ensure the root terminal window of Kali Linux is open.
Type the following command at the command prompt of the root terminal.
hping3 -8 0-5000 -S 192.168.0.1
The given command identifies open ports on PLABSA01 using SYN scan technique. The command uses the following switches:
- -8 : Enables SCAN mode
- 0-5000 : Range of ports to scan
- -S : sets SYN flag
hping3 also prints the list of ports that do not respond to the SYN scan.
Note: You can use the hping3 utility in multiple ways. Details about all the switches supported by the tool can be found in the help section (hping3 -h). You can try to do a port scan on the same target using different switches of hping3 to understand the tool better.
Task 2 - Perform ACK Scan using hping3
In this task, you will scan PLABSA01 using hping3 from PLABKALI01. Note that the IP address of PLABSA01 is 192.168.0.1.
Step 1
Type the following command at the command prompt of the root terminal and press Enter.
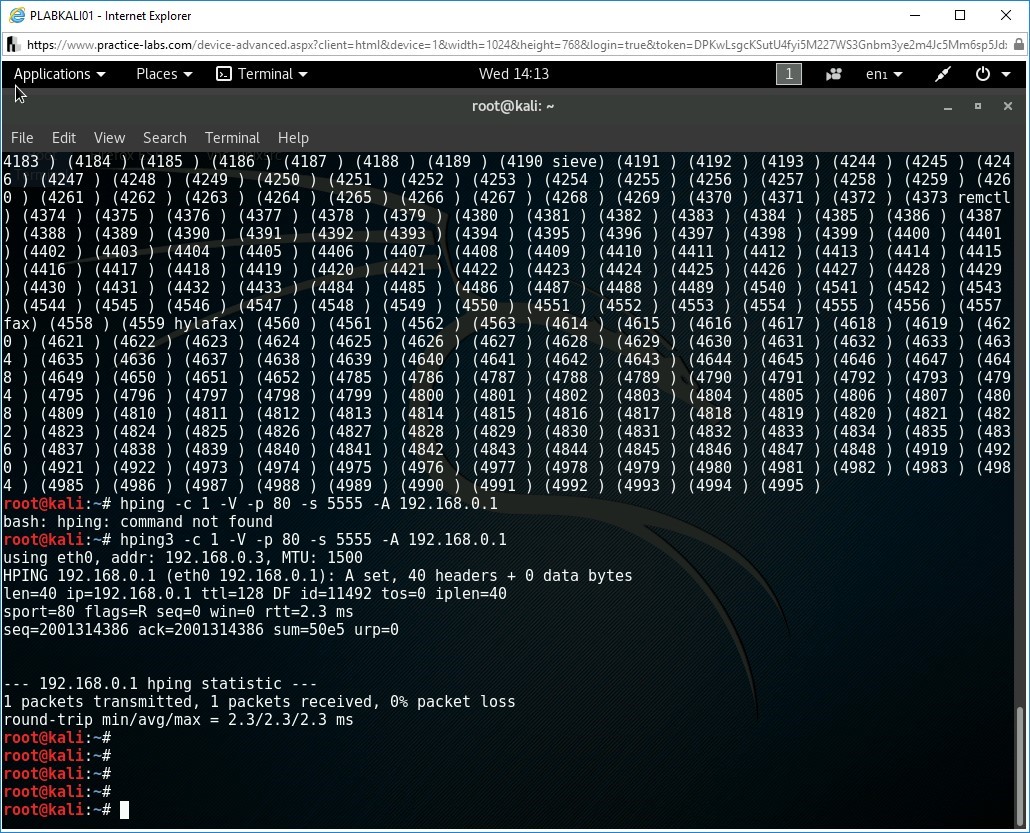
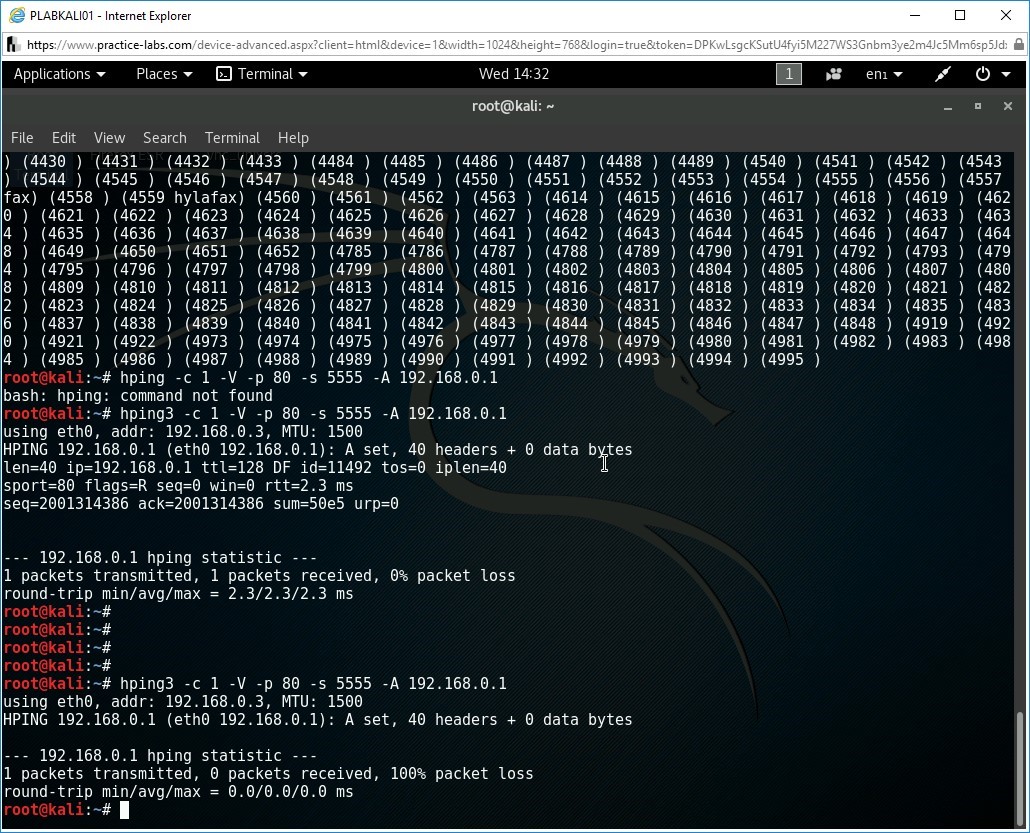
hping3 -c 1 -V -p 80 -s 5555 -A 192.168.0.1
The given command identifies if the port number 80 is filtered or unfiltered by the firewall on PLABSA01. The command uses the following switches:
- -c : Packet count
- -V :Verbose
- -p :Specific port number to scan (Port range can also be specified)
- -s : Base port from which the packet will be sent
- -A : ACK Flag
Notice the output of the command shows there are 0% packet loss in the transmission. This indicates that port 80 is not filtered by the firewall on PLABSA01.
Step 2
To understand ACK scan better, enable the firewall to block all connections on PLABSA01 and then try to perform the ACK scan from PLABKALI01.
Connect to PLABSA01.
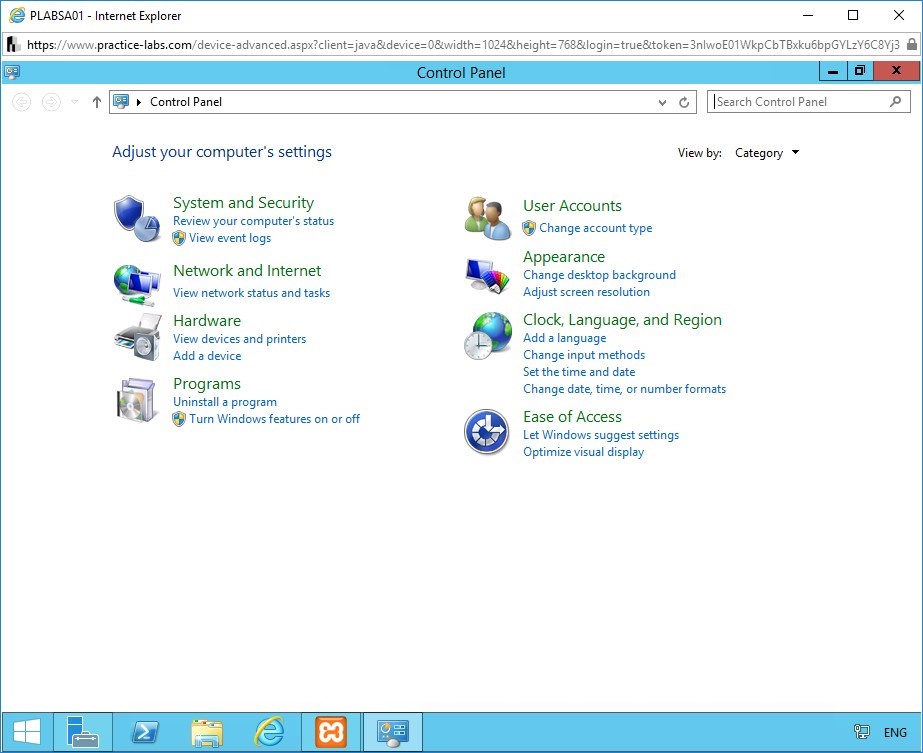
Open Control Panel.
Right-click Start and click Control Panel.
Step 3
Control Panel opens.
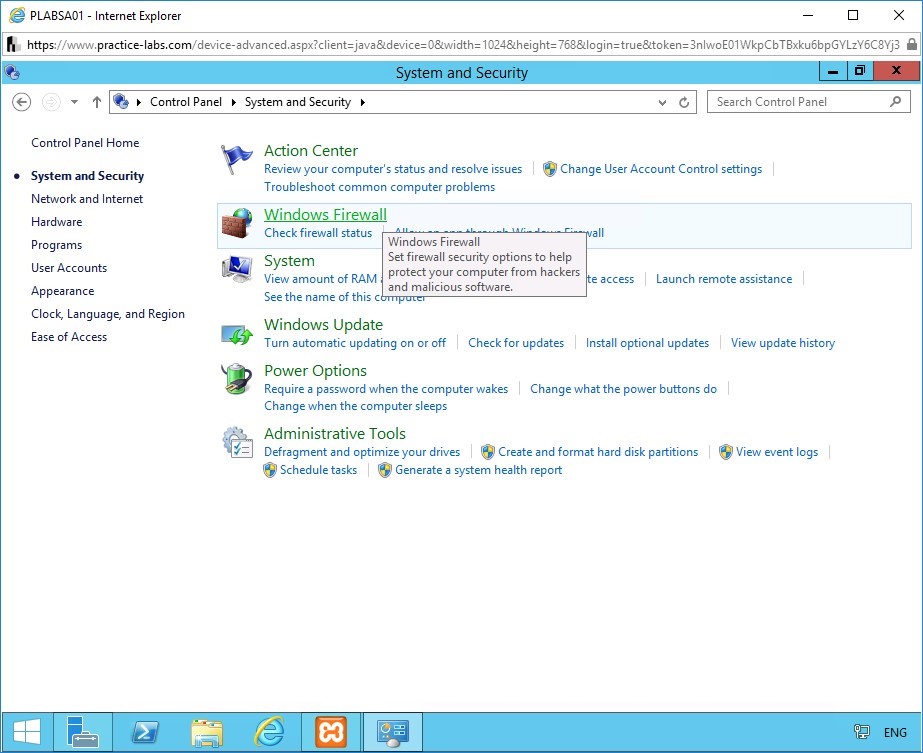
Click System and Security.
Step 4
Click Windows Firewall.
Step 5
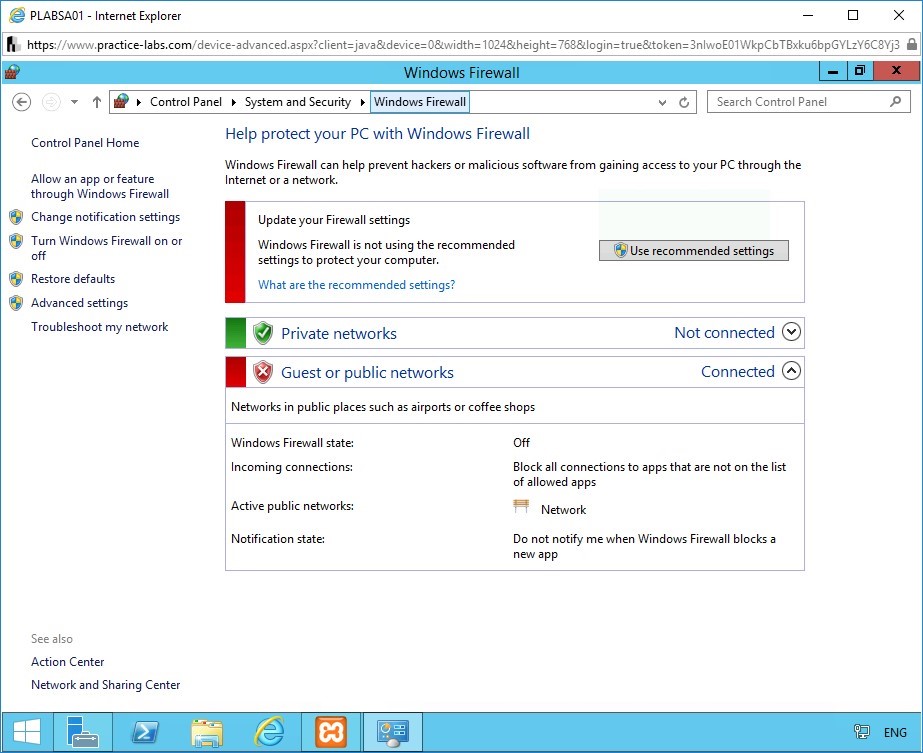
Windows Firewall page is displayed.
Click Turn Windows Firewall on or off.
Step 6
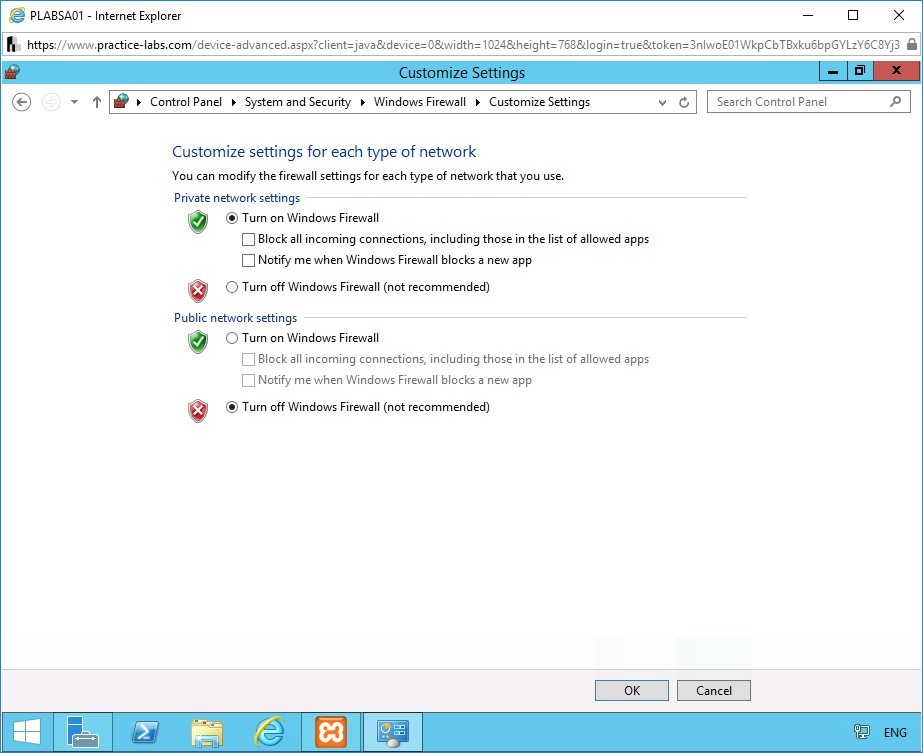
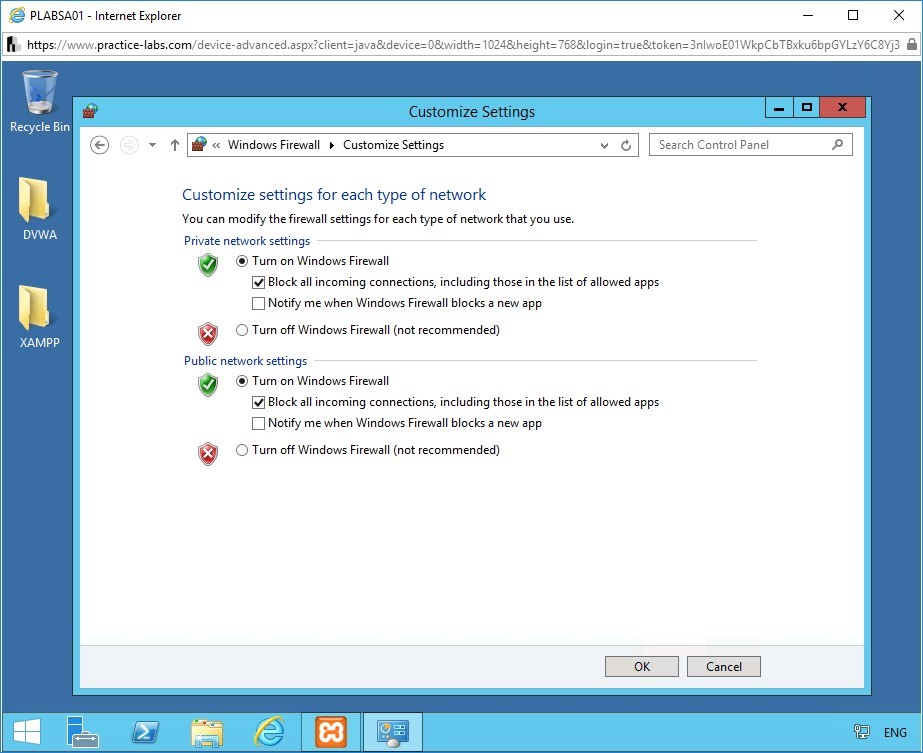
The Customize Settings page opens.
Find the default firewall settings. The firewall settings for the private network is turned on, however, it does not block the incoming connections. The firewall settings for the public network is turned off.
Step 7
Modify the firewall settings.
In the Private network settings section, under Turn on Windows Firewall, check Block all incoming connections, including those in the list of allowed apps.
In the Public network settings section, select Turn on Windows Firewall and check Block all incoming connections, including those in the list of allowed apps.
To save the firewall settings, click OK.
Step 8
Switch to PLABKALI01 device.
To determine the working of the modified firewall settings, type the following command at the command prompt of the root terminal.
hping3 -c 1 -V -p 80 -s 5555 -A 192.168.0.1
Press Enter.
The given command identifies if the port 80 is filtered or unfiltered by the firewall on PLABSA01. The command uses the following switches:
- -c : Packet count
- -V :Verbose
- -p :Specific port number to scan (port range can also be specified)
- -s : Base port from which the packet will be sent
- -A : ACK Flag
Notice the output of the command shows there are 100% packet loss in the transmission. This indicates that port 80 is filtered by the firewall on PLABSA01.
Use the Reset function on PLABSA01. This will restore the default configuration, once the process has completed then proceed to the next task. Please see our help and support page if you are not sure how to do this.
Task 3 - Perform Xmas Scan using hping3
In this task, you will perform Xmas scan. You will create a custom packet with TCP flags such as FIN, URG and PSH and send to port 80 on PLABSA01 using hping3 on PLABKALI01.
Step 1
Switch to PLABKALI01.
At the command prompt of the root terminal of Kali Linux device, type the following command and press Enter.
hping3 -c 1 -V -p 80 -s 5555 -M 0 -UPF 192.168.0.1
The given command creates a custom packet with the TCP flags FIN, URG and PSH and sends them to port 80 on PLABSA01. The given command uses the following switches:
- -c : Packet count
- -V : Verbose
- -p : Specific port number to scan (Port range can also be specified)
- -s : Base port from which the packet will be sent
- -M : Sets TCP sequence number
- -UPF : Sets URG, Push and FIN Flag
Notice the output displays that one packet is successfully sent and one packet is successfully received. This indicates that port 80 is closed. However, port 80 on PLABSA01 is open.
Note: Systems respond to Xmas tree packets if the port is closed. Systems do not respond if the port is open.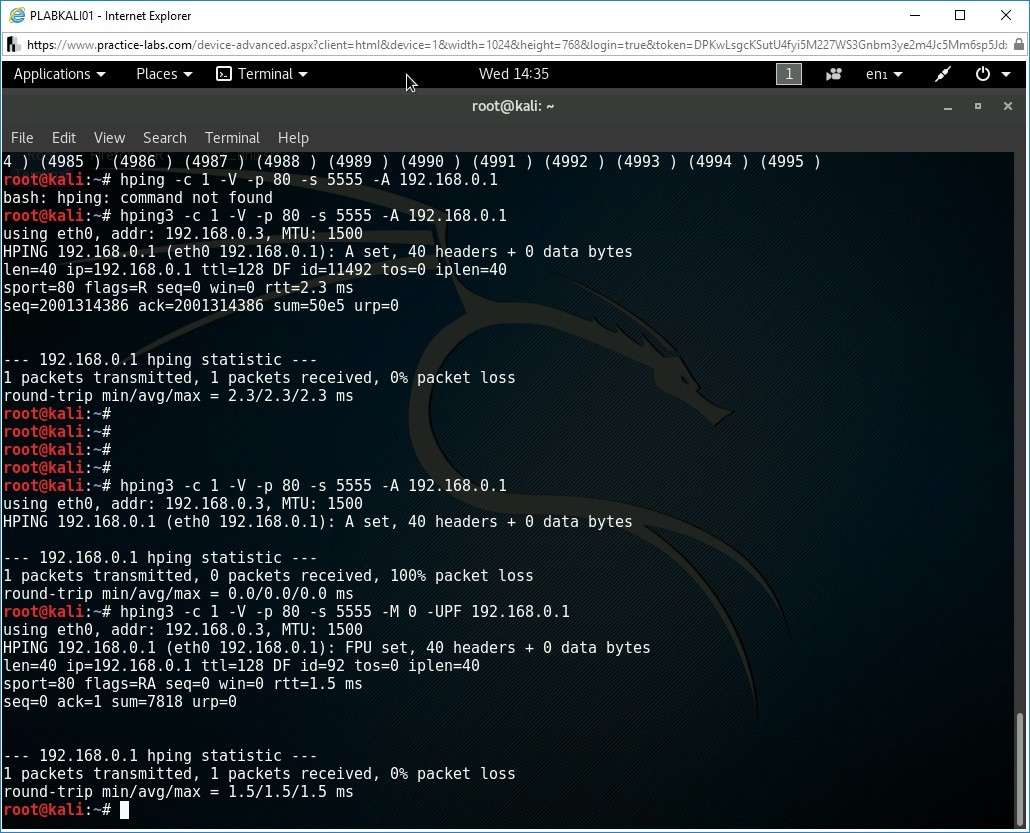
Step 2
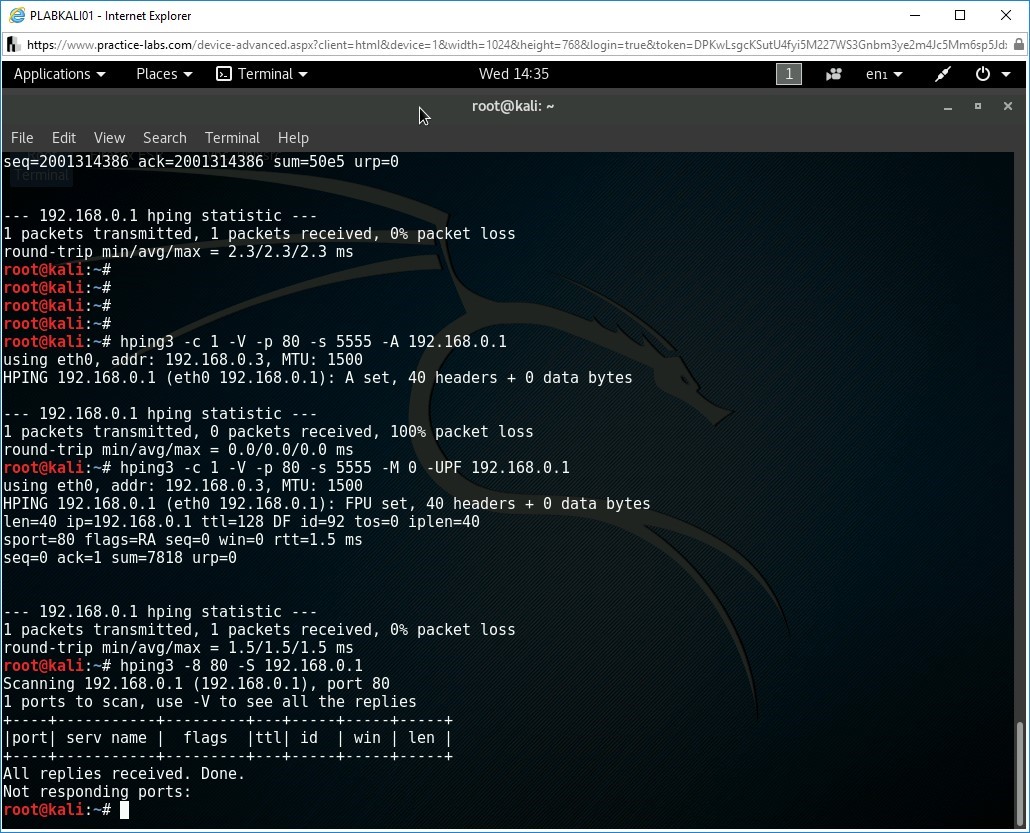
To perform a SYN scan on port 80, type the following command and press Enter.
hping3 -8 80 -S 192.168.0.1
Find that the output indicates that the port 80 is open.
In the Xmas scan that you did in the previous step, you observed that the Xmas scan received a response which indicates that the port is closed. However, when you performed a SYN scan on port number 80 with hping3, you see that the port is open. This is because, the Xmas scan type works only against systems whose TCP/IP implementation follows RFC 793. Microsoft Windows does not follow the RFC. Hence a Xmas scan done on Windows ignores these packets even on closed ports.

Comments
Post a Comment