Implementing software raid
Implementing Software RAID
Exercise 1 - Configure Software RAID
Exercise 1 - Configure Software RAID
Windows has a built-in capability to set up a software RAID (Redundant Array of Inexpensive Disks) that combines multiple disk drive components into a single logical unit for purpose of providing fault tolerance or enhance the performance of your storage subsystem. Based on the various formats used for storing data on the disk-groups, the RAIDs can be of many types, the common ones supported by Windows are RAID-5, RAID-1, and RAID-0.
Software RAID, unlike its hardware counterpart, is slower and entirely dependent on the operating system. Therefore, if Windows becomes inoperable, the only way that you can access your data hosted in a software-based RAID system is by restoring Windows and ensuring that RAID disks are all intact.
In this exercise, you will configure storage by implementing the RAID technique.
Refer to your course material or use your preferred search engine to research this topic in detail.
Task 1 - Creating RAID-5 Volume
A RAID-5 volume requires three disks with unallocated partitions of the same size. Data is written and read across the members of a striped volume and parity information is saved on the disks, which enhances data recoverability. In this task, you will create a RAID-5 volume S, consisting of disks 1, 3, and 4 on PLABDM01.
To create a RAID-5 volume, perform the following steps:
Step 1
Ensure you have powered on the required devices, as mentioned in the introduction section.
Connect to PLABDM01. The Server Manager console is displayed.
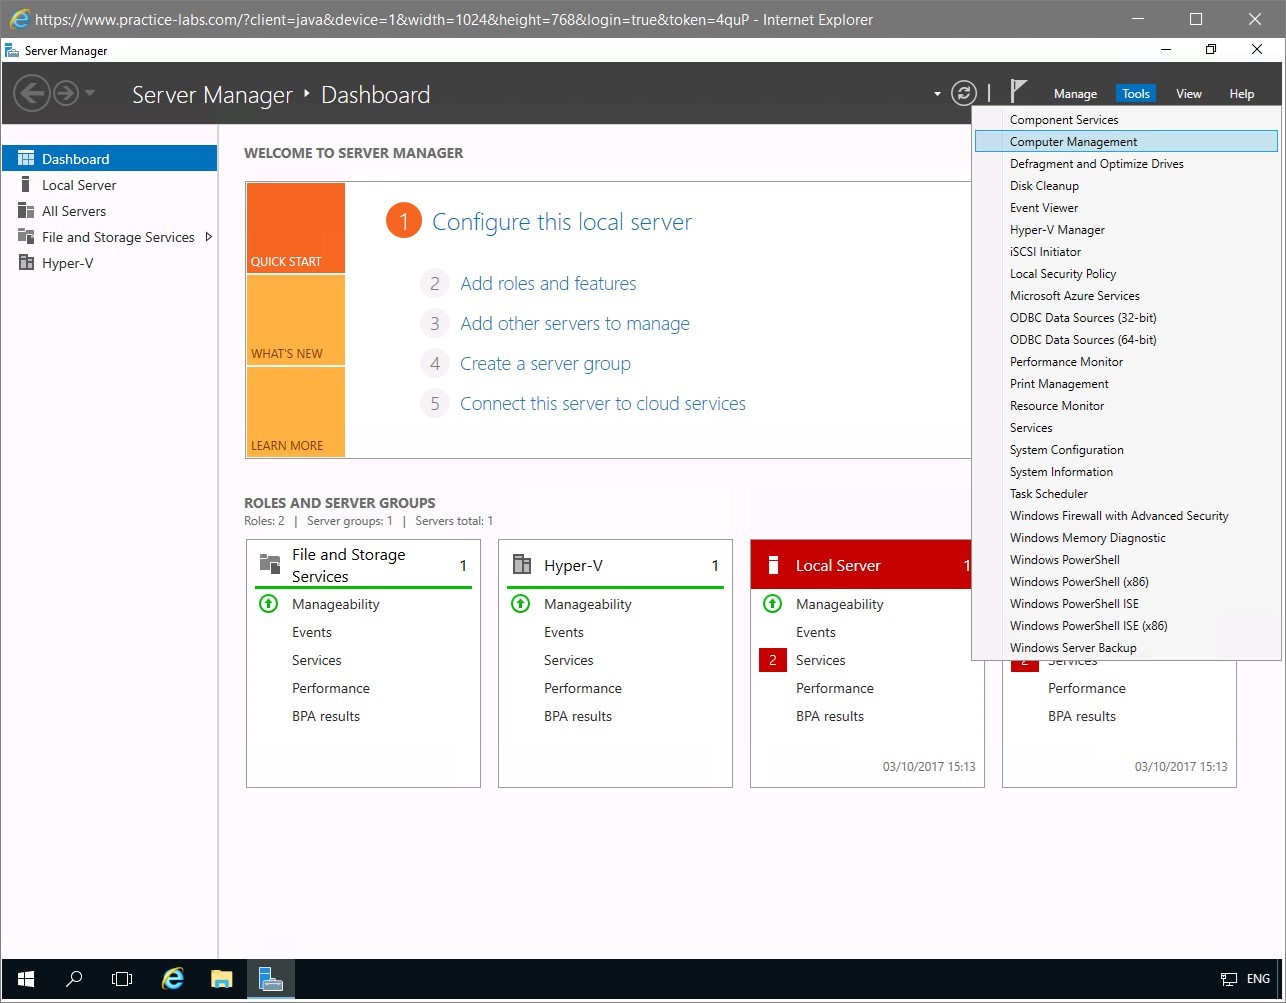
On the menu bar at the top, click Tools and select Computer Management.
Step 2
The Computer Management console is displayed.
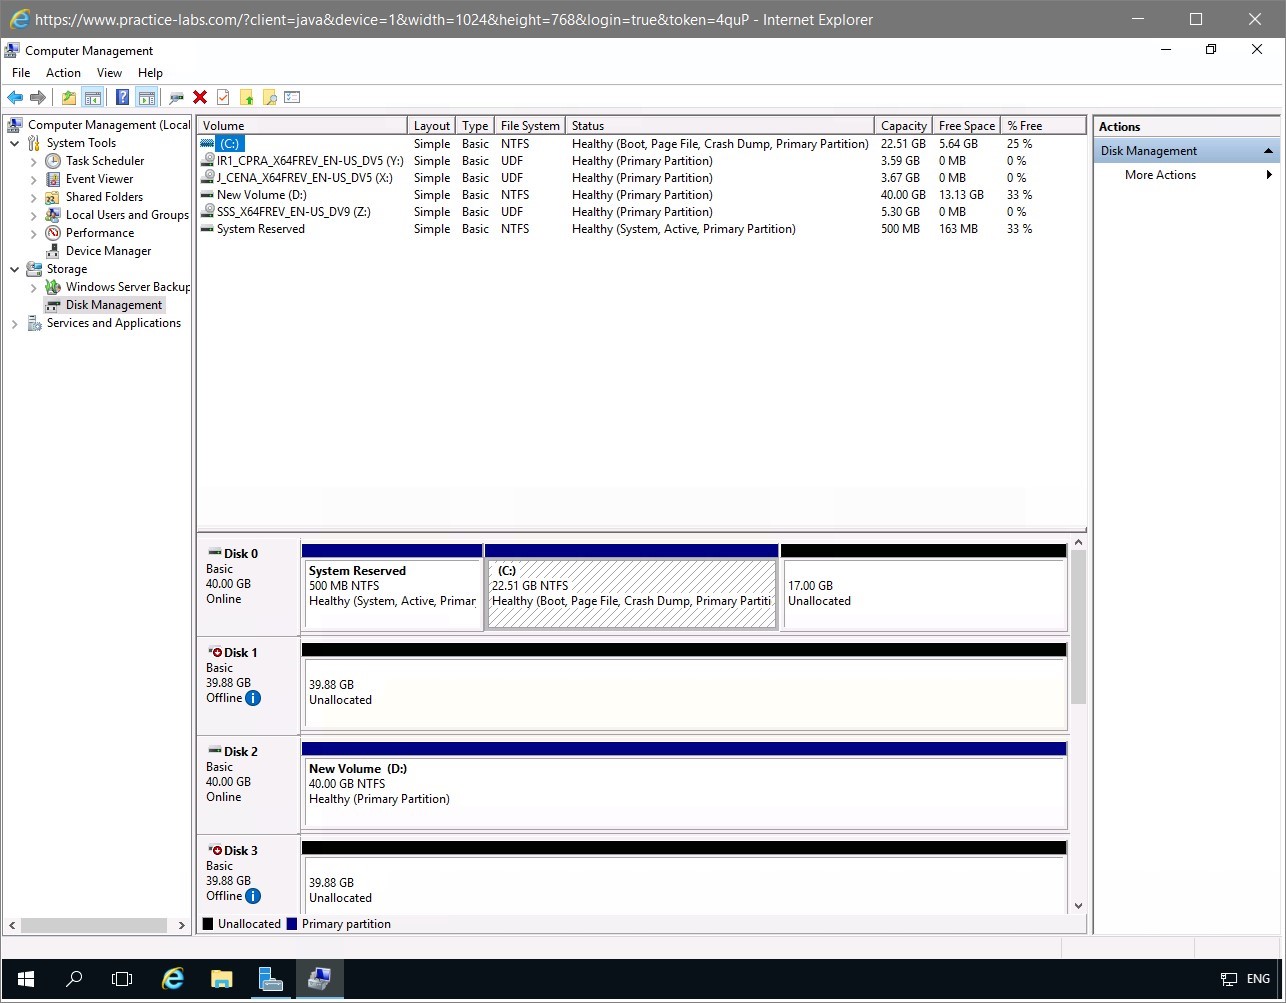
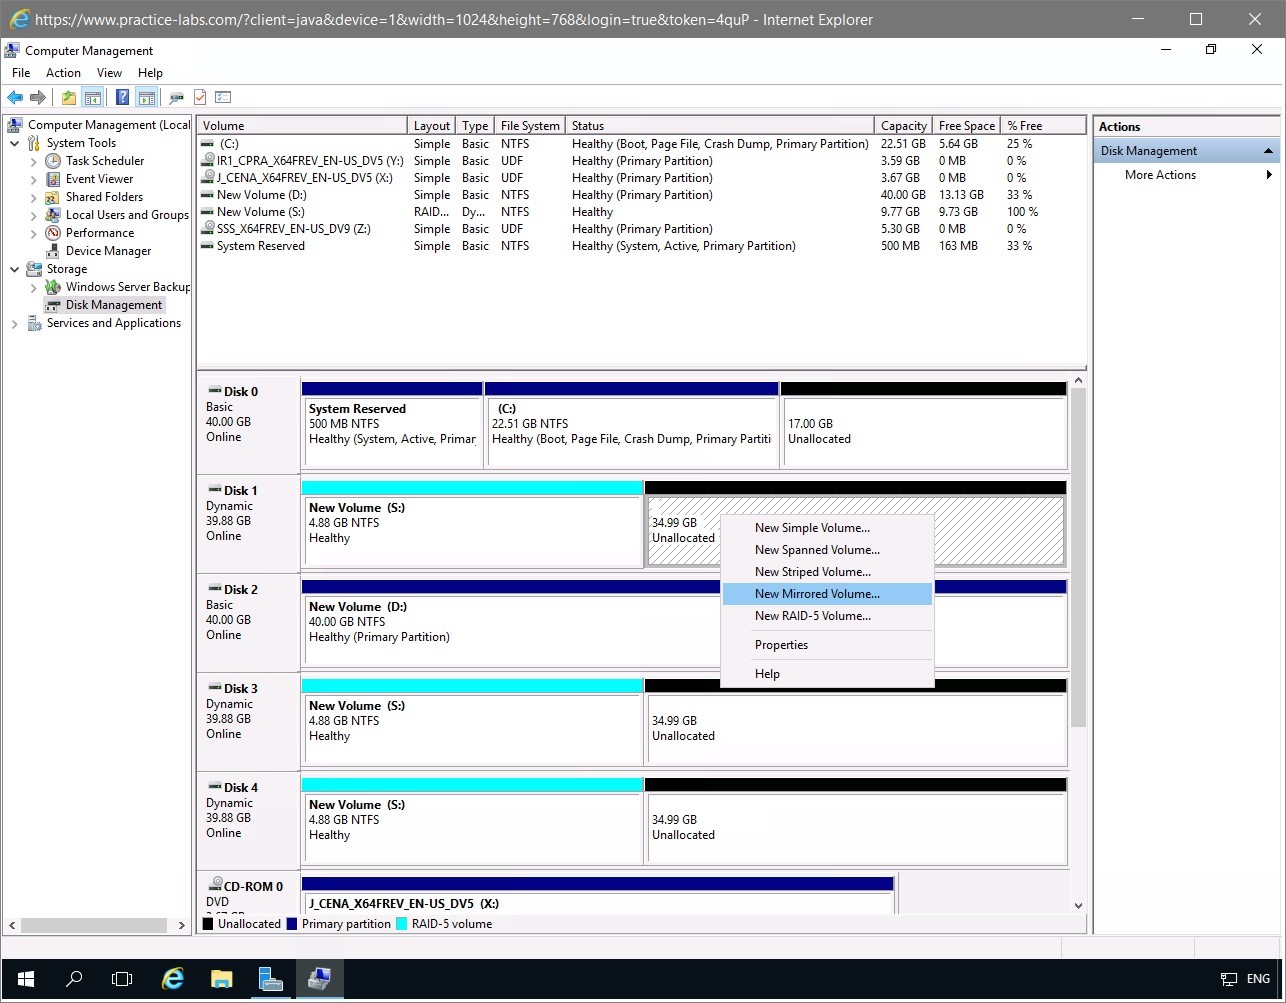
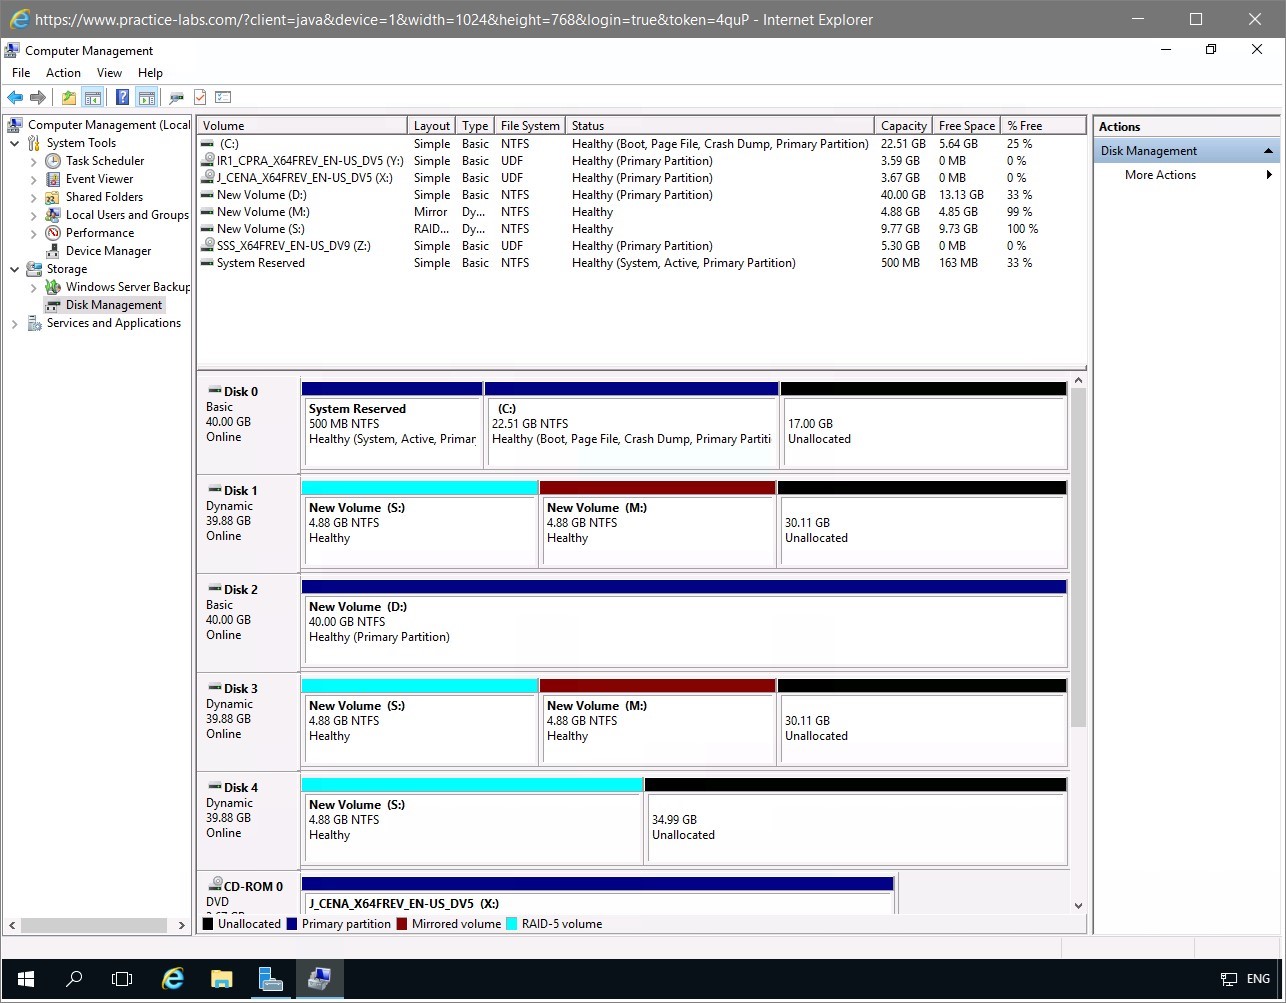
On the left navigation panel, expand the Storage node if required and select Disk Management.
The middle pane dislays the details of the disks available on PLABDM01.
Step 3
Ensure that the current status of the Disk 1, Disk 2, Disk 3, and 4 is Online.
Alert: If your disks show as offline, right-click the offline disks and select Online. This needs to be repeated for each offline disk.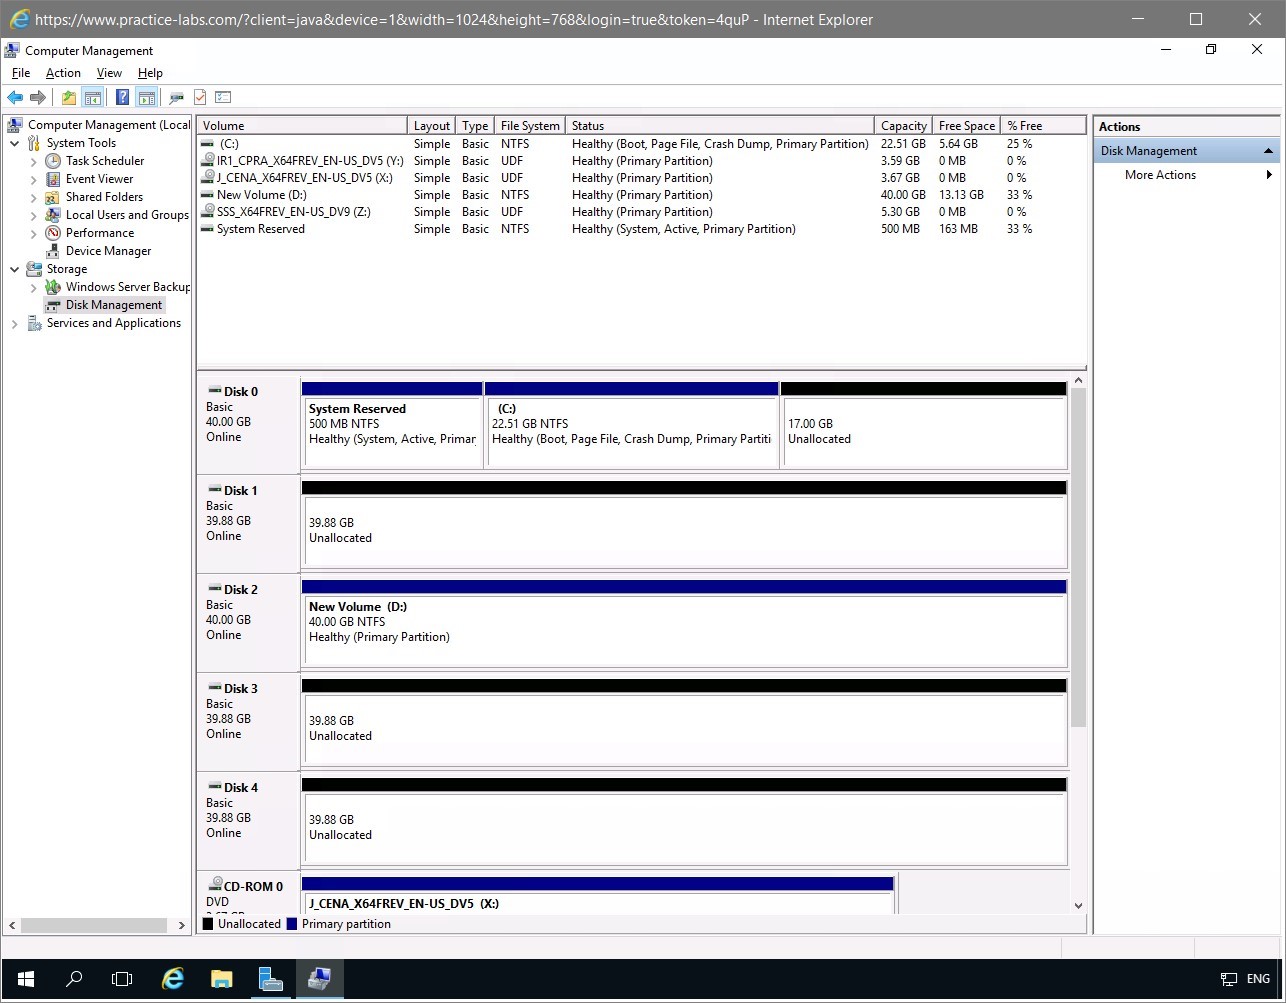
Step 4
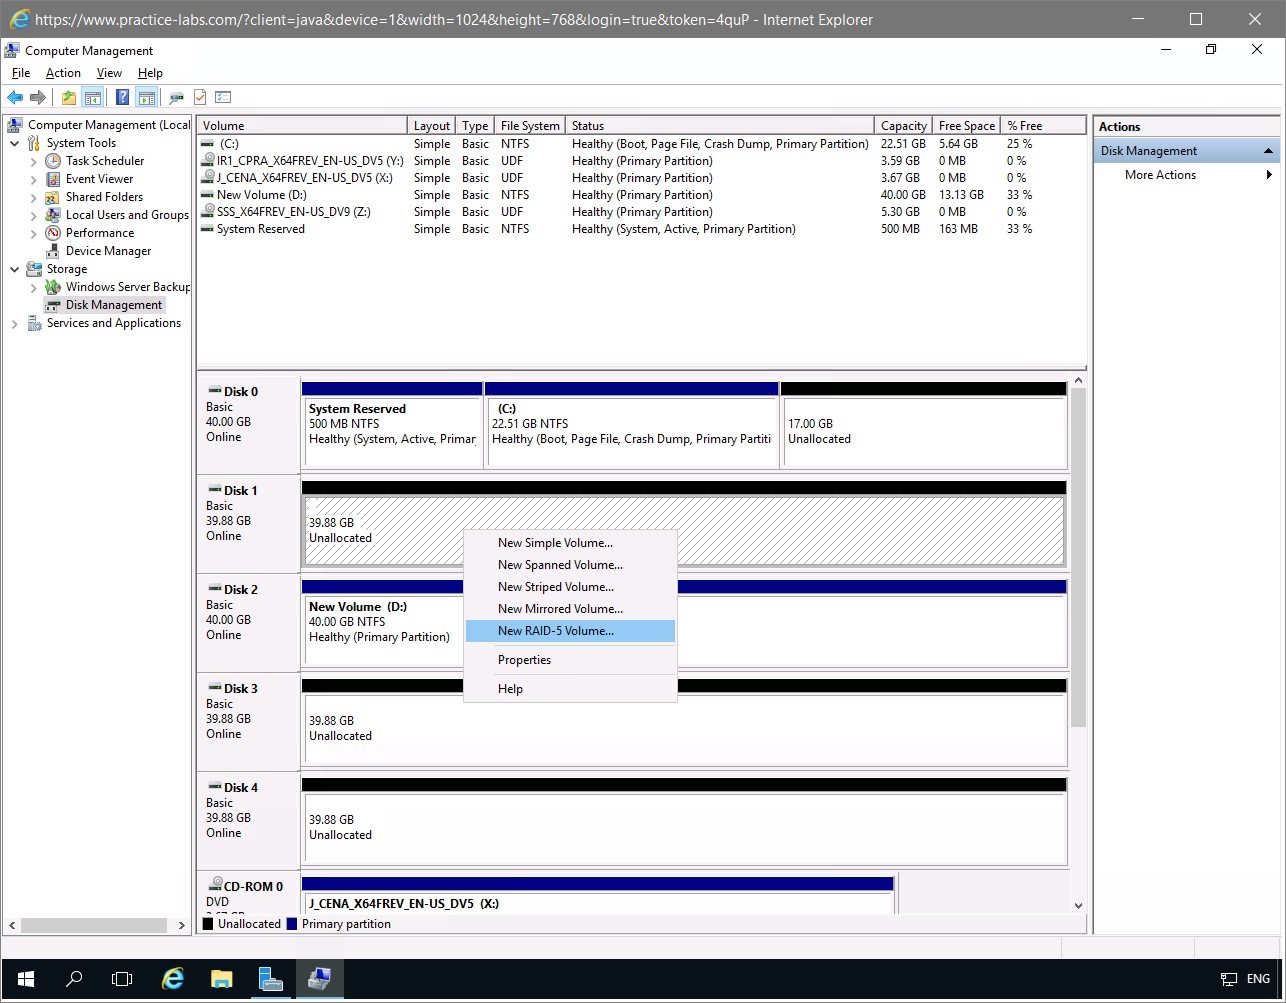
You can start creating the RAID-5 volume.
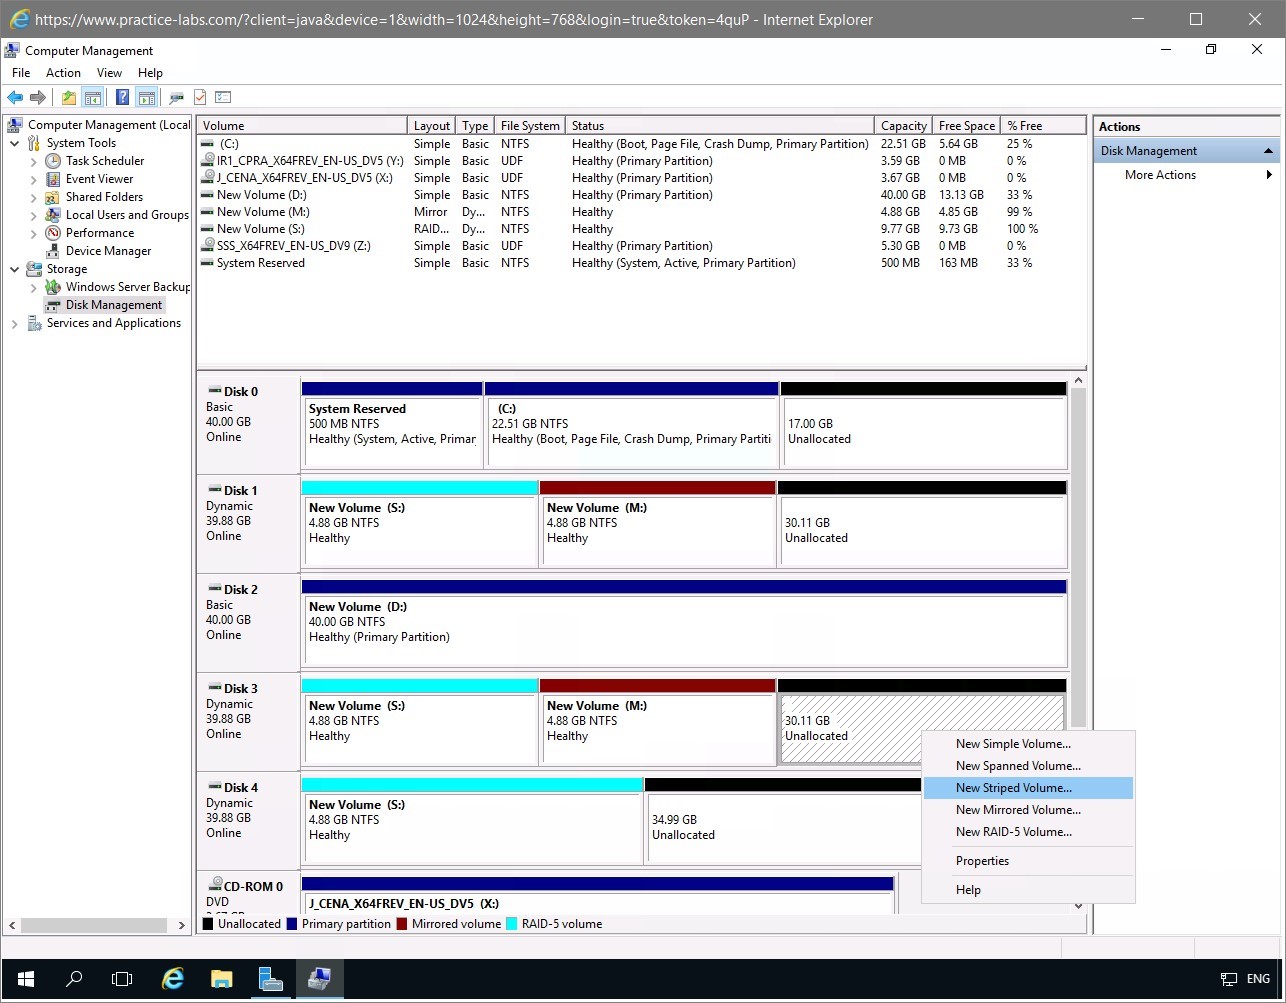
To create the RAID-5 volume, right-click the Unallocated section of Disk 1 and select New RAID 5 Volume…
Step 5
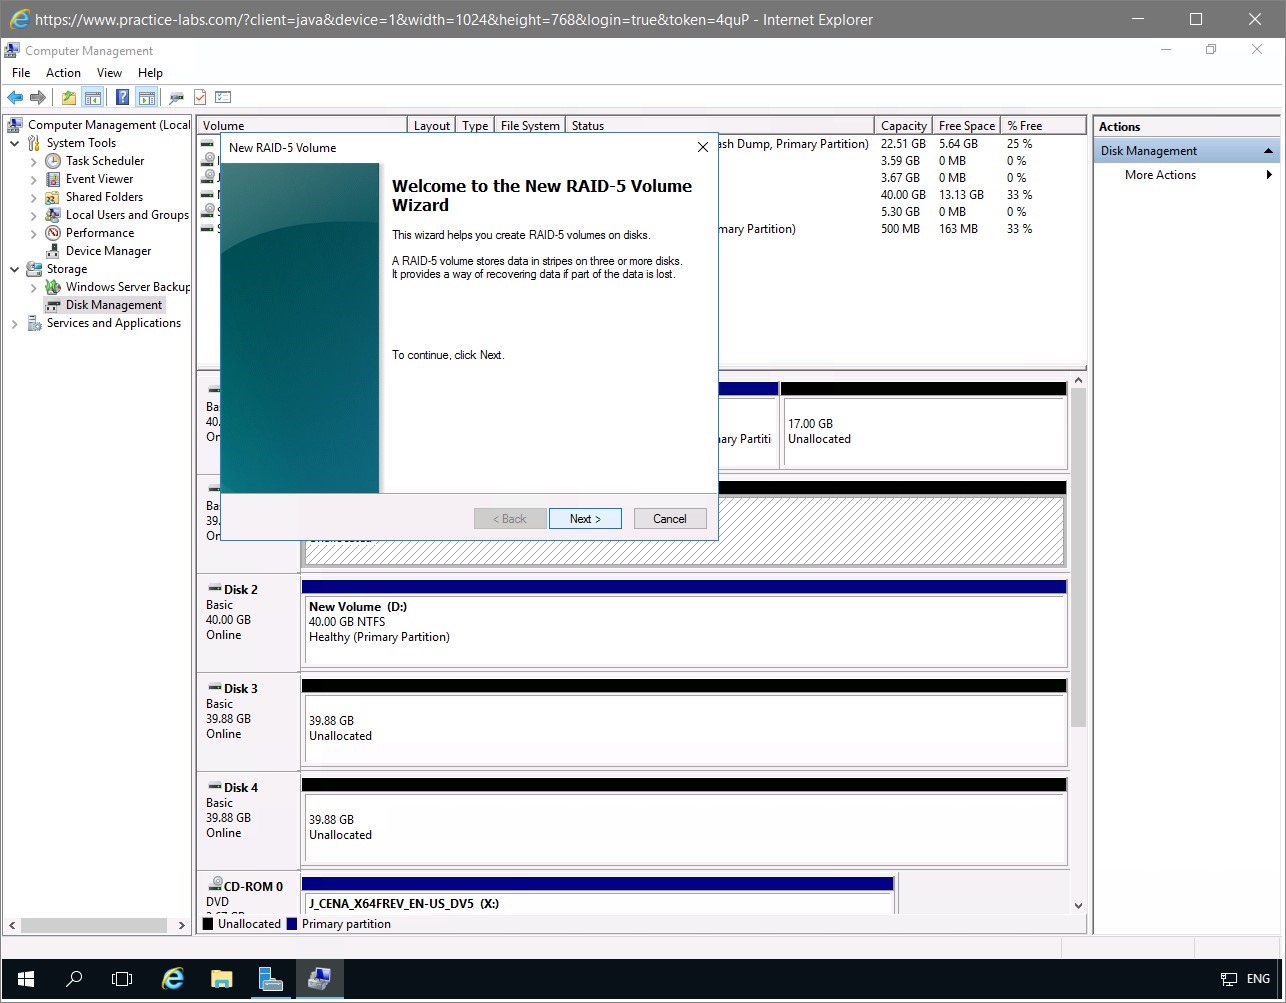
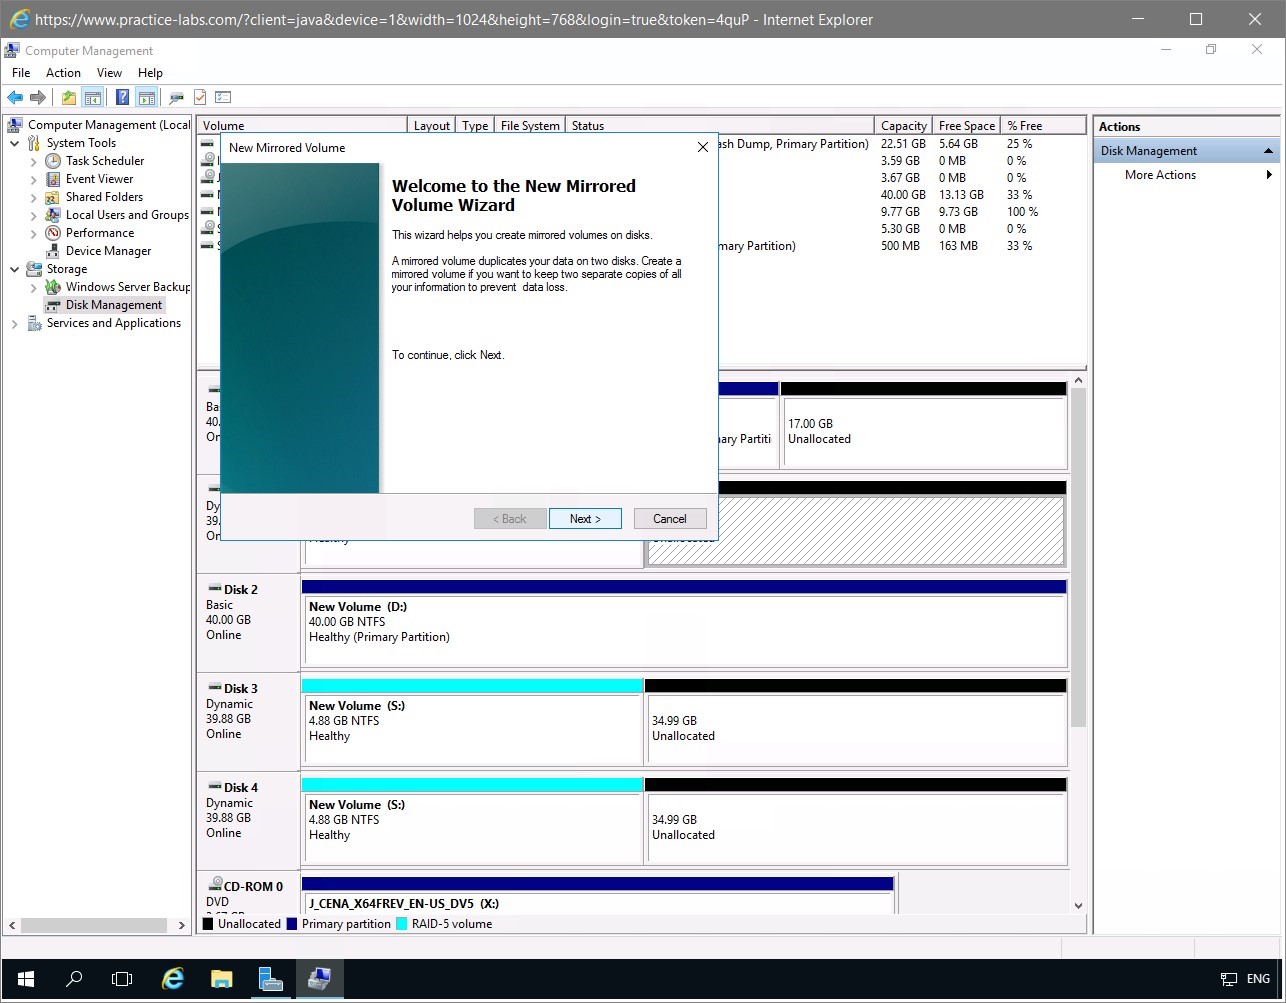
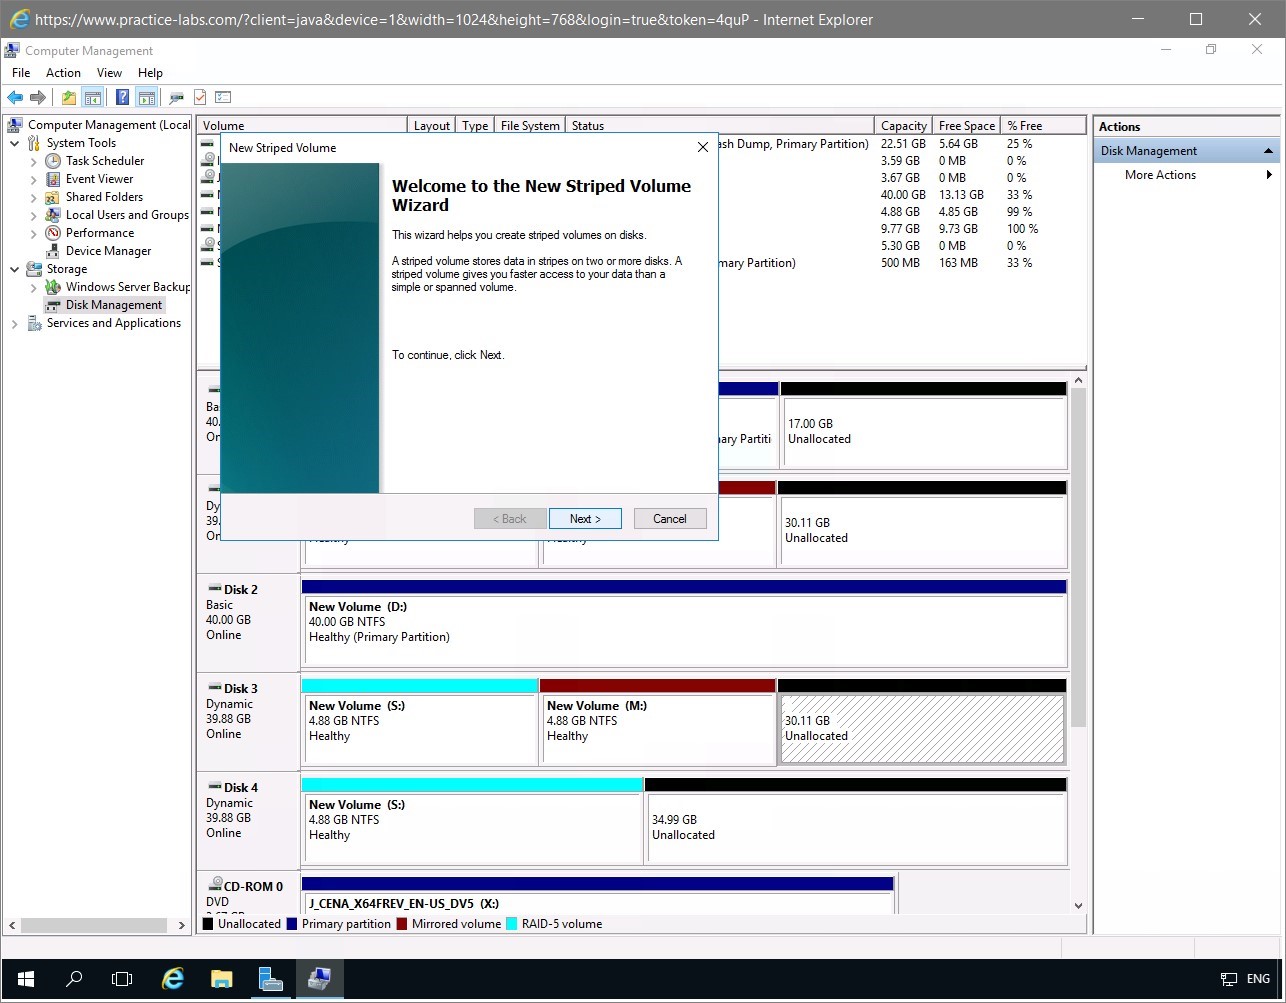
The New RAID-5 Volume wizard is displayed.
On the Welcome to the New RAID-5 Volume Wizard page, read the information and click Next.
Step 6
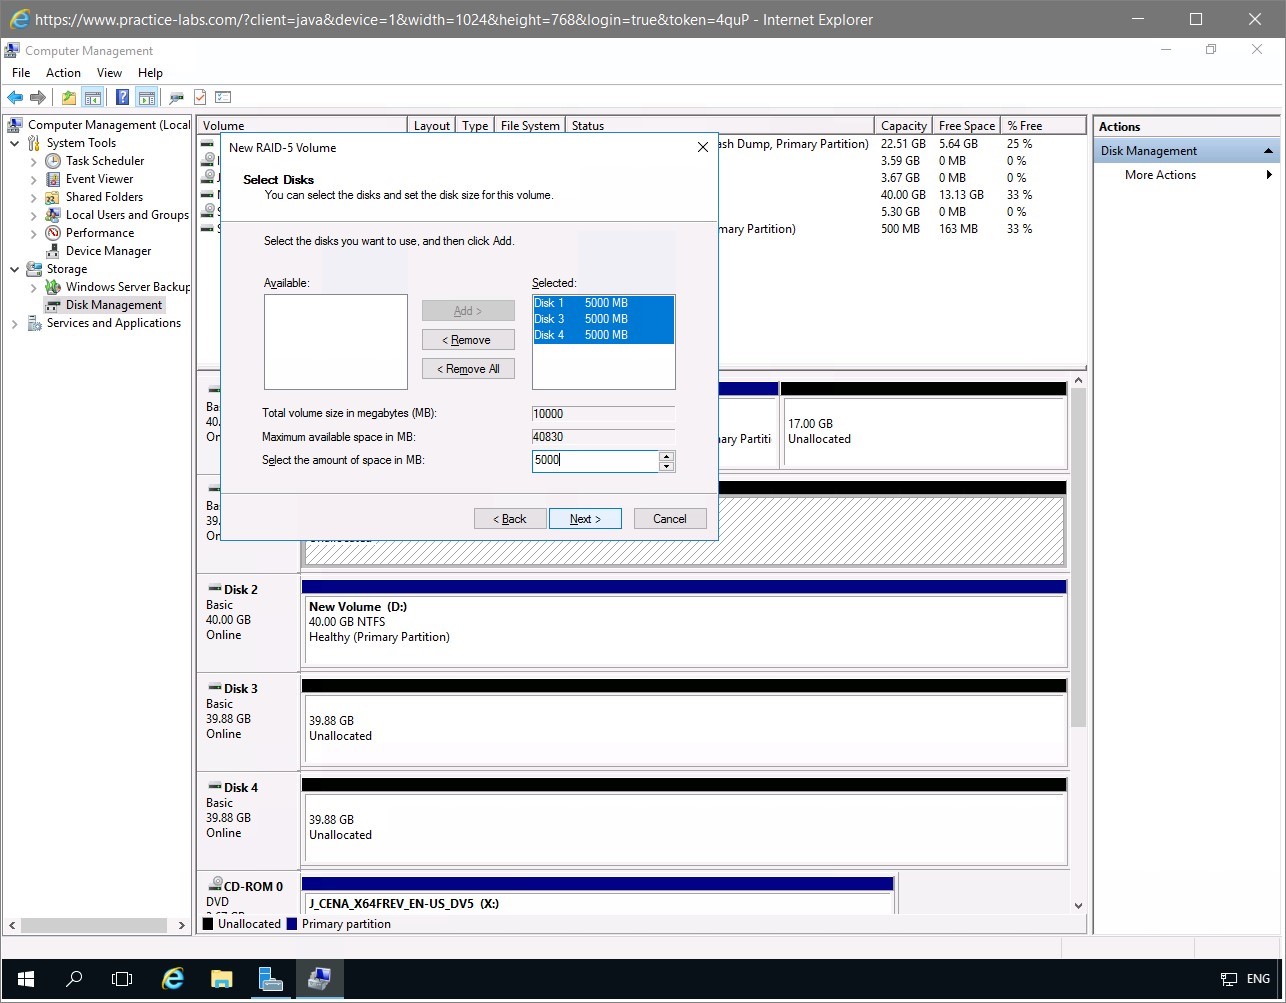
On the Select Disks page, access the Available list box.
This list box displays the disks available to be include in the RAID-5 volume to create. On this list, select Disk 3 and click Add.
Step 7
Notice that Disk 3 now appears in the Selected list box.
Similarly, move Disk 4 to the Selected list box.
Notice the change in the amount of space available for selection as you add Disk 3 and Disk 4.

Step 8
Still on the Select Disks page, type the following storage capacity in the Select the amount of space in MB spin box:
5000
Notice the change in sizes of Disk 1, Disk 3, and Disk 4; and the change in the Total volume size in megabytes (MB) information box display.
The value 5000 is for illustrative purposes only. In a RAID-5 volume, typically you will use a common disk size for each member of this volume. Do not max out the amount of space, as you will need to set aside unallocated disk space that will be required for the other volume types that you will create in a later task.Click Next.
Step 9
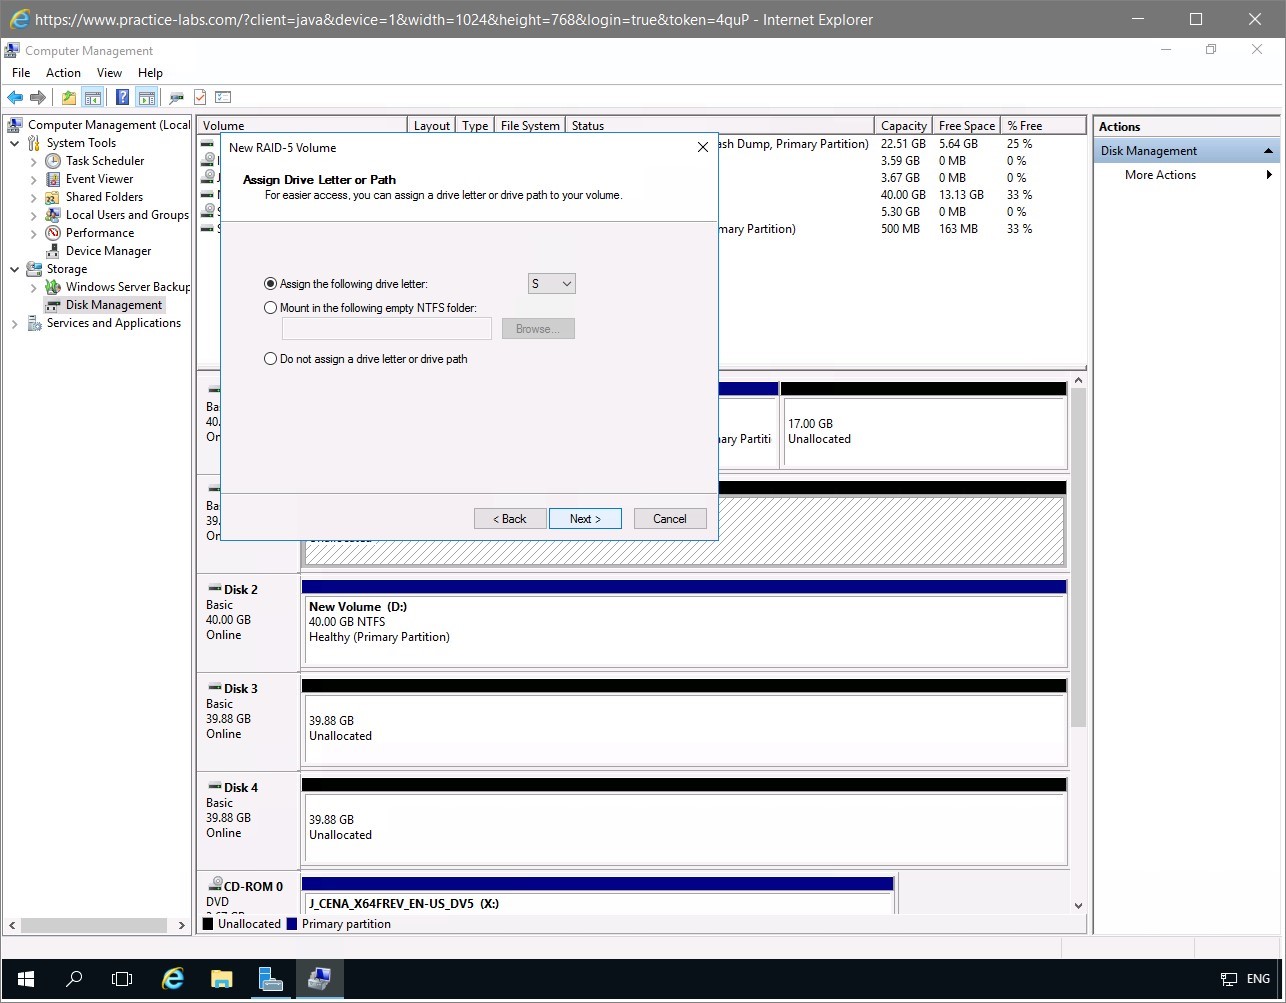
On the Assign Drive Letter or path page, set the Assign the following drive letter drop-down list to S.
Click Next.
Step 10
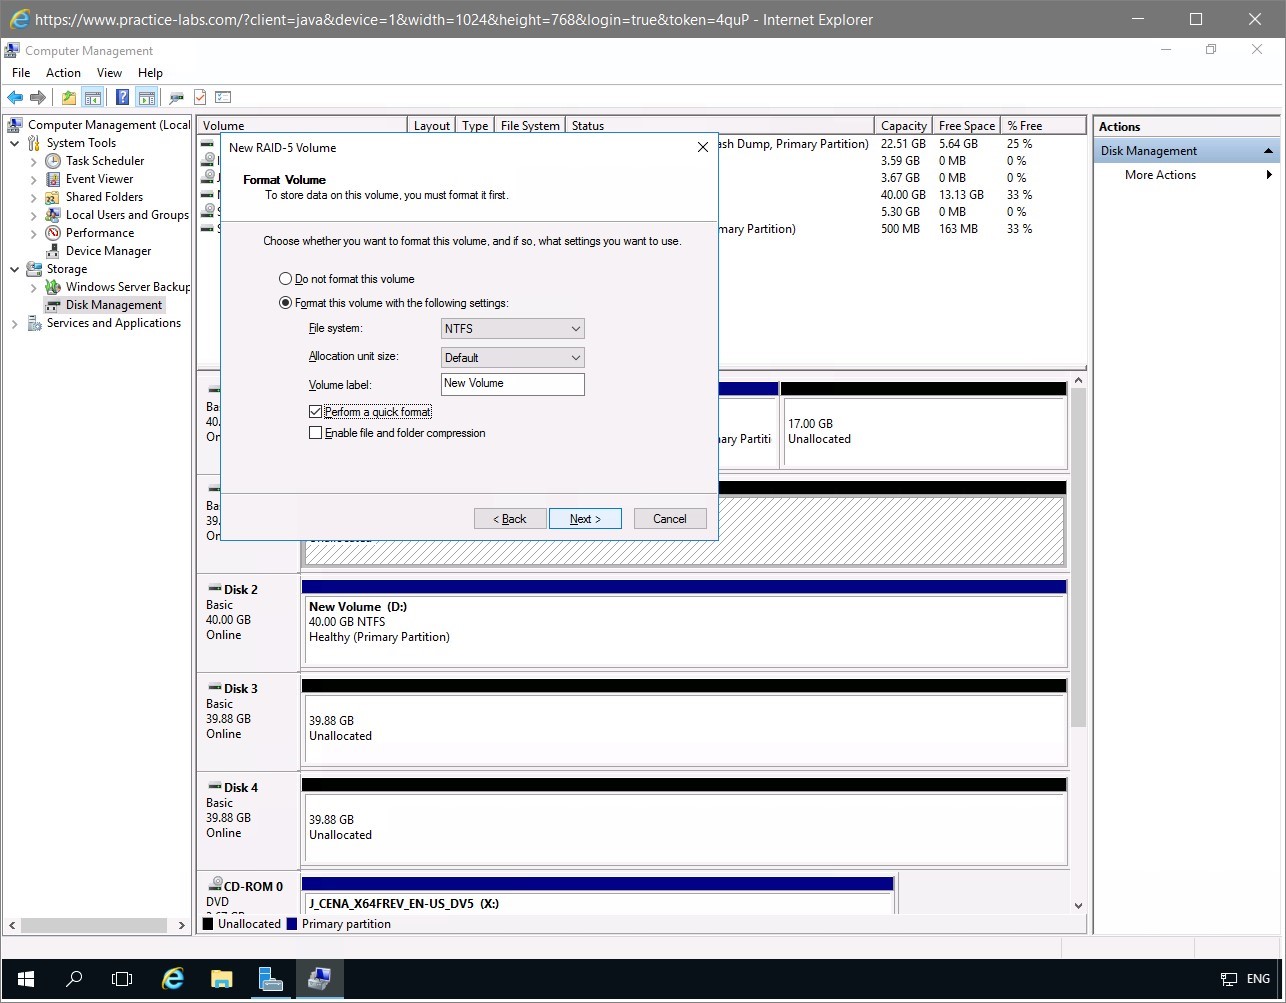
On the Format Volume page, select the Perform a quick format check box.
Click Next.
Step 11
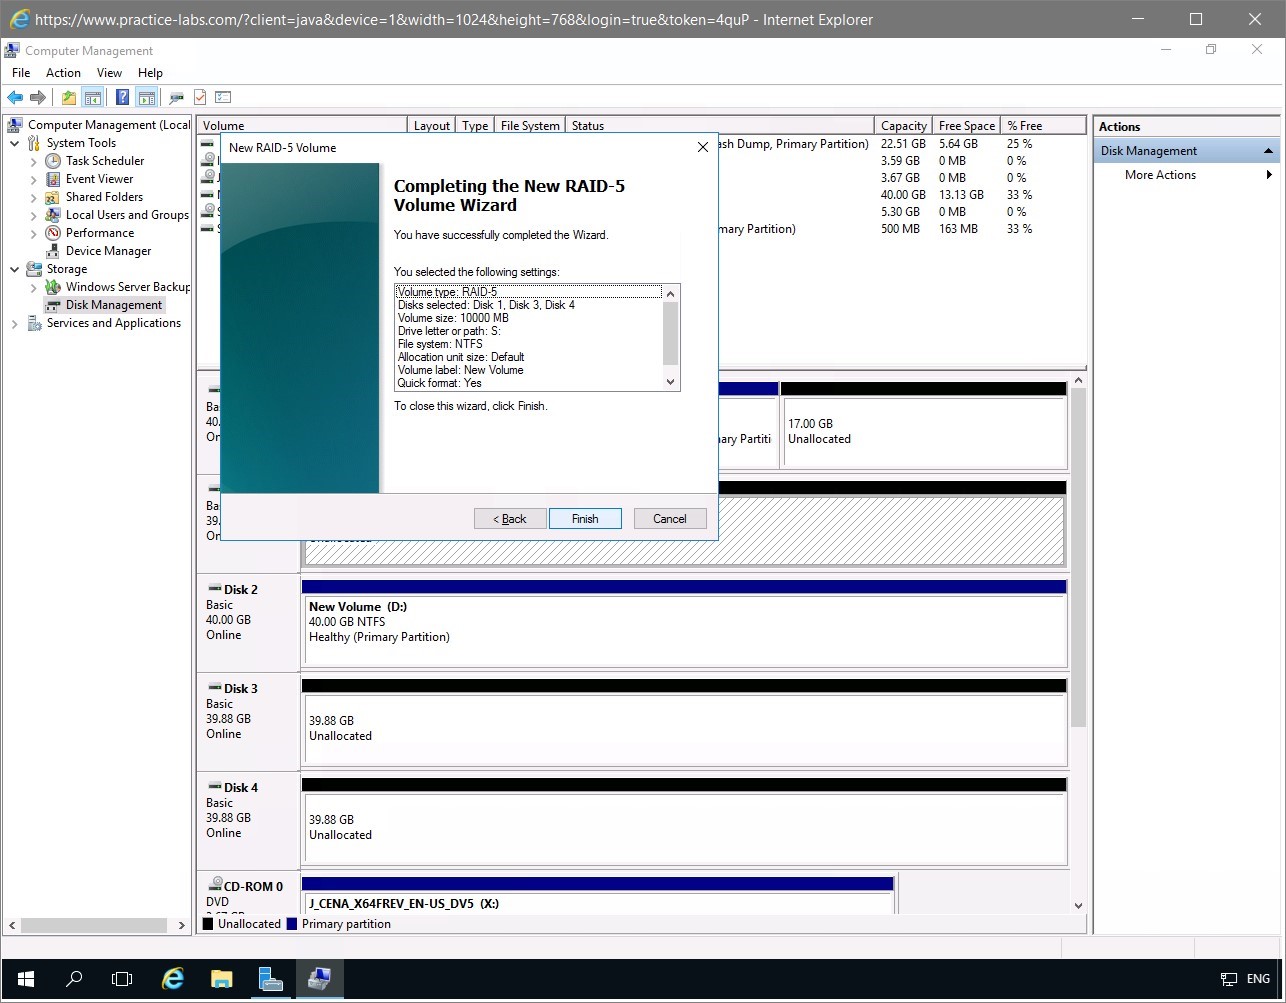
On the Completing the New RAID-5 Volume Wizard page, read the information and click Finish.
Step 12
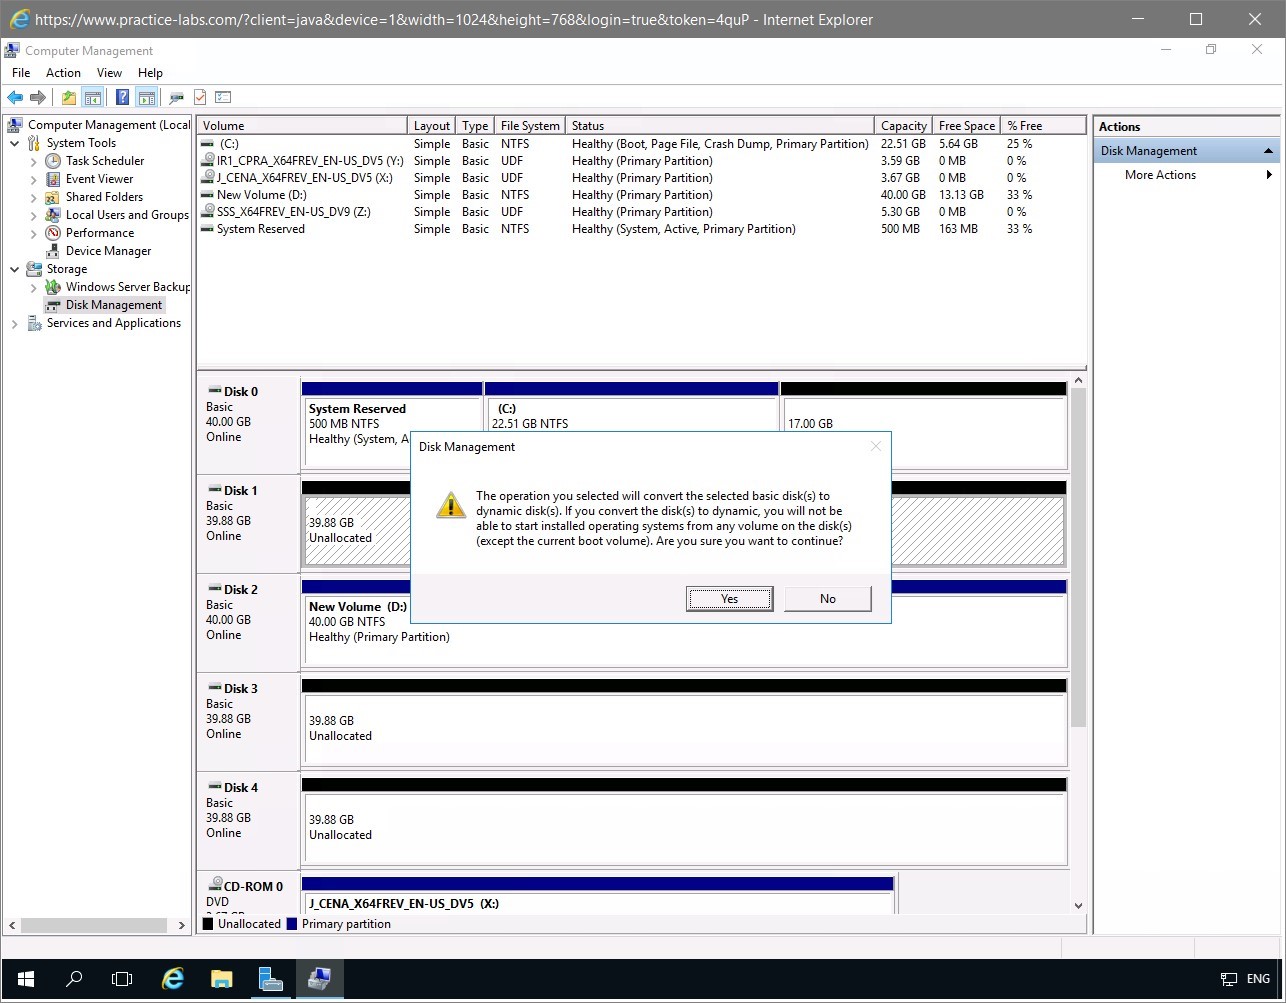
The Disk Management message box verifies that you want to convert the basic disks to dynamic disks.
This conversion is required to support the software-based RAID system.
Click Yes.
Step 13
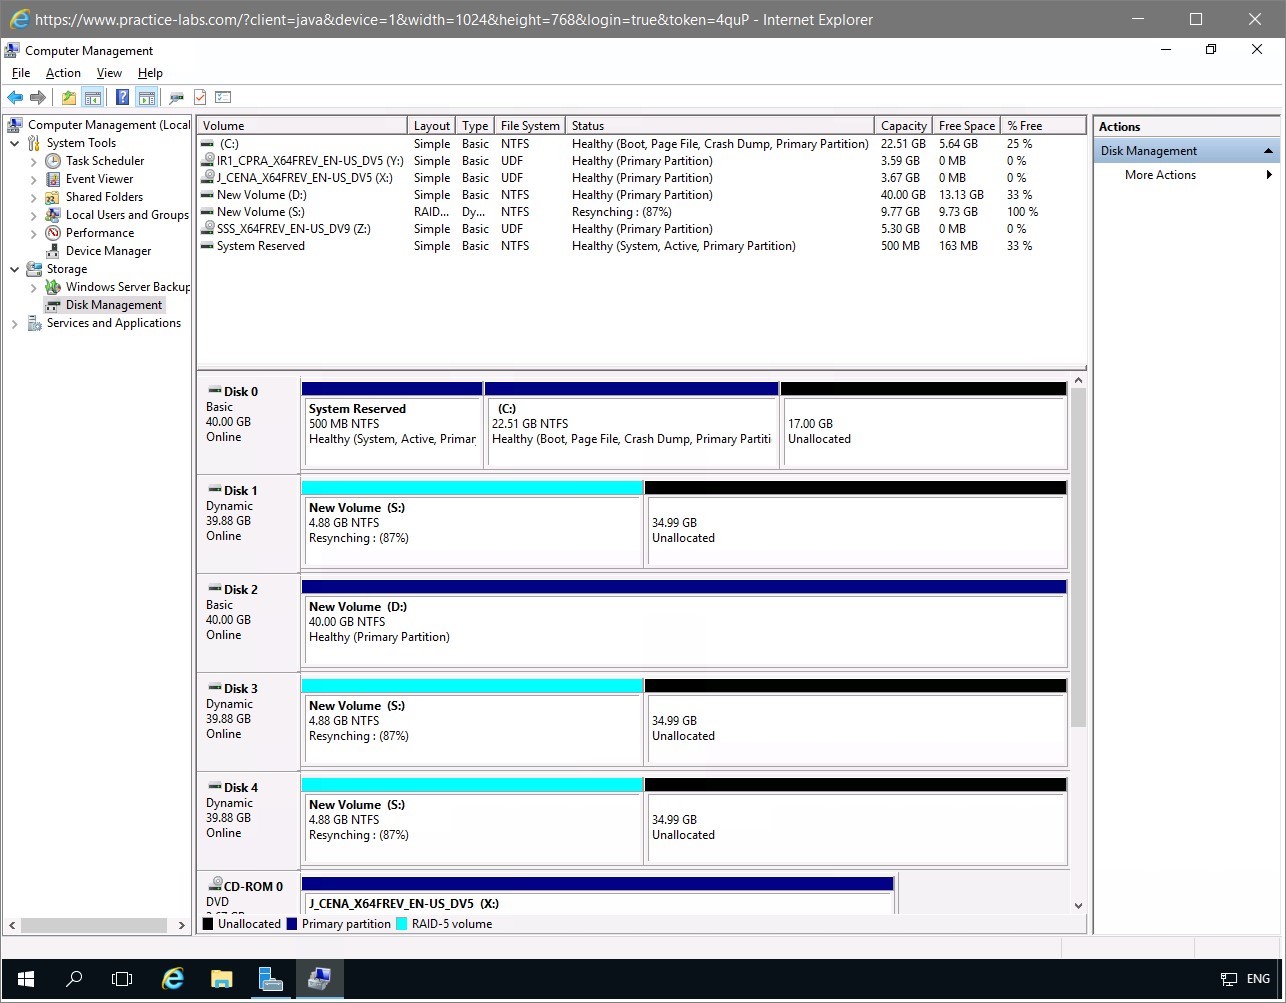
Creating the RAID-5 volume will take a few minutes to finish, so please wait.
Notice the display of the resynching status on the RAID-5 disk members.

Step 14
Now you have New Volume (S:) with a Healthy status.
This is the RAID-5 volume now available.
Step 15
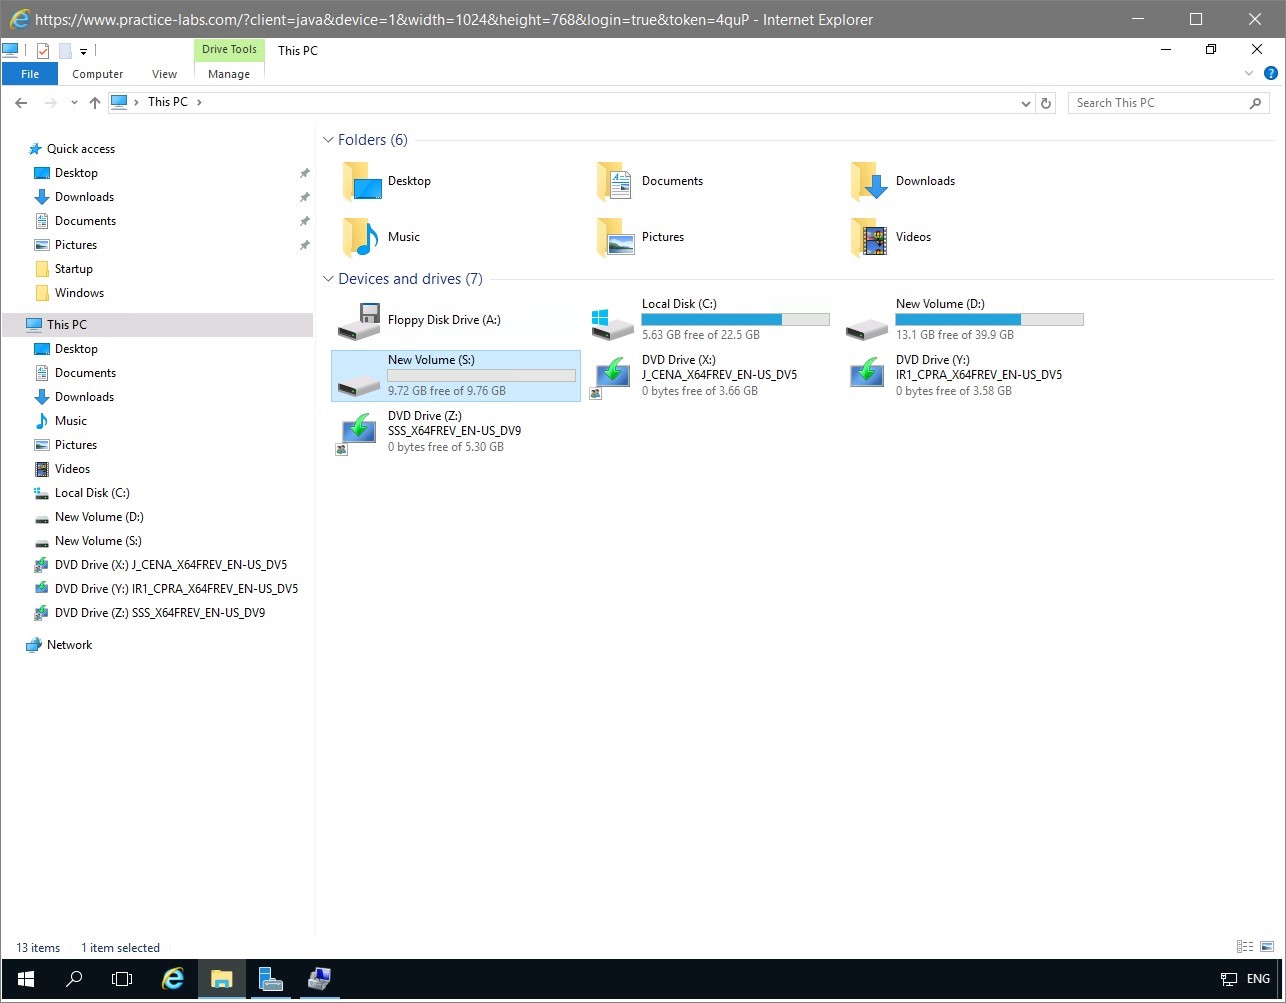
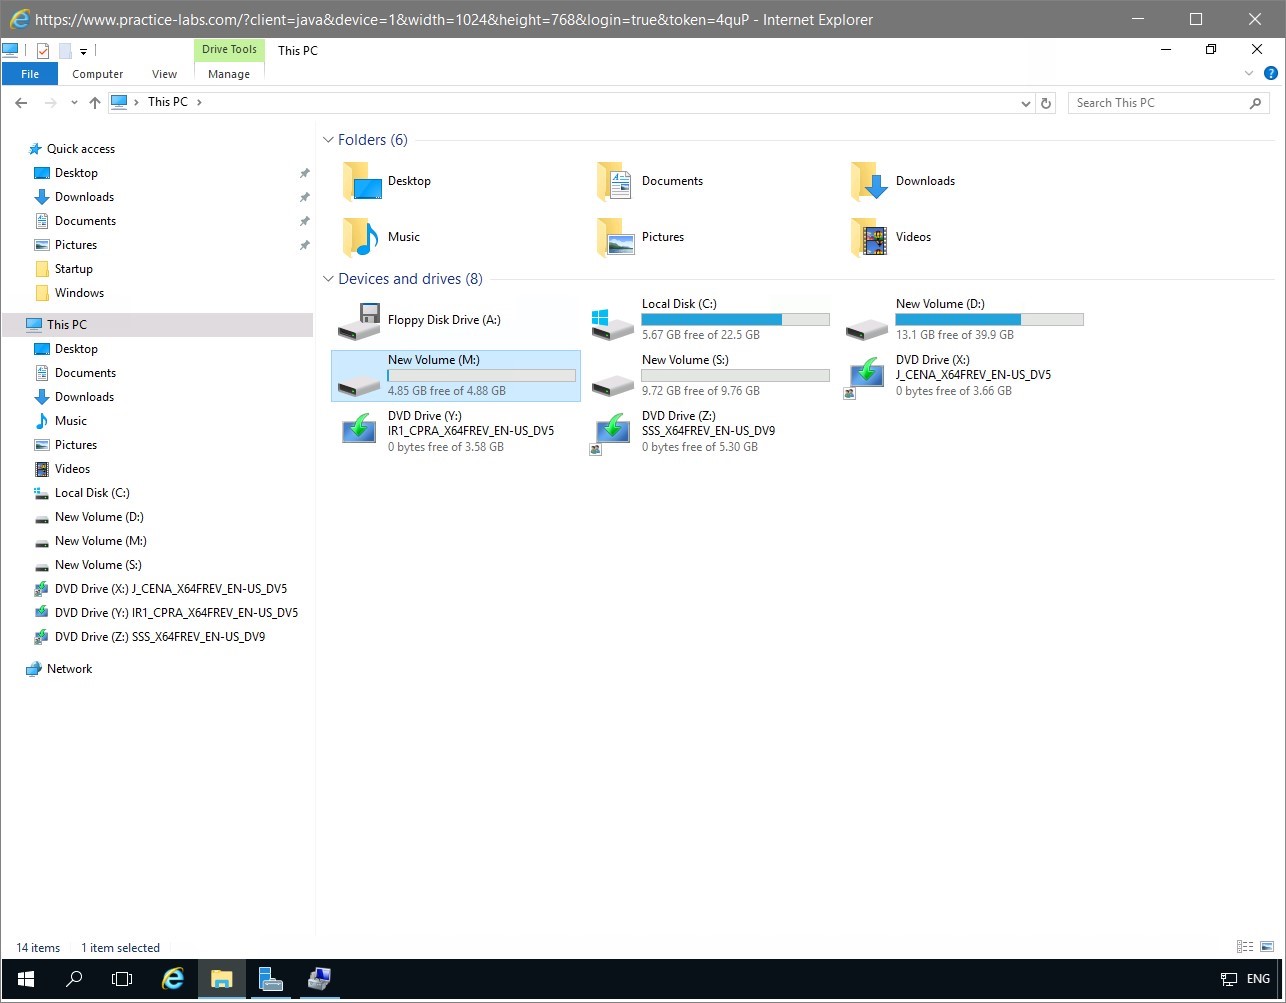
To view the volume you just created, click the File Explorer on the taskbar.
On the explorer window, notice that New Volume (S:) is now listed as an available storage drive. Select This PC in the left pane. After you verify drive S, close the explorer window.
You are navigated back to the Computer Management console.
Leave the devices you have powered on in their current state and proceed to the next task.
Task 2 - Creating Mirrored Volume
A mirrored volume, sometimes referred to as RAID-1, requires two disks with identical unallocated size. The contents of the first disk is mirrored onto the second disk. Therefore, the second disk is a replica or duplicate of the first disk drive. This provides redundancy and increases the data availability. In this task, you will create a mirrored volume M based on disk 1 and disk 2 of PLABDM01.
To create a mirrored volume, perform the following steps:
Step 1
Open Computer Management on PLABDM01 if already not opened and navigate to Disk Management.
On PLABDM01, with the Computer Management console displayed, go to the Unallocated section of Disk 1, right-click it, and select New Mirrored Volume…
Step 2
The New Mirrored Volume wizard is displayed.
On the Welcome to the New Mirrored Volume Wizard page, read the information and click Next.
Step 3
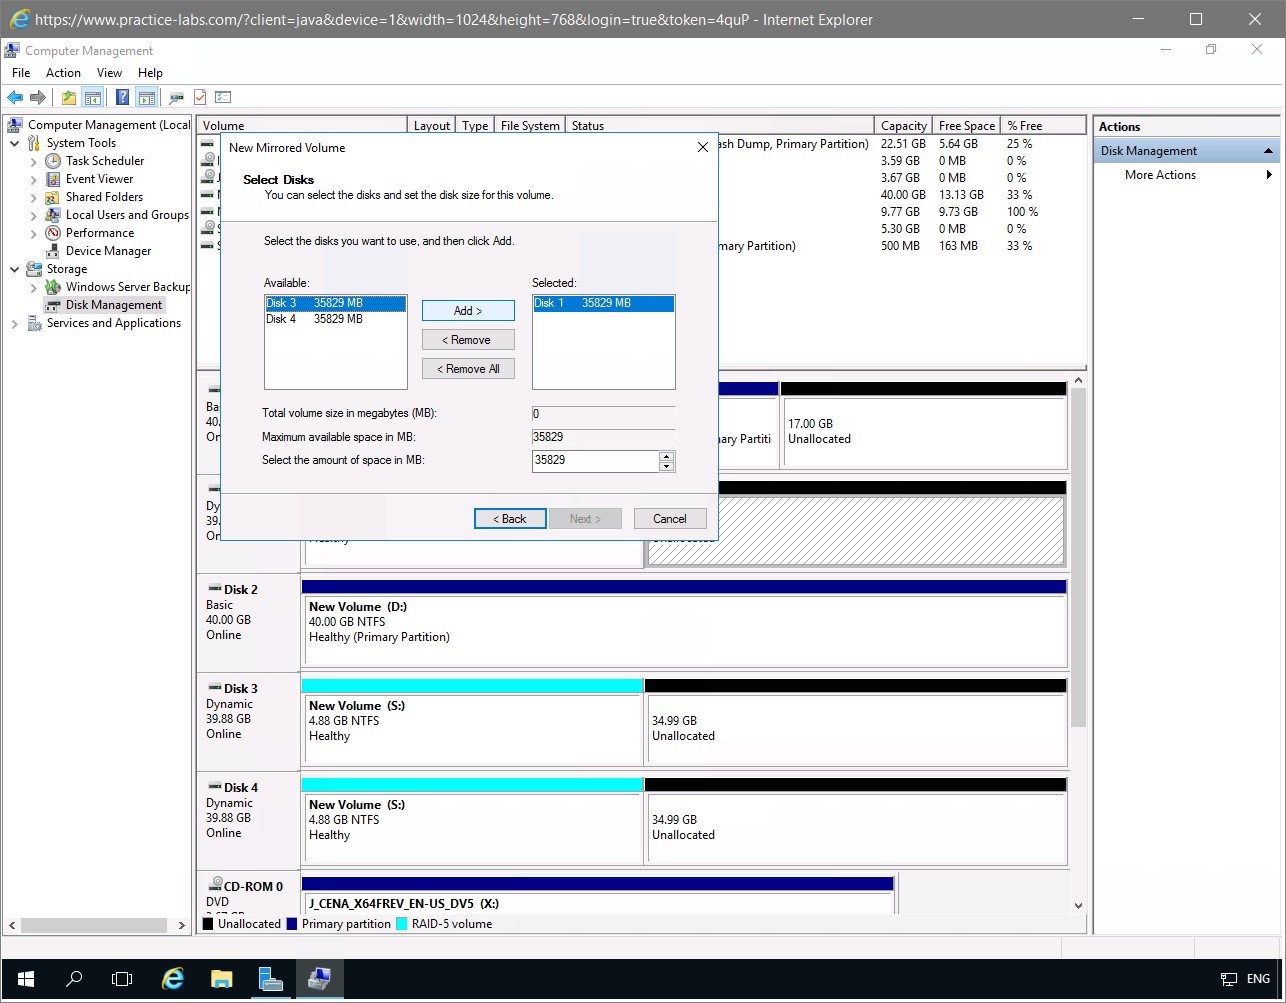
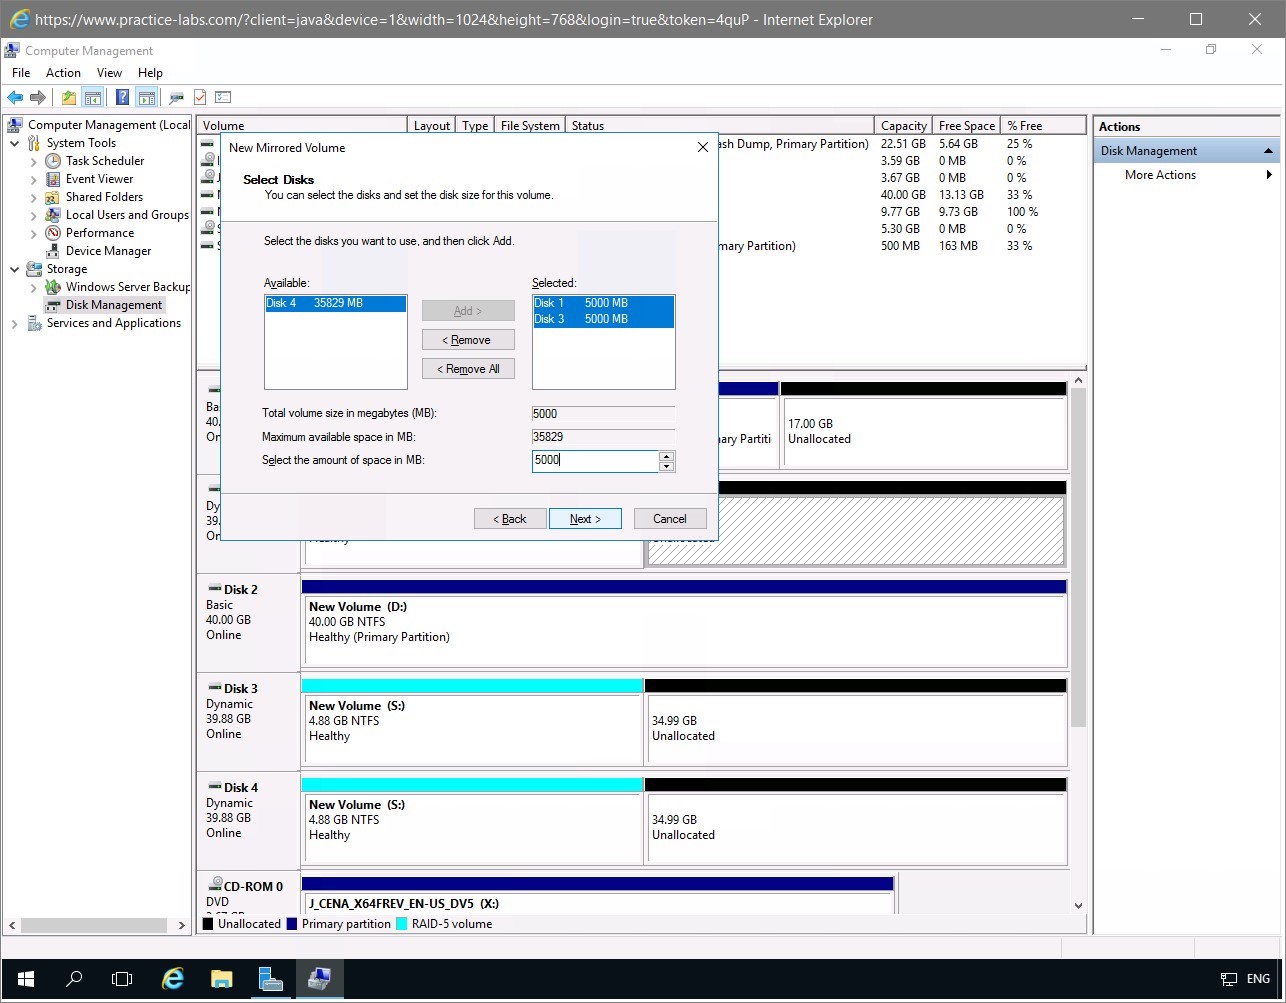
On the Select Disks page, access the Available list box. This list box displays the disks available to be include in the RAID-1 volume to create. On this list, notice that Disk 1 is already selected and listed in the Selected list box.
Select Disk 3 and click Add.
Step 4
Still on Select Disks page, notice the change in the value of Disk 3, as its size is now exactly the same as Disk 1. This is in accordance with the requirements of a mirrored volume - two disks of the same size.
Still on the Select Disks page, type the following storage capacity in the Select the amount of space in MB spin box:
5000
Notice the change in sizes of Disk 1 and Disk 3 and the change in the Total volume size in megabytes (MB) information box display. Accept the other settings on the page and click Next.
Step 5
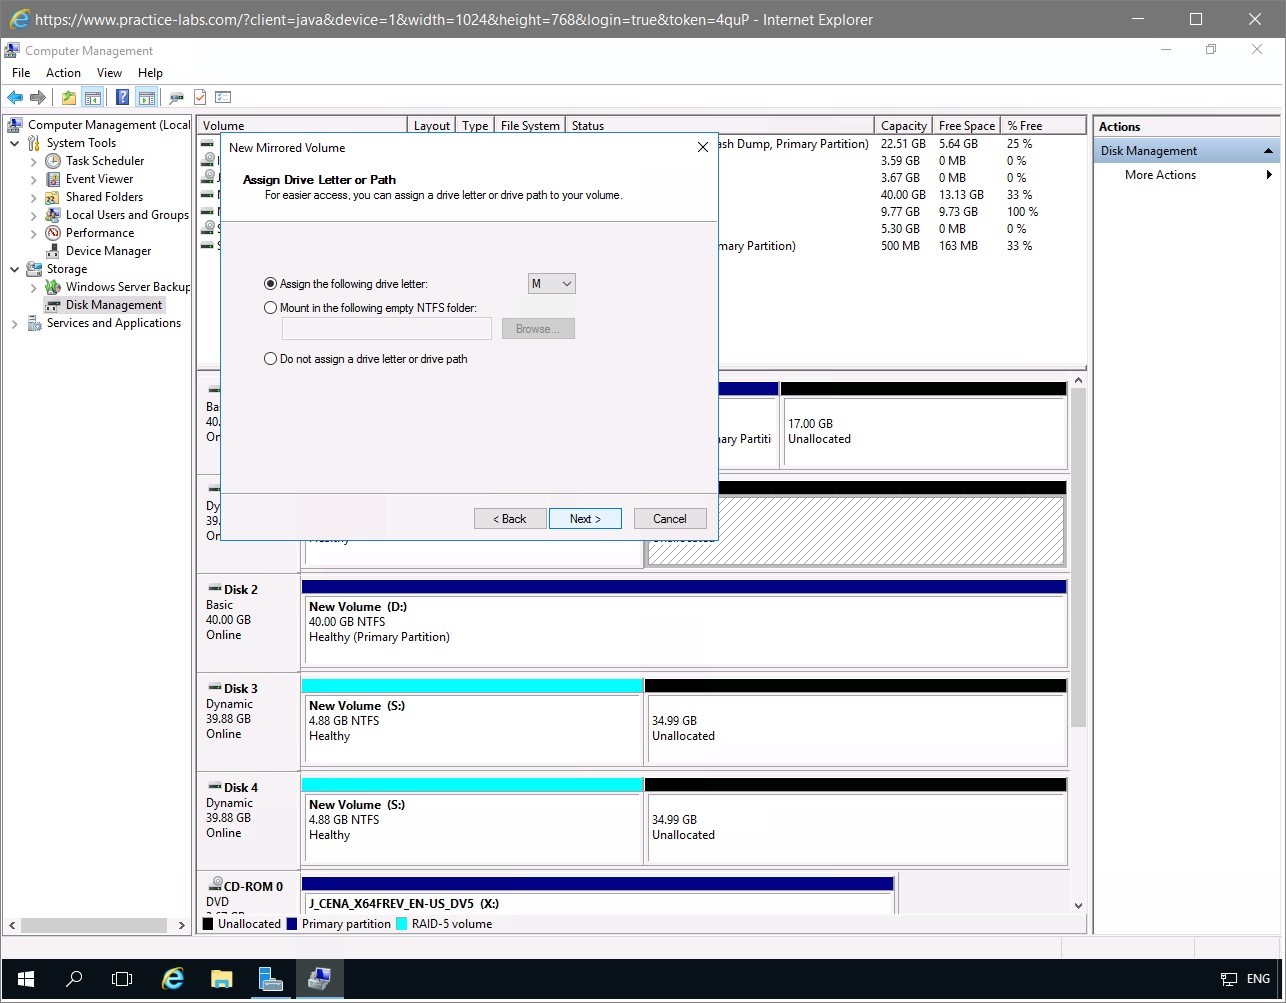
On the Assign Drive Letter or Path page, set the Assign the following drive letter drop-down list box to M.
Click Next.
Step 6
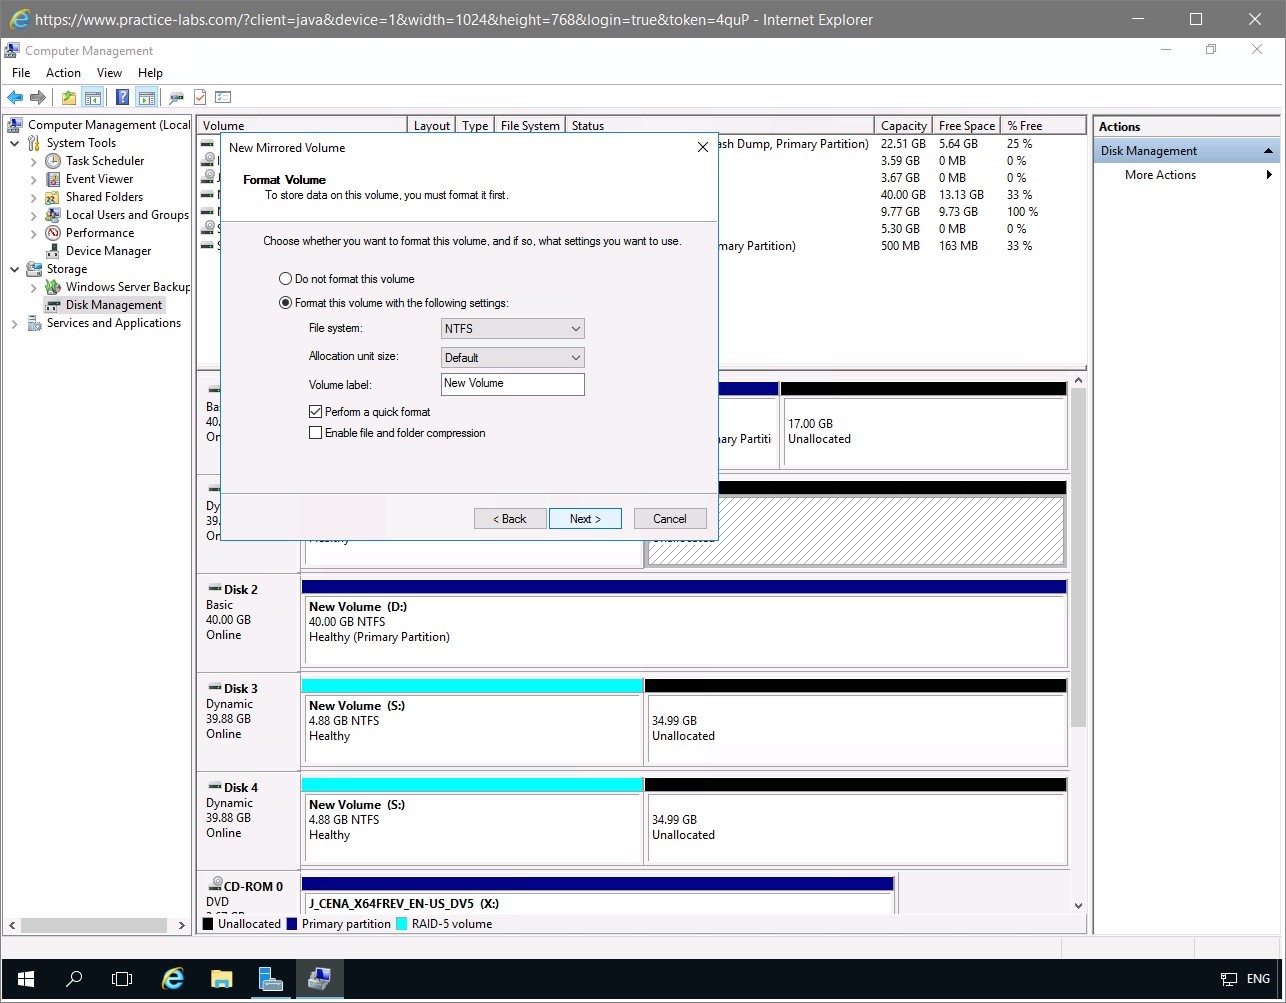
On the Format Volume page, select the Perform a quick format check box.
Click Next.
Step 7
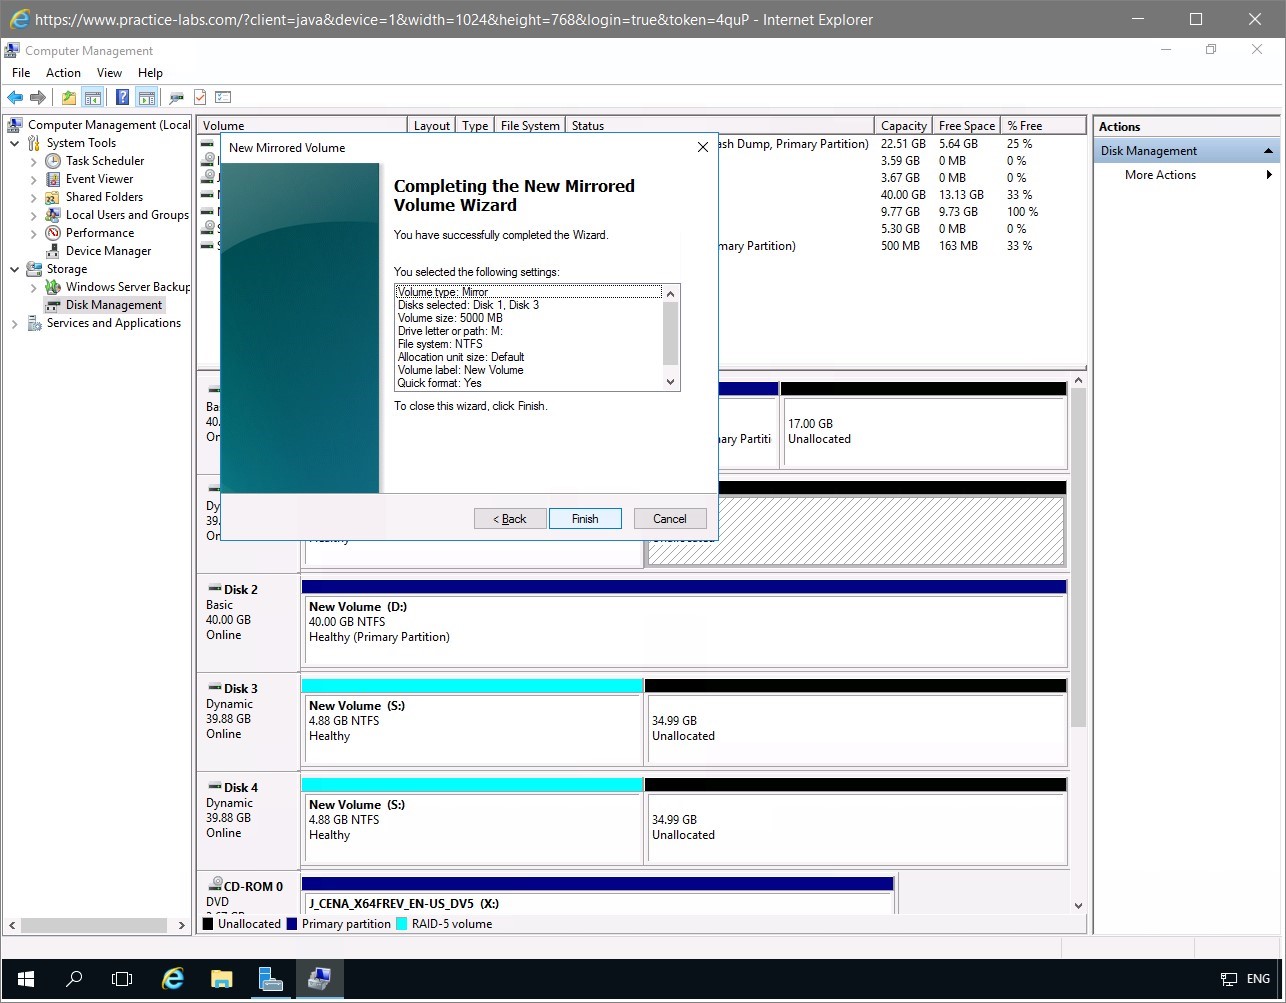
On the Completing the New Mirrored Volume Wizard page, read the information and click Finish.
Step 8
Back on the Computer Management console, notice the New Volume (M:), the mirrored volume, is displayed with the Healthy status.
To verify the availability of the volume just created, click the File Explorer icon on the taskbar.
Step 9
Open Windows Explorer from the task bar and select This PC from the left pane. Notice that the New Volume (M:) is now available for storage.
Minimize the explorer window.
You are redirected back to the Computer Management console.
Leave the devices you have powered on in their current state and proceed to the next task.
Task 3 - Create Striped Volume
A striped volume requires at least two disks with the identical unallocated size. A striped volume is created to enhance the performance of disks as it provides an efficient disk read time because the disk heads are moving simultaneously giving a fast throughput. A striped volume does not provide data redundancy comparable to RAID-5 and Mirrored volumes.
Striped volumes are referred to RAID-0 volumes. In this task, you will create striped volume G based on disk 3 and disk 4 on PLABDM01.
To create a striped volume, perform the following steps:
Step 1
On the PLABMD01 desktop, the Computer Management console is displayed.
On Disk 3, right-click the Unallocated portion and select New Striped Volume…
Step 2
The New Striped Volume wizard is displayed.
On the Welcome to the New Striped Volume Wizard page, read the information and click Next.
Step 3
On the Select Disks page, access the Available list box. This list box displays the disks available to be include in the RAID-0 volume to create. On this list, notice that Disk 3 is already selected and listed in the Selected list box.
Select Disk 4 and click Add.
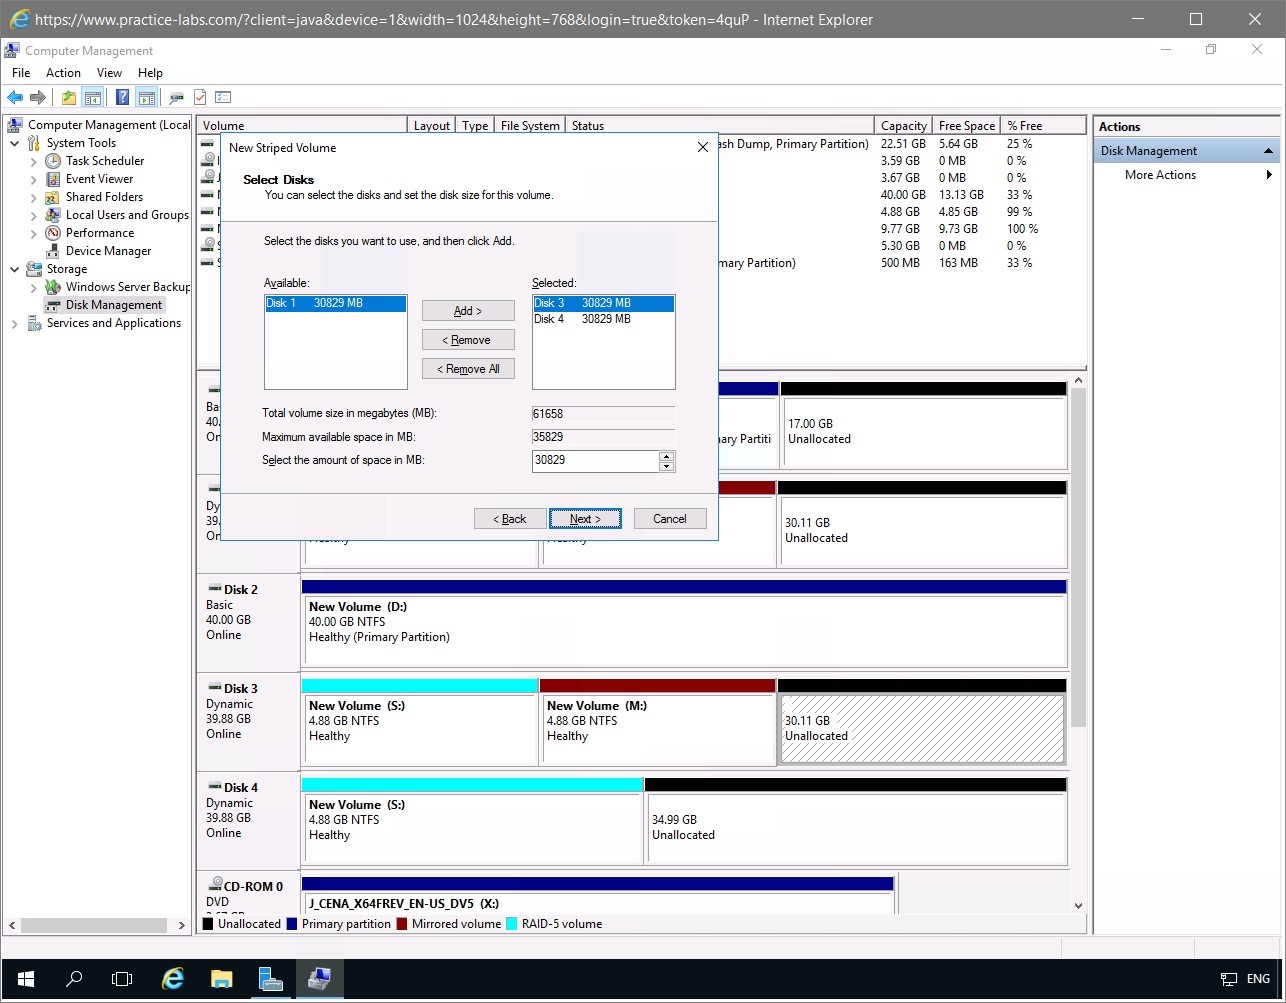
Step 4
Still on the Select Disks page, notice the change in size of Disk 4. Disk 4 now displays a size of 30829 MB.
Click Next.

Step 5
On the Assign Drive Letter or Path page, set the Assign the following drive letter drop-down list box to G and click Next.

Step 6
On the Format Volume page, select the Perform a quick format check box.
Click Next.
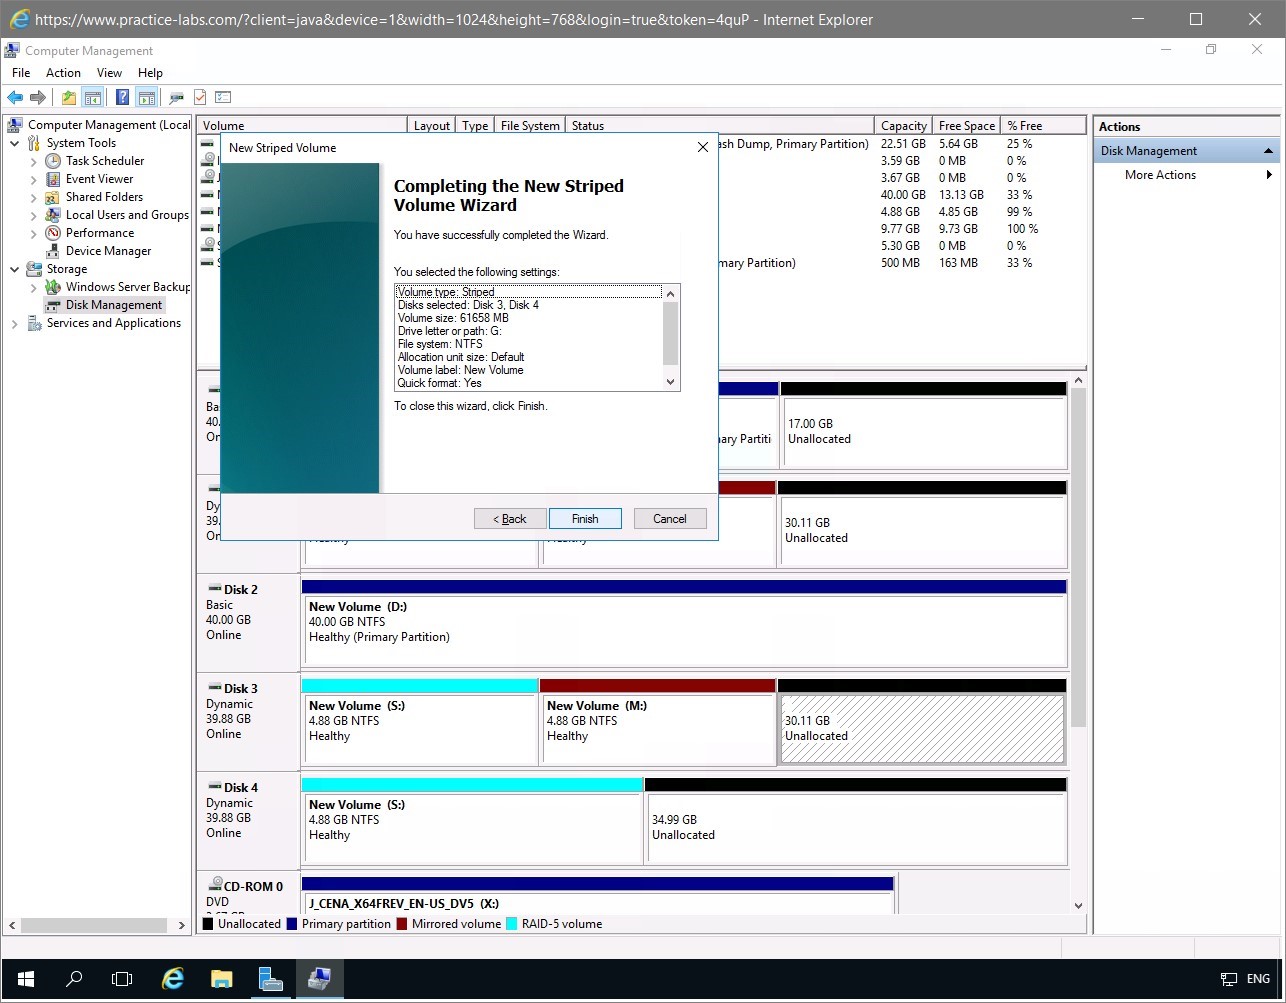
Step 7
On the Completing the New Striped Volume Wizard page, read the information and click Finish.
Step 8
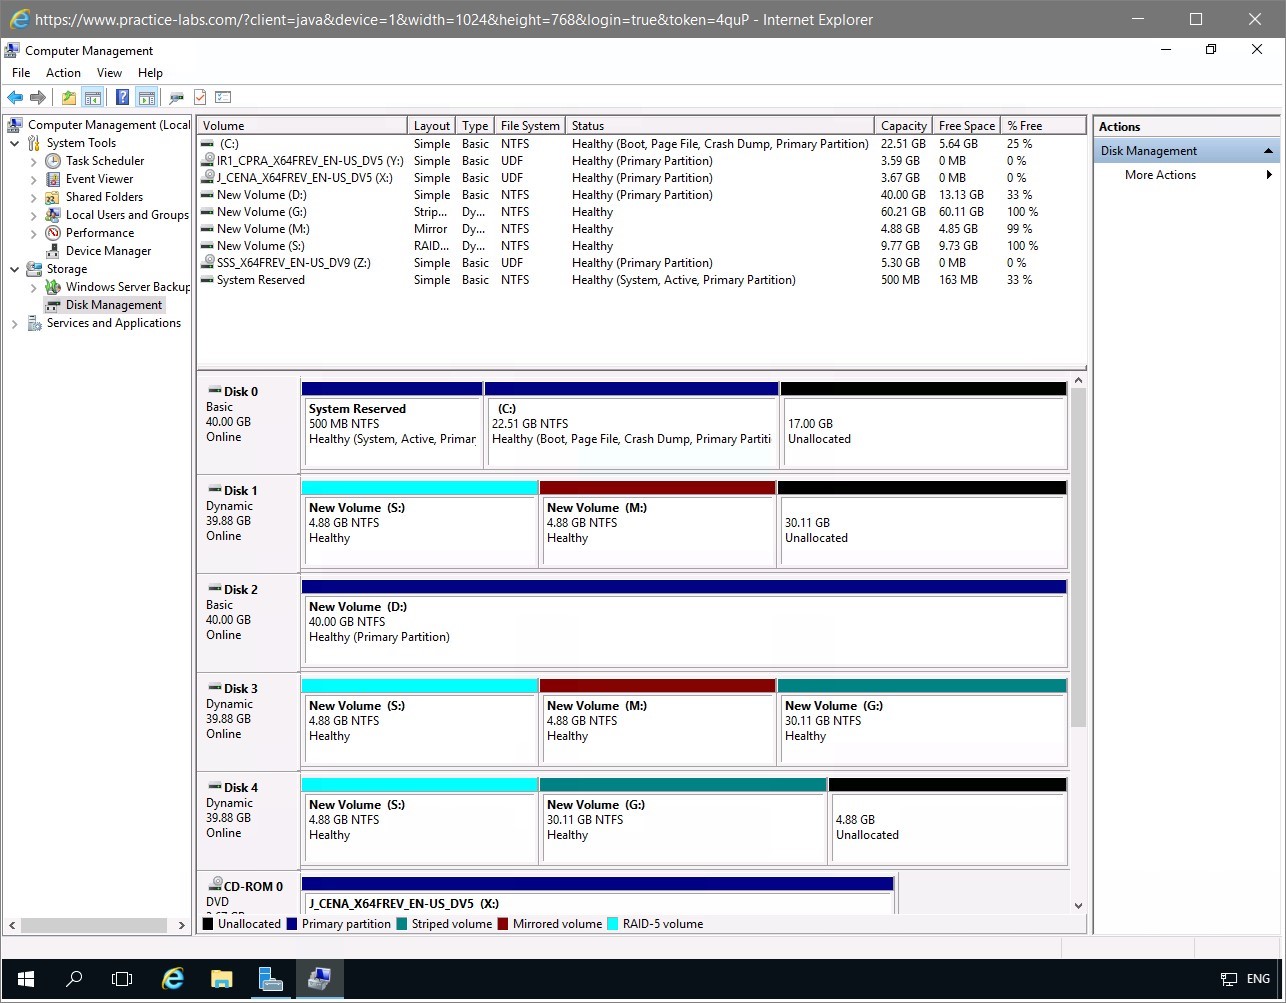
Back on the Computer Management console, which now displays the creation and formatting of disks that comprise the striped volume.
After the process is complete, notice that the New Volume (G:), the striped volume displays a Healthy status.
Step 9
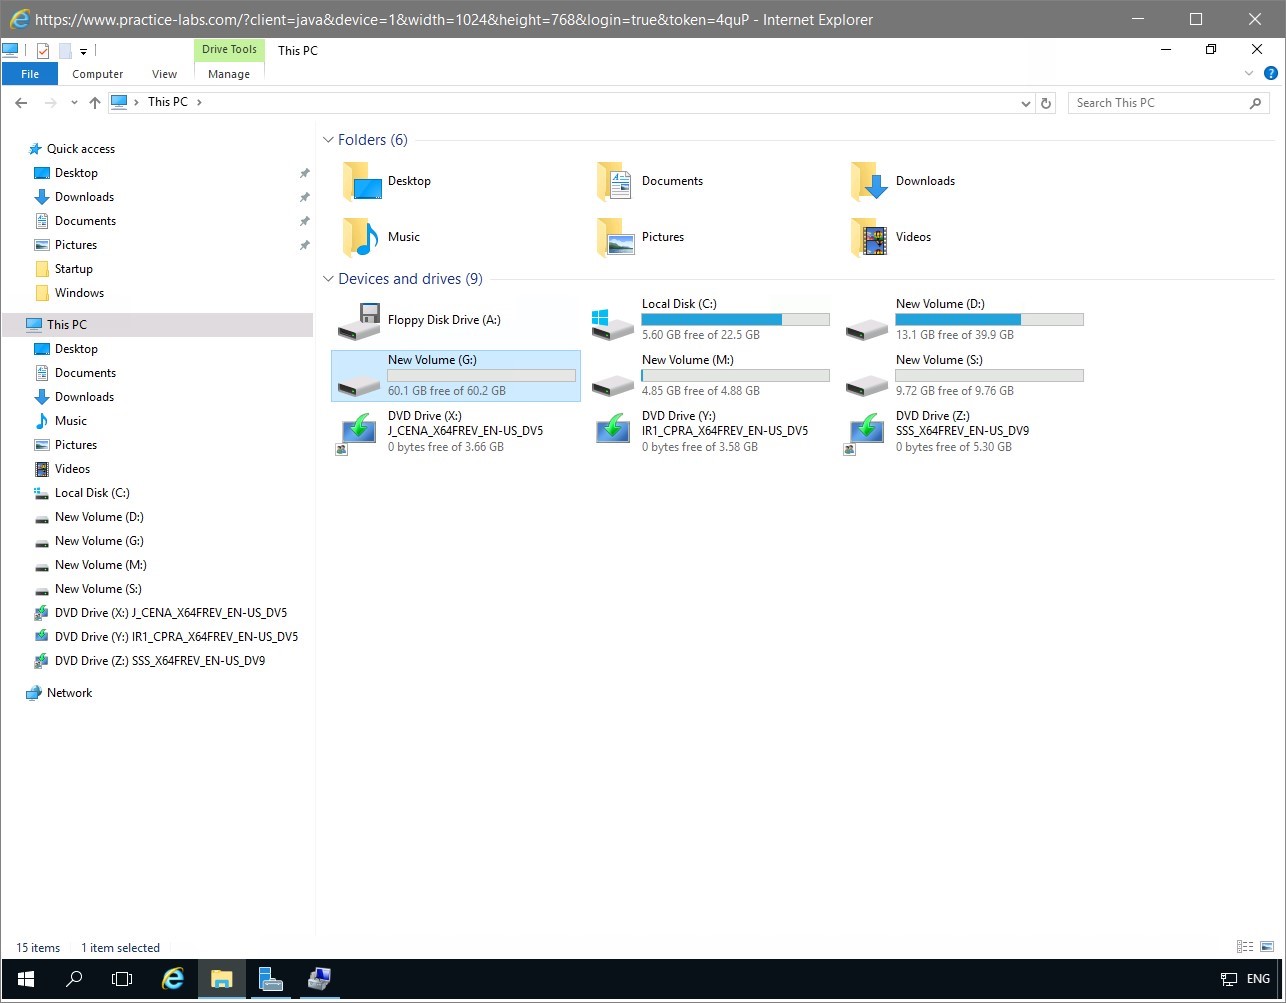
To verify the availability of the volume just created, click the File Explorer icon on the taskbar. On the explorer window, notice that the New Volume (G:) is now available for storage.
Close the file explorer window.

Comments
Post a Comment