Understanding pki concepts
Install and Configure Active Directory Certificate Services
In this exercise, you will install and configure Active Directory Certificate Services in a Windows domain environment.
To get a better understanding of this technology, please refer to your course material or use your preferred search engine to research this topic in more detail.
Task 1 - Install Active Directory Enterprise Root Certificate Service
In this task, you will install AD Certificate Services on Domain Controller device.
Step 1
Ensure you have powered on the required devices and connect to PLABDC01 device.
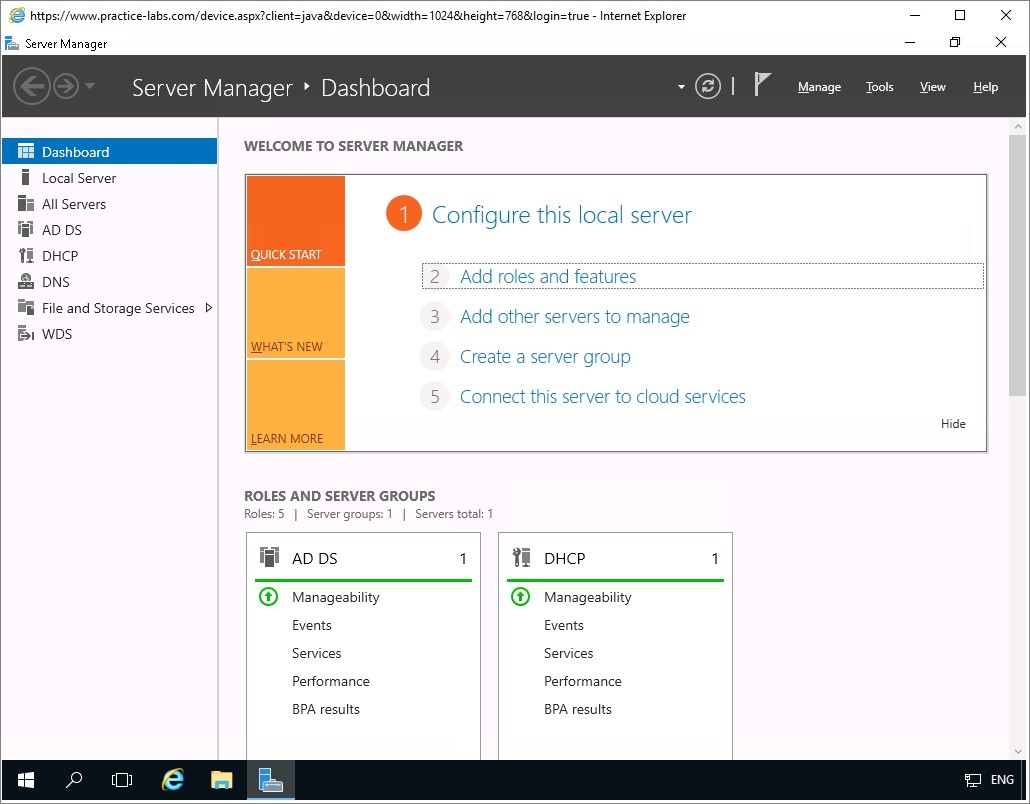
Server Manager automatically opens upon sign on.
Click on Add roles and features link.
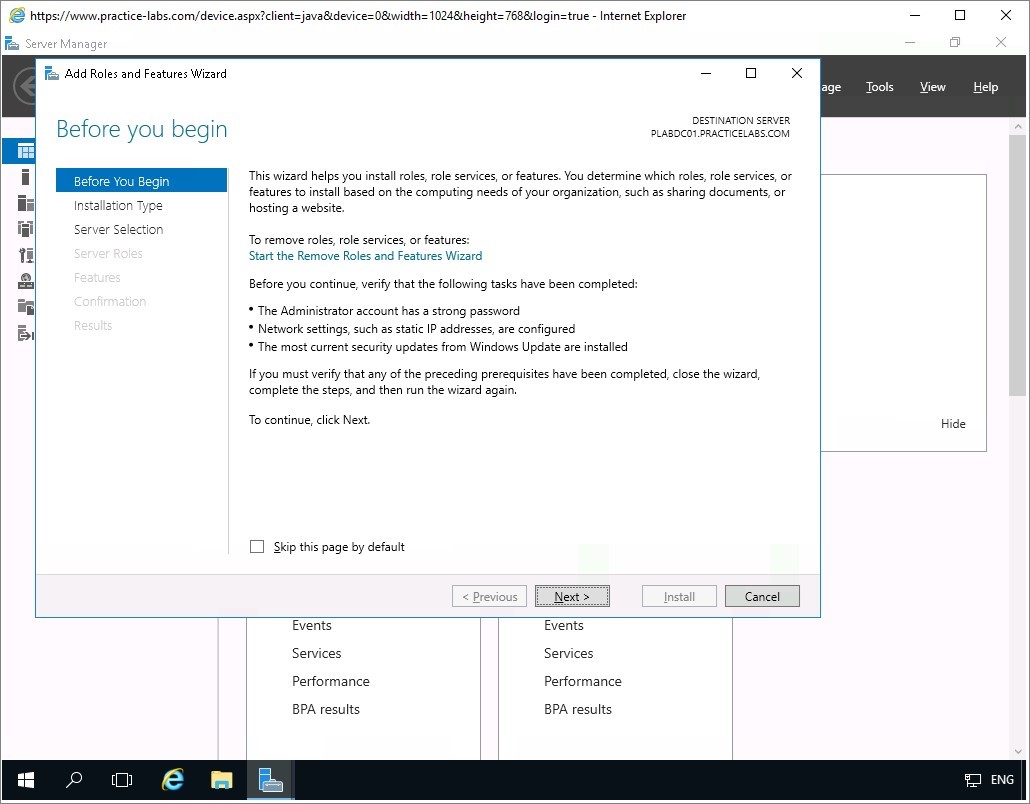
Step 2
On the Before you begin page, click Next.
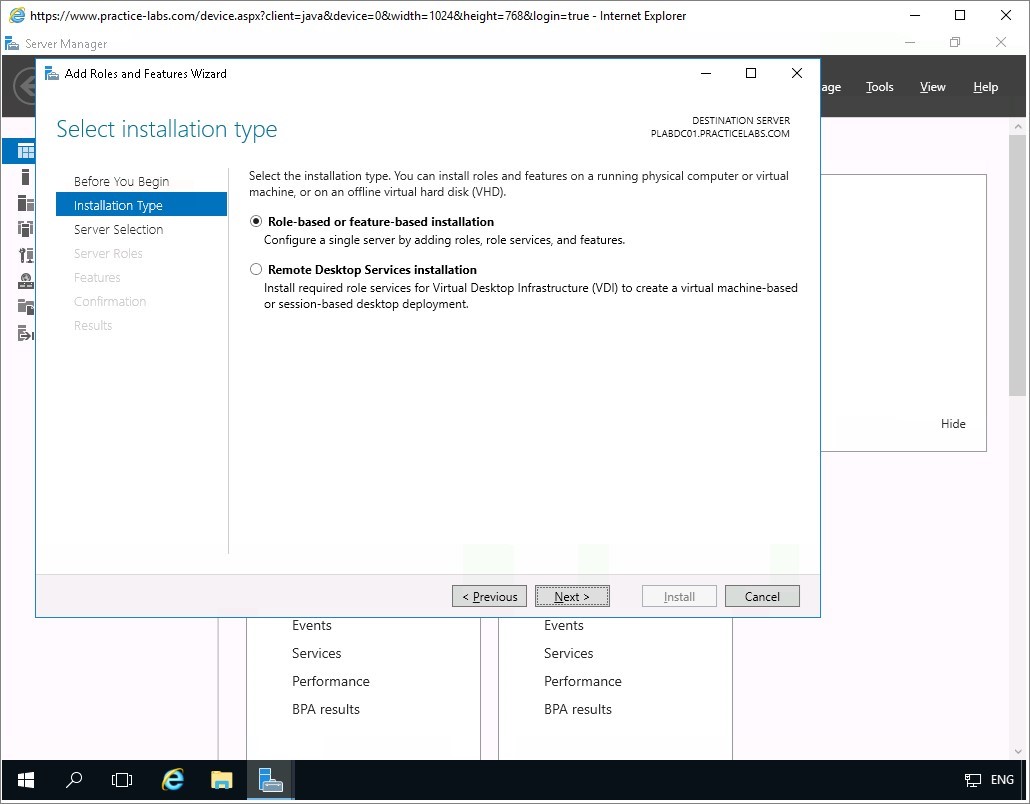
Step 3
On the Select installation type page, click Next.
In Select destination server, keep the default options and click Next.
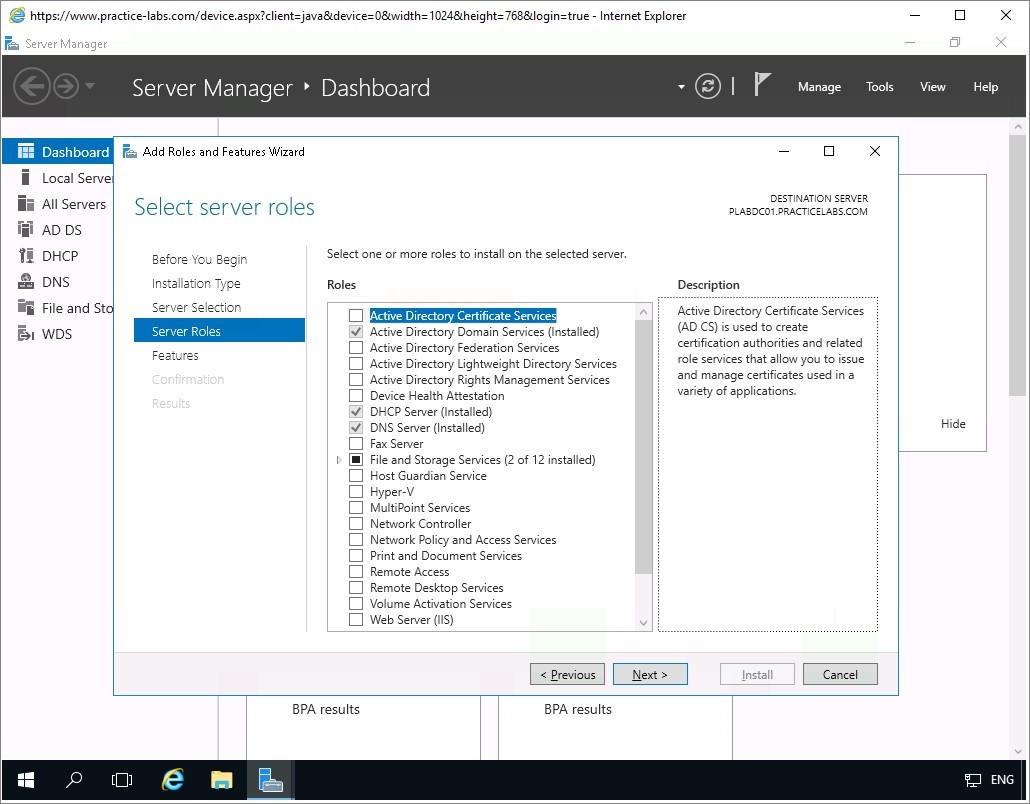
Step 4
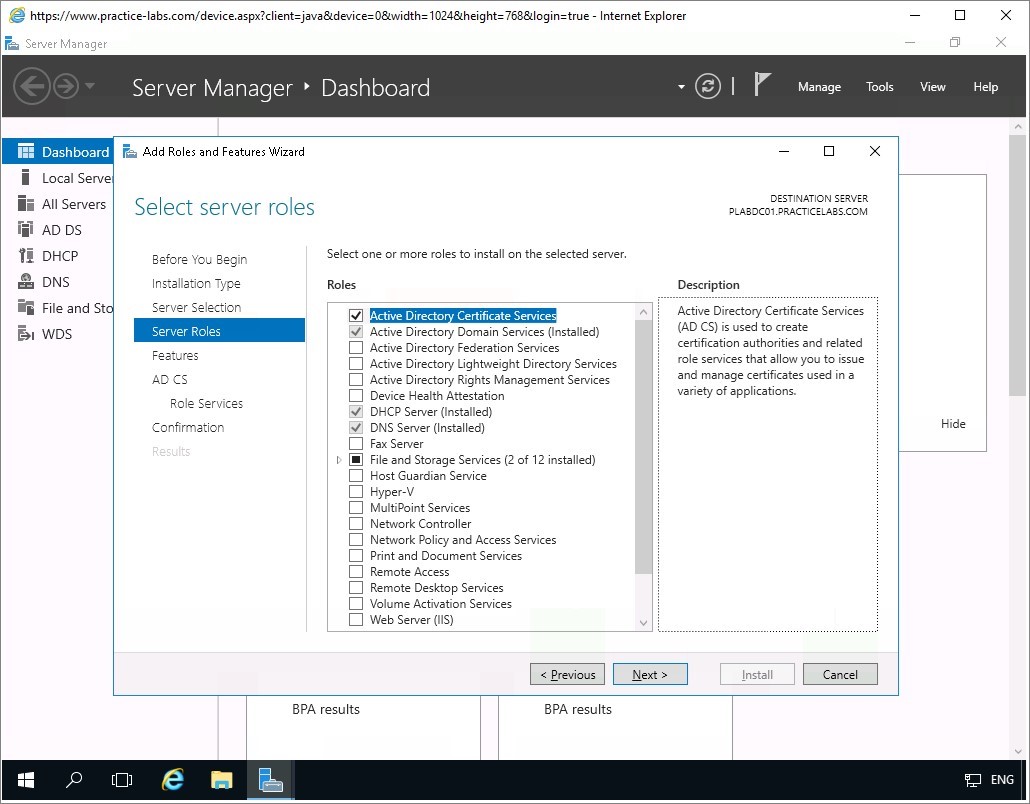
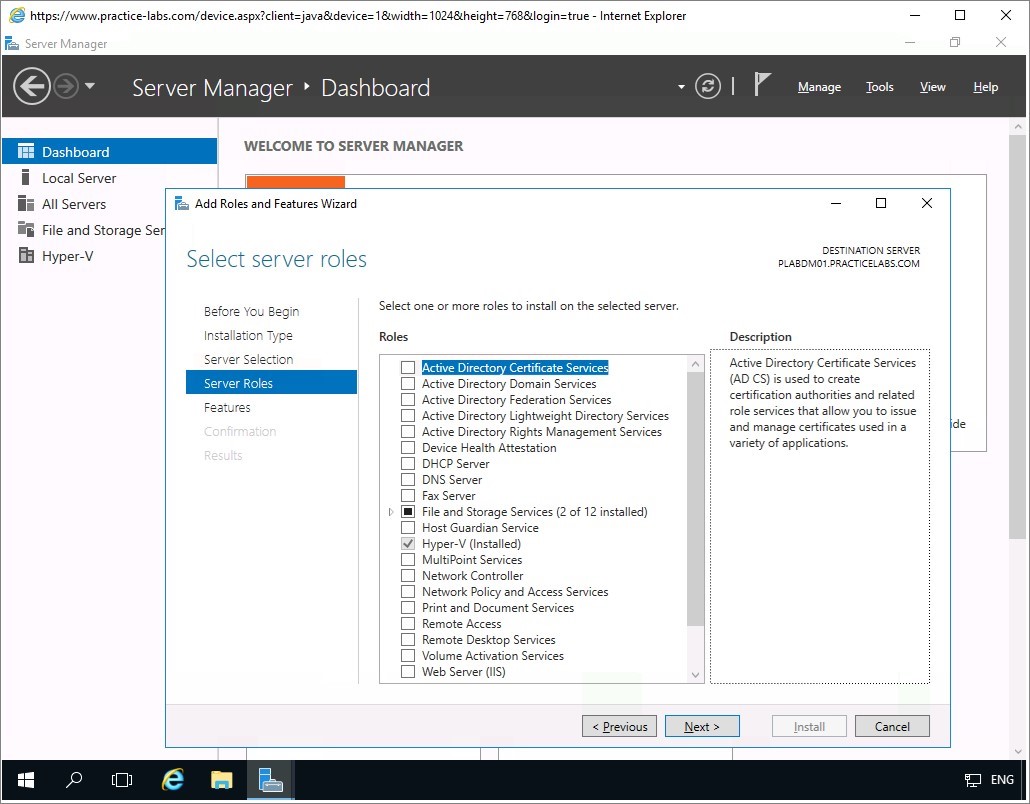
From Select server roles page, click the Active Directory Certificate Services check box.
The Add Roles and Features Wizard automatically appears, click on Add Features.
Step 5
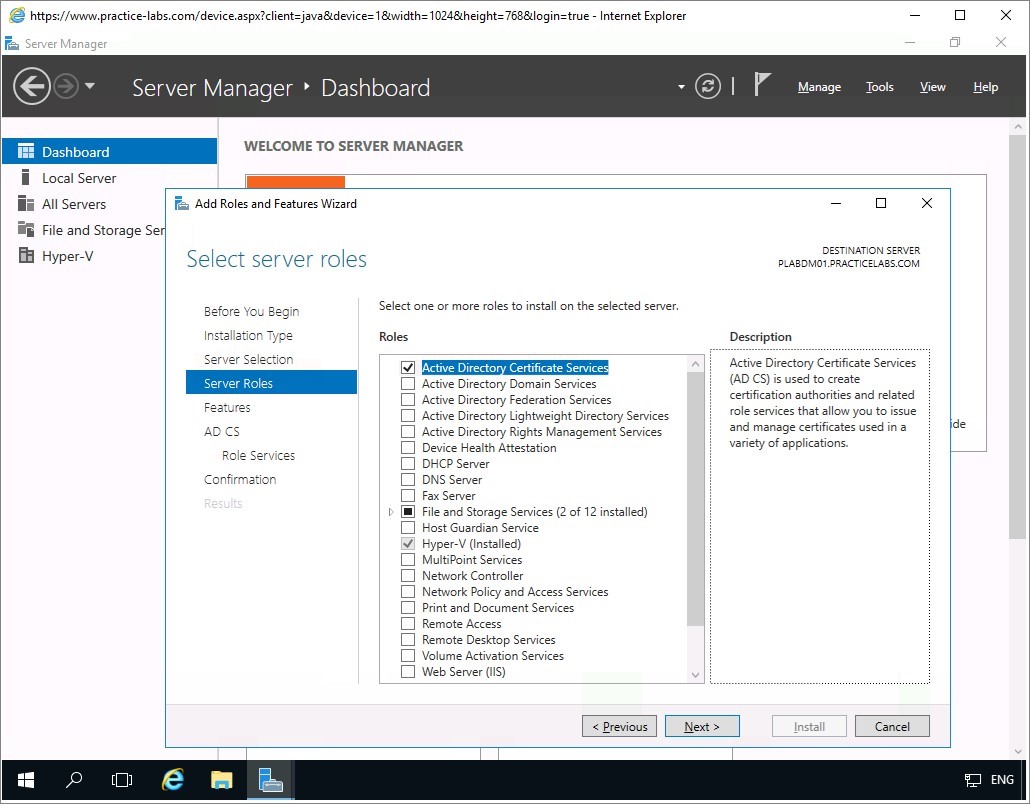
Back on the Select server roles page, you’ll notice the Active Directory Certificate Services check box is now selected.
Click Next to continue.
Step 6
On the Select features page, keep the default settings then click Next.
Read through the information about Active Directory Certificate Services and click Next.
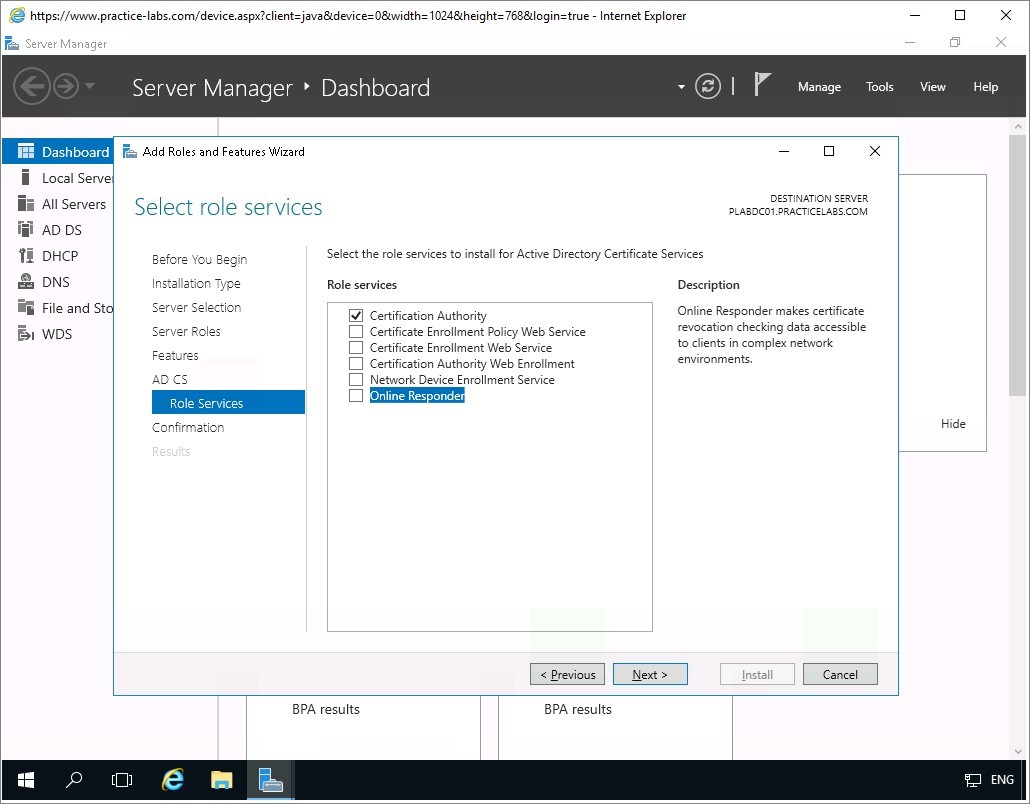
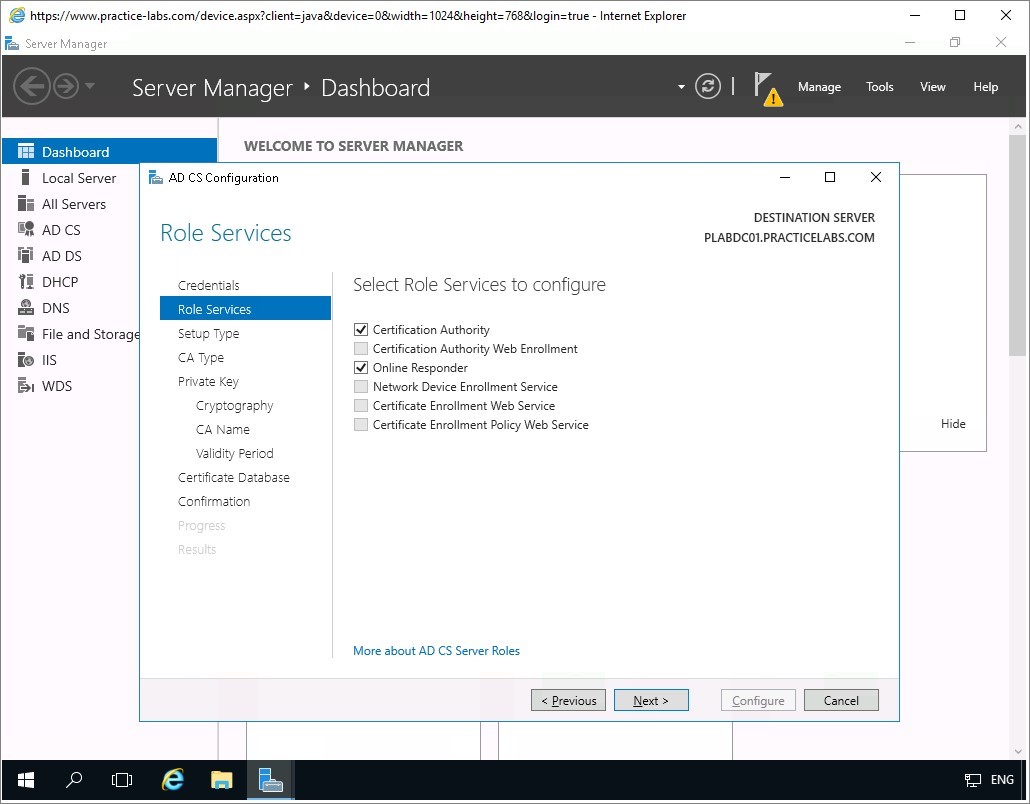
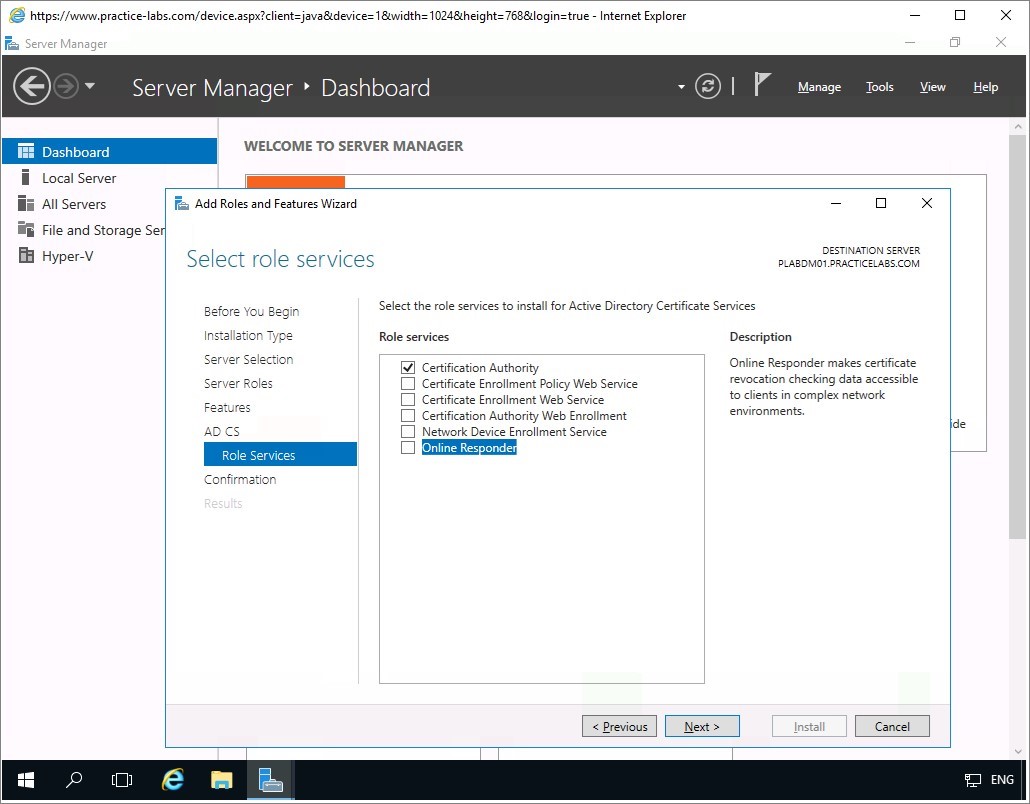
From Select role services page, verify that the Certification Authority check box is selected, then select Online Responder check box.
Step 7
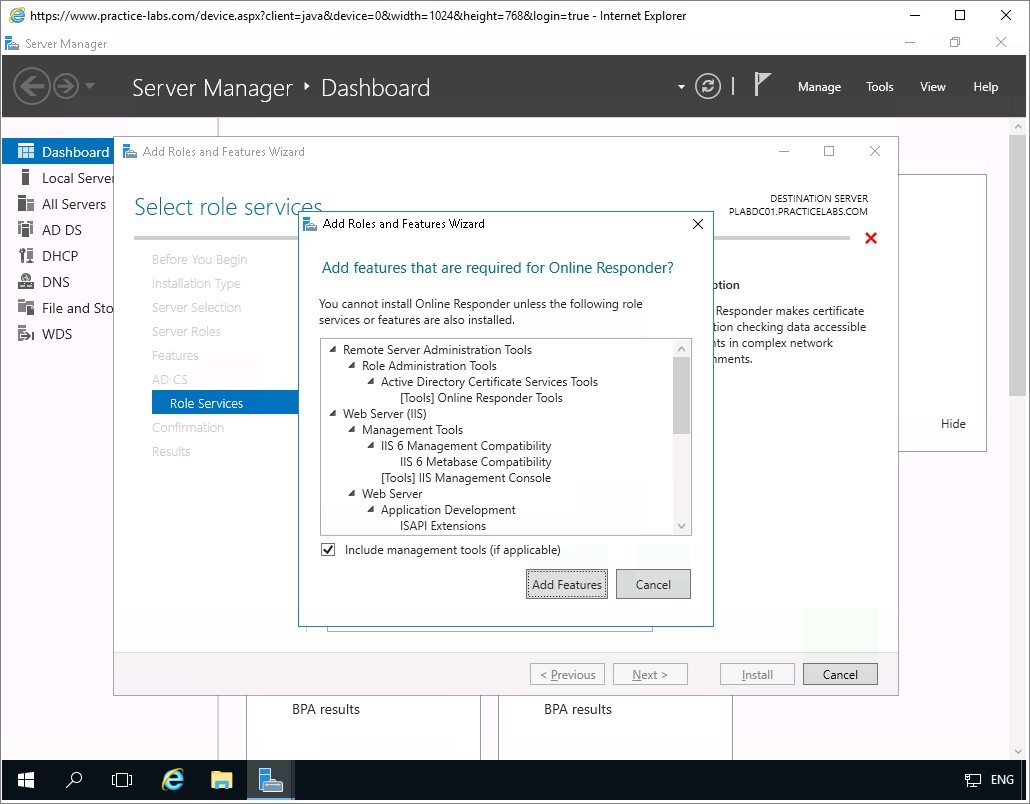
Like before, the Add Roles and Features Wizard box appears as the component you selected will require other components for it to run.
Click Add Features to proceed.
Step 8
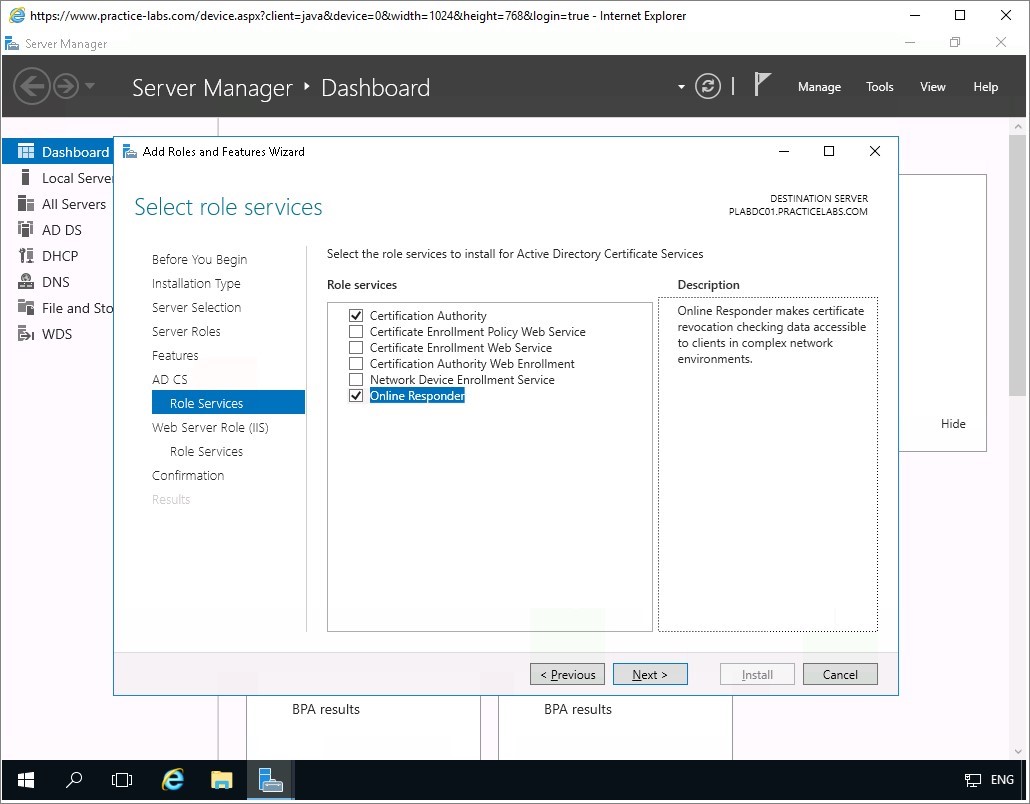
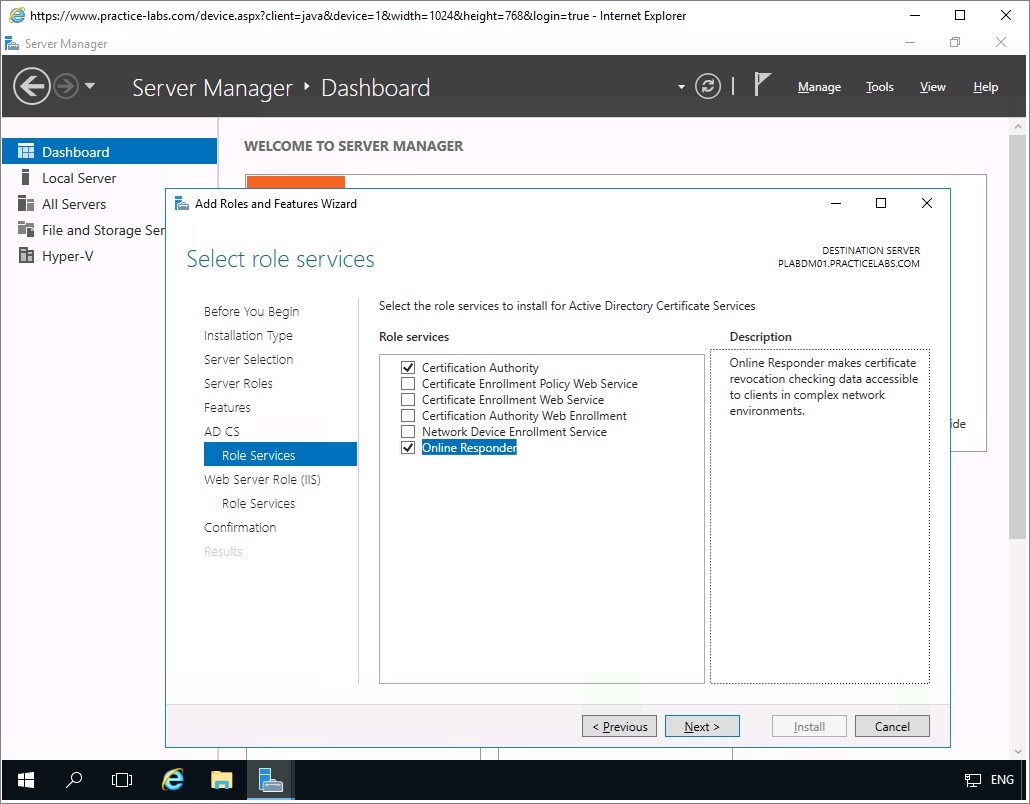
With Certification Authority and Online Responder tick boxes selected, click Next.
Step 9
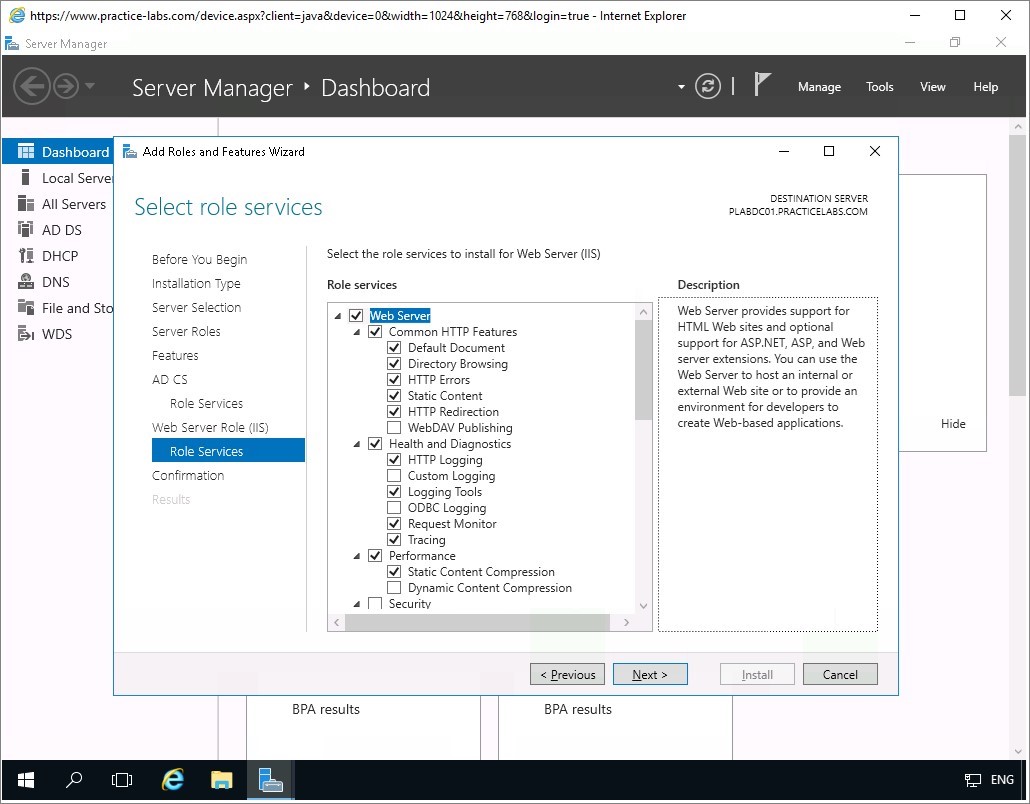
Read through the Web Server Role (IIS) to find out its role in the network and then click Next.
In Select role services page, accept the default role services that will be added by IIS. Click Next.
Click Install to proceed.
Step 10
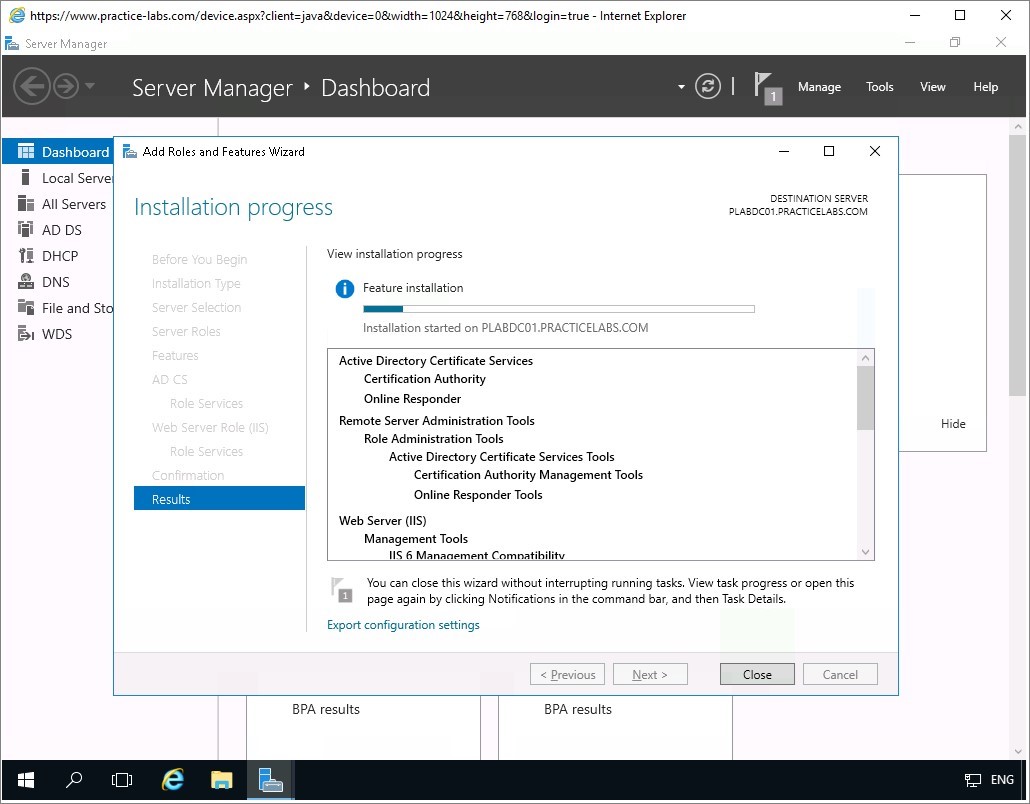
The installation will begin. Please be patient, this will take a few minutes.
Important: If you get an error saying “The request to add or remove features on the specified server failed.” Click Close. This is caused when Server Manager is busy collecting system information on the server following a recent start-up or reboot. Wait for about 1 minute and start over with the installation of the Windows features in this task. If the same problem persists, restart the affected computer and start over with the installation of the Windows features.Choose Close when Installation progress reports a successful operation.
Keep all devices powered on in their current state and proceed to the next task.
Task 2 - Configure Active Directory Certificate Services
After a brief installation of Active Directory Certificate Services and Online Responder on PLABDC01, you must setup these services with the appropriate settings. This will enable these services perform its intended role.
To configure Active Directory Certificate Services, follow these steps:
Step 1
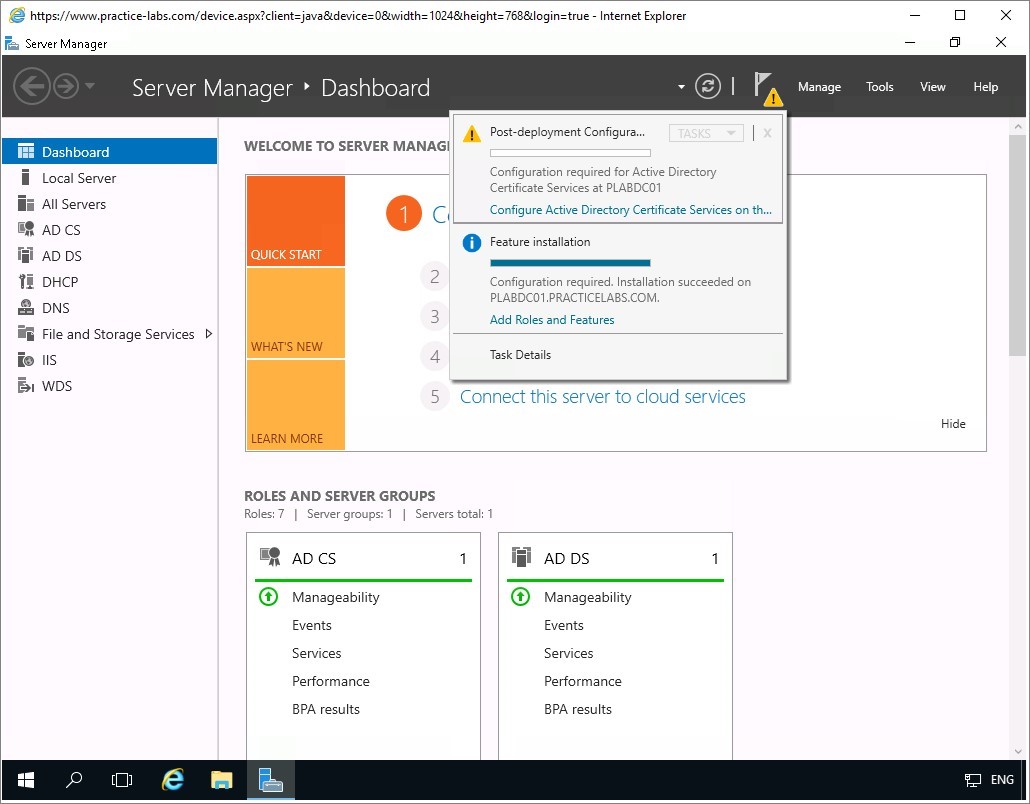
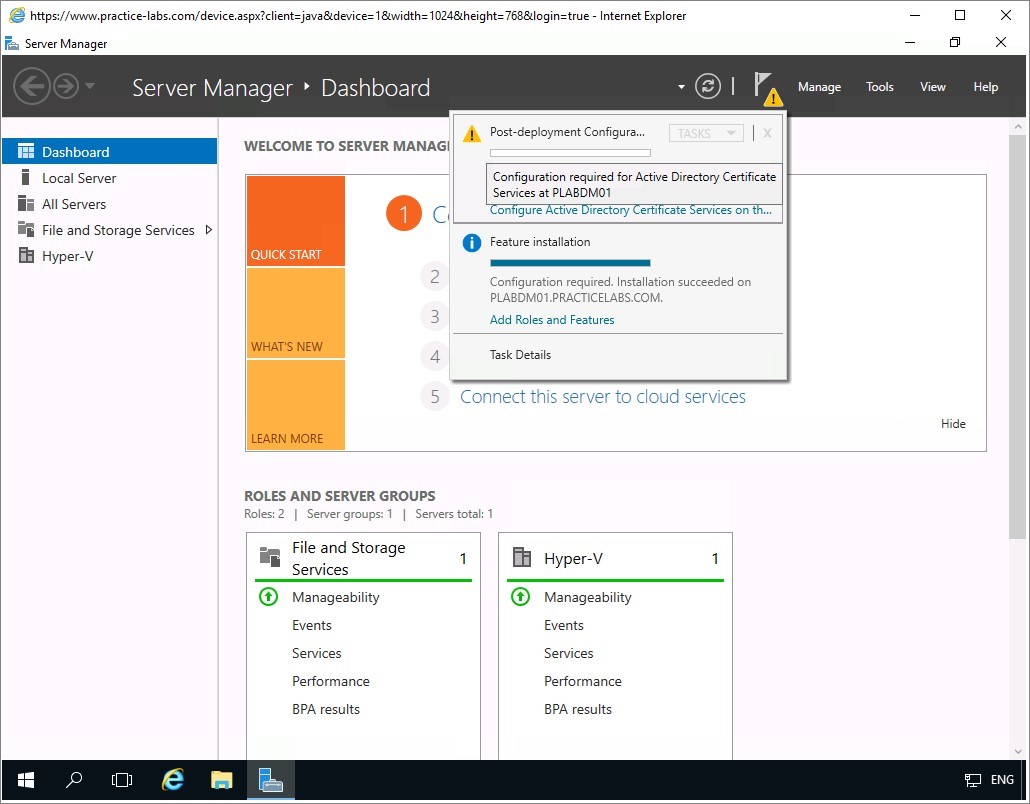
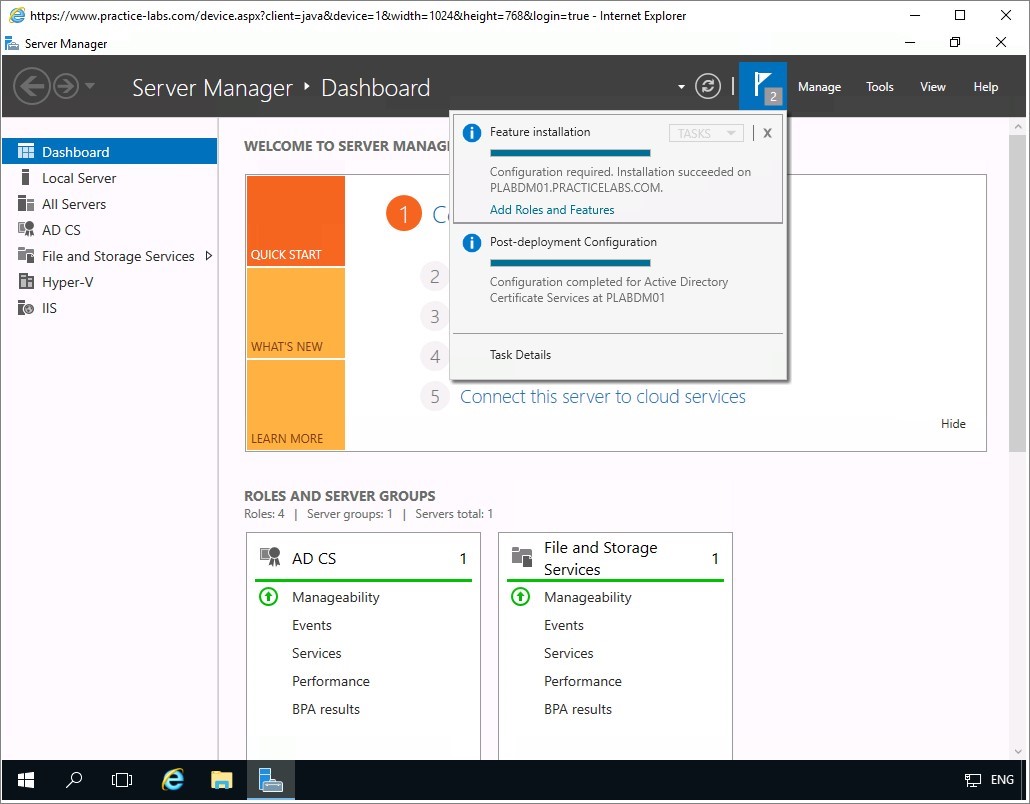
On PLABDC01, you are redirected to Server Manager console.
Click on the flag icon and choose Configure Active Directory Certificate Services on the destination server link.
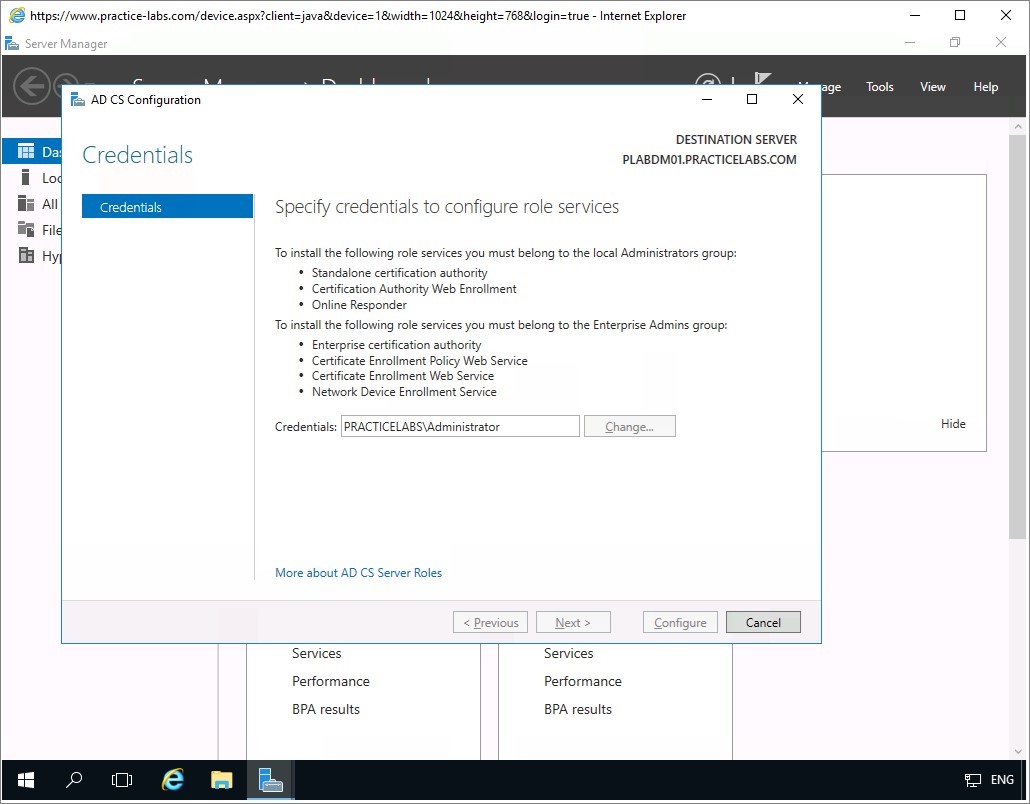
Step 2
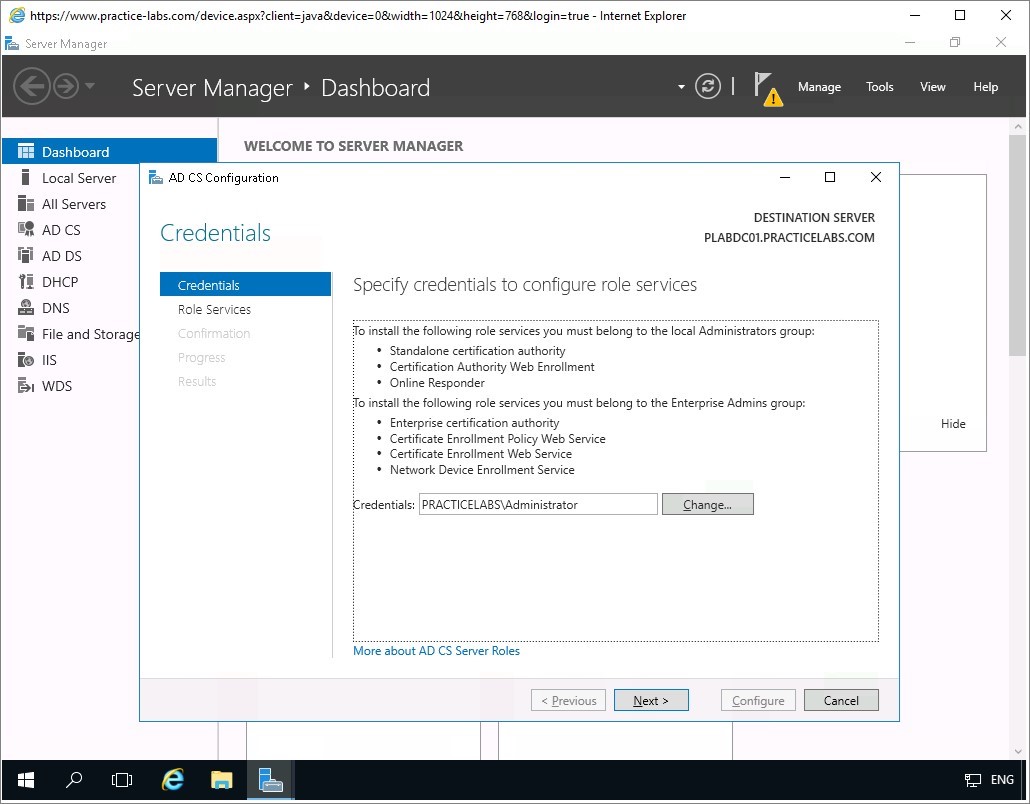
On the Credentials page, the system has detected you’re currently signed in as PRACTICELABS\Administrator.
Click Next.
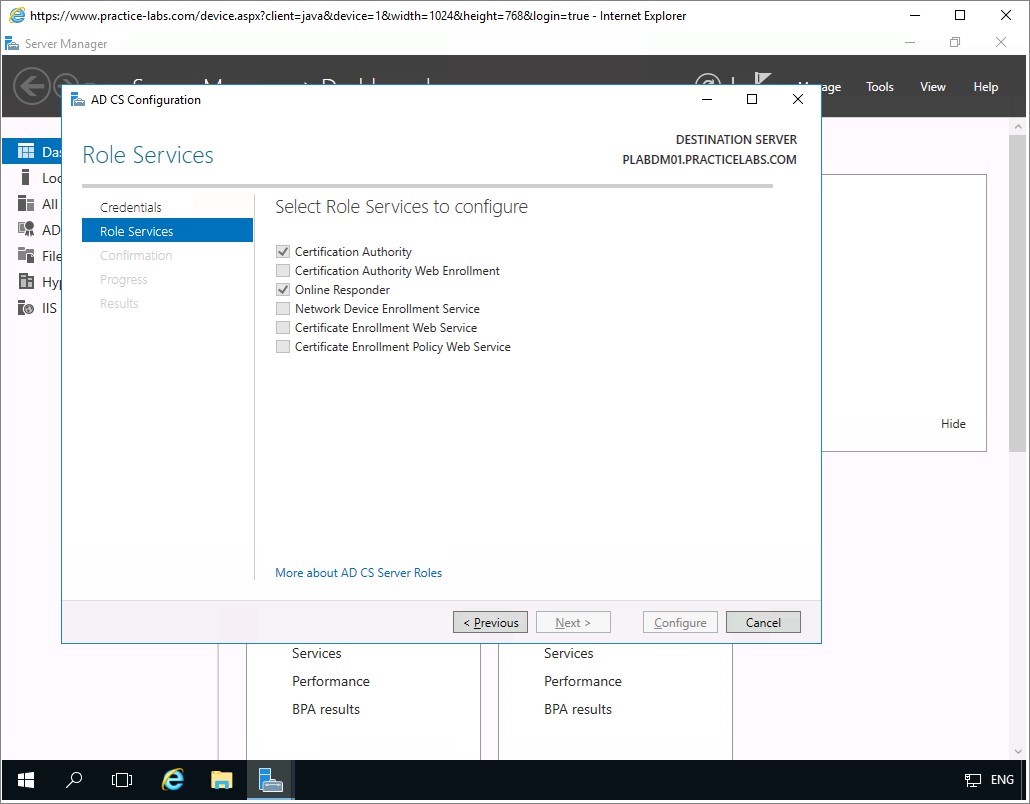
Step 3
In Role Services, select Certification Authority check box. There will be a momentary pause when you select this.
Then click on Online Responder check box.
Click Next.
Step 4
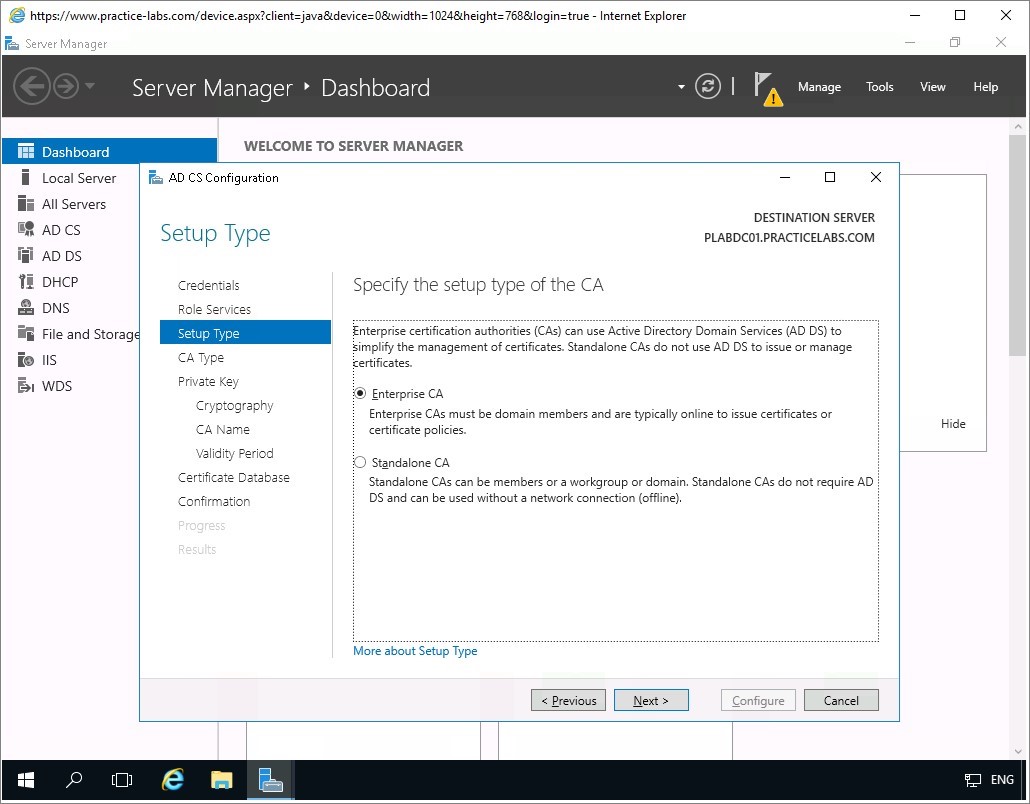
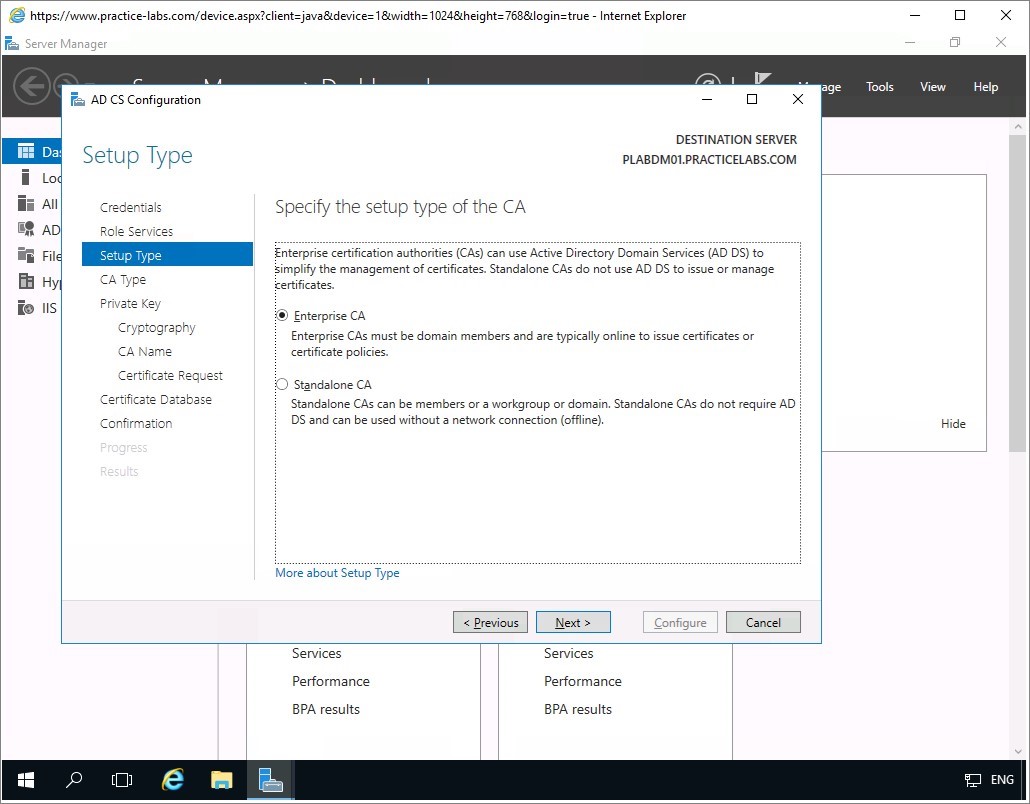
On the Setup Type page, ensure that Enterprise CA option is selected. Click Next.
In CA Type, ensure that Root CA is selected. Click Next.
Step 5
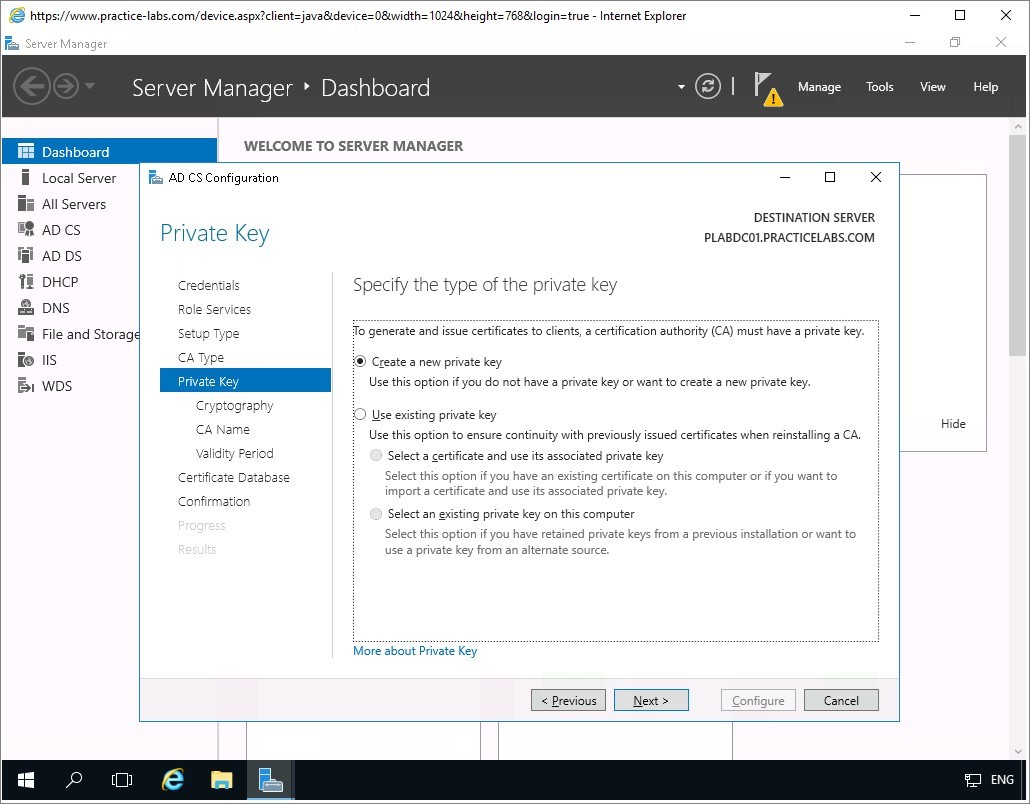
On the Private Key page, verify that the Create a new private key radio button is selected.
Click Next.
Step 6
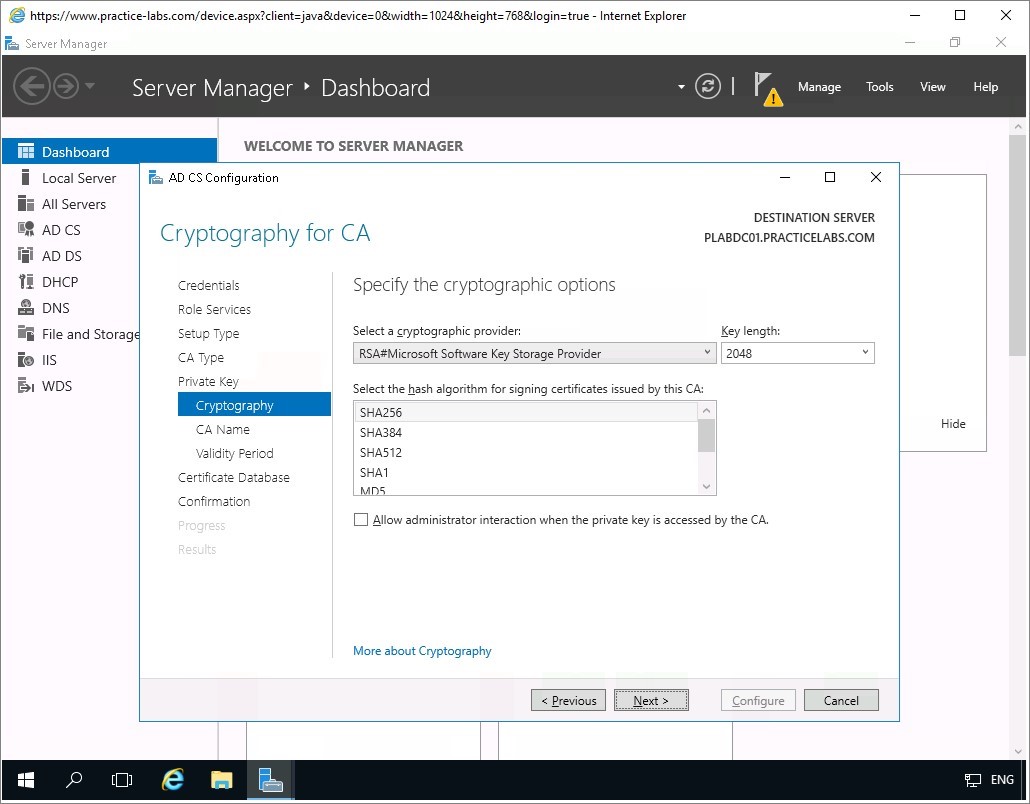
On the Cryptography for CA dialogue box, leave the default cryptographic settings and click Next.
Step 7
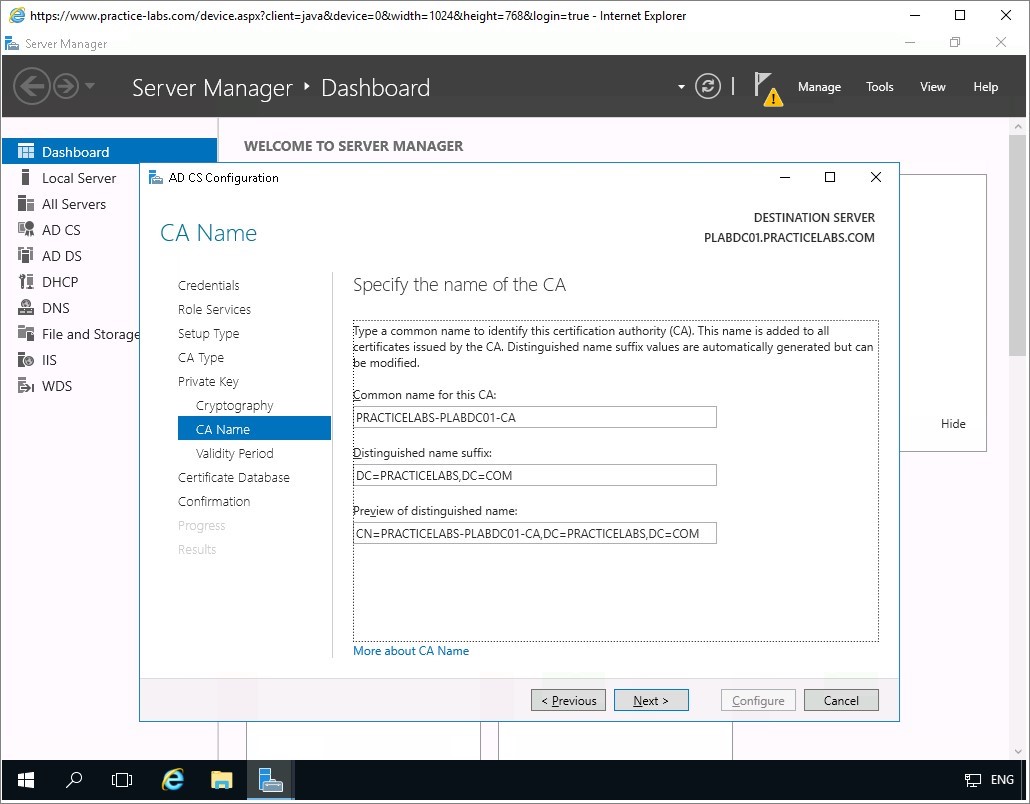
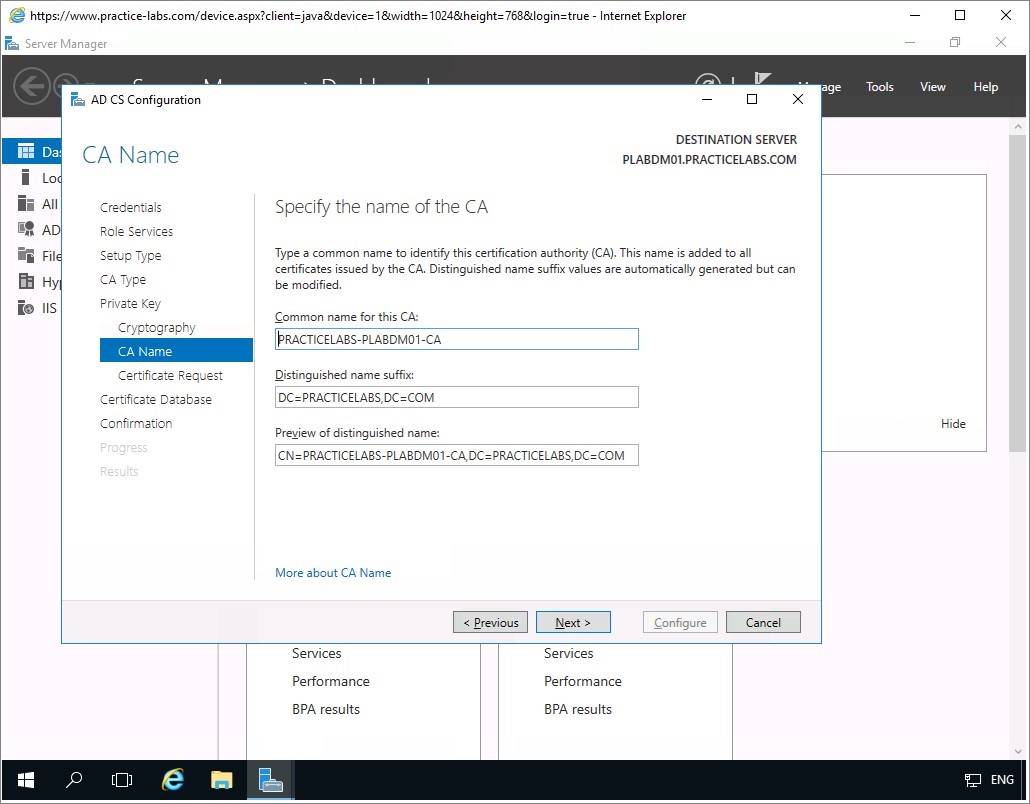
Accept the default CA Name supplied by the AD CS Configuration then click Next.
On the next page accept the Validity Period of 5 years and click Next again.
Step 8
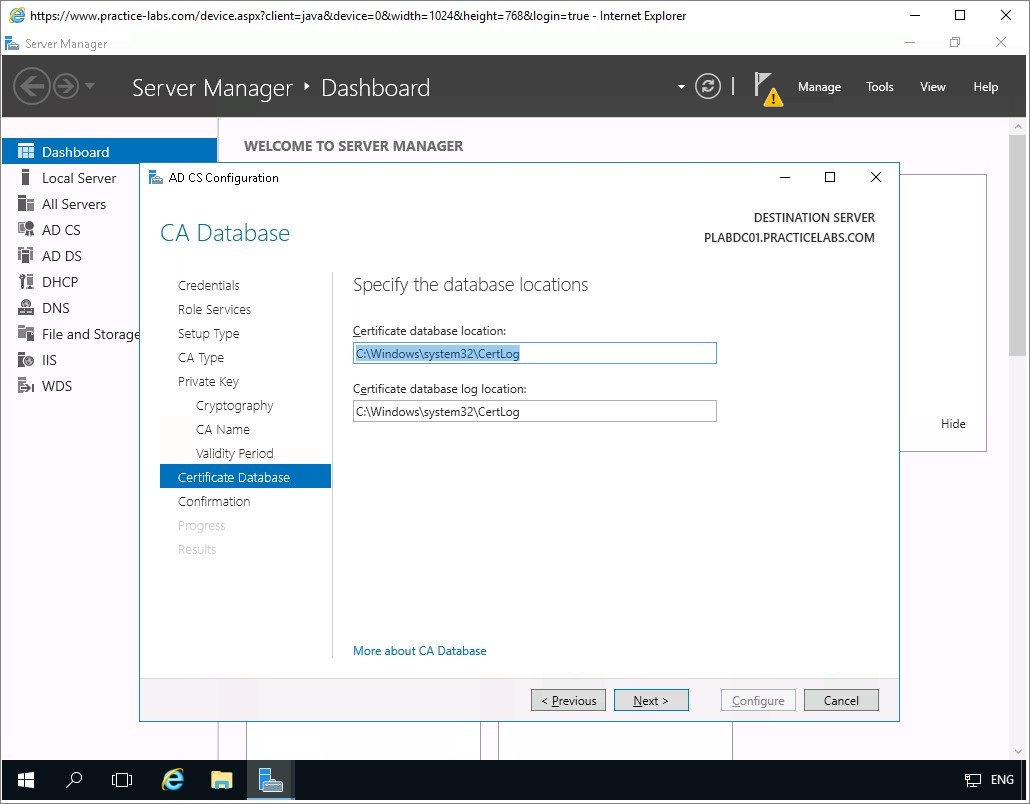
Accept the default path for CA Database and click Next.
Step 9
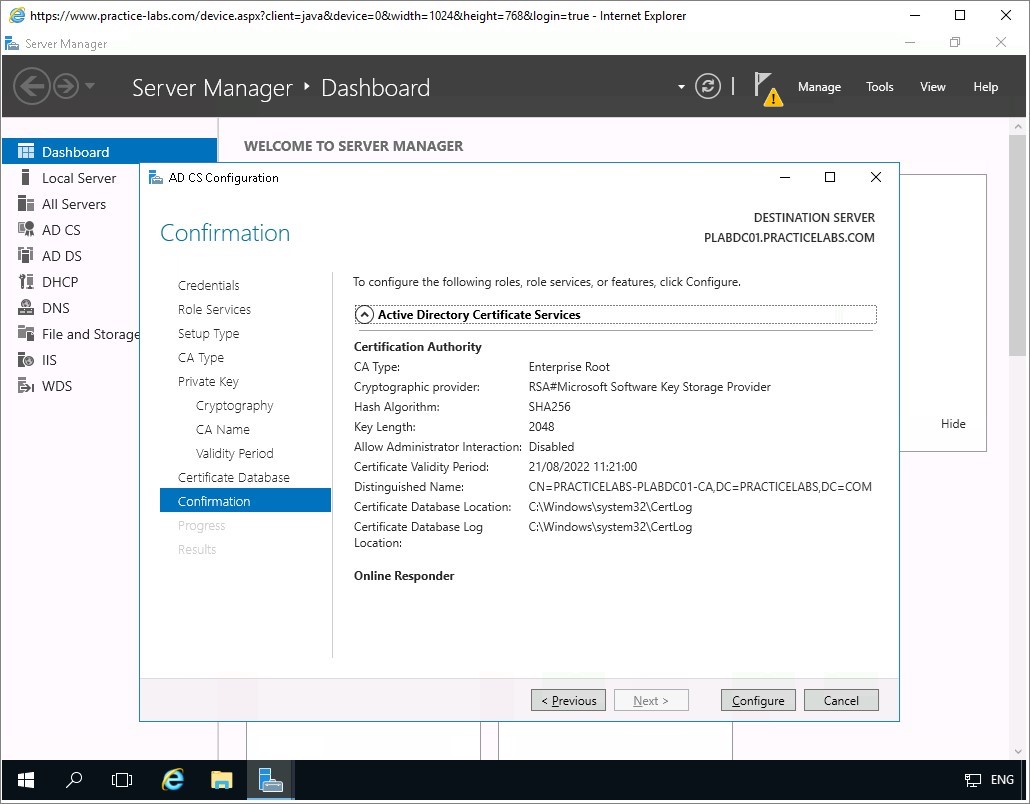
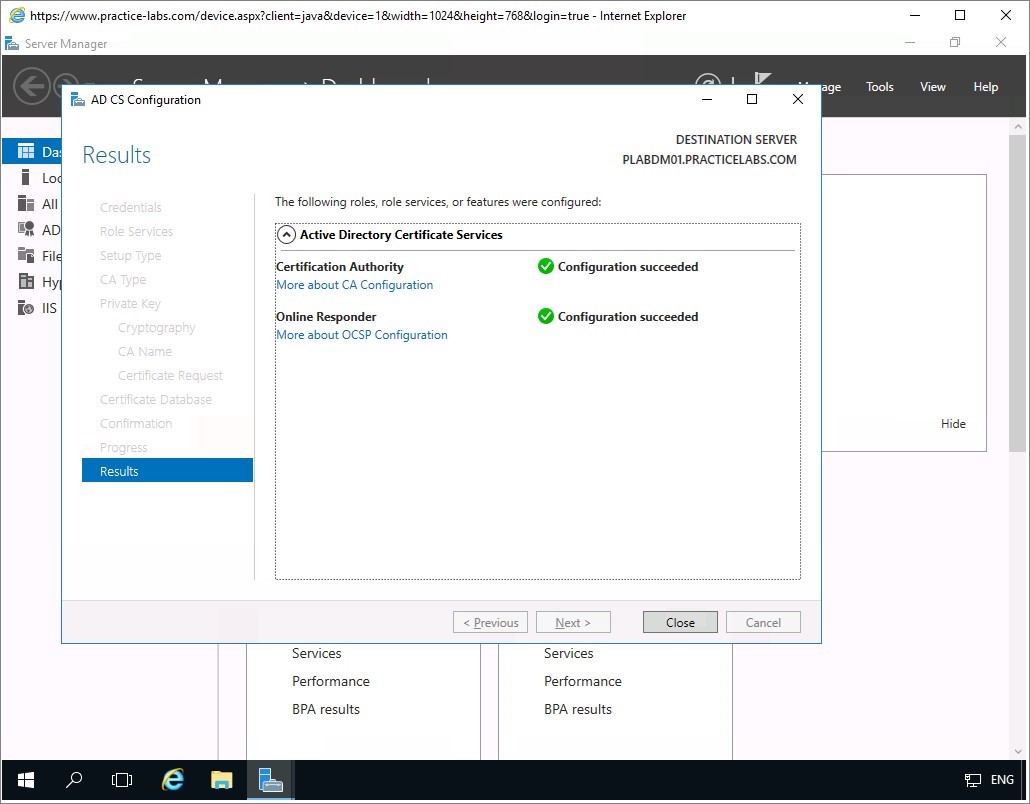
On the Confirmation page, read through the summary settings of this Active Directory Certificate Services that is about to be setup.
Click Configure to proceed with the configuration of AD CS.
Step 10
Please wait while the service is being setup.
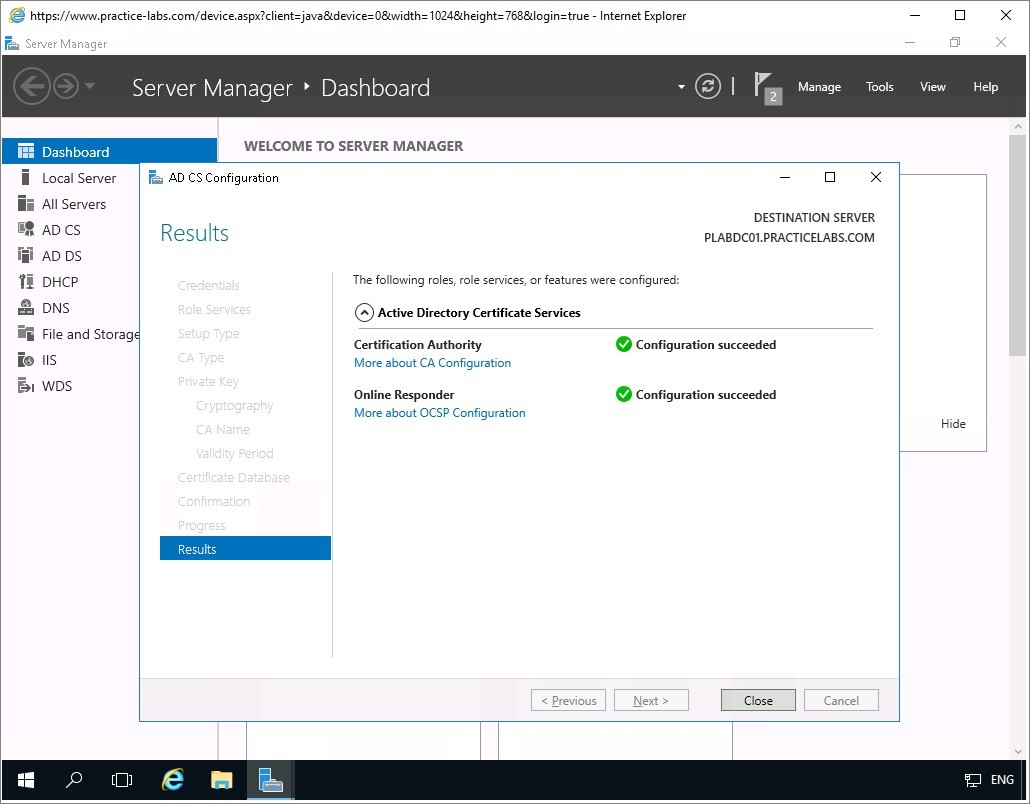
When the Results are displayed with Configuration succeeded, click Close.
Step 11
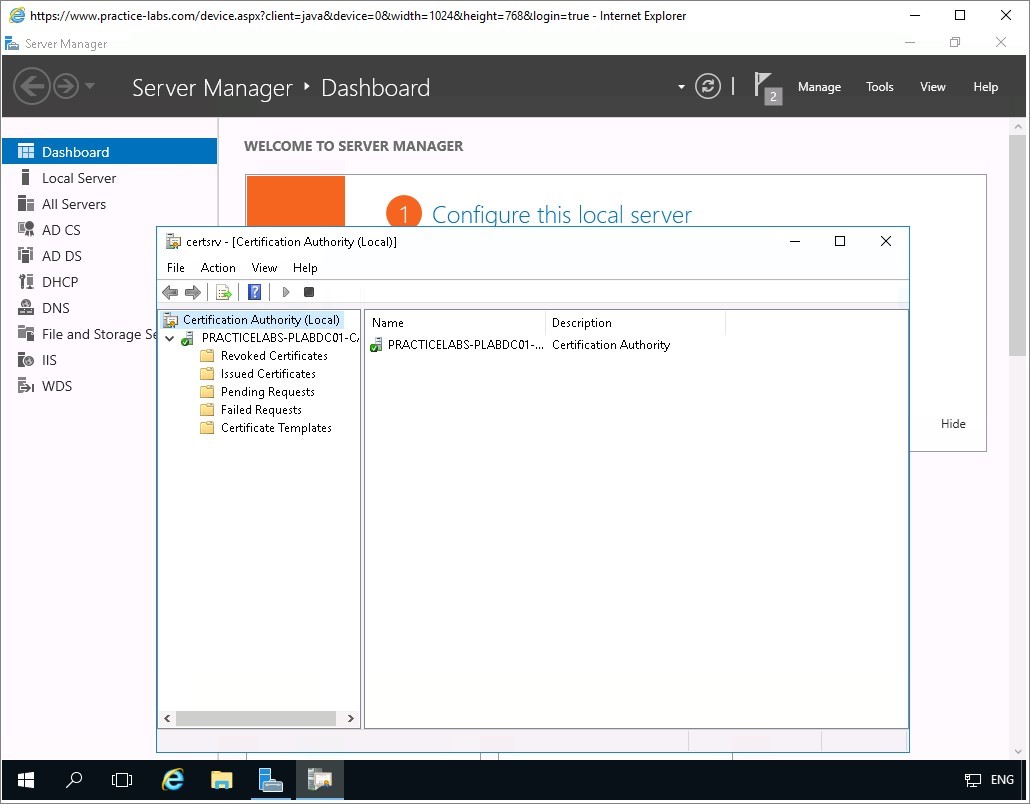
You’ll now verify that AD CS is working.
From the Server Manager Dashboard, go to Tools > Certification Authority.
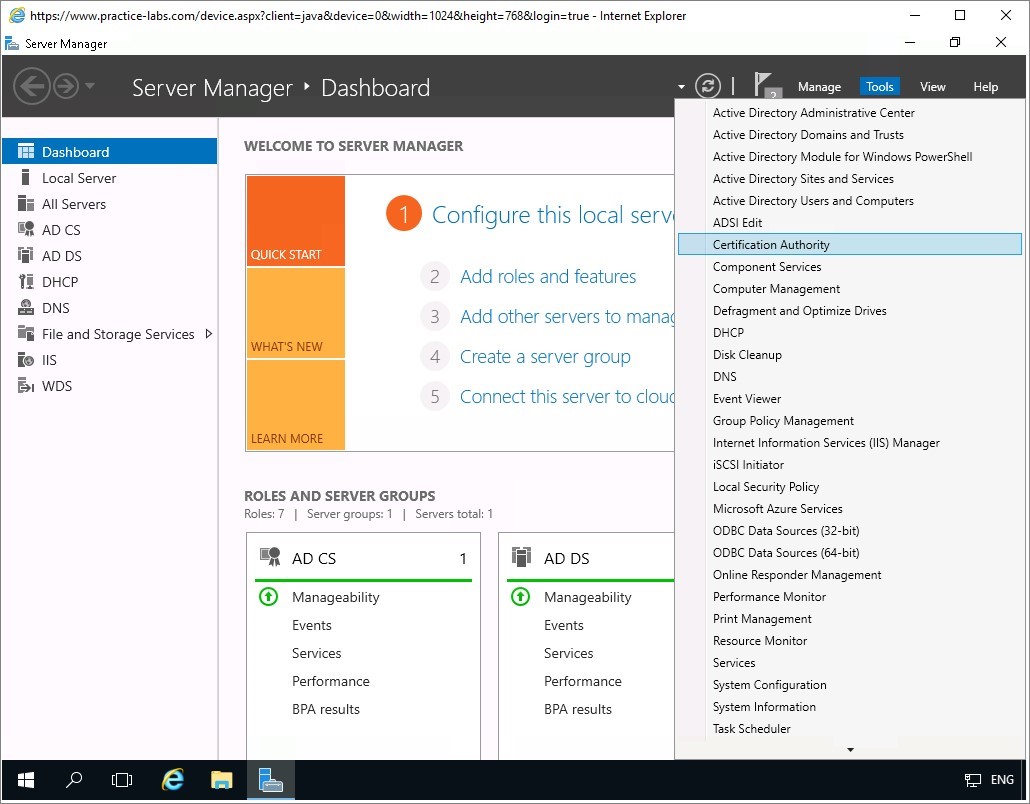
Step 12
Verify Certification Authority snap-in works by expanding PRACTICELABS-PLABDC01-CA node.
The green tick mark indicates that the service has successfully started.
Minimize Certification Authority and Server Manager windows to clear the desktop of PLABDC01.
Keep all devices powered on in their current state and proceed to the next task.
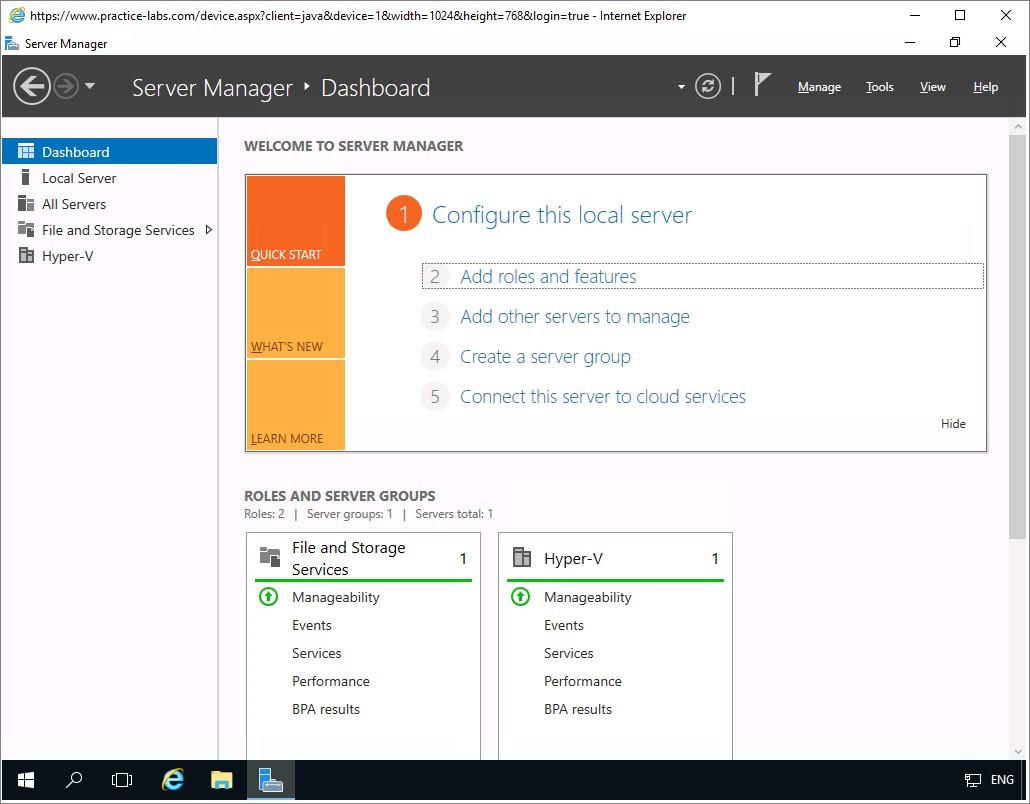
Task 3 - Install Subordinate CA
In this task, you will install a subordinate CA of PracticeLabs.com on a domain member server called PLABDM01. You will follow the same steps that were done earlier when you installed the Enterprise Root CA.
To install the subordinate CA, follow these steps.
Step 1
Connect to PLABDM01.
The Server Manager Dashboard opens automatically. Click on the Add roles and features link.
Step 2
On the Before you Begin page, click Next.
On Select Installation Type page, accept the default setting Role-based or feature installation option. Click Next.
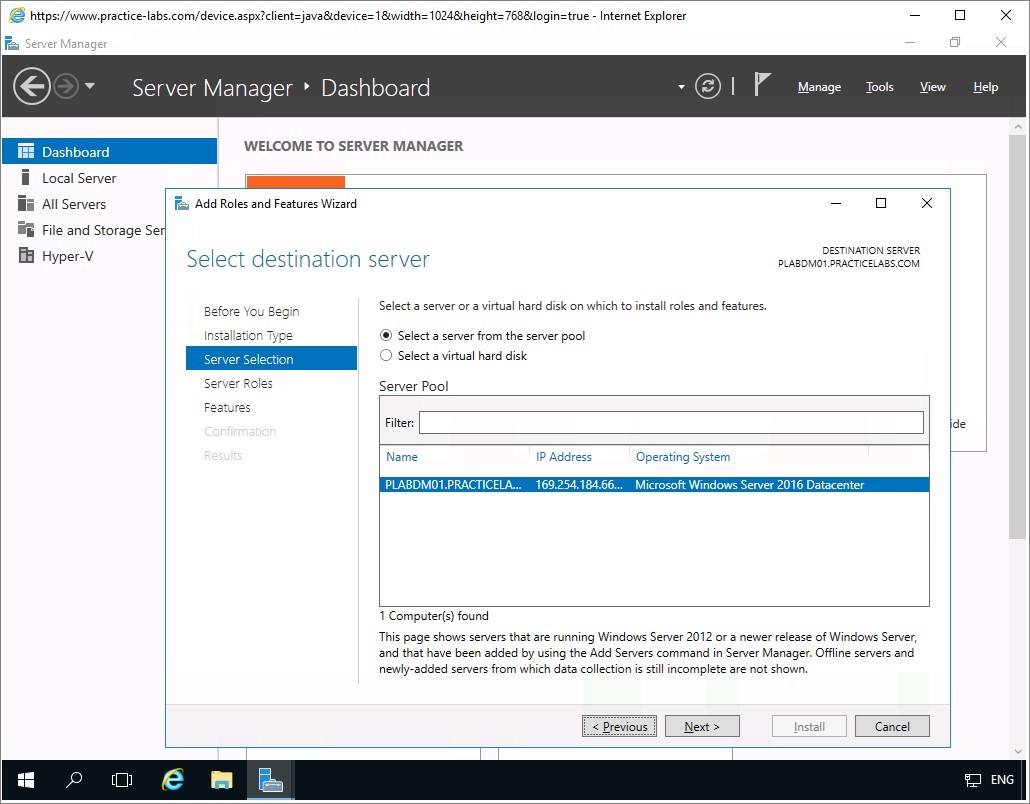
From Select destination server page, click Next.
Step 3
From Select server roles page, click the Active Directory Certificate Services check box.
Like in the earlier task, the Add Roles and Features Wizard appears. Other components are required to make Active Directory Certificate services work on this computer.
Click Add Features.
Step 4
Click Next when you see the Active Directory Certificate Services check box selected.
In Select features page, click Next to accept the default settings.
Read through the introductory text about Active Directory Certificate Services and click Next.
Step 5
In Select role services page, select the Online Responder check box.
The Add Roles and Features Wizard will reappear, click Add Features.
Step 6
When both Certification Authority and Online Responder are selected, click Next.
In Web Server Role (IIS) information page, read through the description about this service, then click Next.
Step 7
From Select role services, the default IIS role services are selected, click Next.
In Confirm installation selections, click Install.

Step 8
On Installation Progress screen, please wait while the services and its components are being installed.
Important: If you get an error saying “The request to add or remove features on the specified failed.” Click Close. This is caused when Server Manager is busy collecting system information on the server following a recent start-up or reboot. Wait for about 1 minute and start over with the installation of the Windows features in this task. If the same problem persists, restart the affected computer and start over with the installation of the Windows features.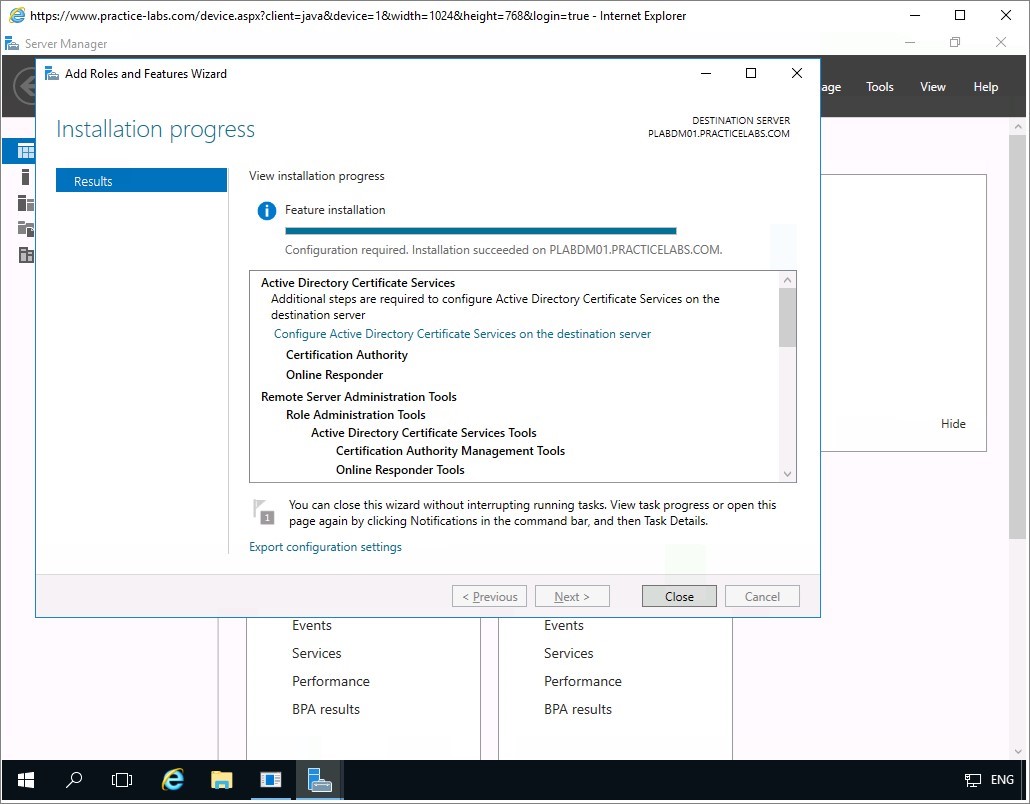
When Installation progress is completed, click Close.
Keep all devices powered on in their current state and proceed to the next task.
Task 4 - Configure Subordinate CA
After a brief installation of Active Directory Certificate Services and Online Responder, you must setup this Certificate service on PLABDM01 to assume the role of a subordinate CA to PLABDC01-PRACTICELABS.COM-CA.
To configure Active Directory Certificate Services subordinate CA role, follow these steps:
Step 1
On PLABDM01, you are back in Server Manager.
Select the flag icon with an exclamation point and click Configure Active Directory Certificate Services on the destination server link.
Step 2
In Credentials page, click Next.
Step 3
Similar to the task done earlier about configuring the Enterprise Root CA, select Certification Authority and Online Responder check boxes.
Then click Next.
Step 4
In Setup Type page, verify that Enterprise CA radio button is selected.
Click Next to accept default settings.
Step 5
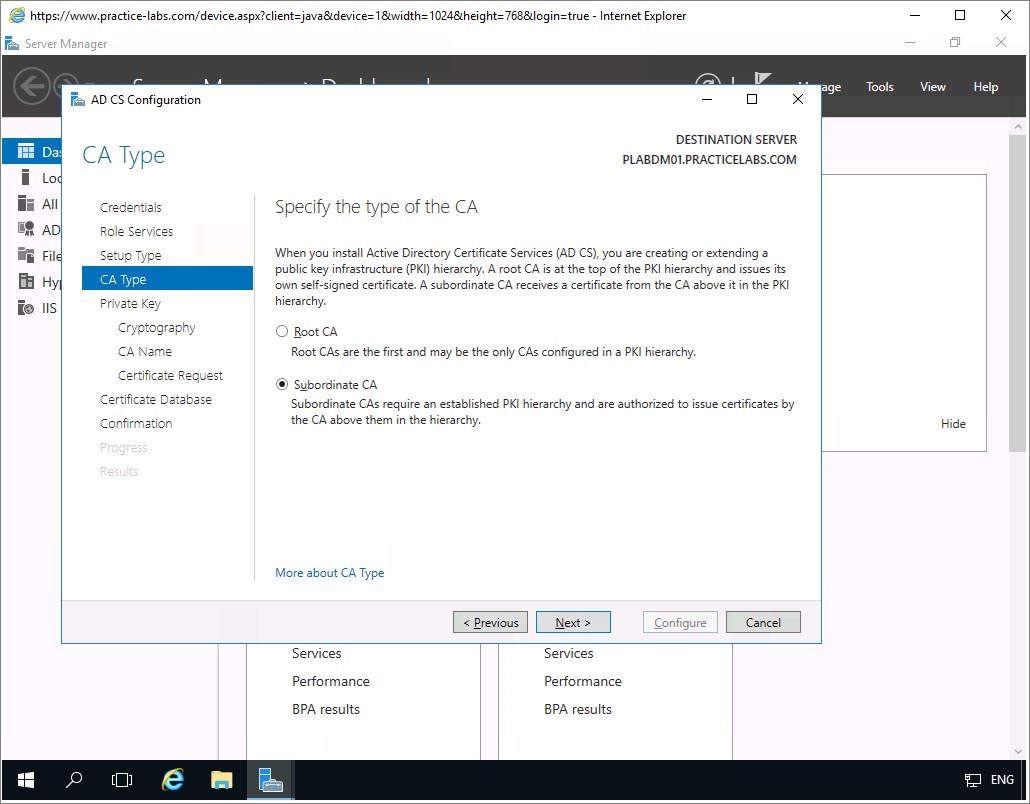
From CA Type, ensure that Subordinate CA option is selected and click Next.
Step 6
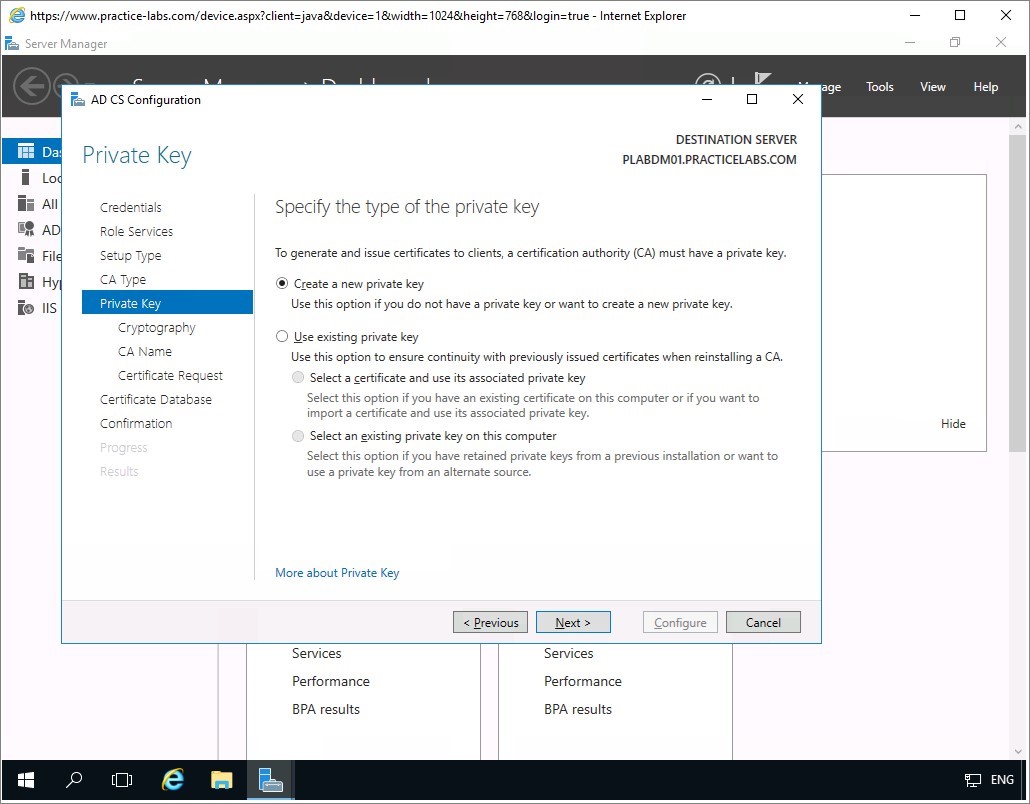
From Private Key page, accept the default setting for Create a new private key and click Next.
Step 7
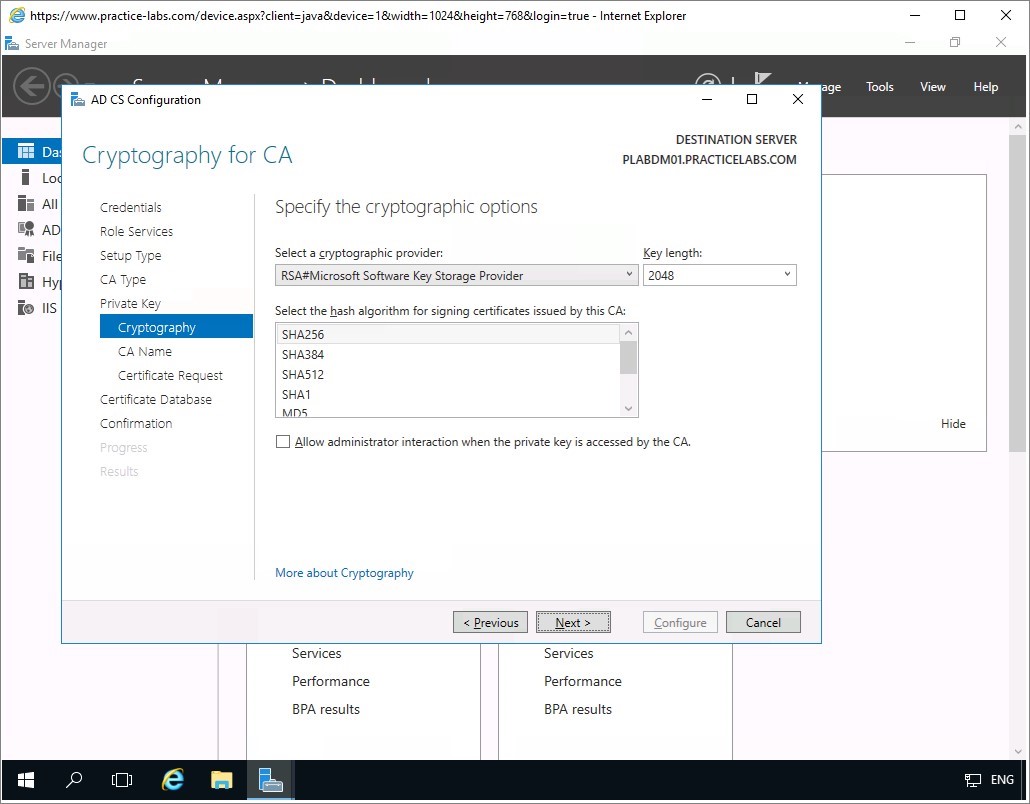
In Cryptography for CA, change the Key length to 1024, and then click Next.
Step 8
From CA Name, accept the name automatically assigned by Windows, click Next to continue.
Step 9
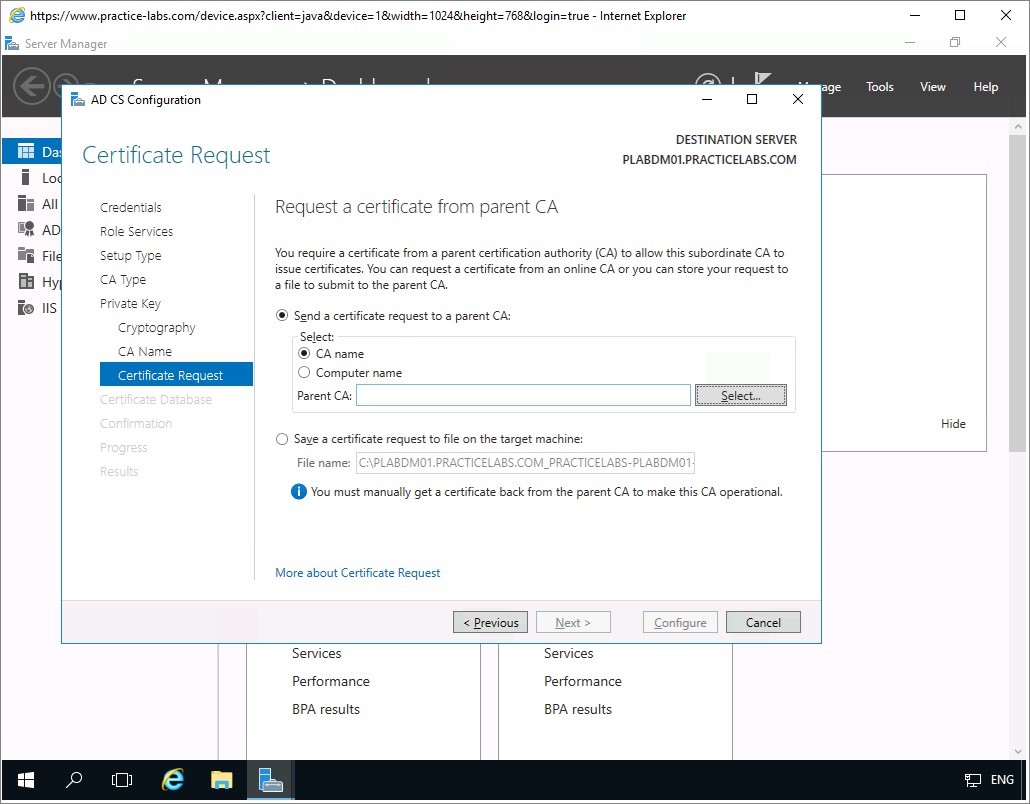
In Certificate Request page, choose the following radio buttons:
- Send a certificate request to a parent CA
- CA Name
Click the Select… button opposite the Parent CA text field.
Step 10
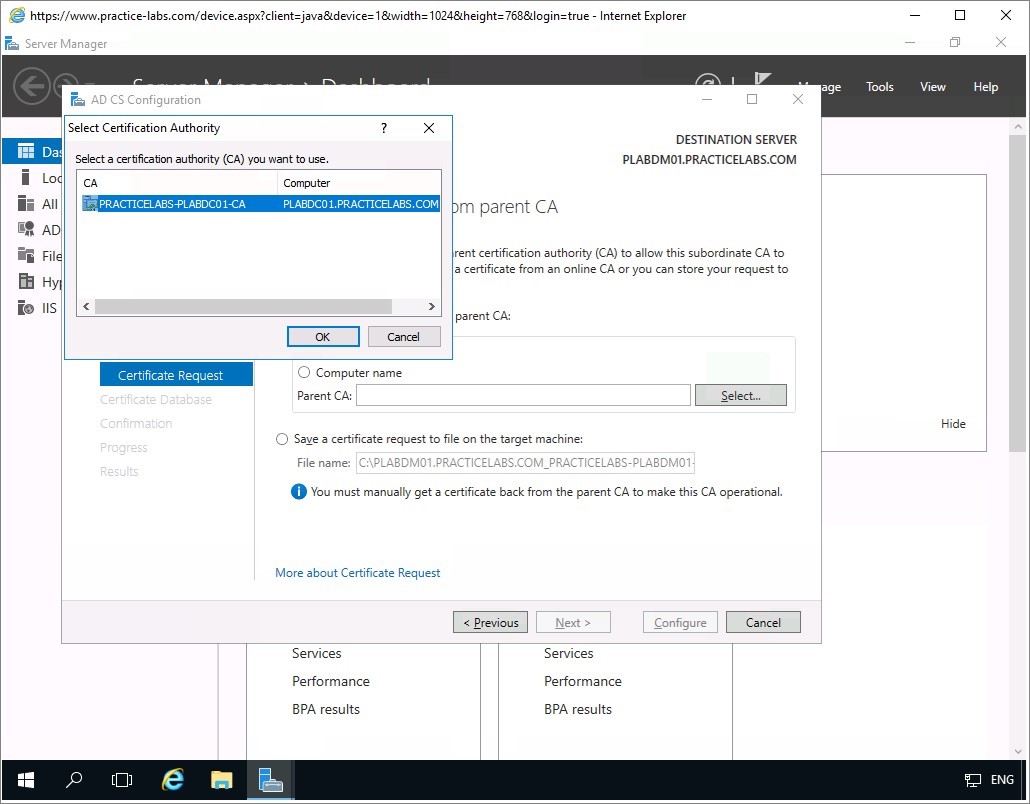
The Select Certification Authority dialogue automatically displays the detected CA in the network called PRACTICELABS-PLABDC01-CA.
Click OK.
Step 11
You are redirected back to Certificate Request page.
It is now filled in with the correct information, click Next.

Step 12
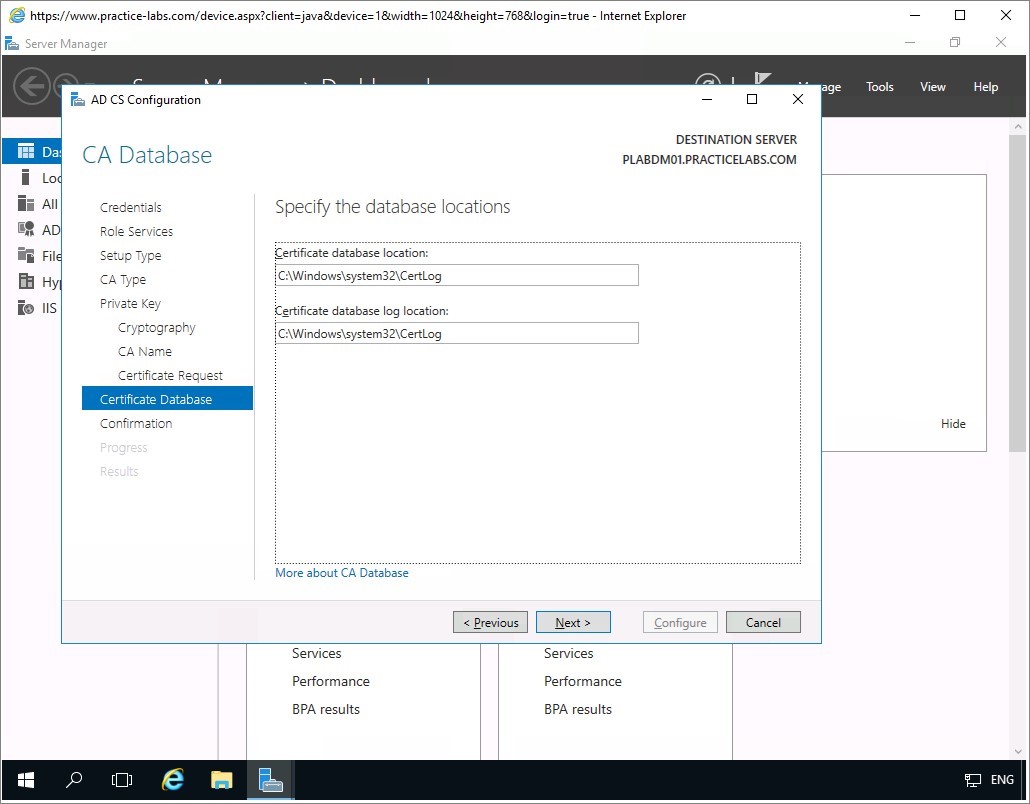
Accept the default paths in CA Database by choosing Next.
In Confirmation page, click Configure to proceed.
Step 13
Please wait while the subordinate CA is being configured in PLABDM01 server.
Server Manager will then report that Certification Authority and Online Responder are successfully configured.
Click Close.
Step 14
You are redirected back to Server Manager console.
Click on the refresh dashboard button to refresh the display.
You will notice that the red indicators on the different sections of the console has disappeared.
This confirms that there are no errors in this CA configuration on this server.
Configure Certificate Revocation Lists (CRLs)
In this exercise, you will configure certificate revocation lists in Certificate Services. When a user certificate is revoked by an administrator regardless of the reason, the Certificate Server records that cancellation to prevent a user from reusing a revoked certificate. In a large network, the revocation of the certificate must be replicated to other CA servers to prevent cancelled certificates from being used to access network resources.
Please refer to your course material or use your preferred search engine to research this topic in more detail.
Task 1 - Request User Certificates
Now that you have configured the CA servers, the next step is to ask for a certificate as an Active Directory user.
To request for a user certificate using a Windows 8.1 workstation, follow these steps:
Step 1
You’ll now need to disable the Server Auto Login feature on the Practice Labs platform. For more information on how to do this, please see the Help/Support page.
Note: You can find it via the following page: http :// www . practice - labs . com / support /#/ userguide / help - tab # ref - inlinehelpNote: Once this setting has been toggling this setting you will need to re-connect to the device in order for it to take effect.Once done, connect to PLABWIN10.
Step 2
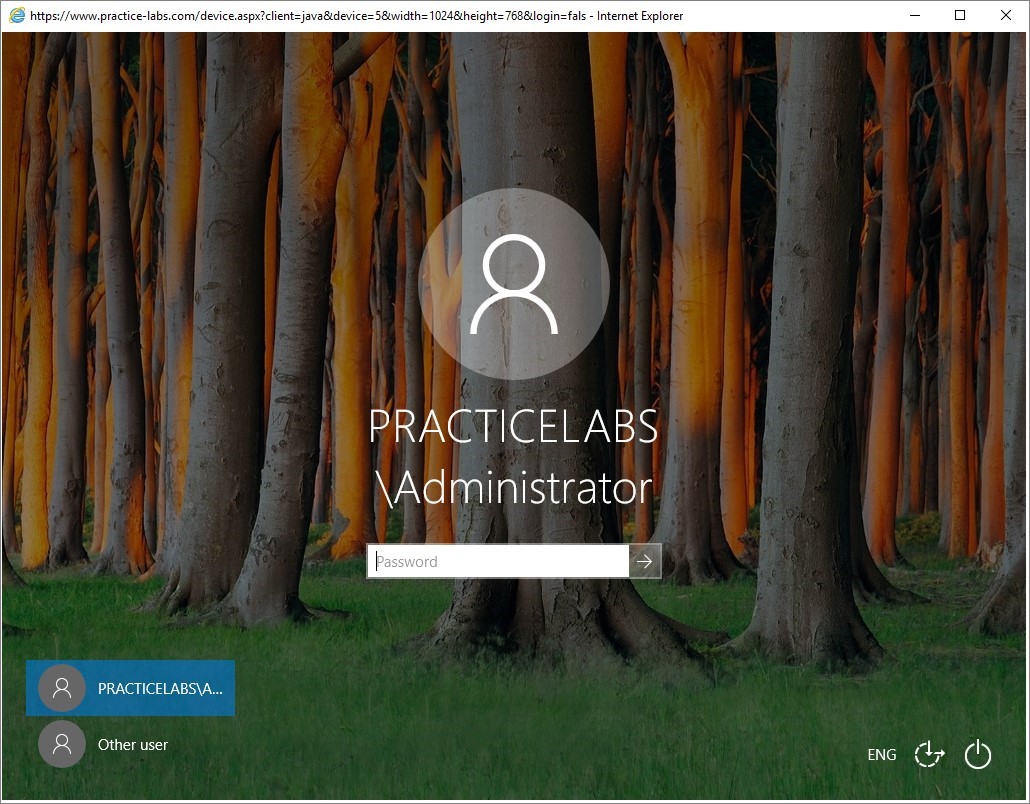
From the windows logon screen, click Other user.
Sign in with the following credentials:
Jan.Regus
Step 3
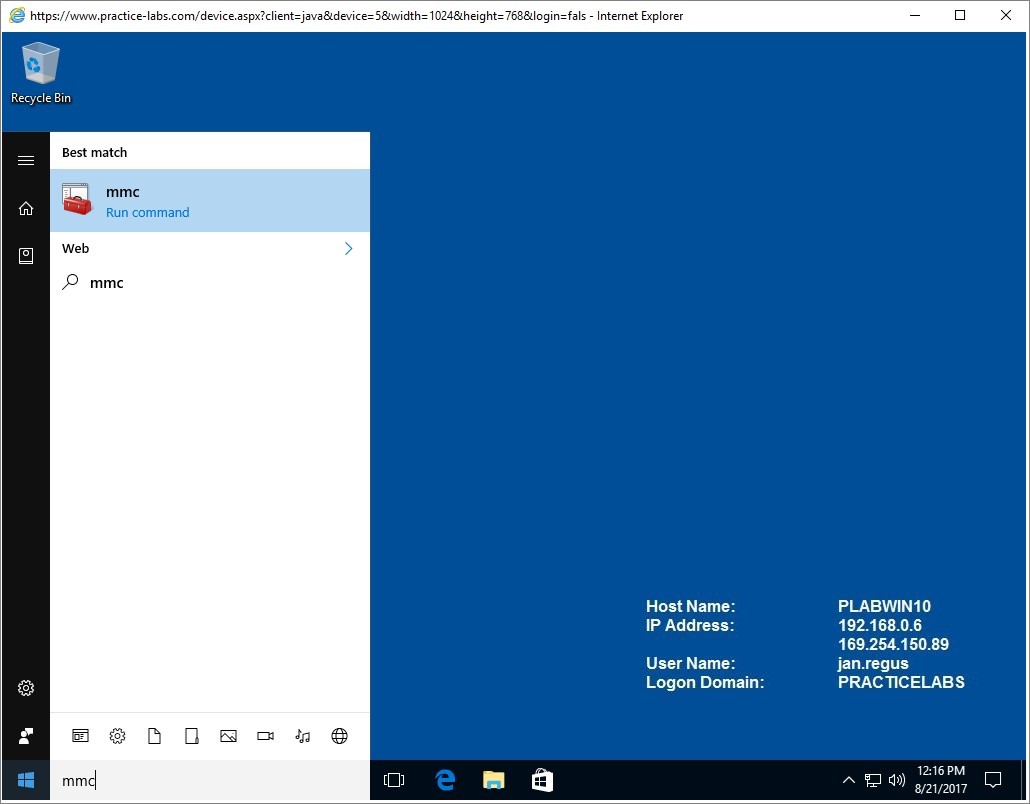
Click the Start button and enter:
mmc
Step 4
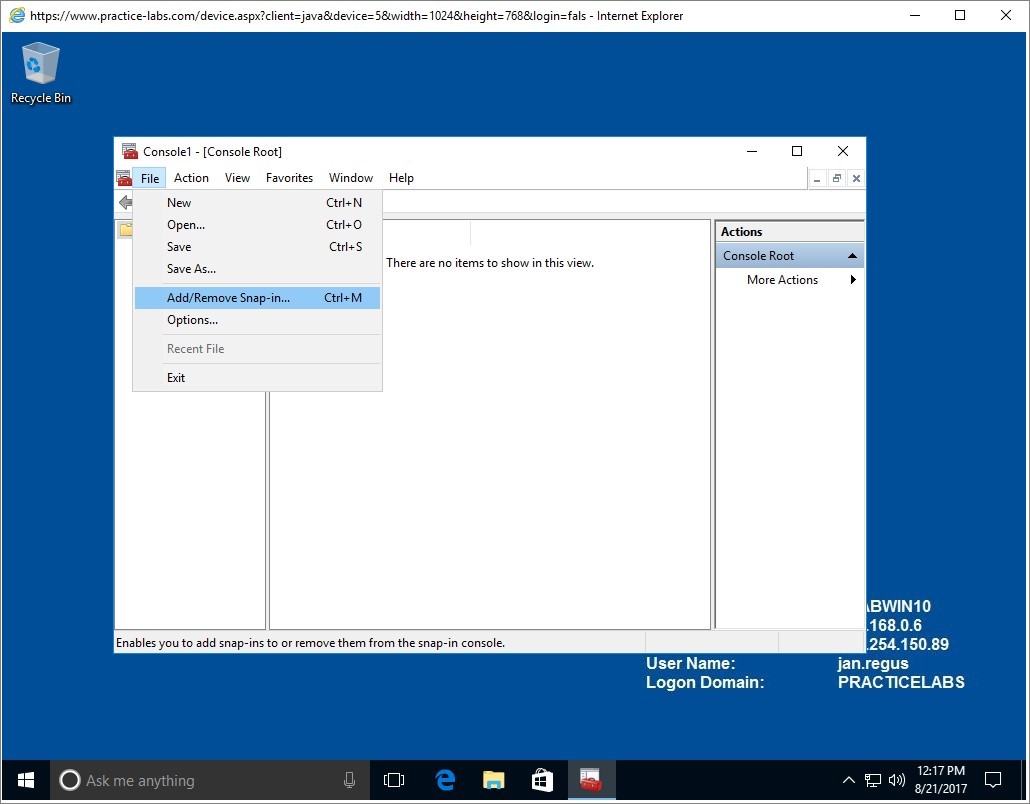
In Console1, click on File and choose Add/Remove Snap-in.
Step 5
From Add or Remove Snap-ins, select Certificates and click Add.
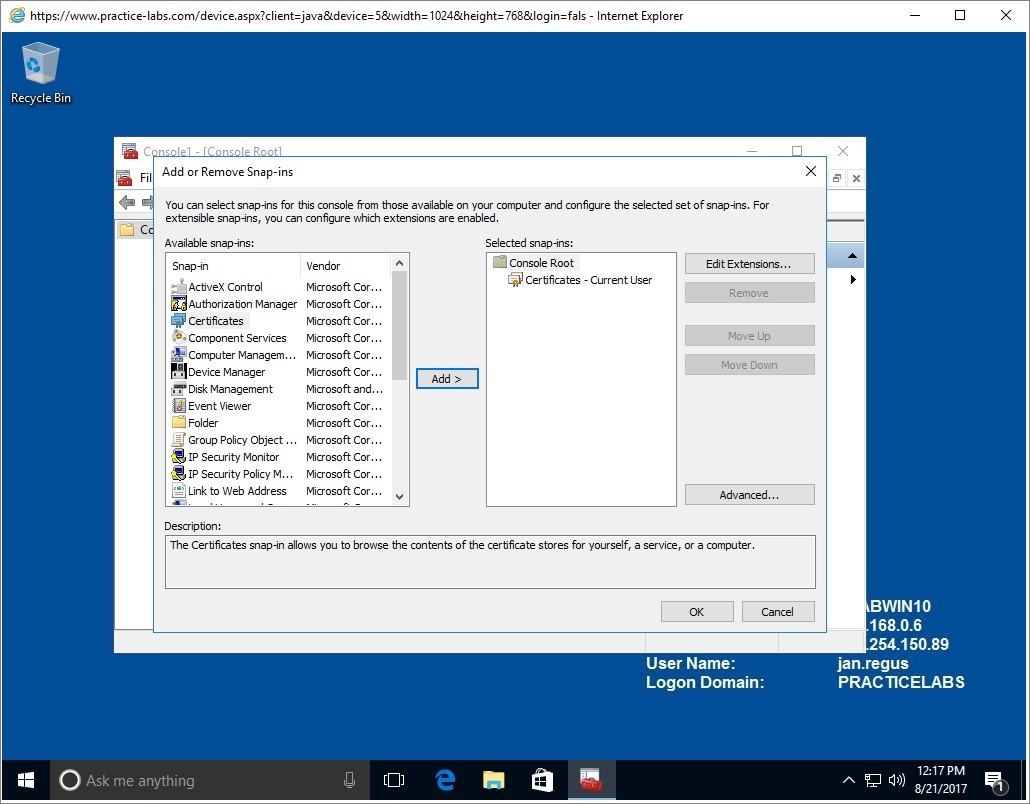
Certificates - Current User is now added.
Click OK to close Add or Remove Snap-in dialogue box.
Step 6
From Console1, expand Certificates-Current User.
Expand Personal.
Then right-click on Personal and choose All Tasks > Request New Certificate.
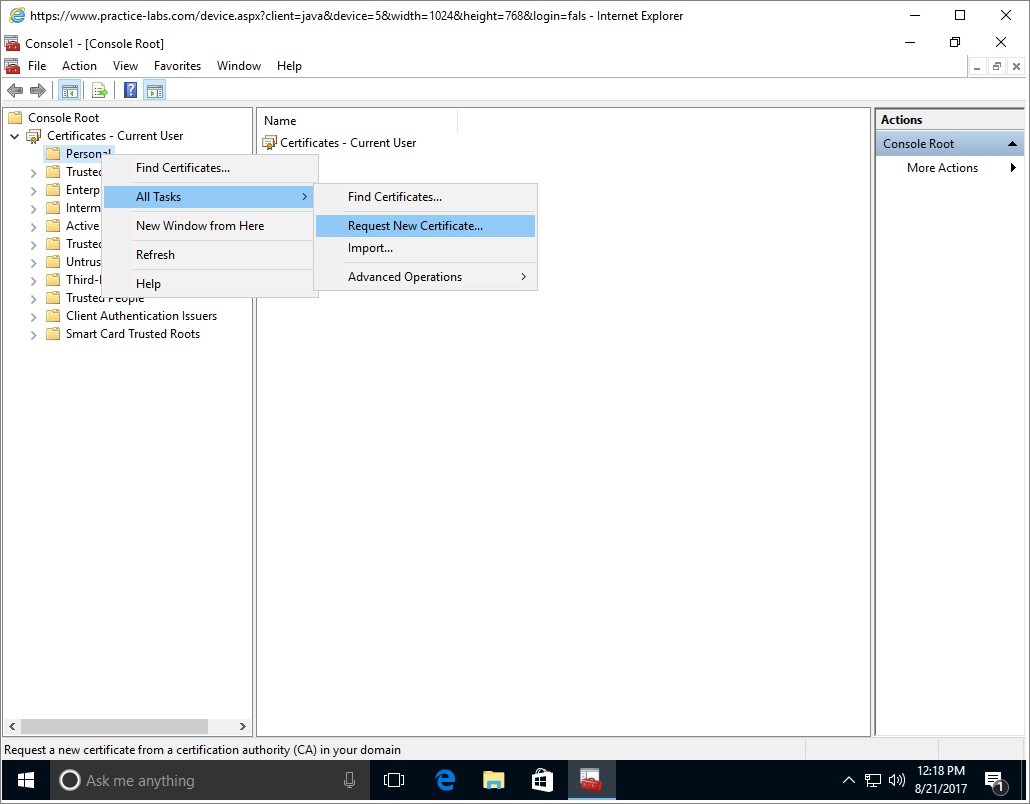
In Before you begin, click Next.
Step 7
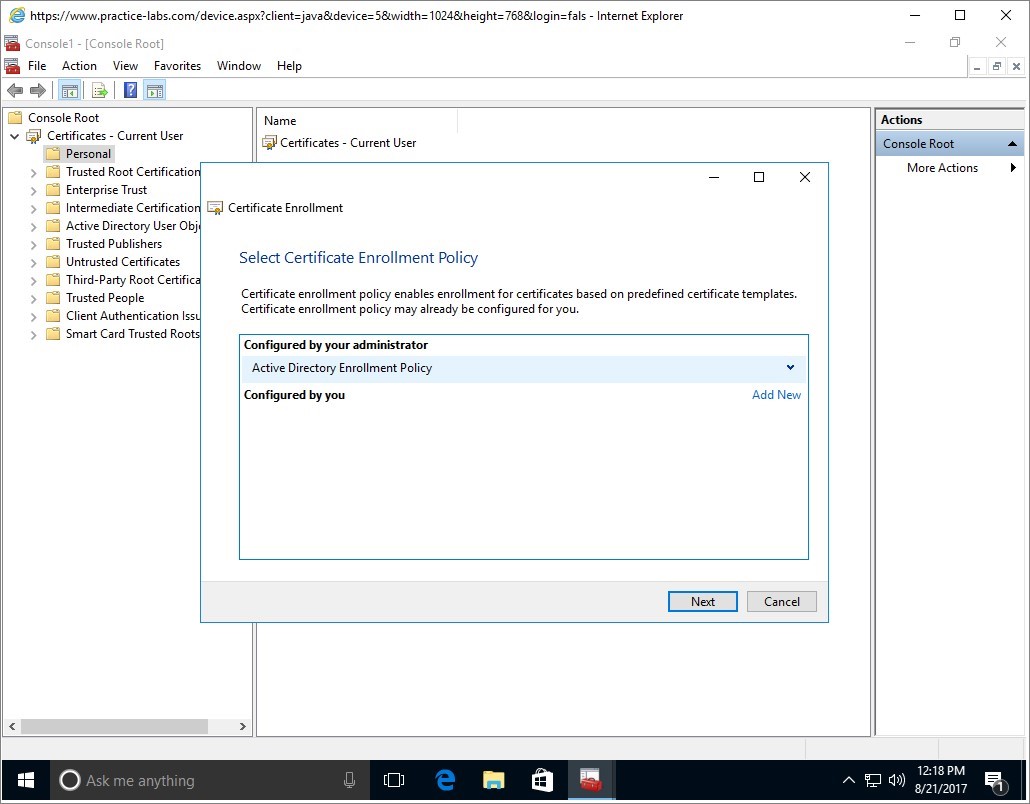
In Select Certificate Enrollment Policy, click Next.
Step 8
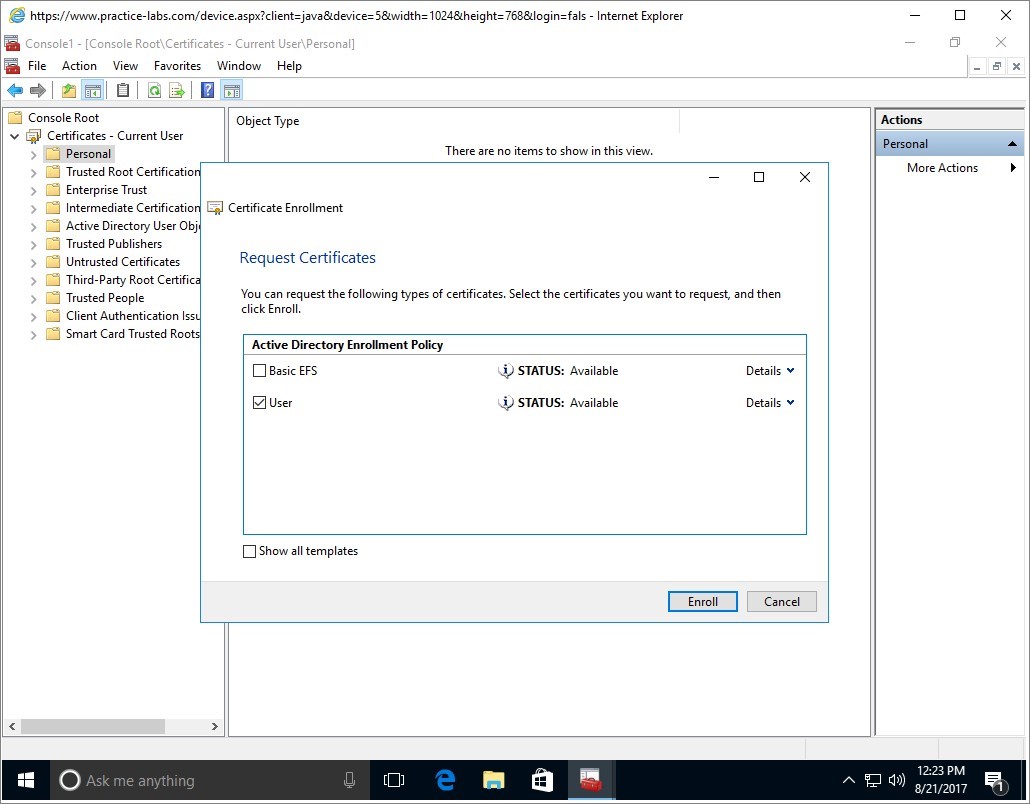
In Request Certificates, click User check box and click Details down arrow button.
Alert: If there are no certificates listed, please close all open windows including Console1. When asked to save console settings to Console1, click No.Select the Windows start button and type Command Prompt. Right click on the Command Prompt and select Run as administrator.
The credentials required are as follows.
Username: Administrator
Password: Passw0rd
Input the following command and press enter.Gpupdate /forceAfterwards, attempt from step 3 again.
Step 9
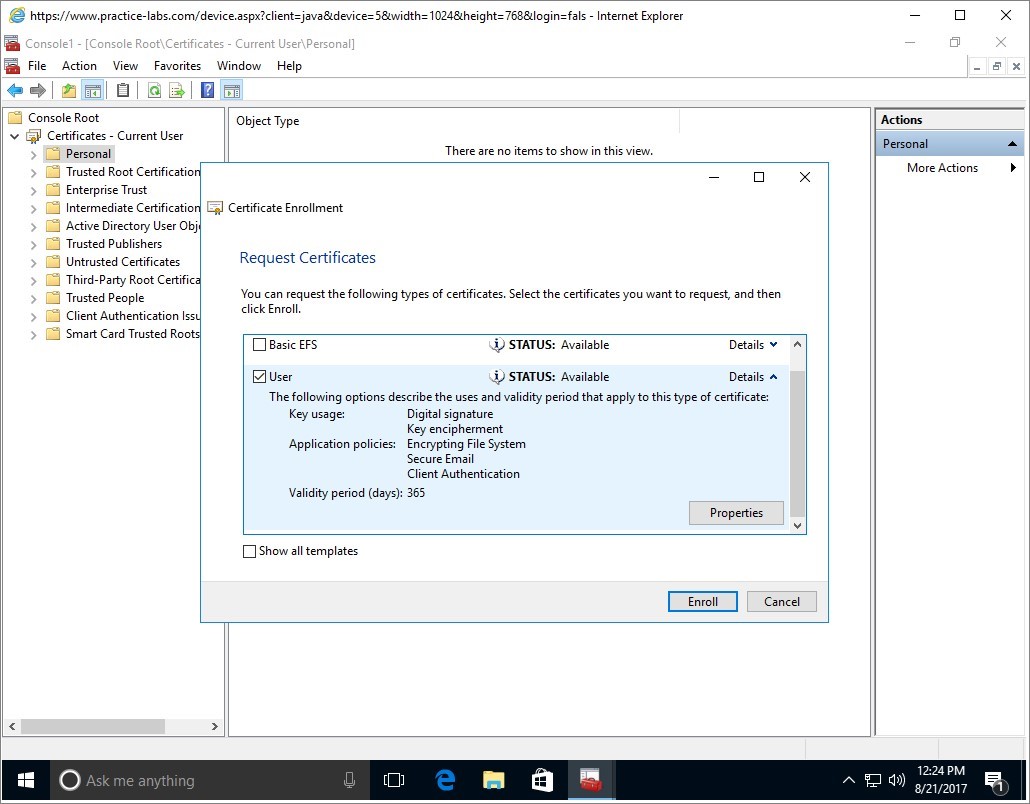
The details now display additional information about this certificate.
Click on Properties.
Step 10
The Certificate Properties dialogue box is displayed.
Click on Certification Authority tab.

Step 11
On Certification Authority tab, you will find the servers that can issue certificates to the user.
Clear PRACTICELABS-PLABDC01-CA check box.
Leave the other PRACTICELABS-PLABDM01-CA selected.
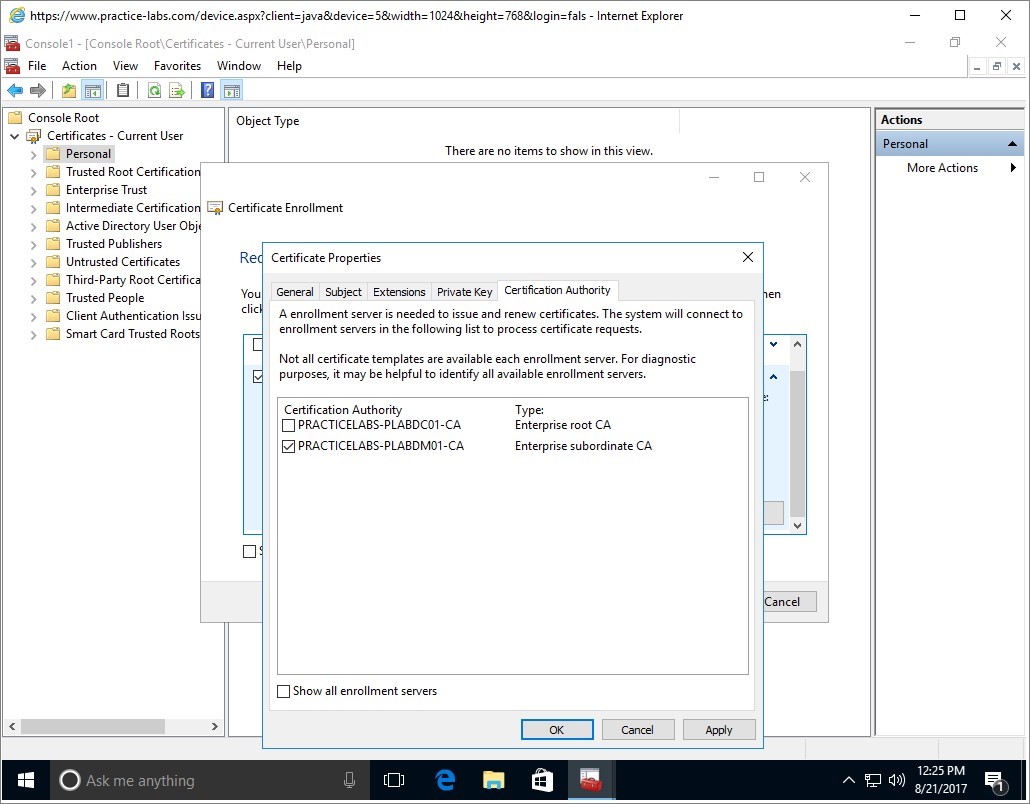
Click OK.
Back in the Request Certificates page, click Enroll.
Step 12
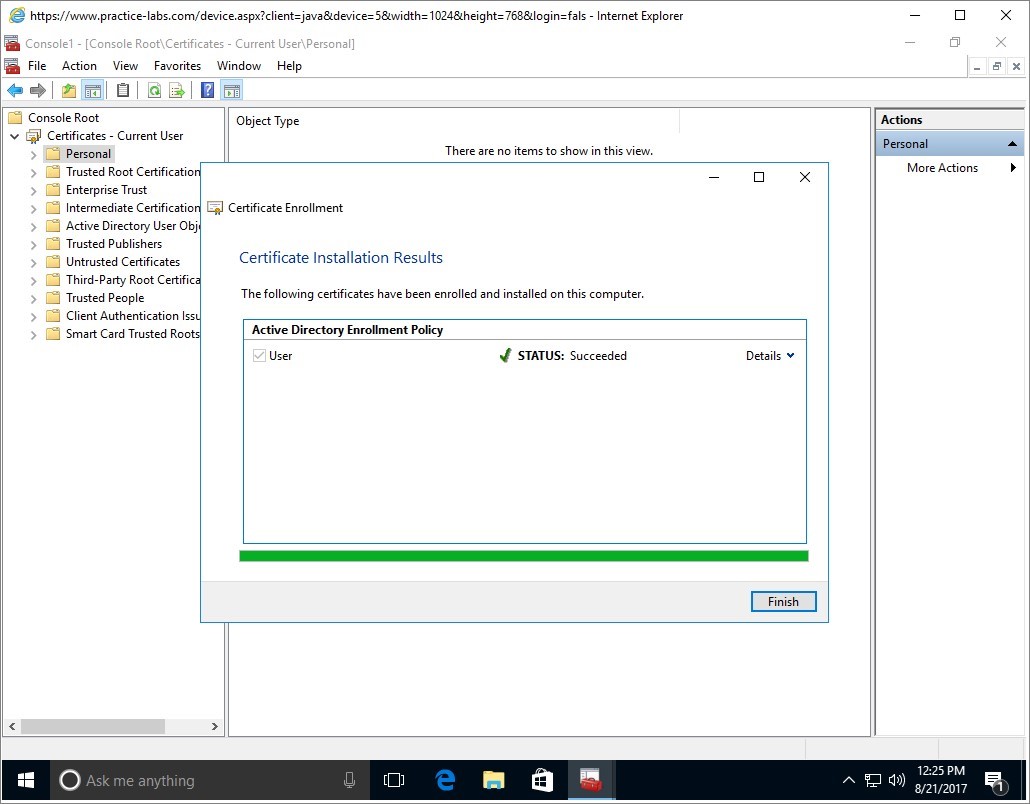
Wait for the enrolment to be completed.
Then click Finish when STATUS: Succeeded is displayed.
Step 13
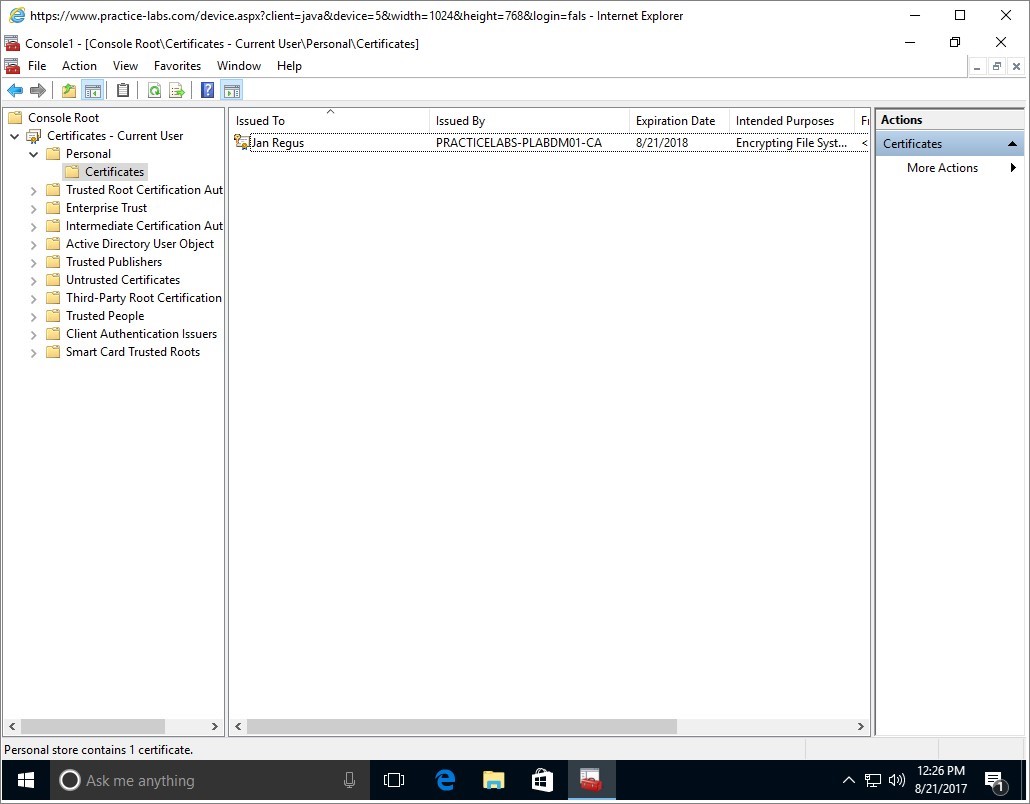
Expand Personal and then click on Certificates folder.
A user certificate has now been issued to Jan Regus.
Keep all devices powered on in their current state and proceed to the next task.
Task 2 - Verify Issued Certificate
Remember that during the certificate enrolment, you configured PLABWIN10 computer to enrol with PLABDM01 server.
In this step, you will verify the certificate issued to Jan Regus.
Step 1
Switch to PLABDM01 device.
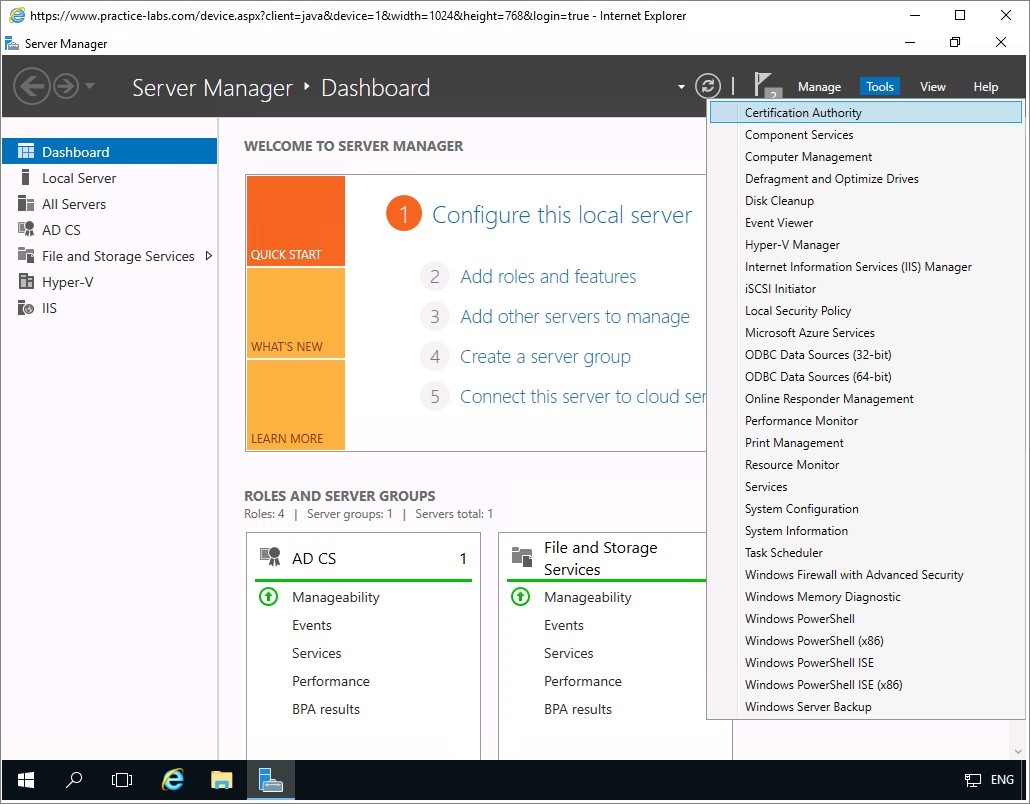
Reopen Server Manager dashboard from the taskbar.
Click on Tools and select Certification Authority.
Step 2
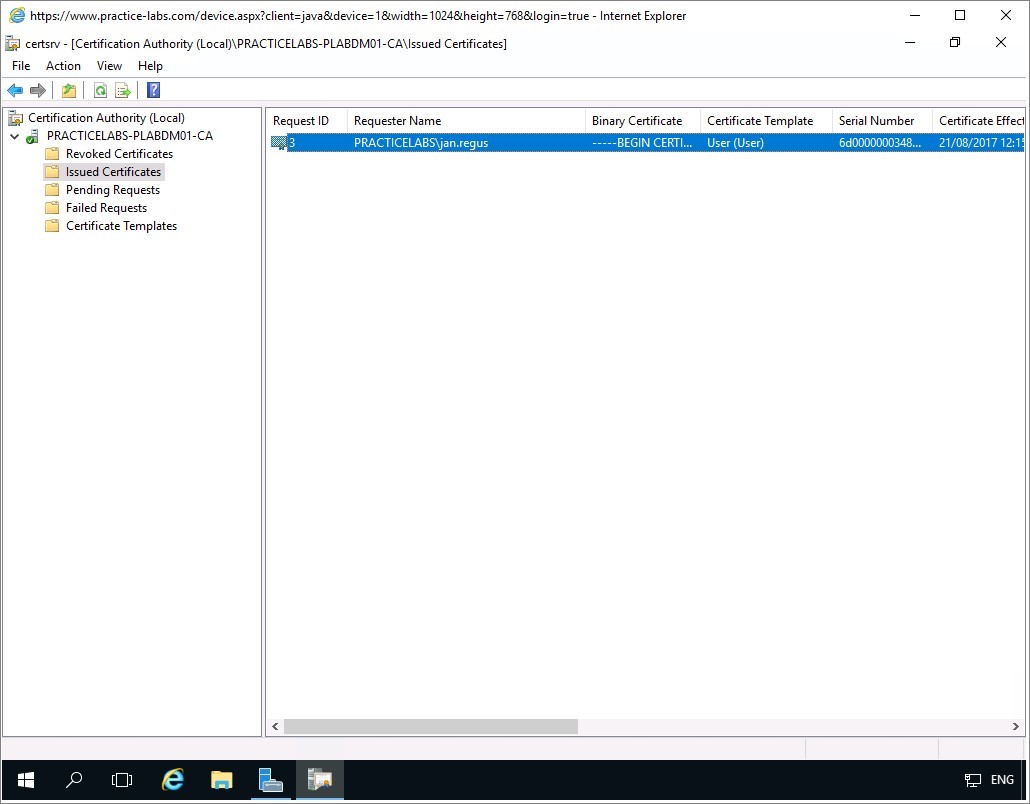
Certification Authority (Local) opens.
Expand PRACTICELABS-PLABDM01-CA.
Click on Issued Certificates folder and verify if you can view the issued certificate to Jan Regus on the right details pane.
Step 3
Right-click on the PRACTICELABS\jan.regus certificate and choose All Tasks > Revoke Certificate.
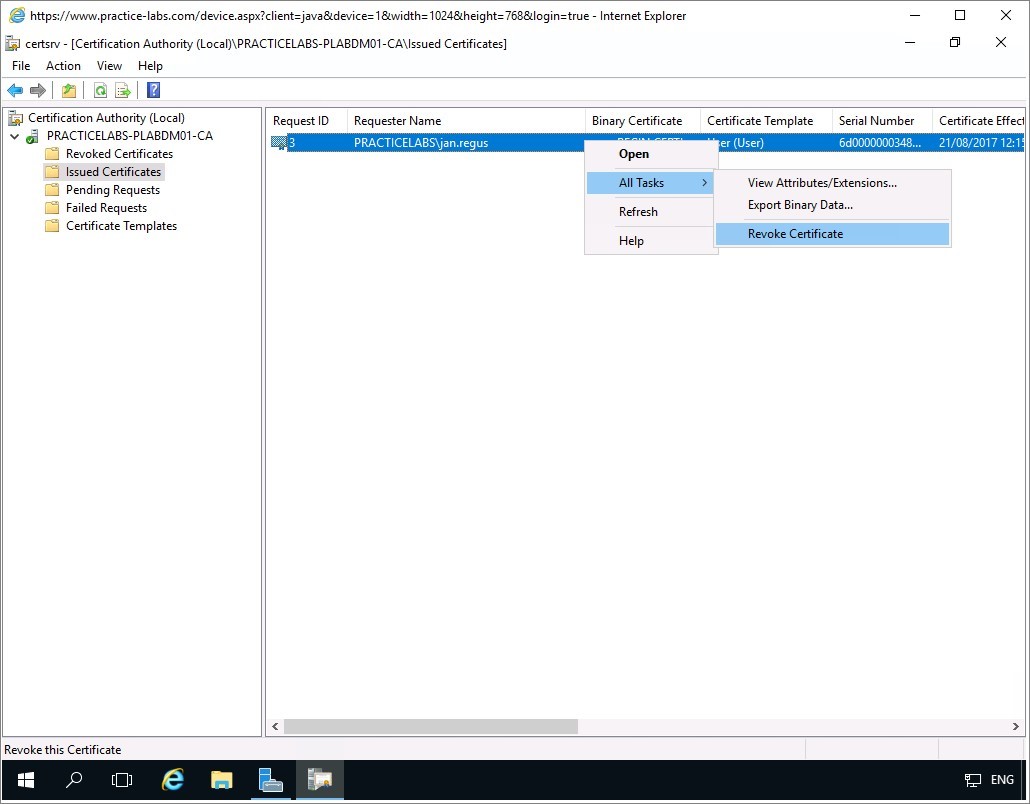
Step 4
In Certificate Revocation, select Key Compromise and then click Yes to proceed.
Note: If Reason code for certificate revocation is Certificate Hold, it can be unrevoked by the administrator.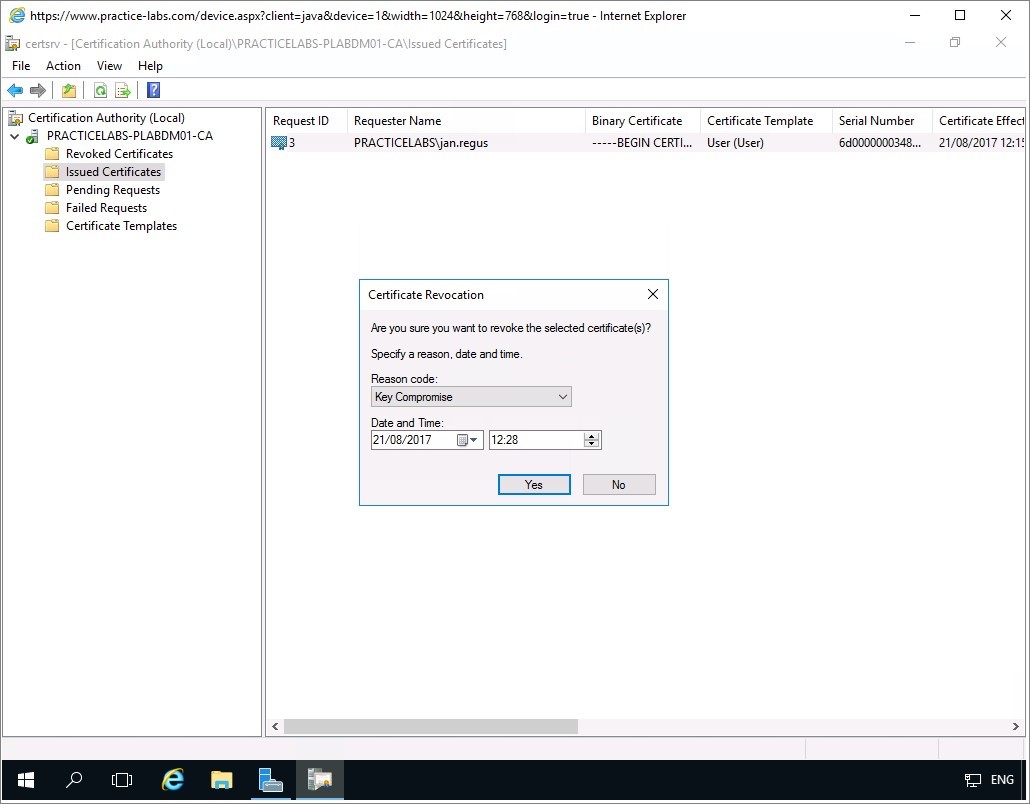
Step 5
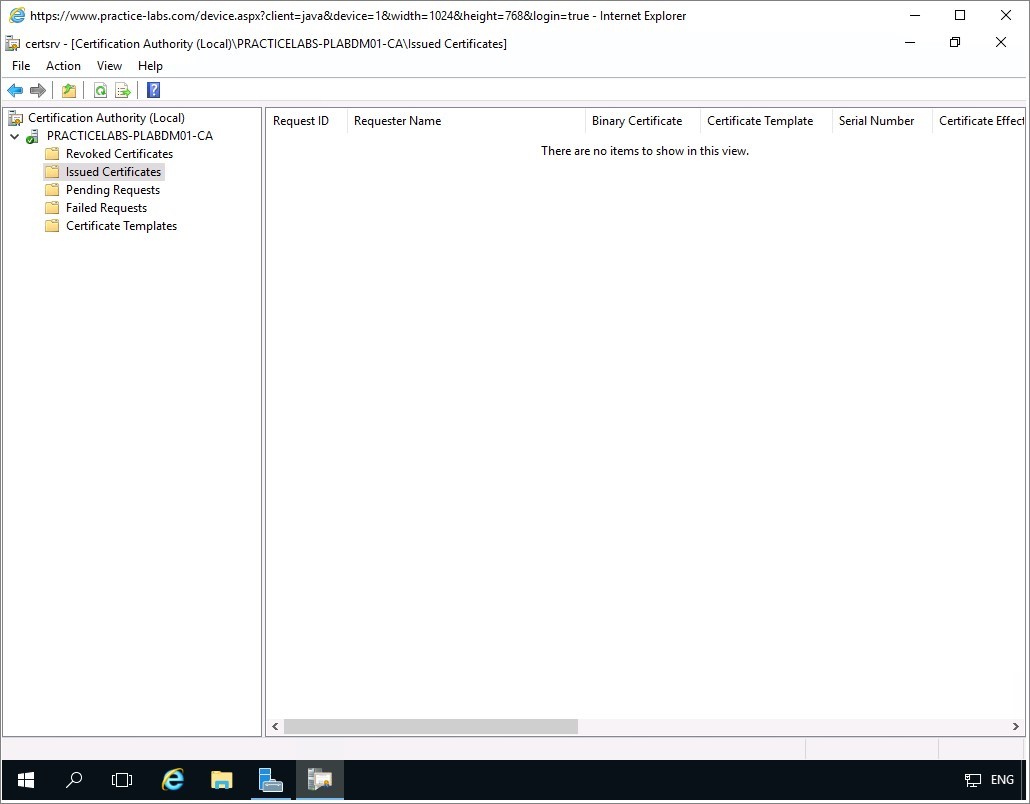
The Jan Regus' certificate disappears from the Issued Certificates folder.
Click on Revoked Certificates folder instead.
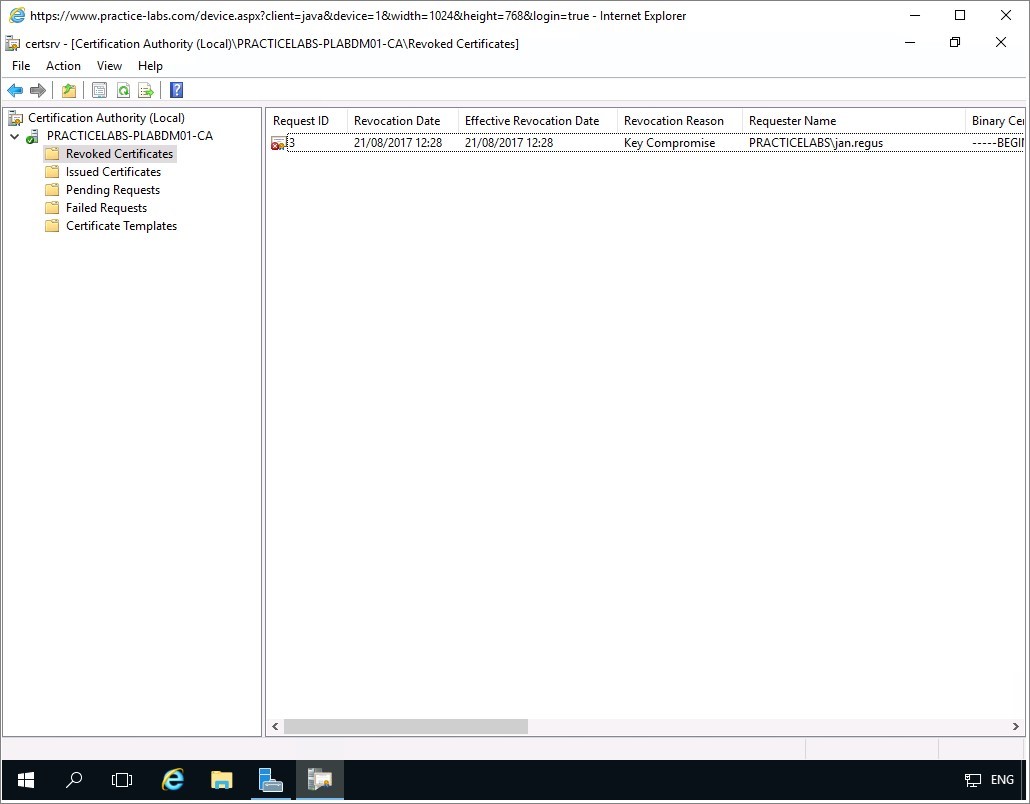
Step 6
The Revoked Certificates folder now displays the revoked certificate of user Jan Regus.
Step 7
Next is to publish the revoked certificates to other CA servers.
Right-click on Revoked Certificates folder and choose All Tasks > Publish.
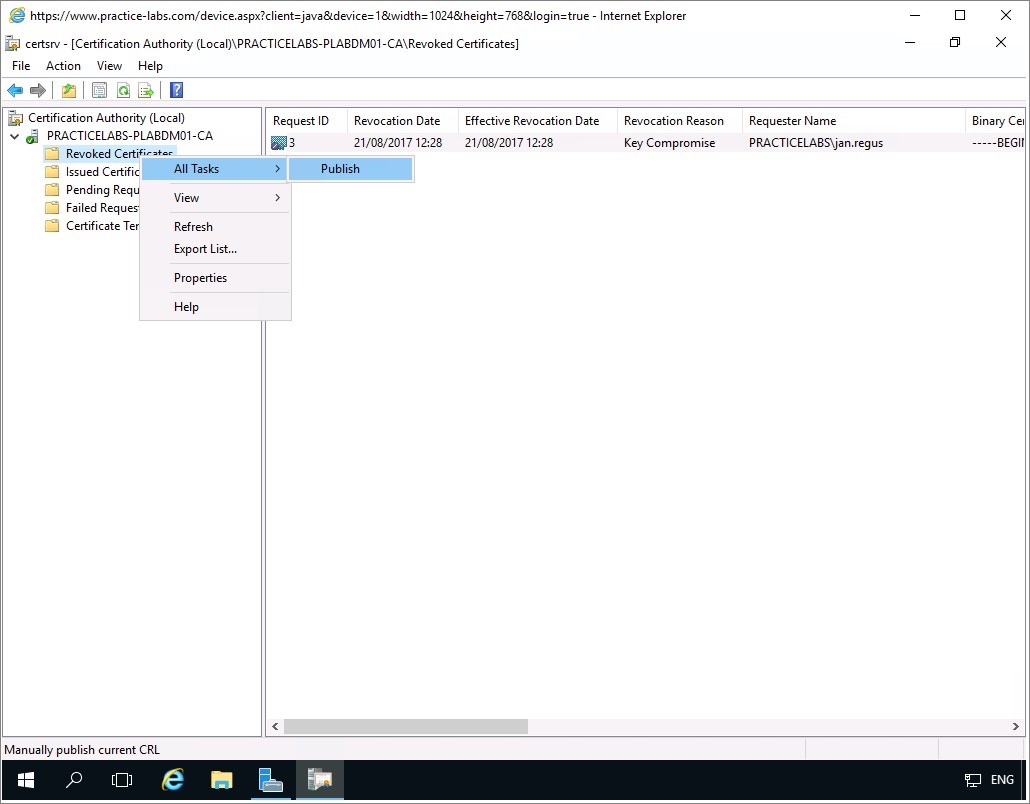
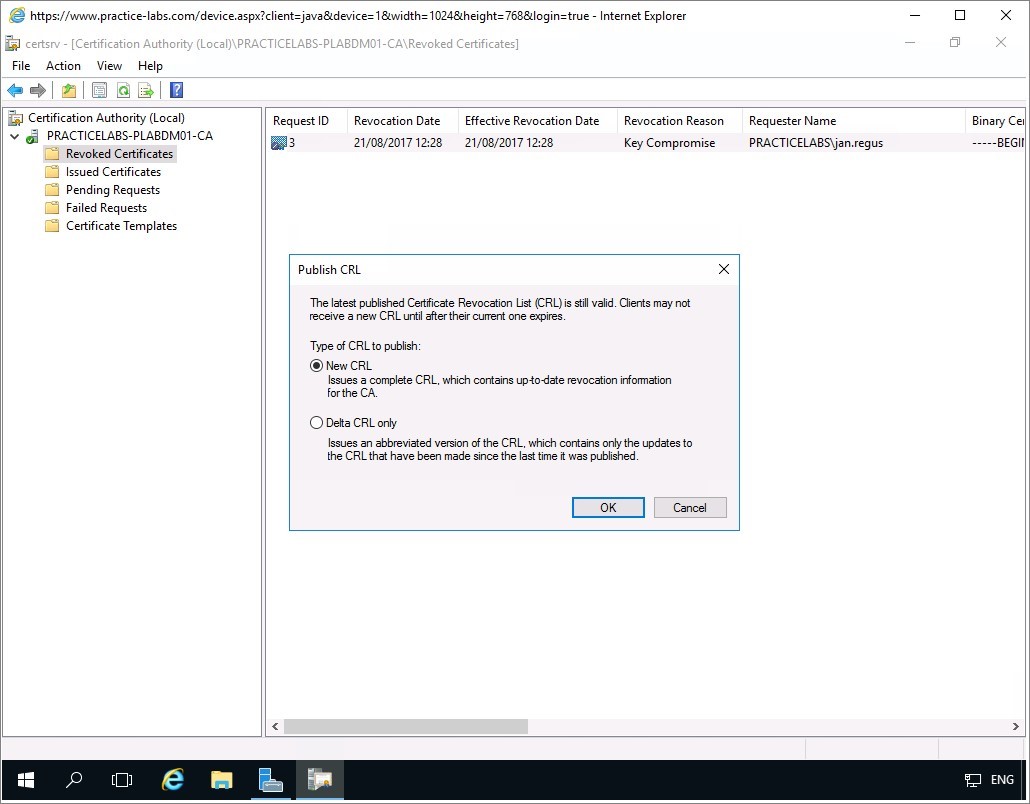
Step 8
In Publish CRL, verify that New CRL is chosen.
Click OK.
Step 9
Right-click on Revoked Certificates folder and choose Properties.
The CRL Publishing Parameters tab displays the publication interval for New CRL and Delta CRLs (recent updates of revoked certificates).
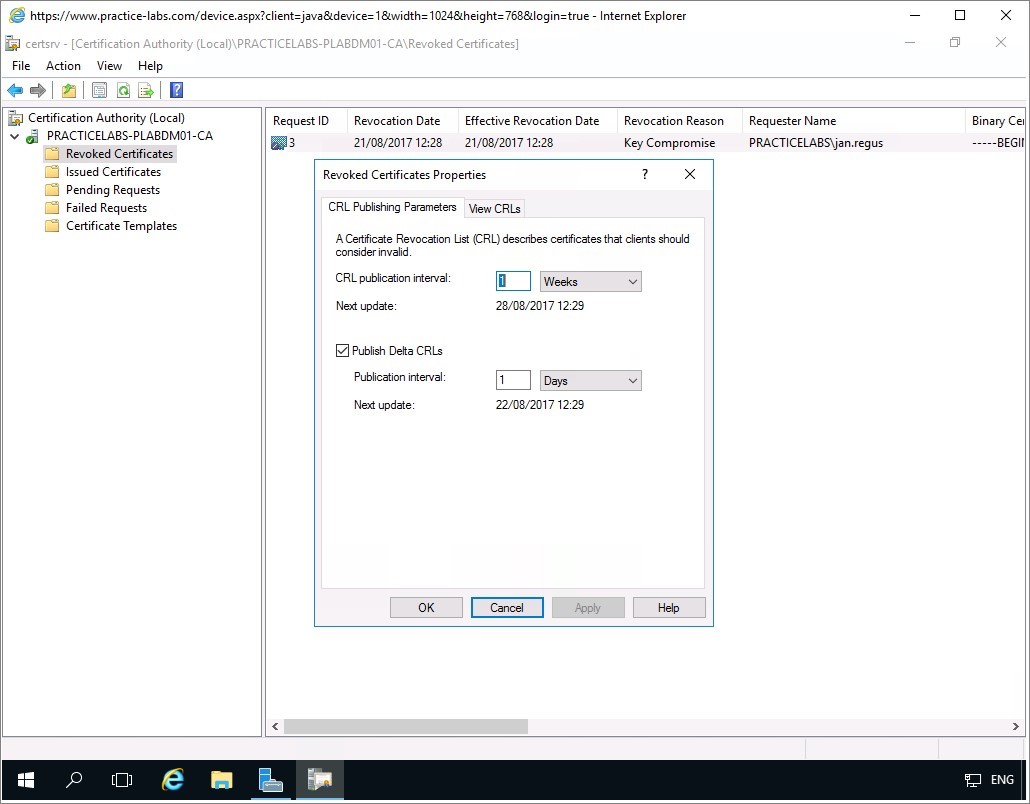
Step 10
Click on View CRLs tab.
View CRLs tab displays publication status of CRLs.

Click OK. Keep Certification Authority window open for the next task.
Keep all devices powered on in their current state and proceed to the next task.
Task 3 - Configure a new path for CRLs
To configure a new path for CRLs, follow these steps:
Step 1
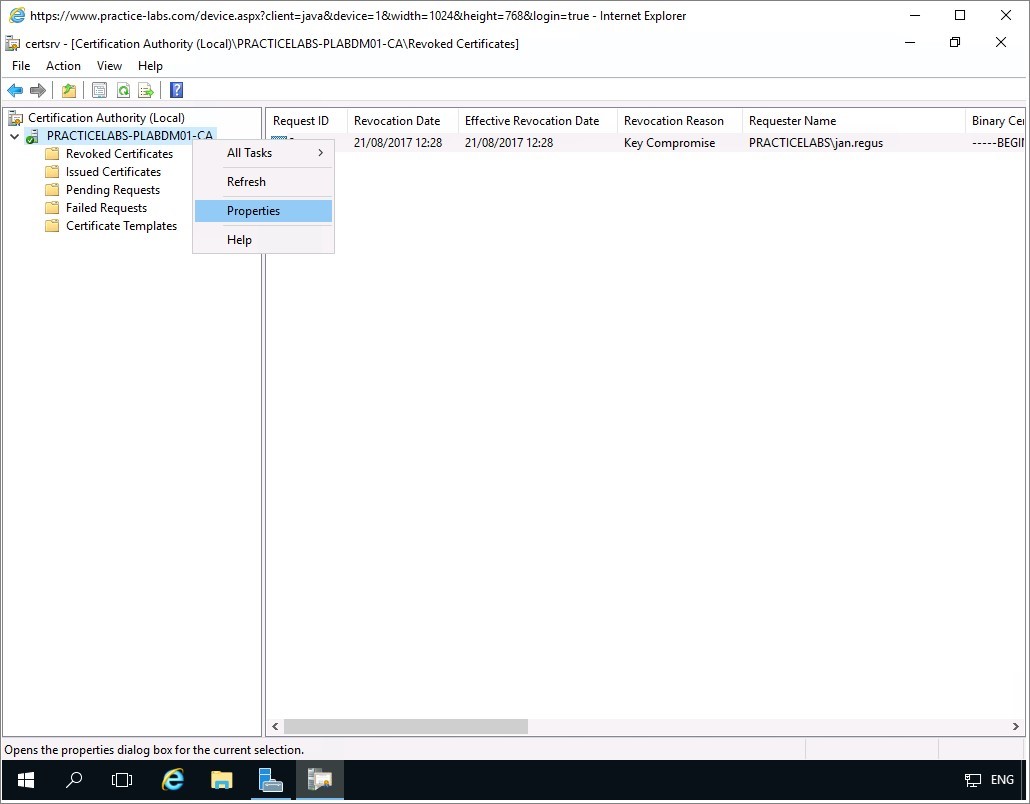
On PLABDM01 server, right-click on PRACTICELABS-PLABDM01-CA and choose Properties.
Step 2
In PRACTICELABS-PLABDM01-CA Properties, click on Extensions tab.
Under the Extensions tab, click Add…
Step 3
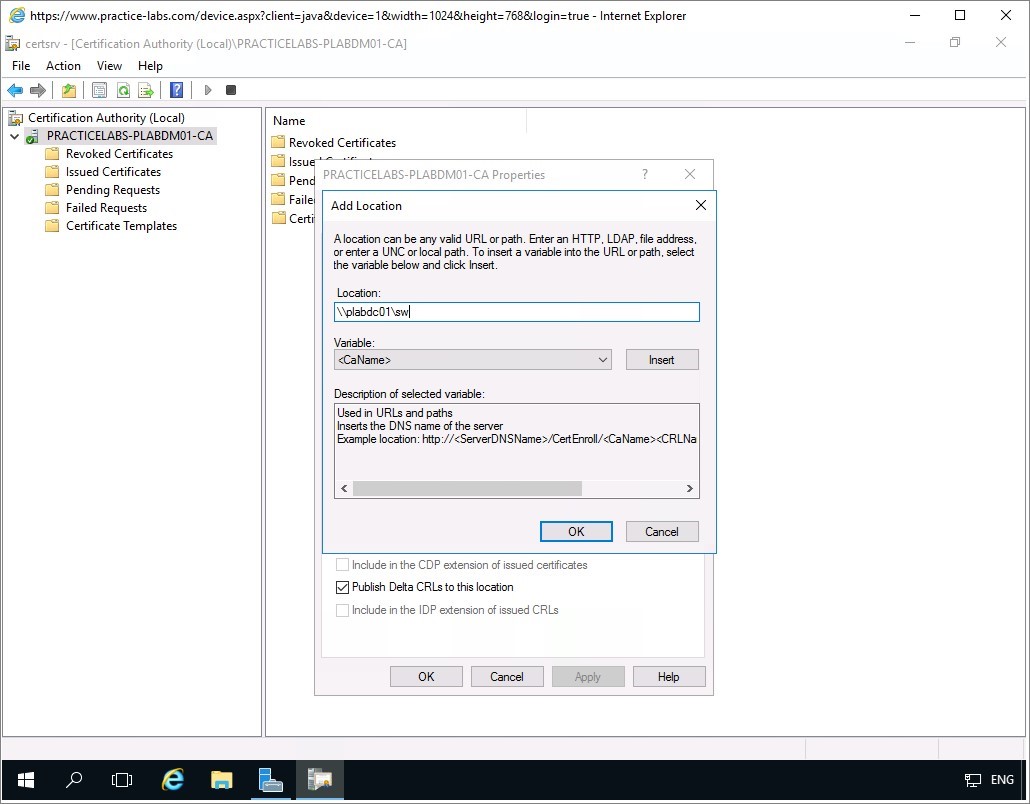
From Add Location, click in Location text box and type:
\\plabdc01\sw\
Step 4
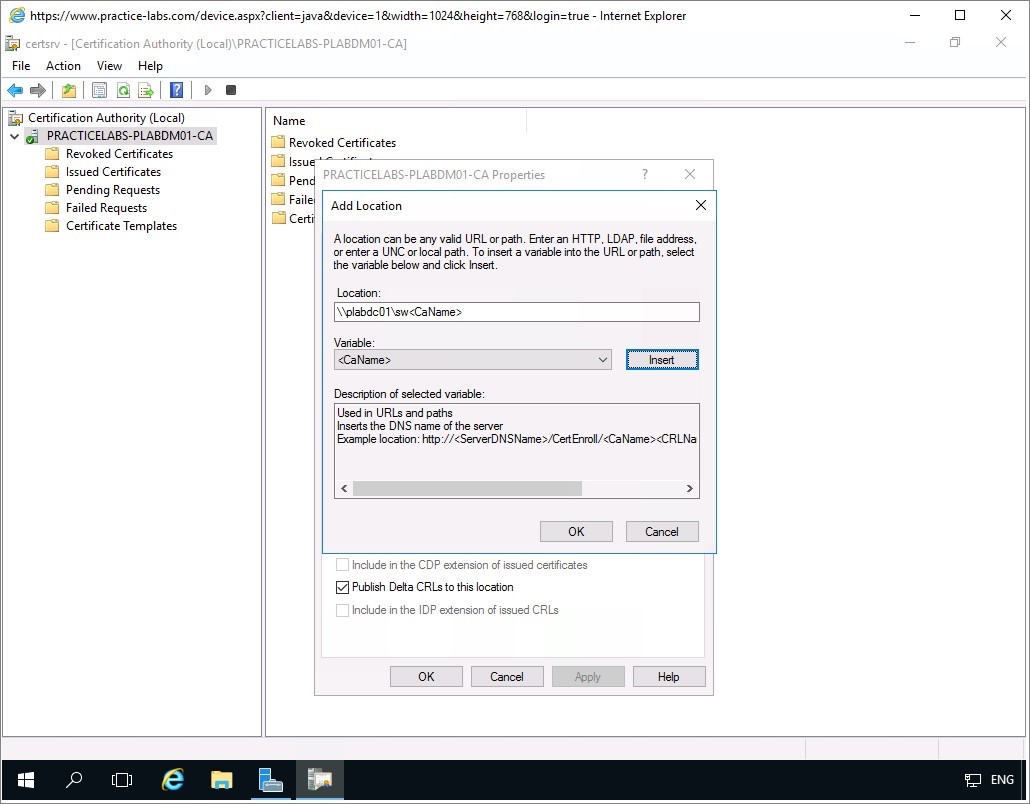
From Add Location dialogue box, after adding the network path, put the cursor at the end of network path location. Click Insert.
You’ll see that <CaName> has appended at the end of network path \\plabdc01\sw.
Click OK.
Step 5
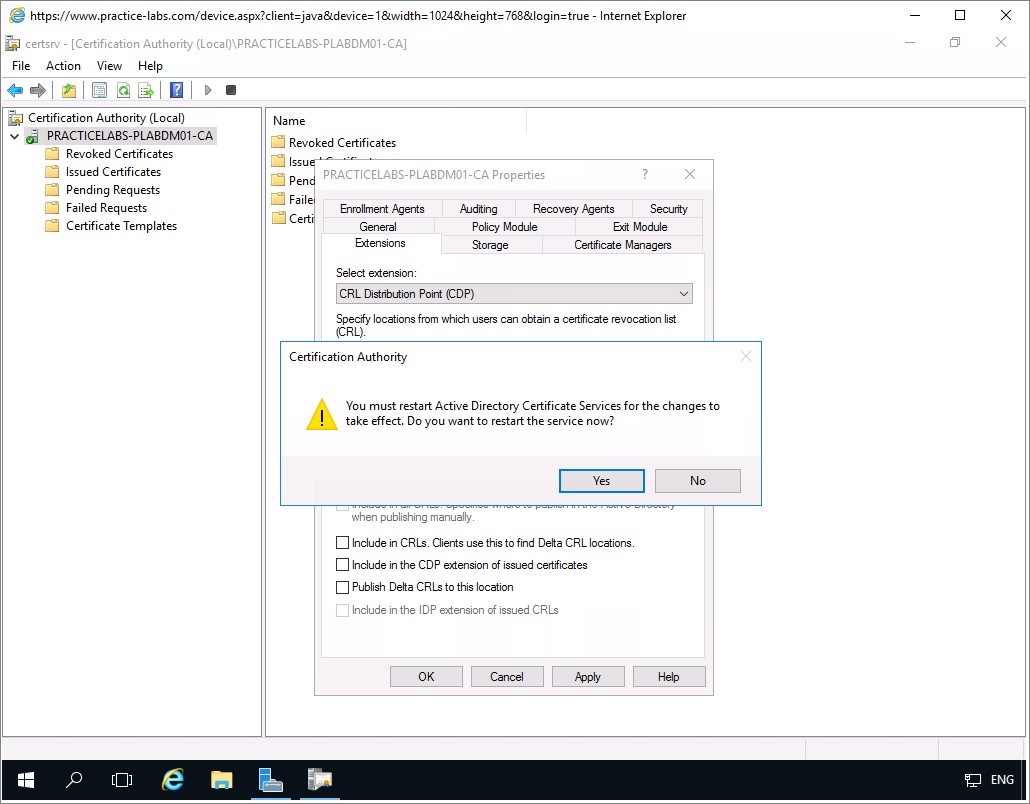
Click Apply to save changes in the Extensions tab.
When prompted to restart, click Yes.
Keep all devices powered on in their current state and proceed to the next task.
Task 4 - Adding Certificate Managers
To configure certificate managers, follow these steps:
Step 1
Still on PLABDM01 server, from Certificate Managers tab, select Restrict certificate managers radio button.
Click OK.
Note: By selecting this option, you will be restricting aspects of AD Certificate Services administration to Domain Admins and Enterprise Admins groups in this domain.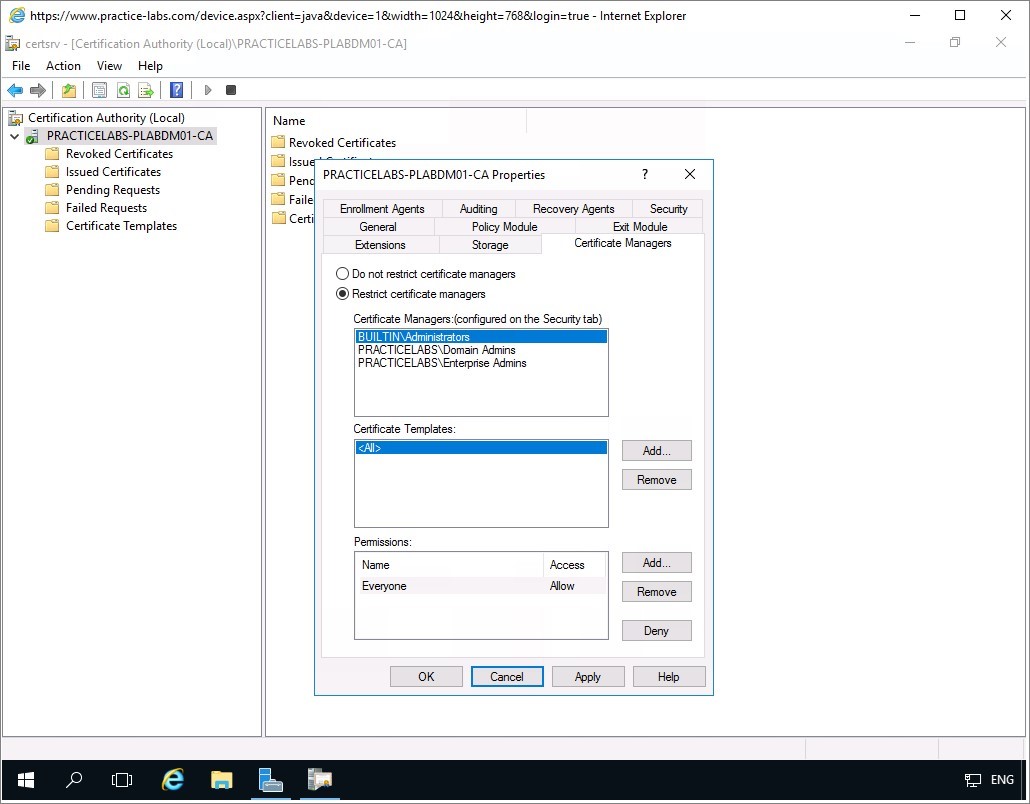

Comments
Post a Comment