Web applications are accessed using user credentials, which are stored in a database in the backend. There are several methods to store user credentials. If user credentials are stored in clear text, then they are prone to an attack and can be read easily. You can also encrypt the user credentials. The best method is to convert them to hashes and then salt them. This method is difficult to crack.
In this exercise, you will learn to perform Web application password cracking.
Learning Outcomes
After completing this exercise, you will be able to:
Sniff the Passwords
Use Medusa to Crack Passwords
Your Devices
You will be using the following devices in this lab. Please power these on now.
PLABDC01 - (Windows Server 2019 - Domain Server)
PLABWIN10 - (Windows 10 - Workstation)
PLABKALI01 - (Kali 2019.2 - Linux Kali Workstation)
Task 1 - Sniffing the Passwords
Even though sniffing the password does not really fall into “offline password cracking,” it is a great method to capture the password that is being transmitted in unencrypted form.
In this task, you will learn about sniffing passwords. To do this, perform the following steps:
Step 1
Ensure you have powered on all the devices listed in the introduction and connect to PLABKALI01.
Credentials are:
Username:
root
Password:
Passw0rd
The desktop is displayed.
Figure 1.1 Screenshot of PLABKALI01: Showing the desktop of PLABKALI01.
Step 2
In the left pane, click the Firefox ESR icon.
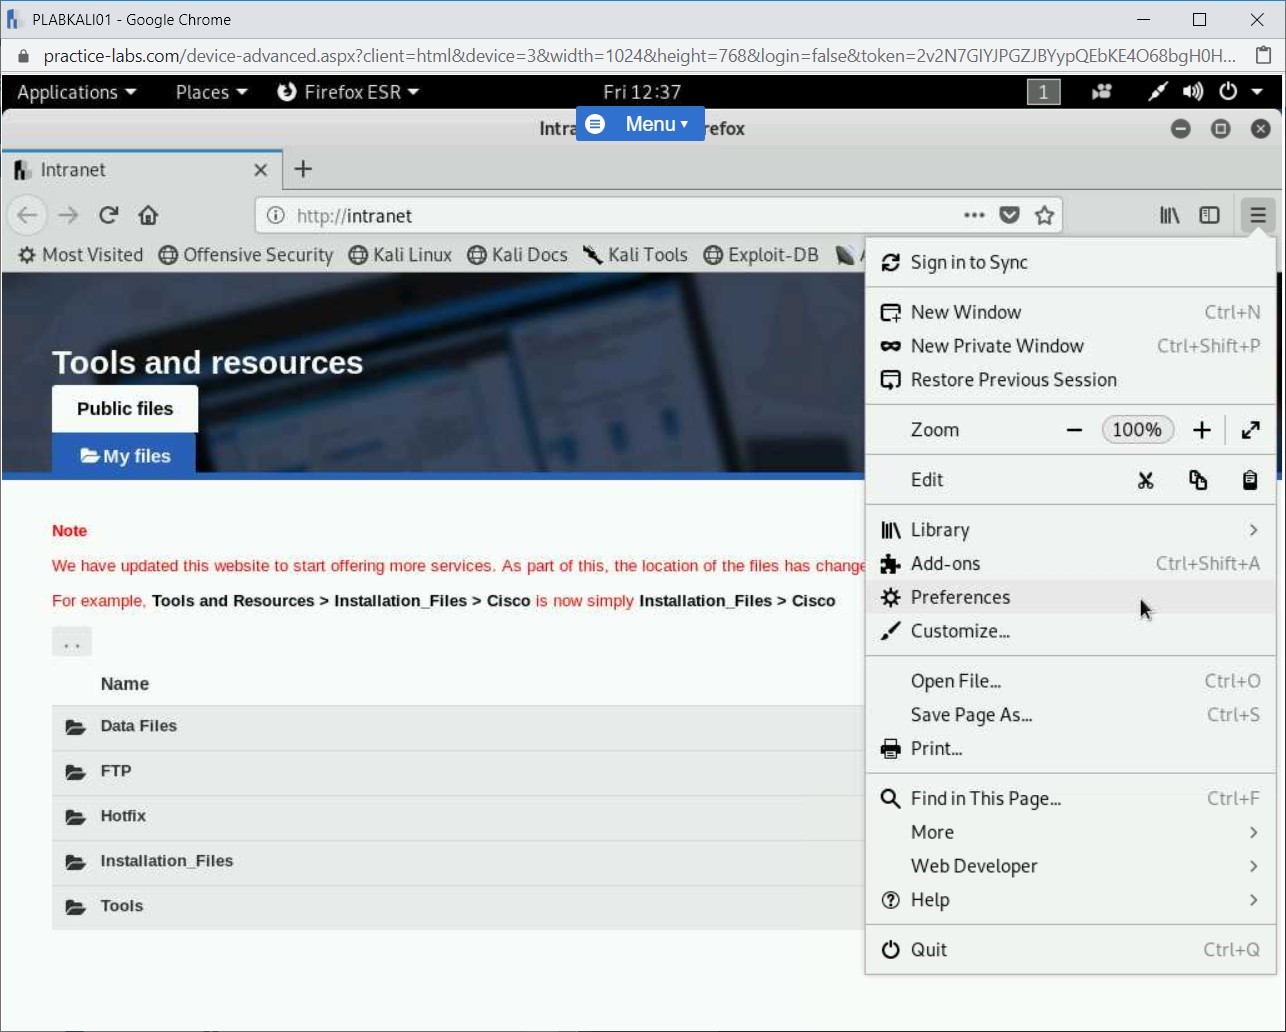
Step 3
Click the menu icon at the top right then click Preferences.
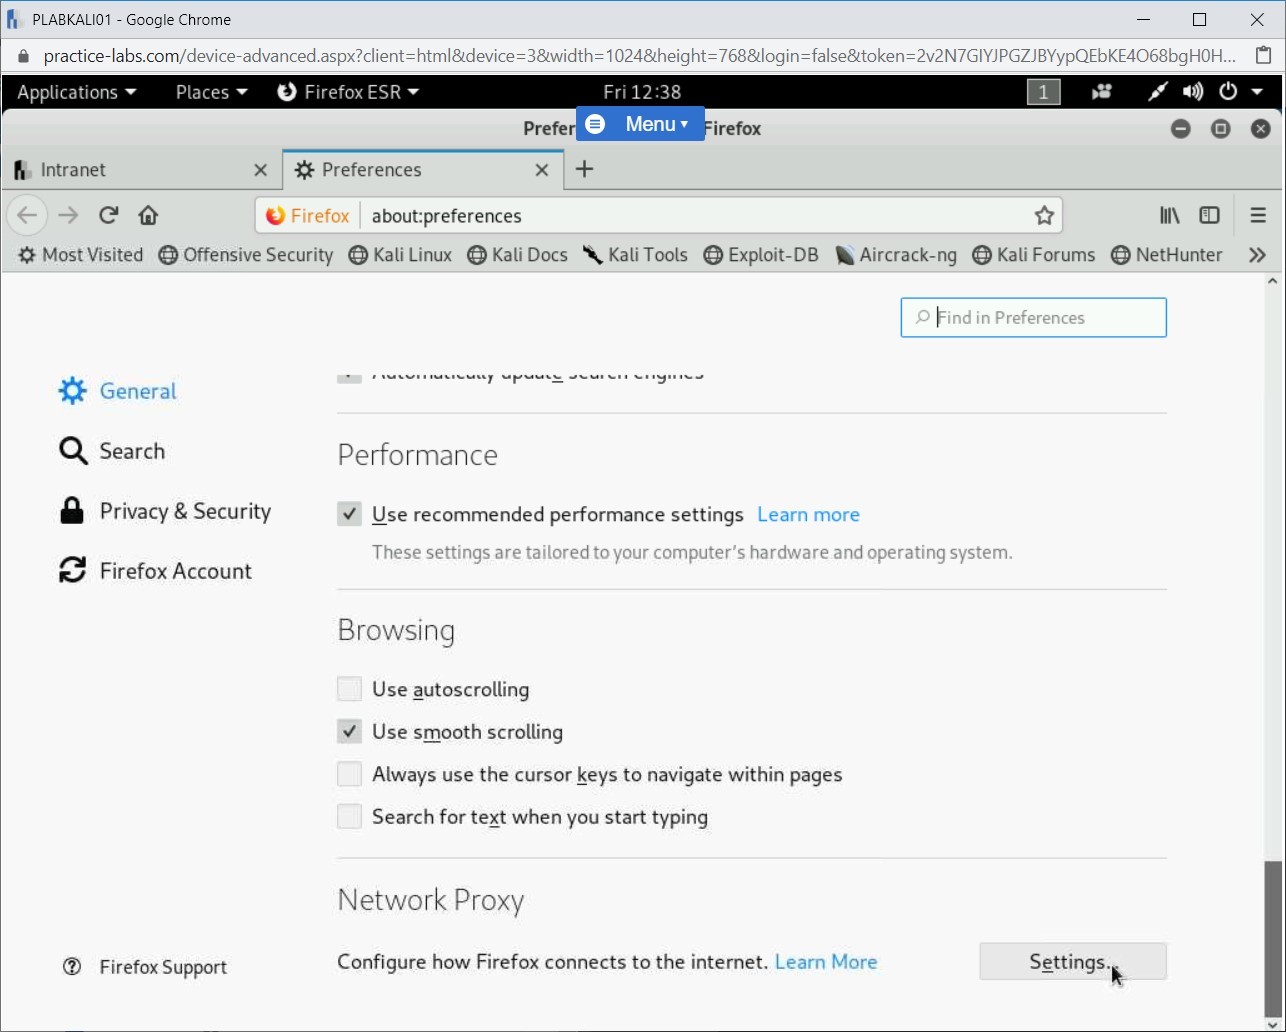
Step 4
Scroll down until you see Network Proxy, click Settings…
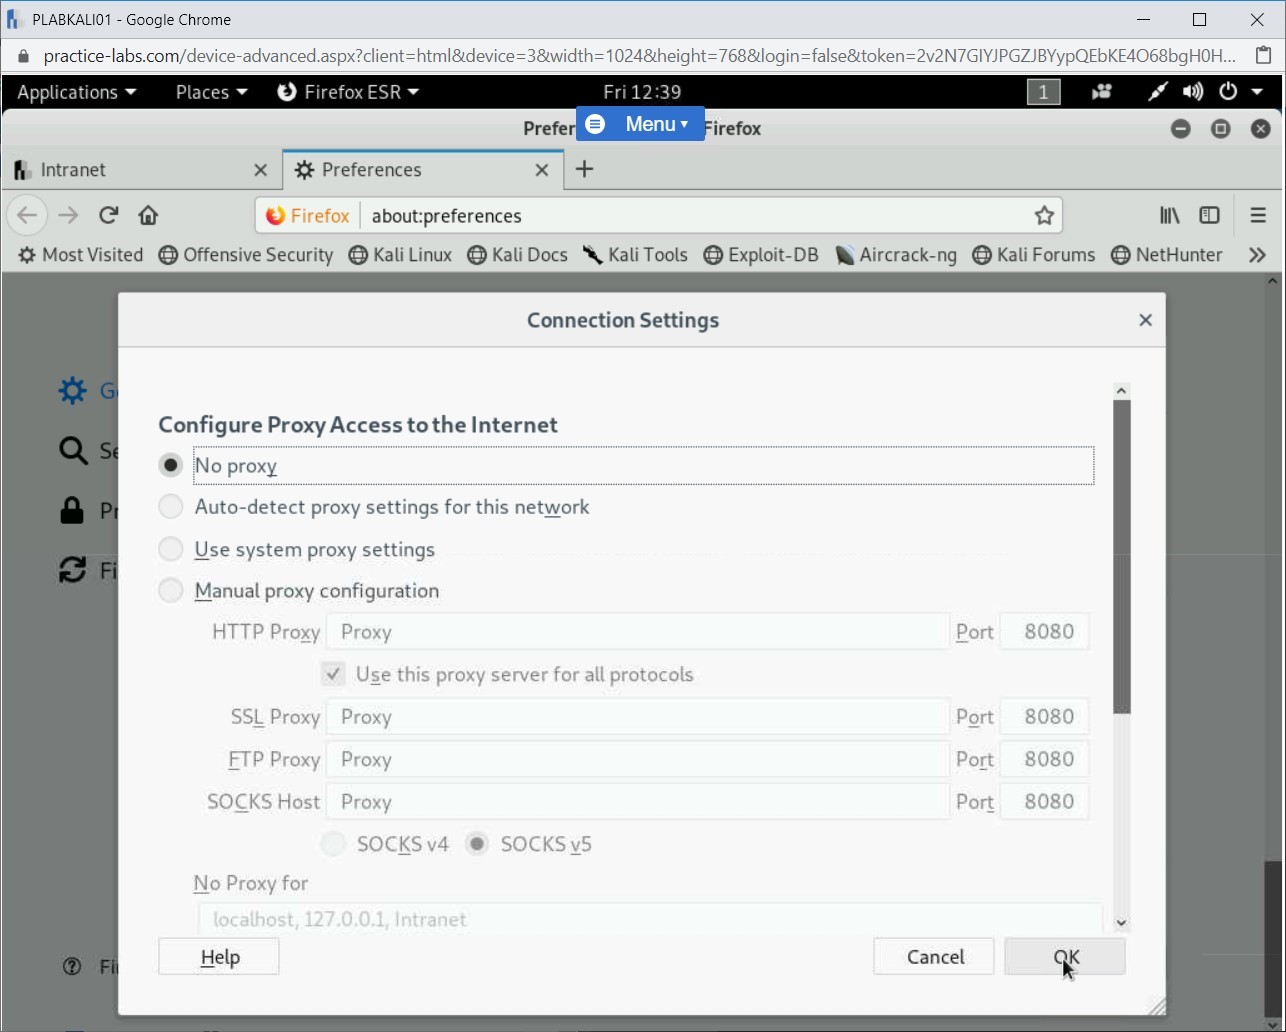
Step 5
Select the radio button for No proxy then click OK.
Step 6
Close Firefox ESR then in the left pane, click the Terminal icon.
Figure 1.2 Screenshot of PLABKALI01: Clicking the Terminal icon in the left pane.
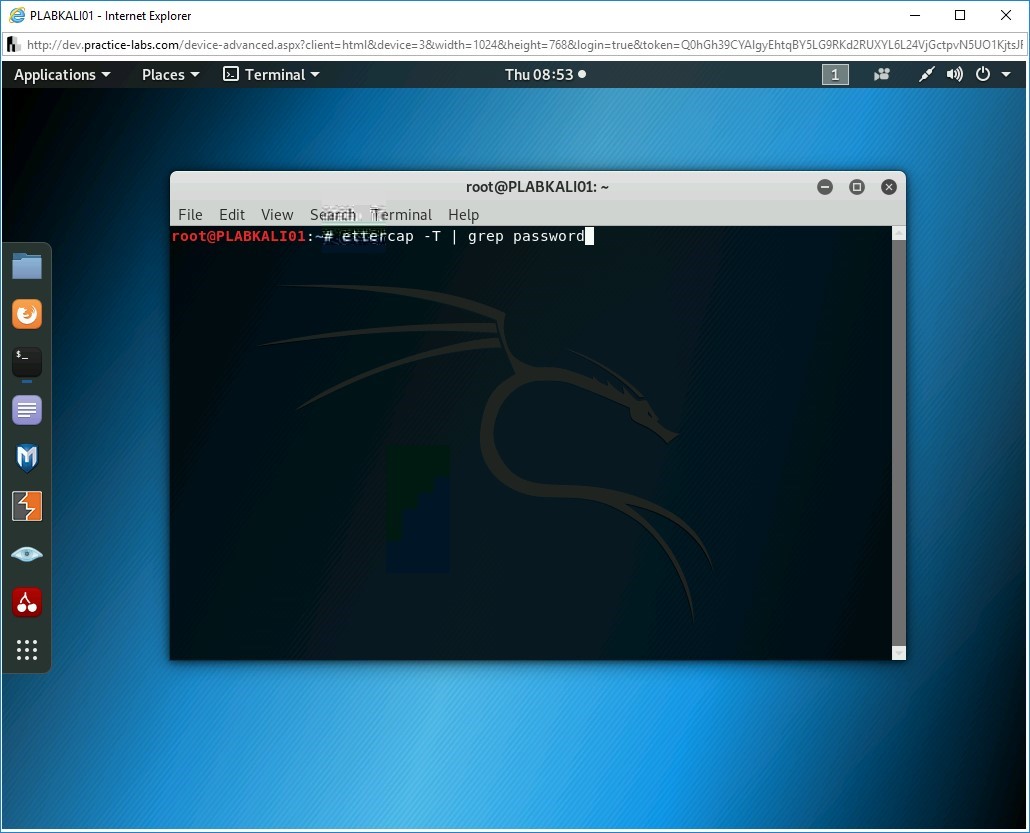
Step 7
The terminal window is displayed. You will start the Ettercap tool to capture the password from an unencrypted session. Type the following command:
ettercap -T | grep password
Press Enter.
Figure 1.3 Screenshot of PLABKALI01: Start the ettercap tool to capture the password from an unencrypted session.
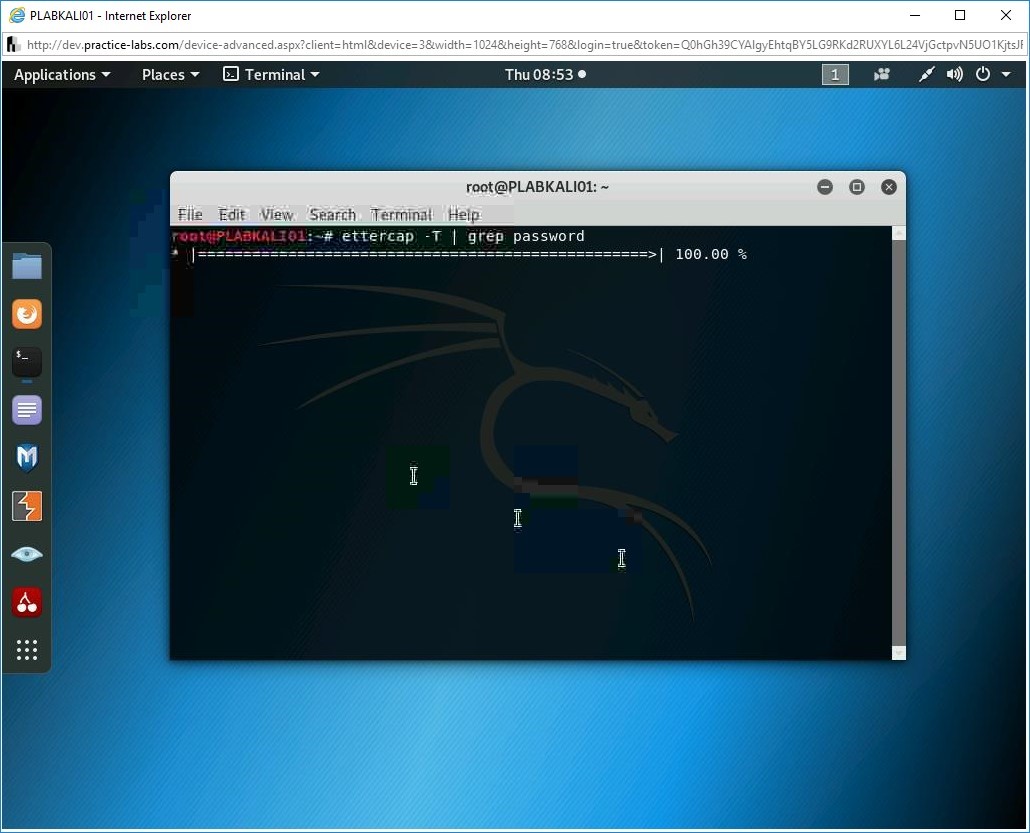
Step 8
The sniffing process starts.
Figure 1.4 Screenshot of PLABKALI01: Showing the started Ettercap sniffing process.
Step 9
Click the Firefox ESR icon in the left pane.
Figure 1.5 Screenshot of PLABKALI01: Clicking the Firefox ESR icon in the left pane.
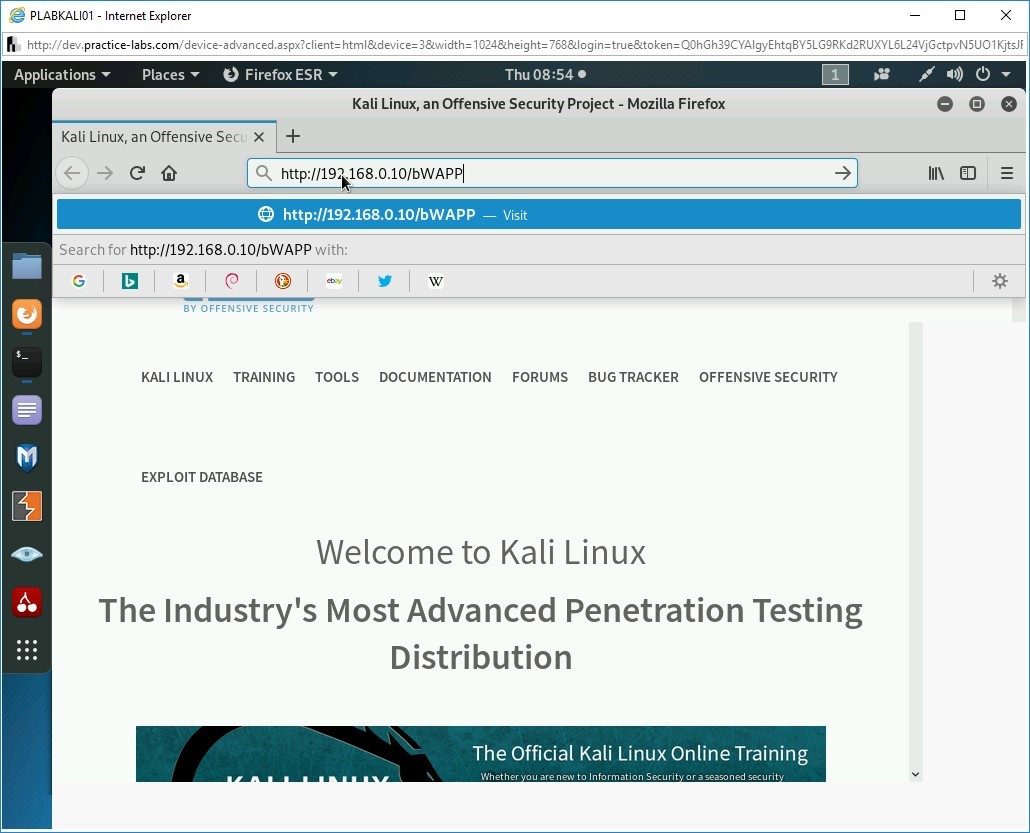
Step 10
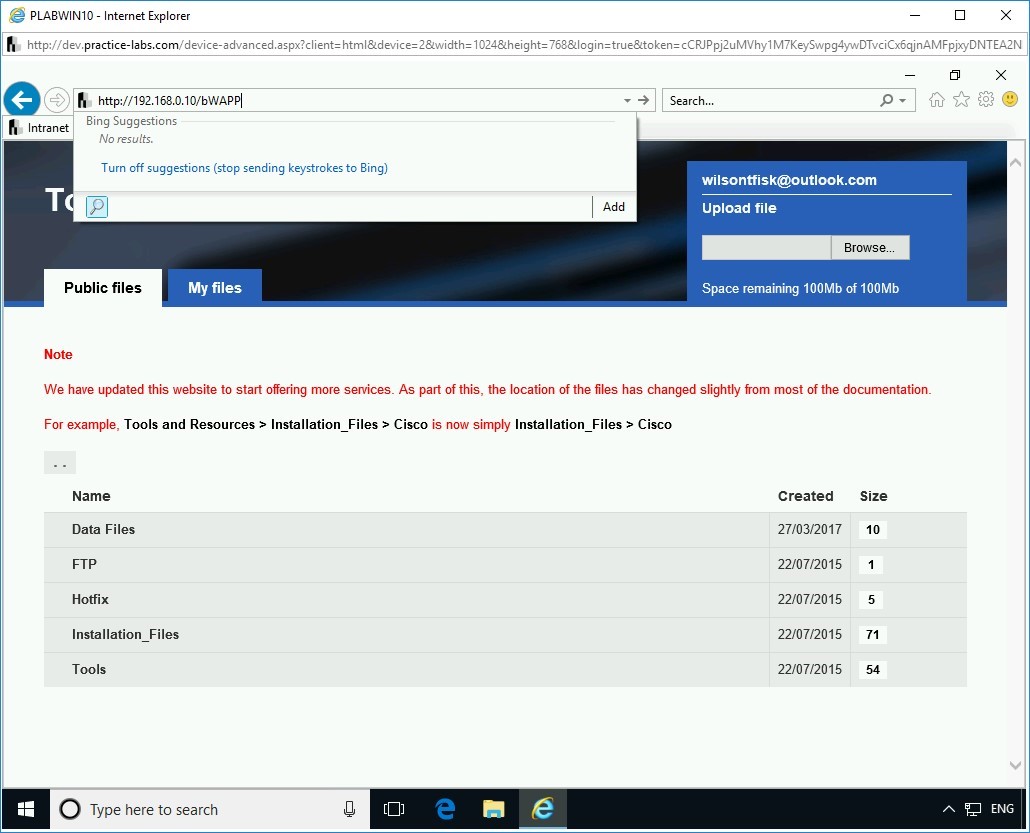
The Firefox window is displayed. In the address bar, type the following URL:
http://192.168.0.10/bWAPP
Press Enter.
Figure 1.6 Screenshot of PLABKALI01: Entering the bWAPP URL in the address bar of Firefox.
Step 11
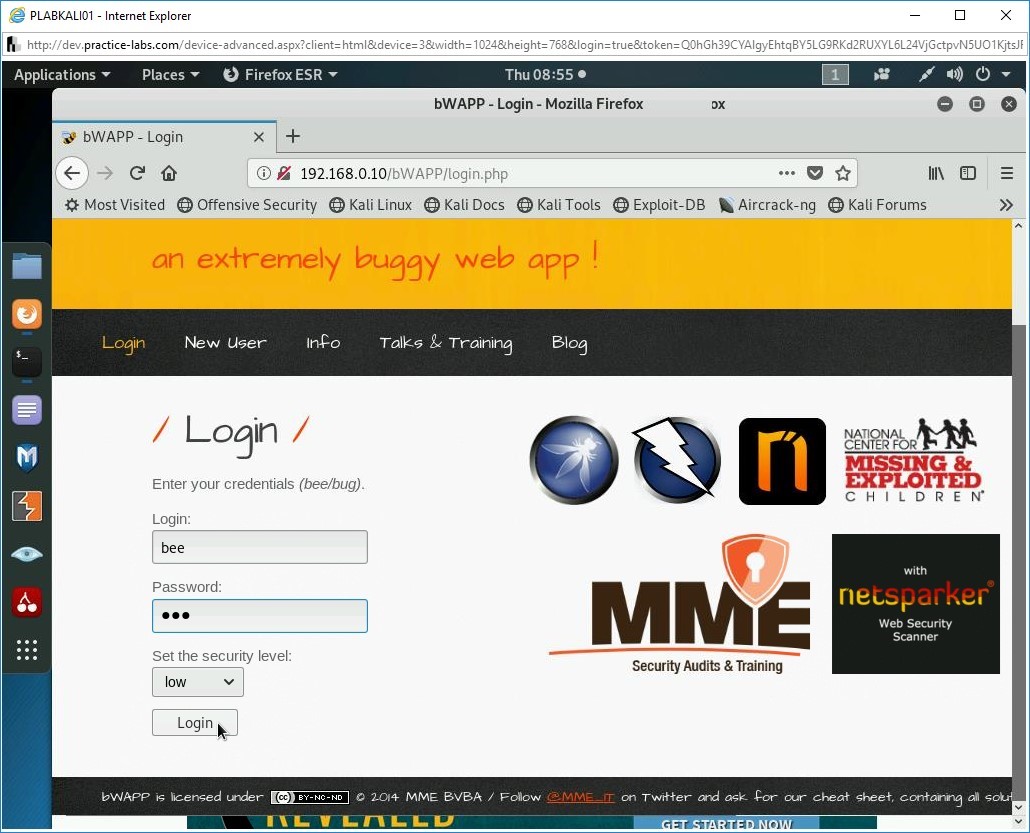
The login page is displayed.
In the Username text box, type the following:
bee
In the Password text box, type the following:
bug
Click Login.
Figure 1.7 Screenshot of PLABKALI01: Showing the login page of the bWAPP Web application with the entered credentials.
Step 12
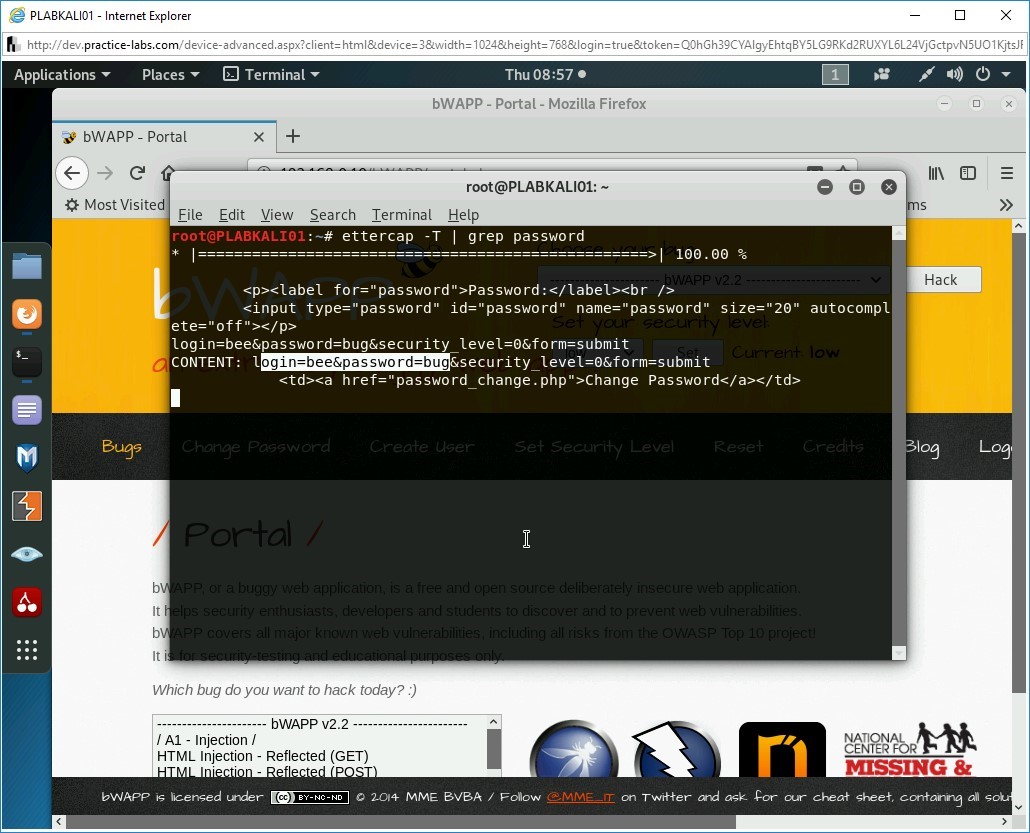
Click the terminal window to bring it in the foreground.
Notice that the username and password are now captured.
Figure 1.8 Screenshot of PLABKALI01: Showing the captured username and password in the Ettercap sniffing session.
Step 13
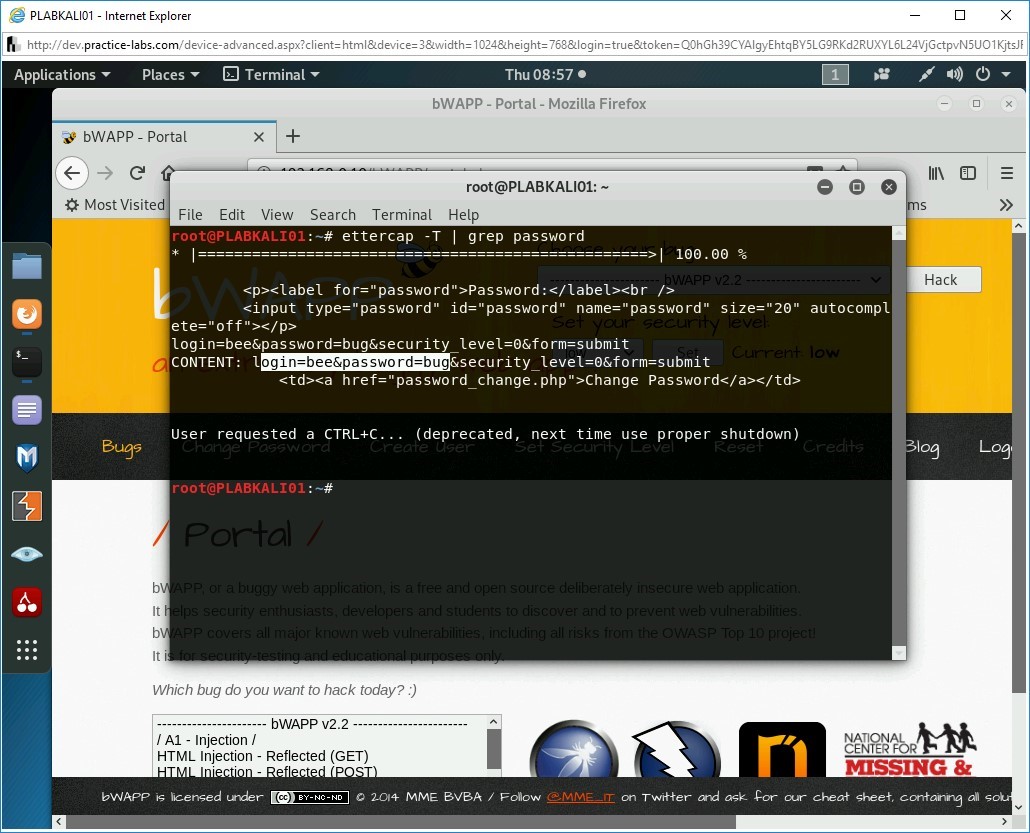
Press the Ctrl + C keys to break the sniffing process.
Figure 1.9 Screenshot of PLABKALI01: Pressing the Ctrl + c keys to break the Ettercap session.
Step 14
Close all open windows.
You are now back on the PLABKALI01desktop.
Figure 1.10 Screenshot of PLABKALI01: Showing the PLABKALI01 desktop.
Task 2 - Use Medusa to Crack Passwords
Medusa is a login cracking application. It works well with the Web applications and can use different protocols. It has the capability to crack passwords but also the usernames. You can supply two different wordlist files, usernames and passwords, as inputs and it can crack both.
In this task, you will use Medusa to crack the username and password on the bWAPP Web application. To do this, perform the following steps:
Step 1
Ensure you have powered on all the devices listed in the introduction and connect to PLABKALI01. The desktop is displayed.
Figure 1.11 Screenshot of PLABKALI01: Showing the desktop of PLABKALI01.
Step 2
In the left pane, click the Terminal icon.
Figure 1.12 Screenshot of PLABKALI01: Clicking the Terminal icon in the left pane.
Step 3
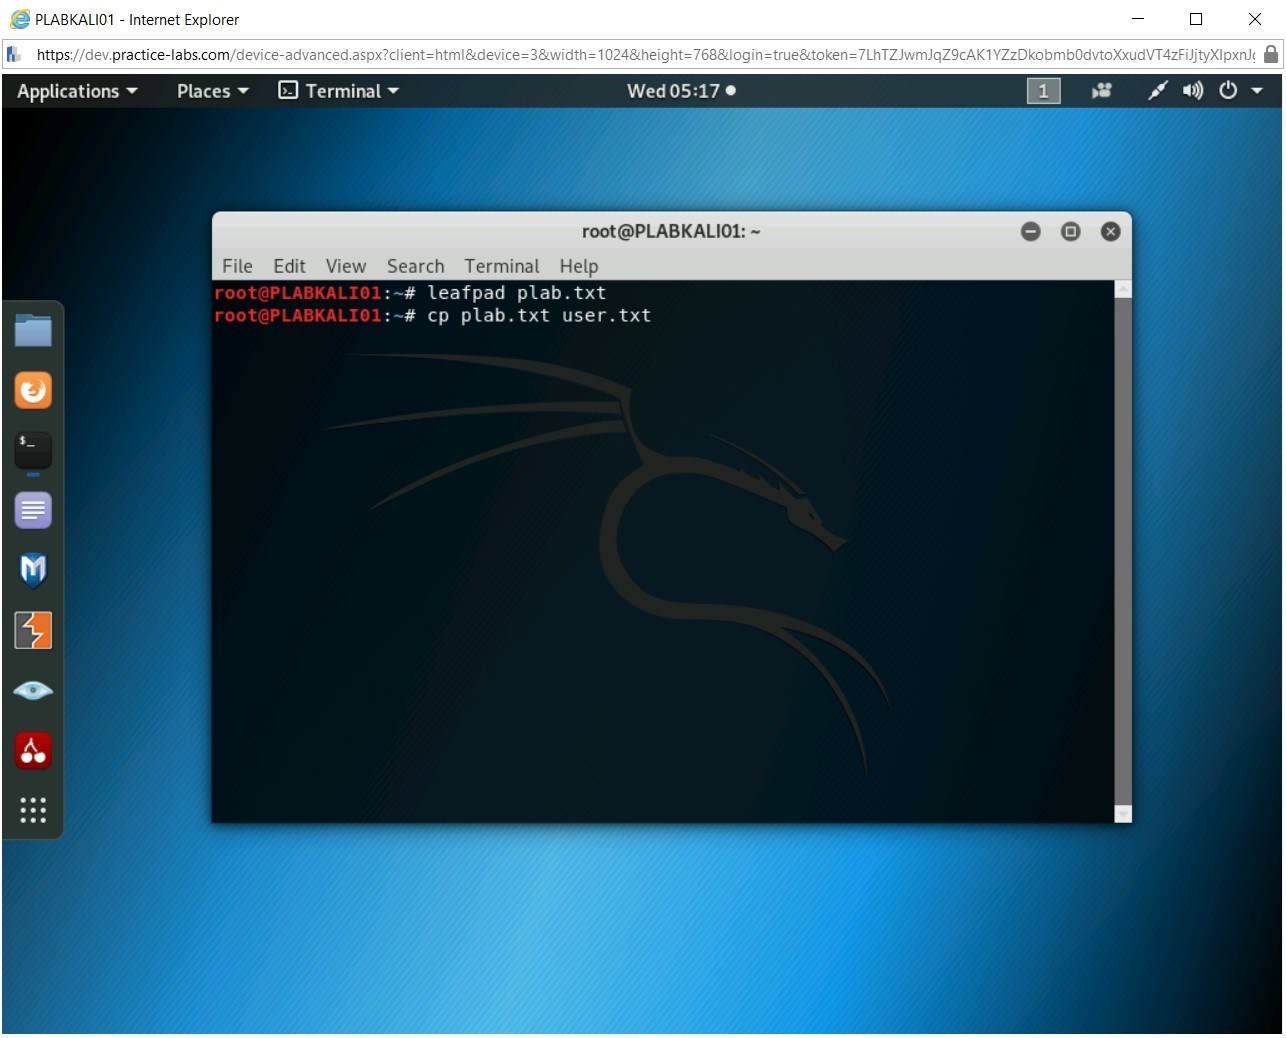
You have an option to use a pre-defined wordlist. You can also download the wordlists from the Internet. There are several wordlists available that have grown into Gigabytes in size. An alternative is to create a small wordlist manually, which you will do now. This file will contain the keywords that will be used for guessing the password. In the command prompt window, type the following command:
leafpad plab.txt
Press Enter.
Figure 1.13 Screenshot of PLABKALI01: Opening the Leadpad text editor with a new file named plab.txt.
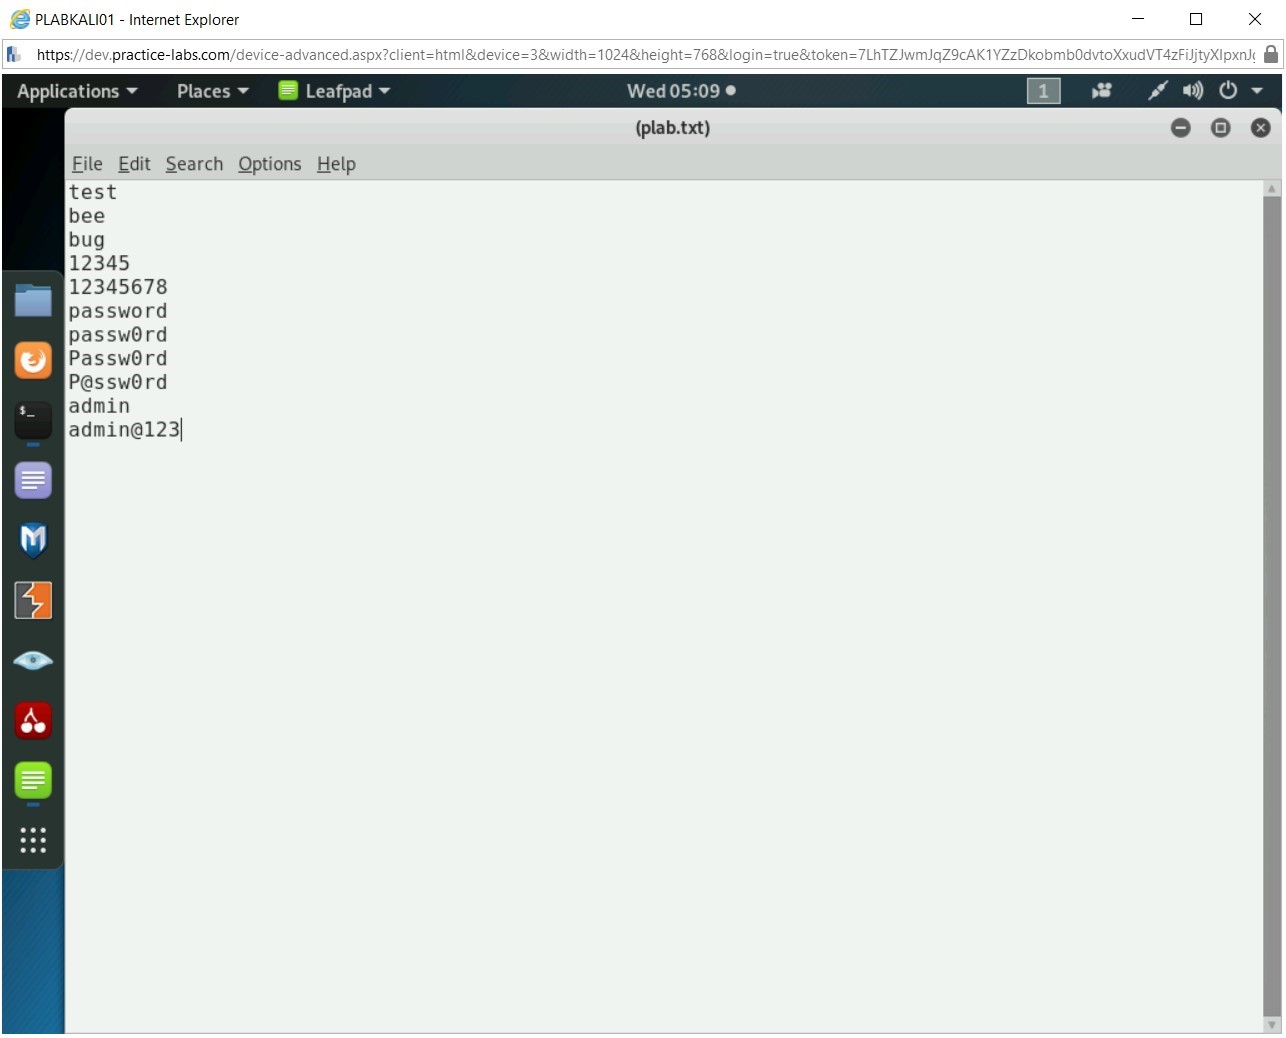
Step 4
Leafpad opens with a file named (plab.txt).
Type the following words:
test
bee
bug
12345
12345678
password
passw0rdPassw0rd
P@ssw0rd
admin
admin@123
Press Enter after each word except the last one.
Figure 1.14 Screenshot of PLABKALI01: Entering the words in the plab.txt file.
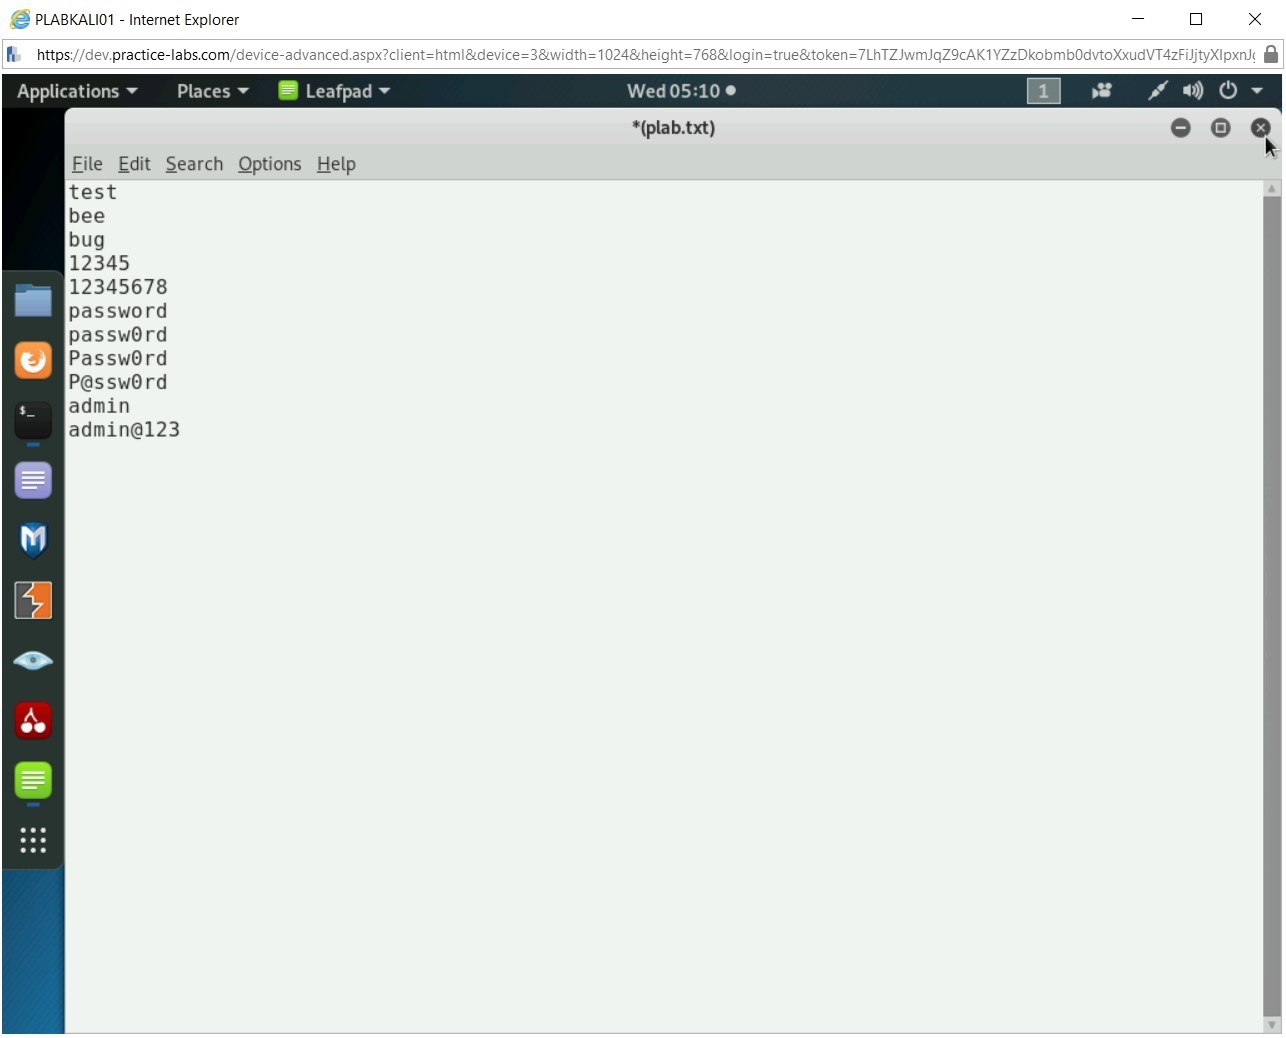
Step 5
Press Ctrl + s to save the file.
Close the plab.txt file.
Figure 1.15 Screenshot of PLABKALI01: Saving the file as plab.txt.
Step 6
Let’s make a copy of this file as the usernames file. Type the following command:
cp plab.txt user.txt
Press Enter.
Figure 1.16 Screenshot of PLABKALI01: Copying the plab.txt file as user.txt.
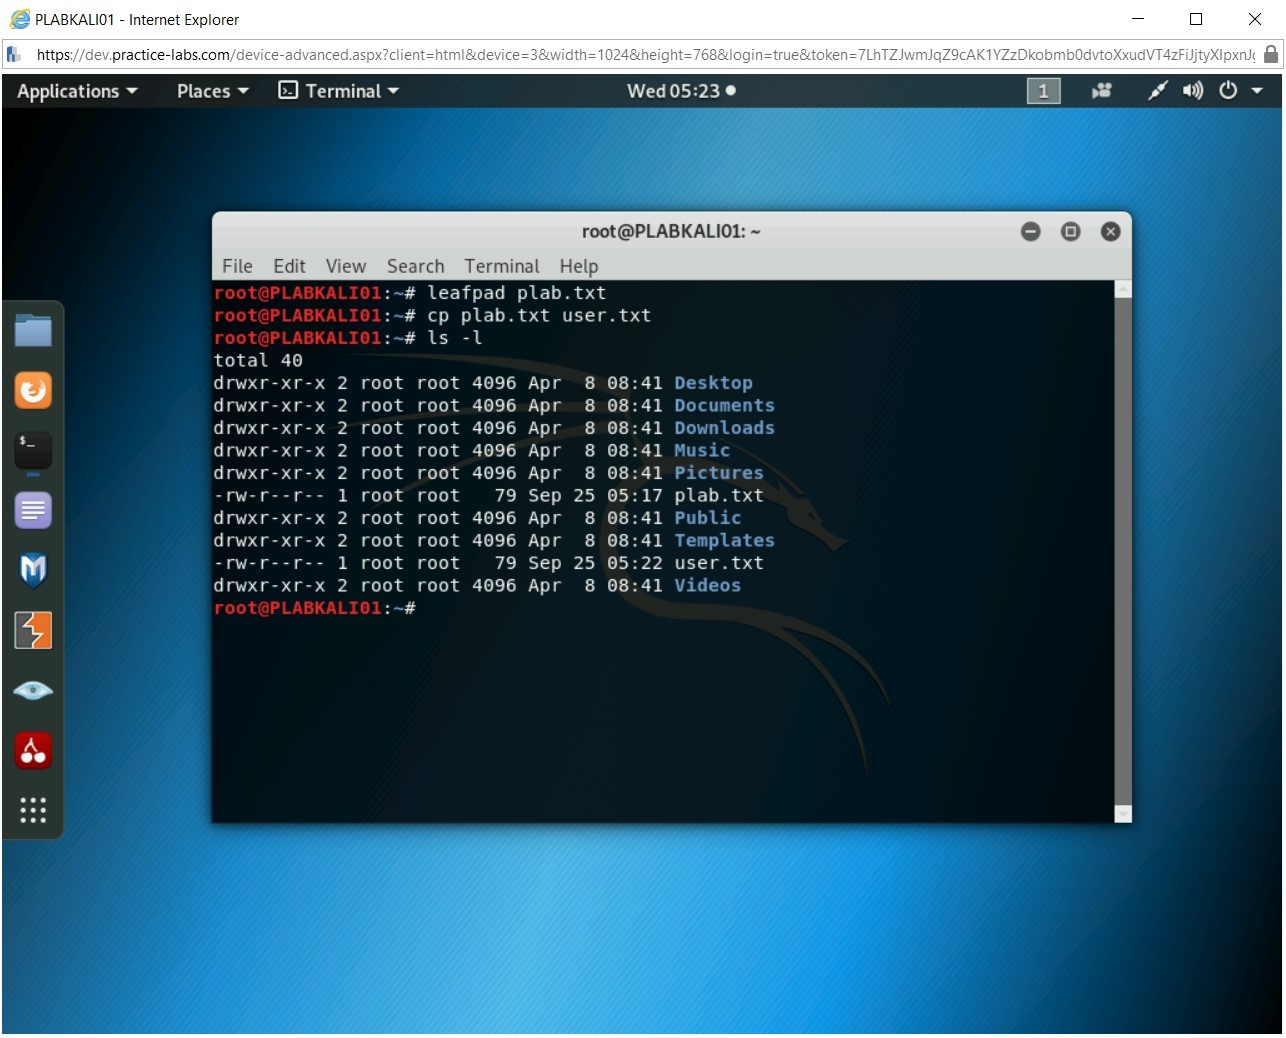
Step 7
The cp command does not return any output. To verify you have two files, plab.txt and user.txt, type the following command:
ls -l
Press Enter.
Figure 1.17 Screenshot of PLABKALI01: Listing the files in the root directory.
Step 8
The file listing contains both the files.
Figure 1.18 Screenshot of PLABKALI01: Showing the files in the root directory.
Step 9
Clear the screen by entering the following command:
clear
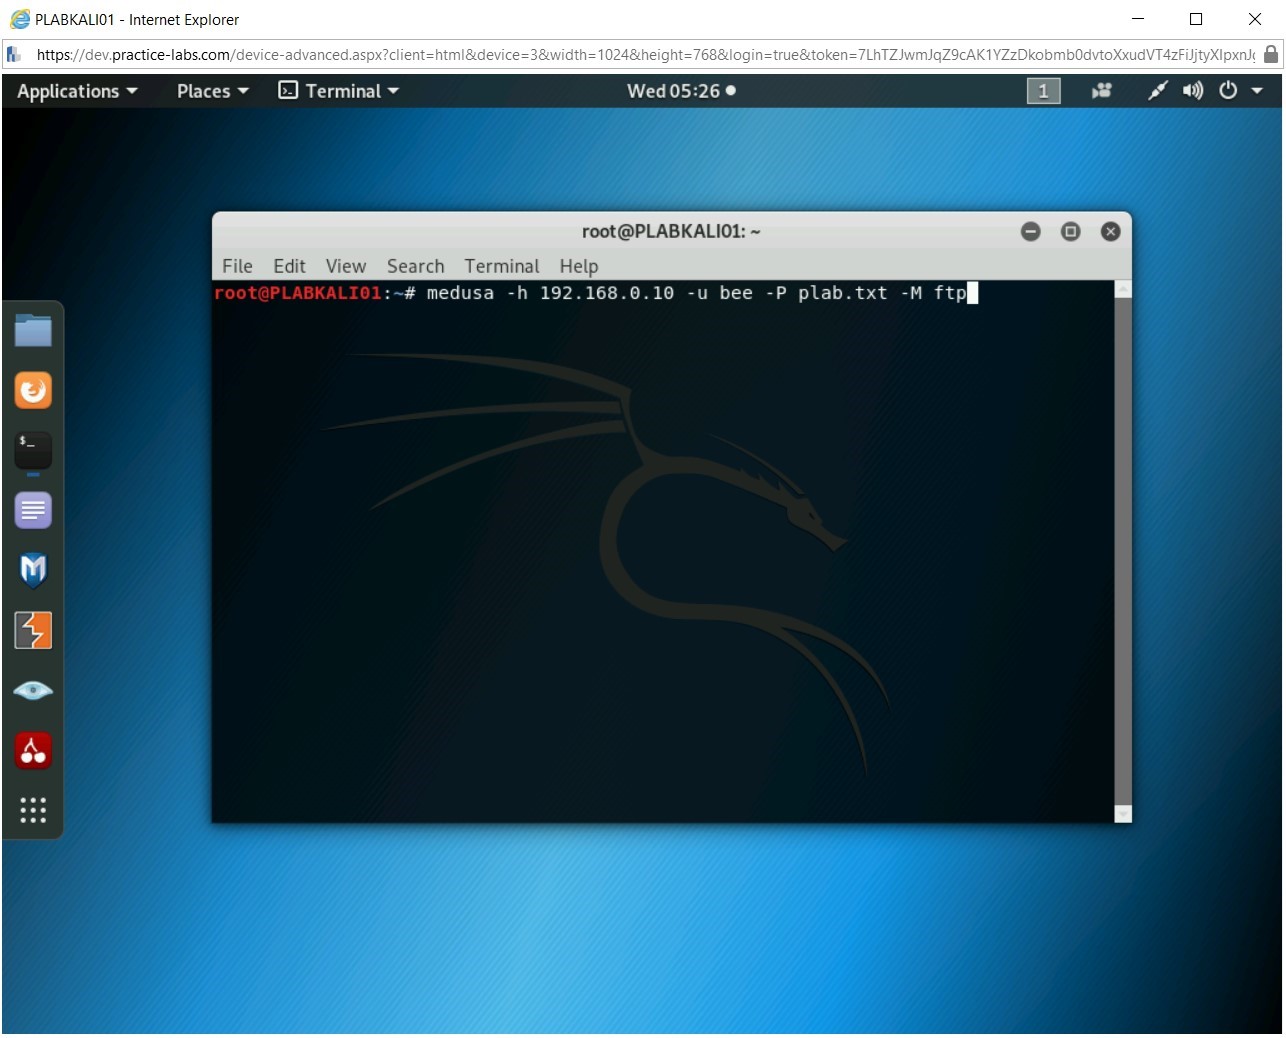
You will now use the plab.txt as the password wordlist and attempt to guess the password for the username bee. You will attempt to break the password of the FTP account that is running on the Webserver, 192.168.0.10. Type the following command:
Note: The command below uses the following parameters: -h: IP address of the target system, -u: Username. If -U is used, then you need to specify the username wordlist, -P: Password wordlist. If -p is used, then you can specify a single password, -M: Module used for cracking the password
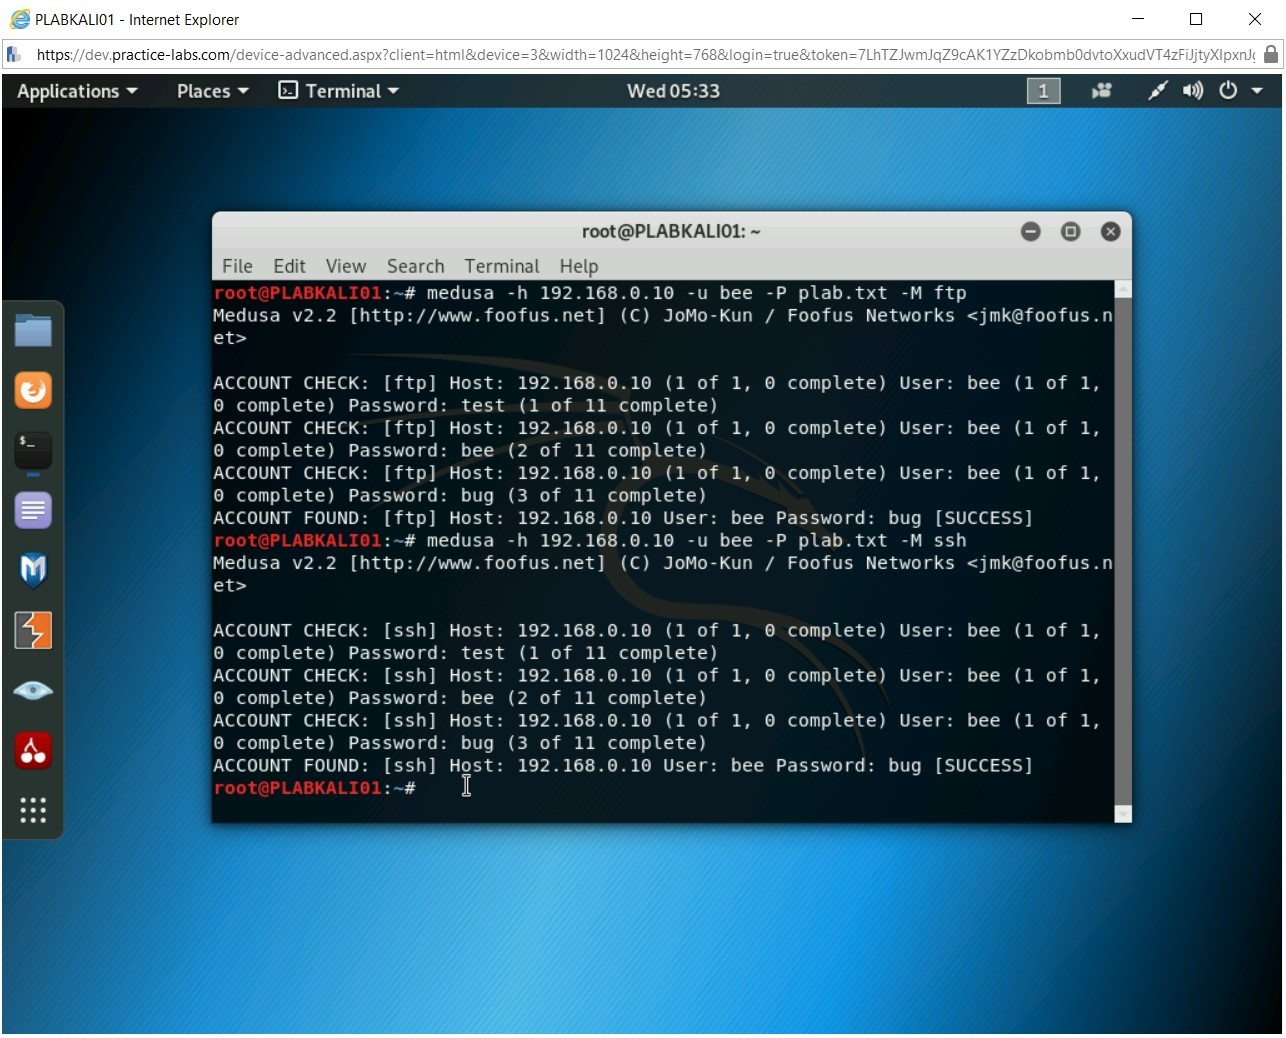
medusa -h 192.168.0.10 -u bee -P plab.txt -M ftp
Press Enter.
Figure 1.19 Screenshot of PLABKALI01: Entering the medusa command to crack the password for username bee.
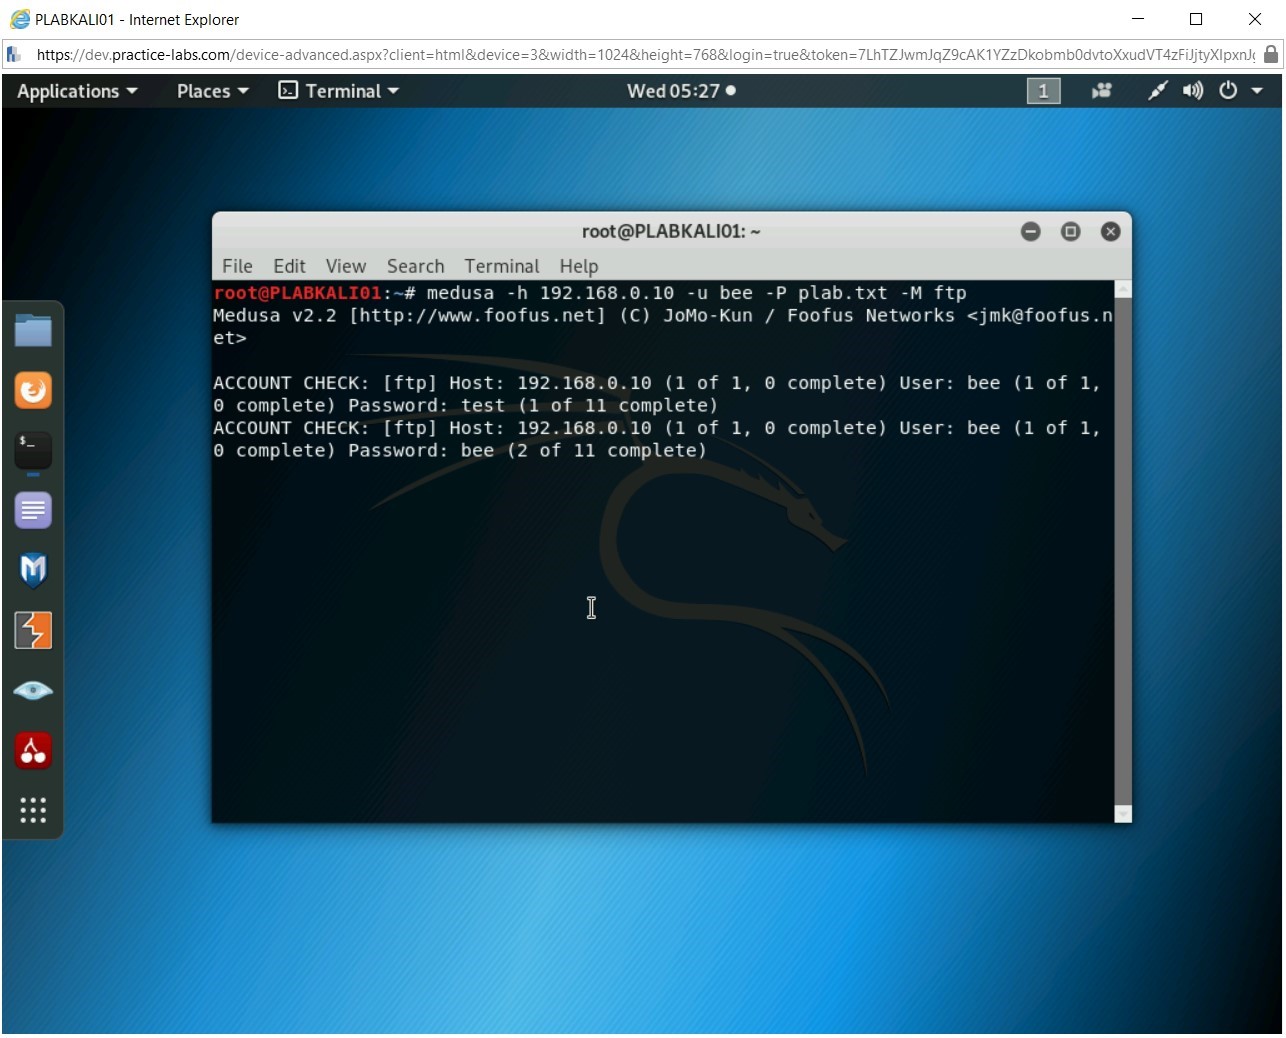
Step 10
The password cracking process starts. It uses each word from the plab.txt against the username, bee.
Figure 1.20 Screenshot of PLABKALI01: Showing the password cracking process.
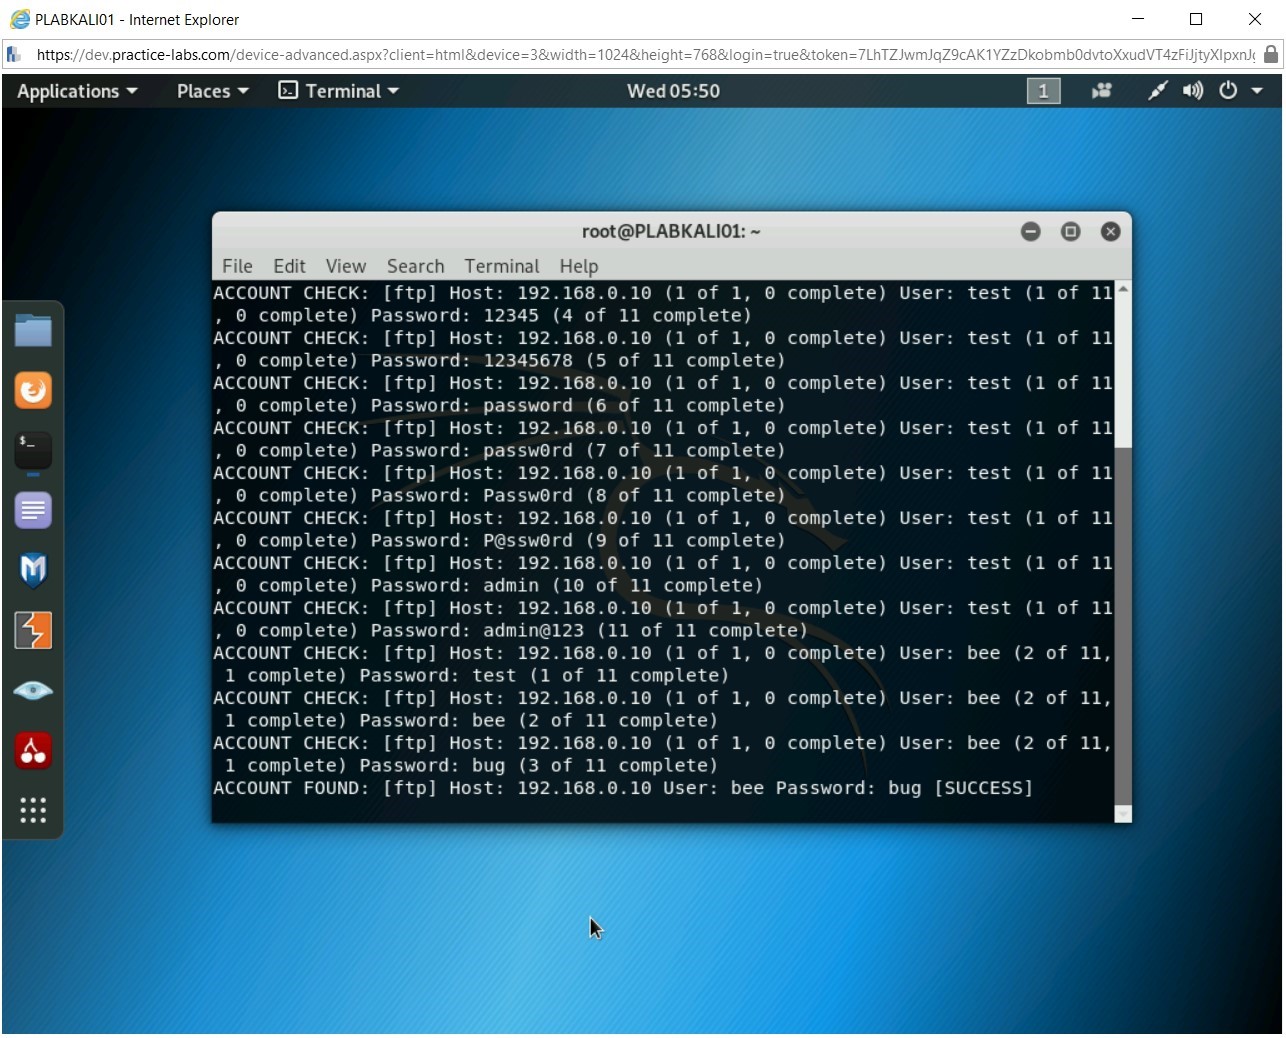
Step 11
Finally, the correct password is found. The last statement lists the password as bug. Notice that after the correct password is found, Medusa stops the process.
Figure 1.21 Screenshot of PLABKALI01: Showing the cracked password for the username bee.
Step 12
Let’s attempt to crack the password for the SSH module. Type the following command:
medusa -h 192.168.0.10 -u bee -P plab.txt -M ssh
Press Enter.
Figure 1.22 Screenshot of PLABKALI01: Entering the medusa command to crack password for SSH.
Step 13
Similar to the FTP module, the password for SSH is also cracked for the username, bee.
Figure 1.23 Screenshot of PLABKALI01: Showing the cracked password.
Step 14
Clear the screen by entering the following command:
clear
Let’s find the username by providing the password as an input.
Type the following command:
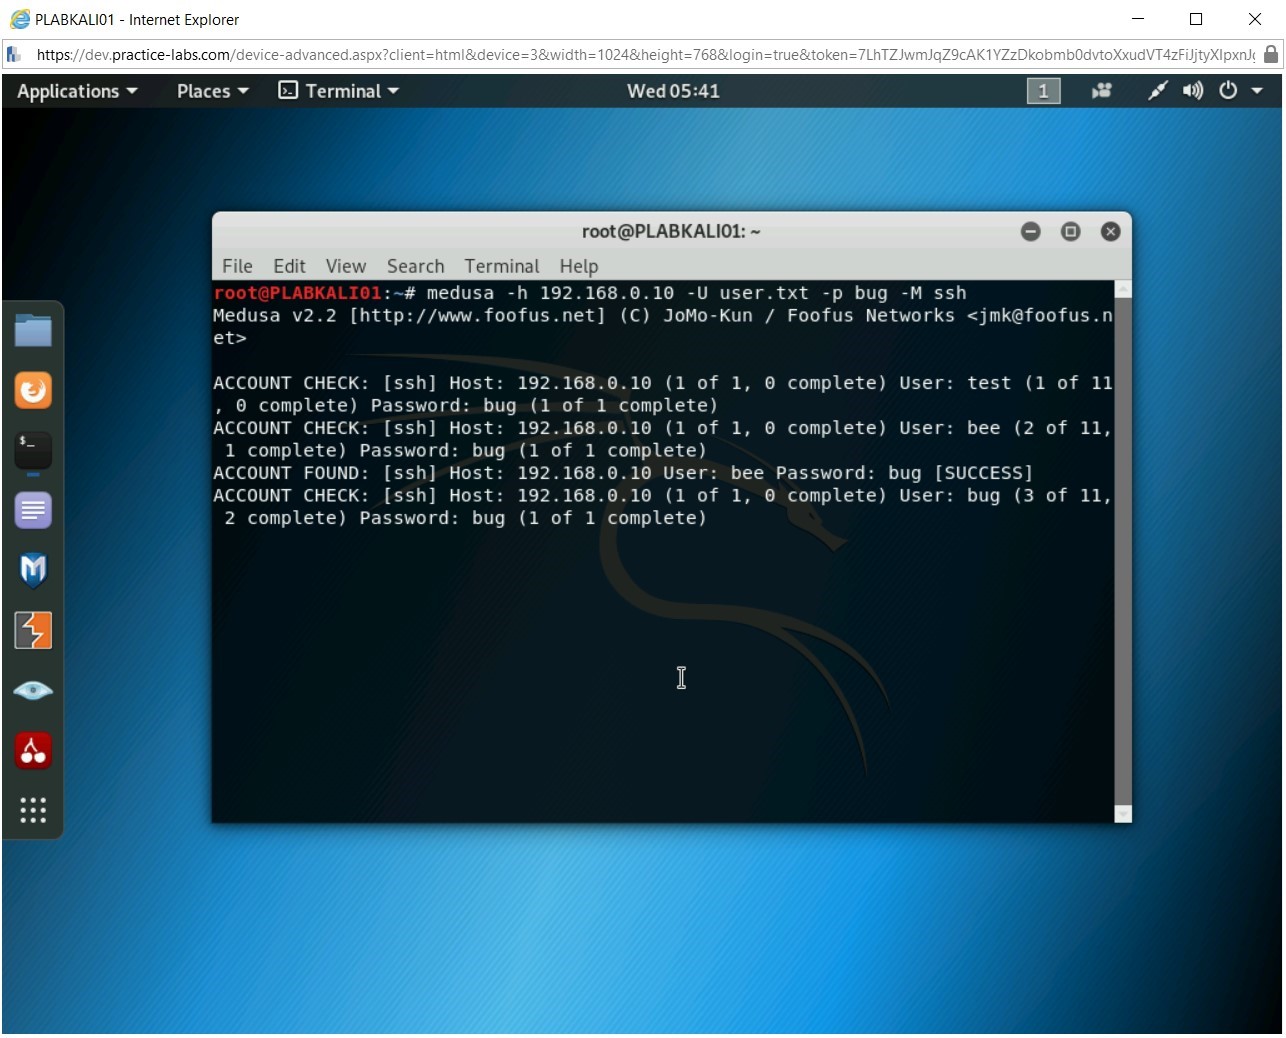
medusa -h 192.168.0.10 -U user.txt -p bug -M ssh
Press Enter.
Figure 1.24 Screenshot of PLABKALI01: Entering the password to find the relevant username.
Step 15
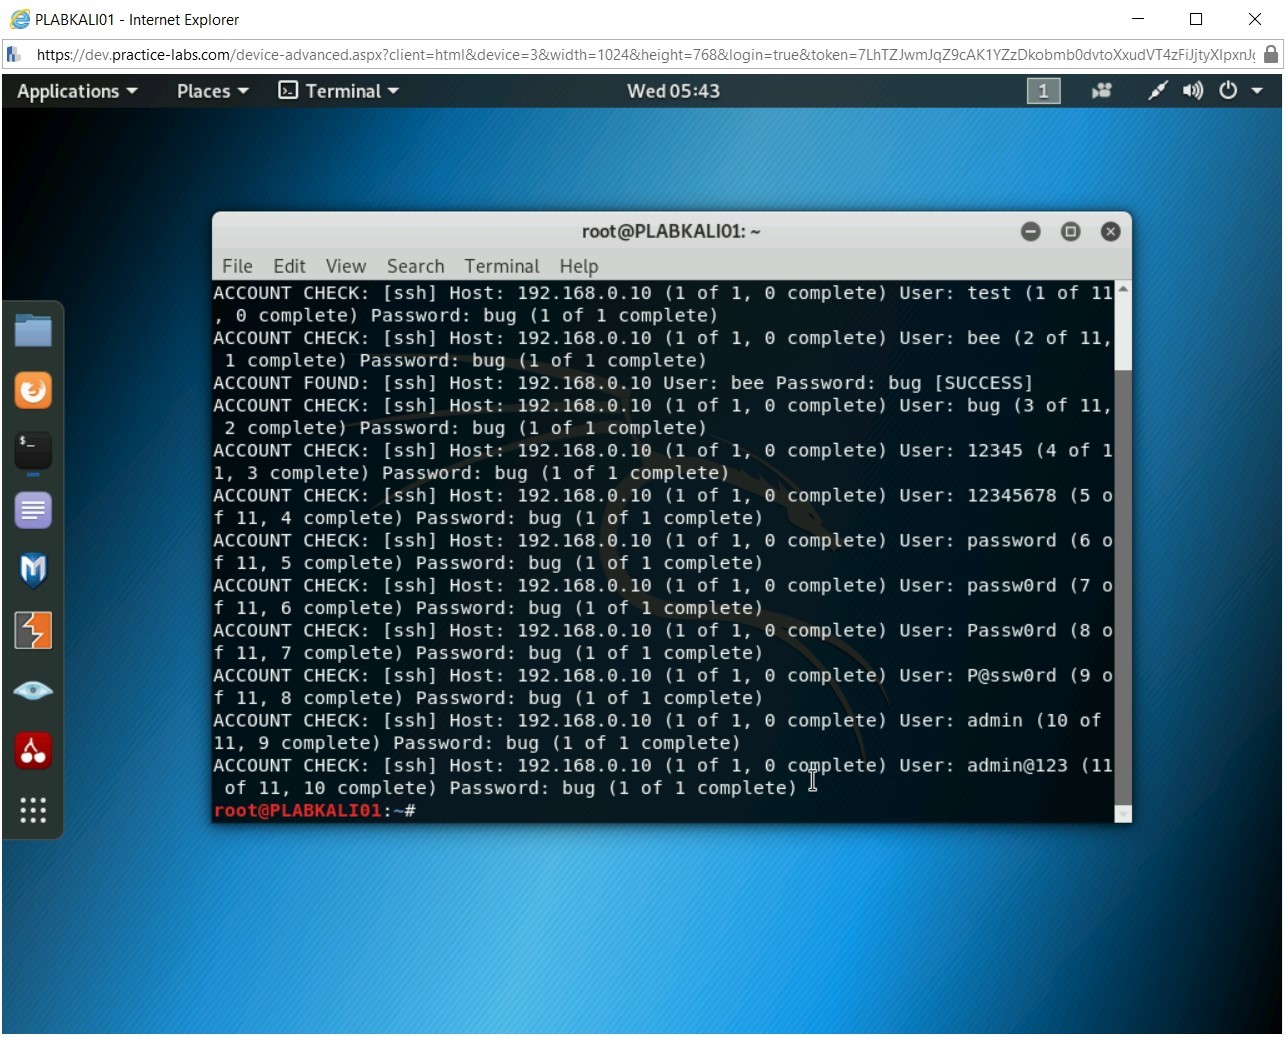
The username cracking process starts. Notice the statement with [SUCCESS]. It has found one username. However, unlike password cracking, the username cracking process does not stop and attempts to find more usernames from the given wordlist. It will run through all the usernames given in the wordlist.
Figure 1.25 Screenshot of PLABKALI01: Showing the cracked username for the password bug.
Step 16
After running through the usernames in the wordlist, the username cracking process stops.
Figure 1.26 Screenshot of PLABKALI01: Showing the username cracking process as completed.
Step 17
Clear the screen by entering the following command:
clear
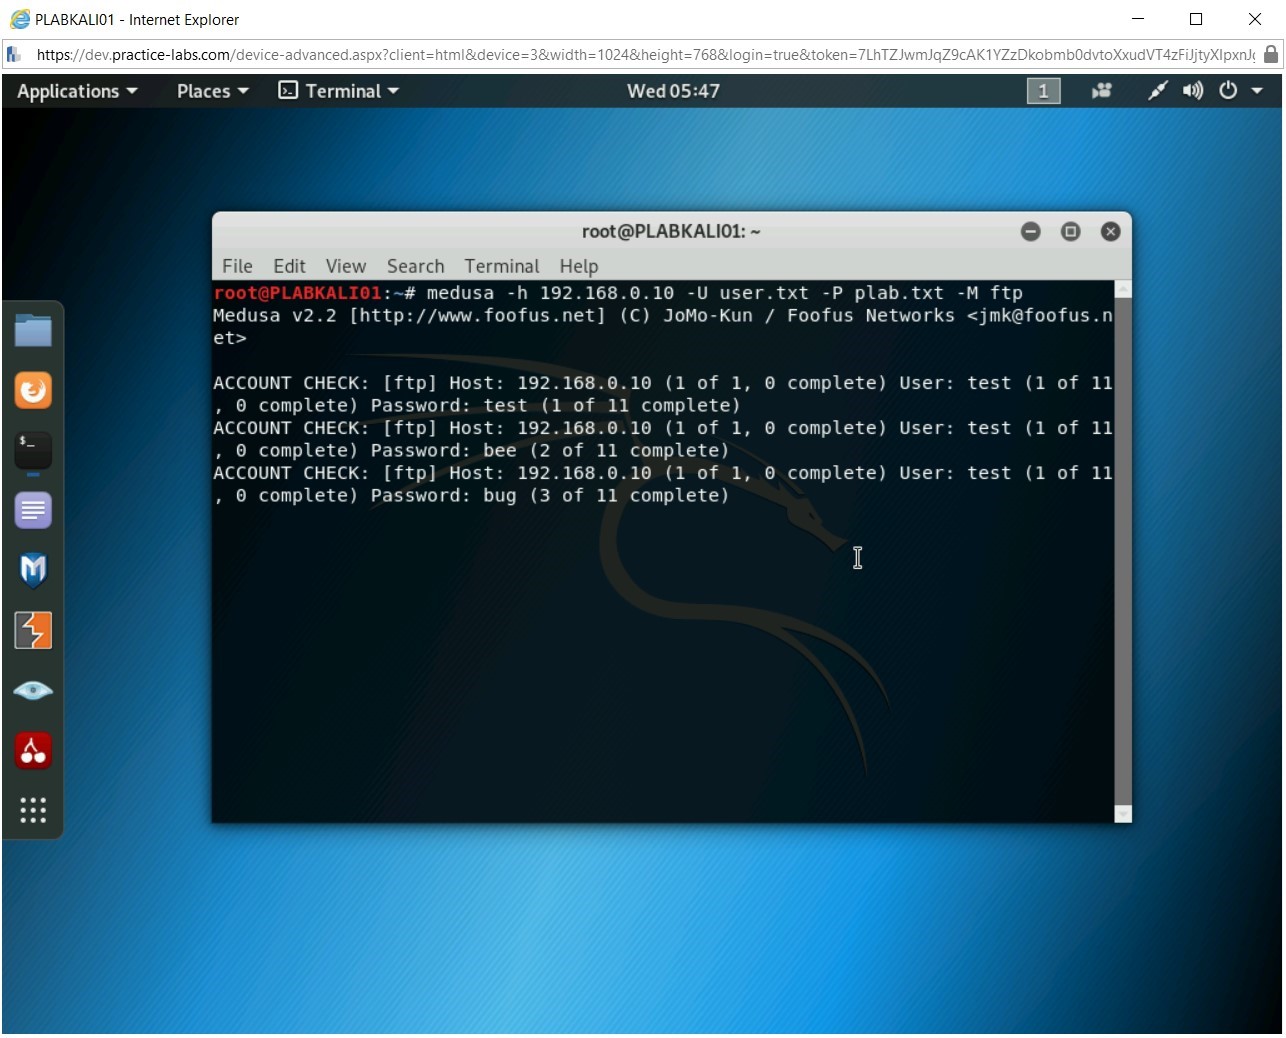
Let’s now attempt to use the username and password wordlists to find the username and the password. To do this, type the following command:
Figure 1.27 Screenshot of PLABKALI01: Entering the command to find the username and password.
Step 18
The username and password cracking process starts. Each username will be run against each password in the plab.txt.
Note: The username and password cracking process will take a while to complete.Figure 1.28 Screenshot of PLABKALI01: Showing the running process to find the username and password.
Step 19
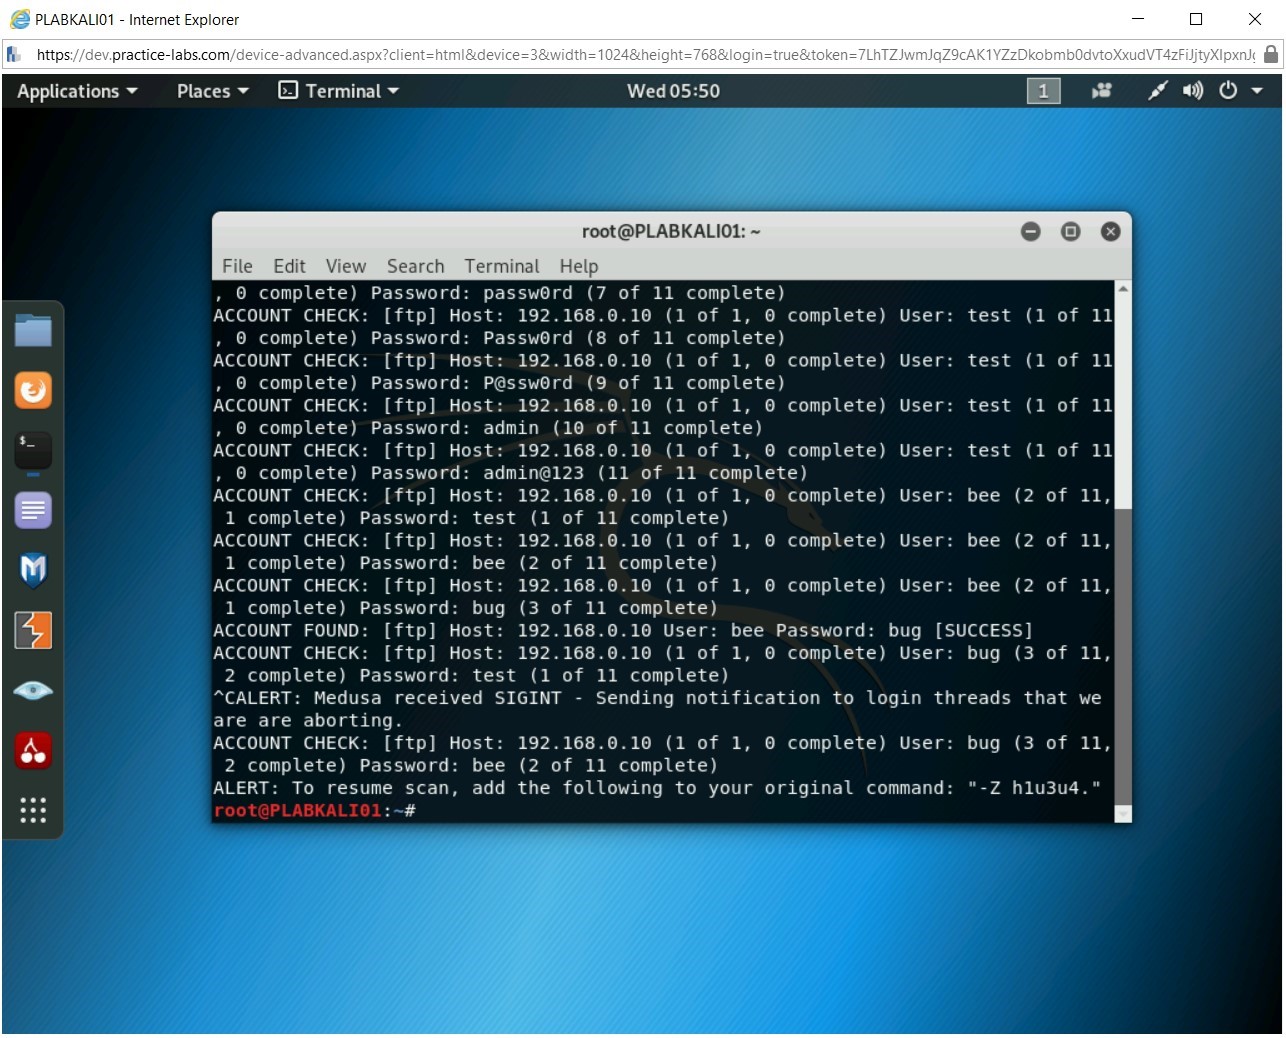
The password has been cracked the process can be continued to crack the rest of the passwords if time permits. Else, press Ctrl + c to stop the password cracking process.
Figure 1.29 Screenshot of PLABKALI01: Showing the username bee with the password bug.
Step 20
The password has been successfully cracked with the combination of the username (bee) and the password (bug).
Figure 1.30 Screenshot of PLABKALI01: Showing the terminated process.
In many scenarios, organizations use off-the-shelf applications. In other scenarios, the organizations use a mix of off-the-shelf and custom applications. The patches and updates for the off-the-shelf applications are created and released by the vendor that created the application. It is now the organization's responsibility to update their existing off-the-shelf applications to patch these applications. In the case of custom applications, this is not the scenario. The custom applications are developed to meet a specific business need. An organization may have an in-house development team to create the application, or it might be outsourced to another vendor. Releasing updates is a common issue with custom applications. The vendors do not provide updates in most cases. Therefore, these inherent vulnerabilities will continue to be present until the time application is used.
There are several known Web application vulnerabilities. Open Web Application Security Project, more commonly known as OWASP, releases the top 10 Web application vulnerabilities, which are released after every few years. This data is collected from various organizations through extensive research, and then the top 10 Web applications are selected. Remember - there are hundreds of Web application vulnerabilities, and therefore, when performing an ethical hack, you can focus on the key ones but do not ignore to test for the other vulnerabilities. The top 10 Web application vulnerabilities of 2017 released by OWASP are:
A1:2017 - Injection
A2:2017 - Broken Authentication
A3:2017 - Sensitive Data Exposure
A4:2017 - XML External Entities (XXE)
A5:2017 - Broken Access Control
A6:2017 - Security Misconfiguration
A7:2017 - Cross-Site Scripting (XSS)
A8:2017 - Insecure Deserialization
A9:2017 - Using Components with Known Vulnerabilities
A10:2017 - Insufficient Logging & Monitoring
This module will cover a few of these vulnerabilities that you can find and exploit.
Note: In this module, you will use a Web application named bWAPP, which is designed with more than 200 vulnerabilities. It is not legal to exploit a live Web application on the Internet, and therefore, you will use this Web application to learn the art of exploiting a Web application. It will not be possible to cover all types of vulnerabilities due to the short time in the lab environment.
In this exercise, you will learn about finding and exploiting Web application Vulnerabilities.
Learning Outcomes
After completing this exercise, you will be able to:
Perform Broken Authentication Attacks
View Session ID in URL
Conduct OS Command Injection Attack
Perform Server-side Includes Injection Attack (SSI)
You will be using the following devices in this lab. Please power these on now.
PLABDC01 - (Windows Server 2019 - Domain Server)
PLABWIN10 - (Windows 10 - Workstation)
PLABKALI01 - (Kali 2019.2 - Linux Kali Workstation)
Task 1 - Perform Broken Authentication Attacks
Authentication is a process that confirms a user’s identity using a username and password. The user’s identity is validated by the server or the Web application. In a Web application scenario, the authentication process is as follows:
On a login form of a Web application, the user enters the login credentials in the form of a username and password.
After the user submits the user credentials, they are then sent to the Web application, where the user credentials are verified for the user, and then a session is created and stored in a database.
A cookie is sent to the user’s system.
When a user makes a subsequent request, the session ID is verified with the one that is stored in the database. The Web browser at the client end stores and sends the token as a cookie to the server. If both the session ID values match, the user’s request is processed. However, if the values do not match, then the request is not processed any further.
After performing certain tasks, when a user logs out from the Web application, from the client and the server, the session is destroyed.
In this task, you will learn to perform broken authentication attacks. To do this, perform the following steps:
Step 1
Ensure you have powered on all the devices listed in the introduction and connect to PLABWIN10. The desktop should be displayed.
Figure 2.1 Screenshot of PLABWIN10: Showing the desktop of PLABWIN10.
Step 2
In the Type here to search text box, type the following:
Internet Explorer
From the search results, select Internet Explorer.
Figure 2.2 Screenshot of PLABWIN10: Selecting Internet Explorer from the search results.
Step 3
The Internet Explorer window is displayed. In the address bar, type the following URL:
http://192.168.0.10/bWAPP
Press Enter.
Figure 2.3 Screenshot of PLABWIN10: Entering the URL for the bWAPP application in the address bar.
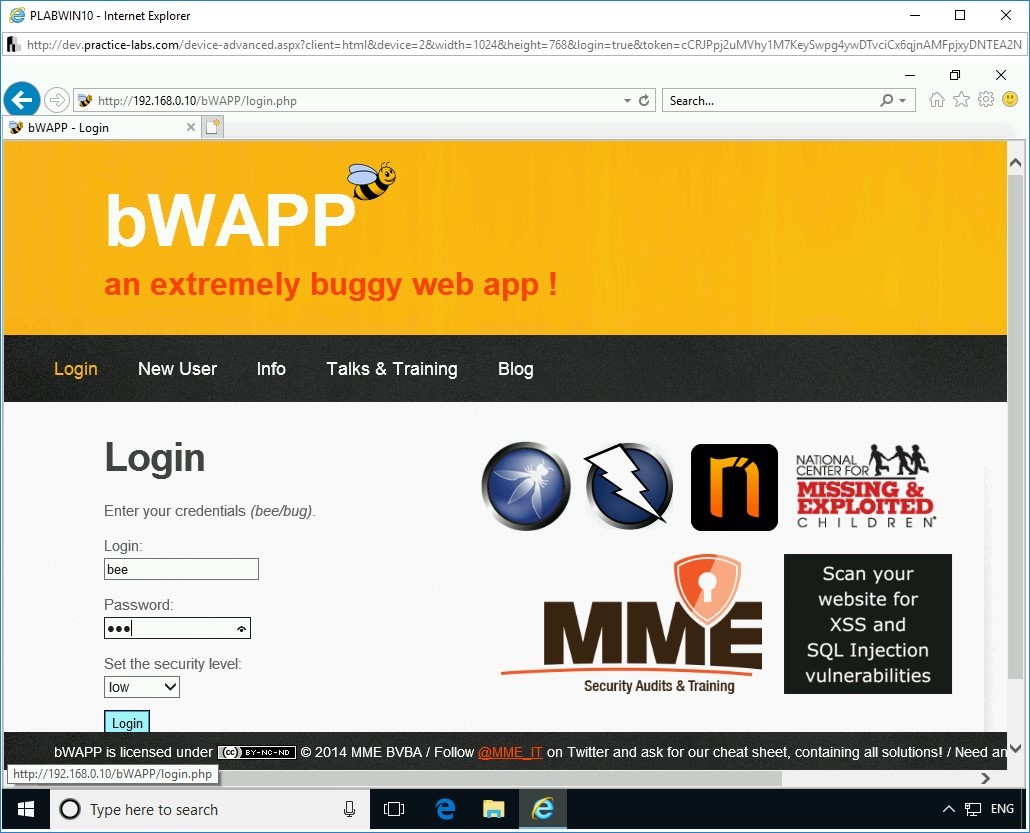
Step 4
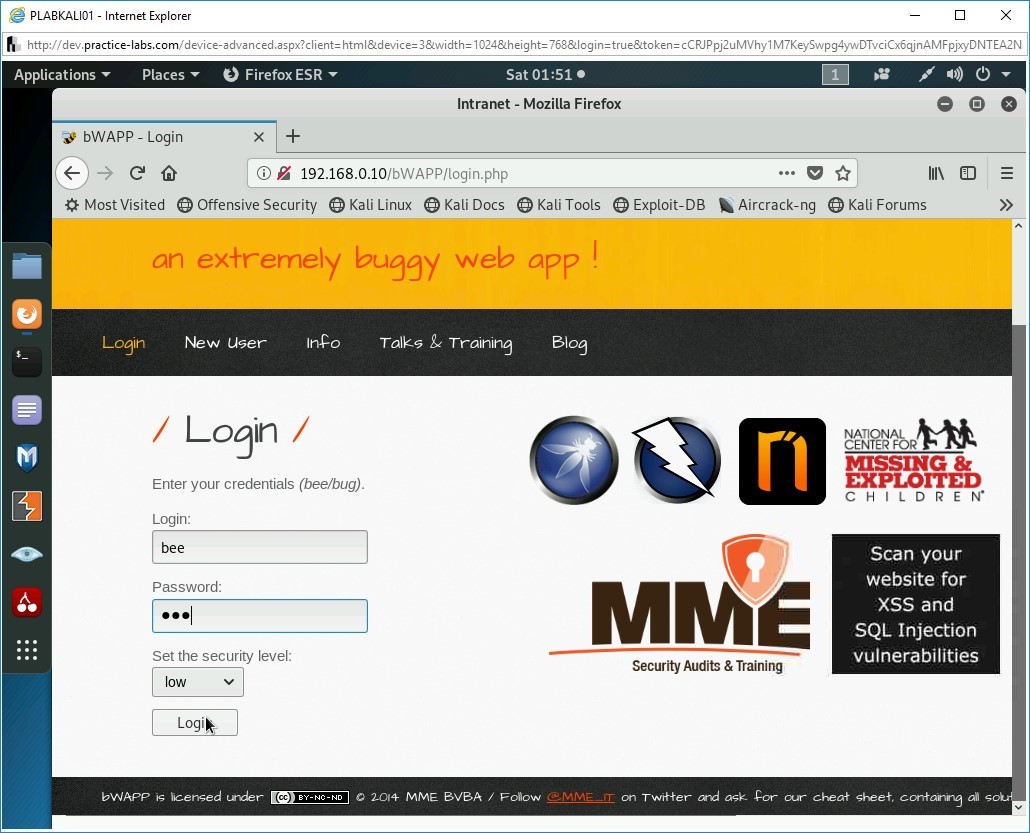
The login page of the bWAPP Web application is displayed. In the Login text box, type the following username:
bee
In the Password text box, type the following password:
bug
Click Login.
Figure 2.4 Screenshot of PLABWIN10: Entering the user credentials and clicking the Login button.
Step 5
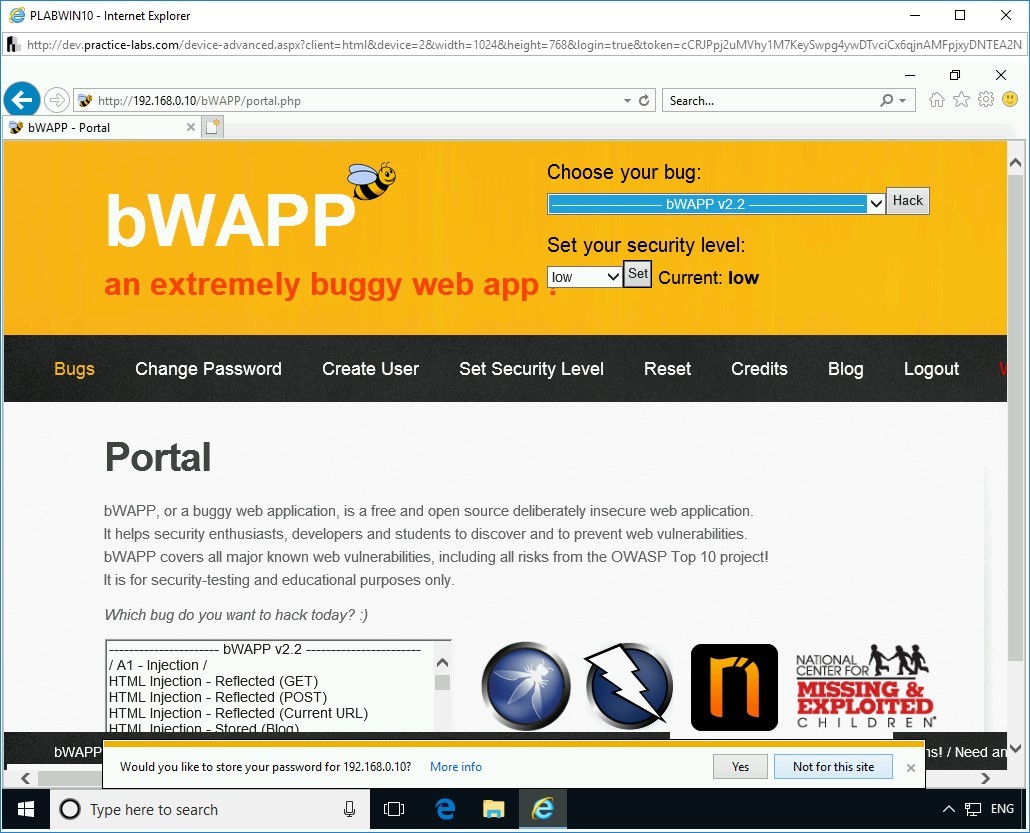
A notification bar is displayed about remembering the password. Click Not for this site.
Figure 2.5 Screenshot of PLABWIN10: Clicking the Not for this site button on the notification bar.
Step 6
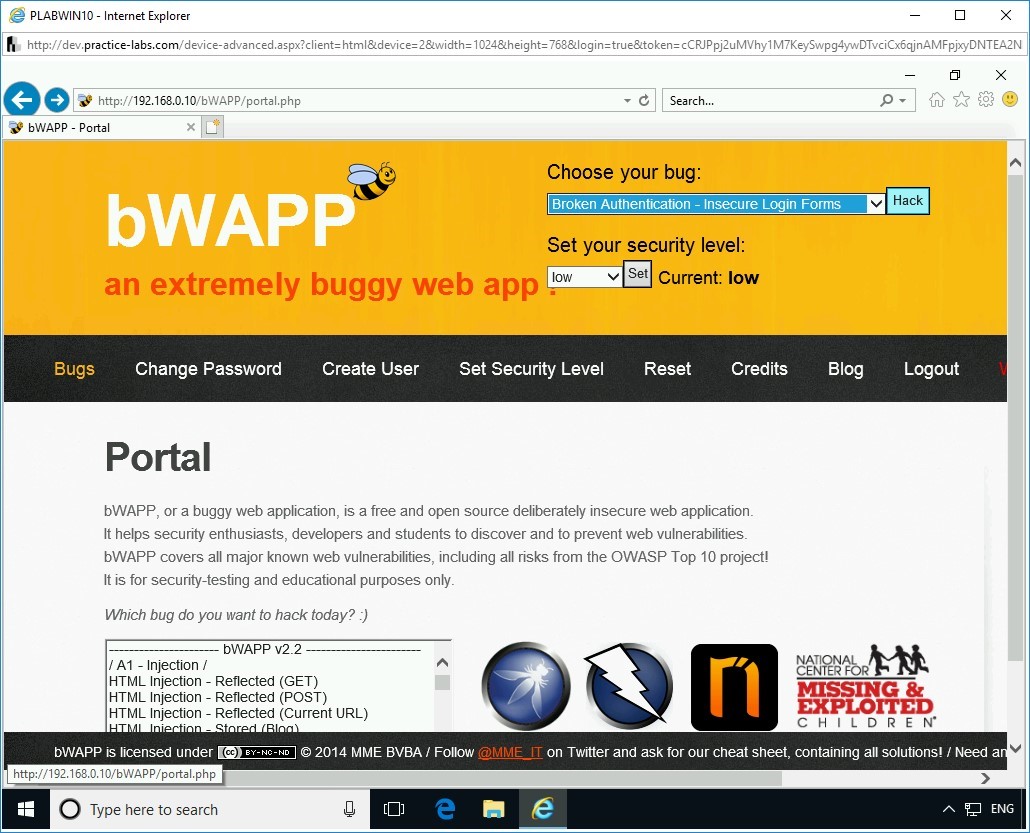
From the Choose your bug: drop-down, select Broken Authentication - Insecure Login Forms, and click Hack.
Figure 2.6 Screenshot of PLABWIN10: Selecting Broken Authentication - Insecure Login Forms and clicking Hack.
Step 7
The login page is displayed.
Figure 2.7 Screenshot of PLABWIN10: Showing the login page.
Step 8
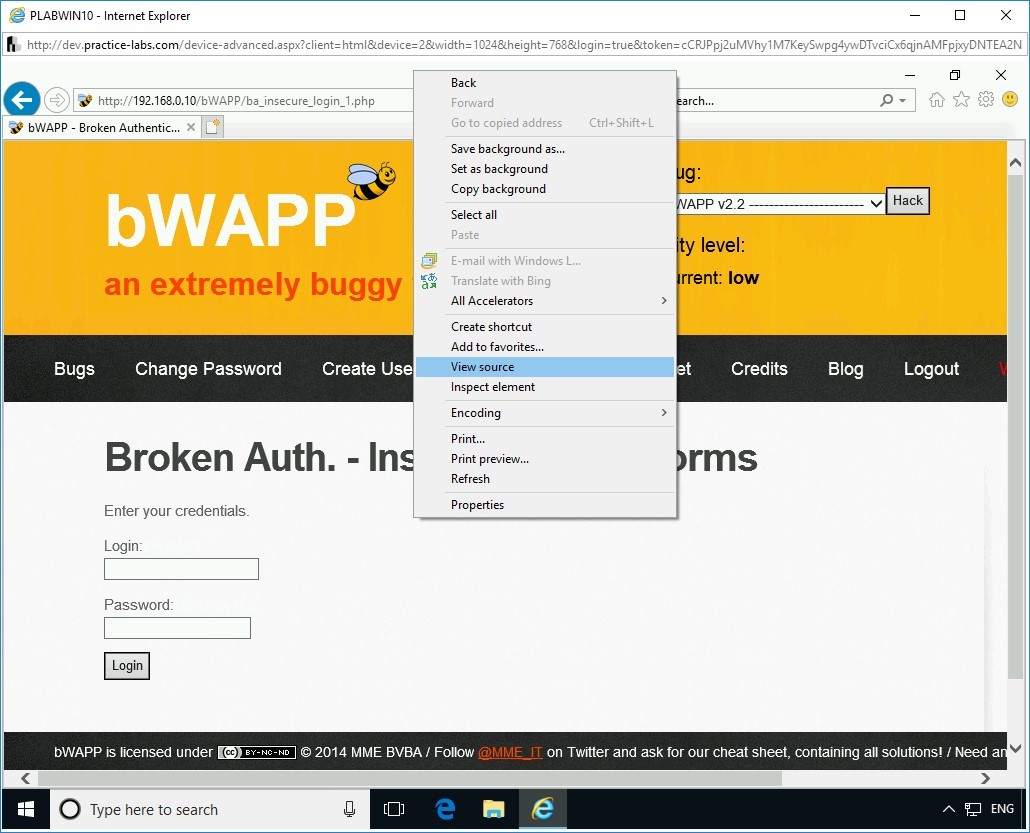
Several times, the developers hard-code the login information in the login form. It is quite easy to extract login information. To do this, right-click anywhere on the login form and select View source.
Figure 2.8 Screenshot of PLABWIN10: Right-clicking the Webpage and selecting View source.
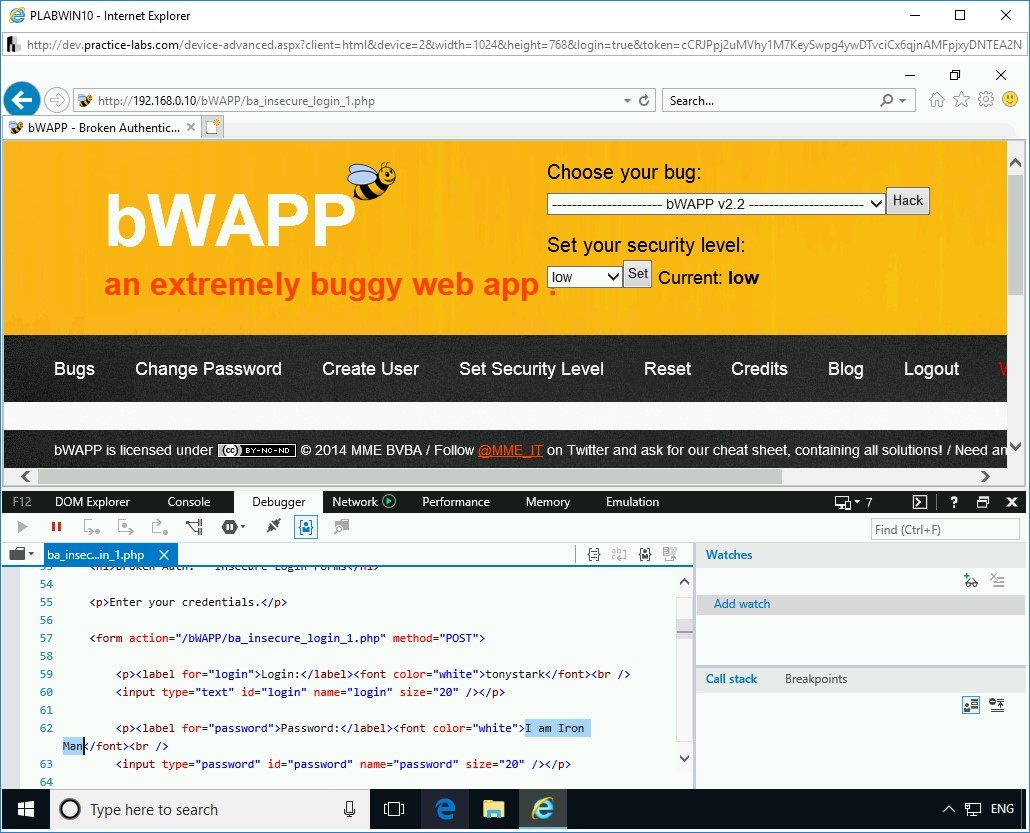
Step 9
A Debugger window opens in the bottom section of the Webpage and displays the source code for the login page. Review the code from line 59 to 63. Notice the username and password. It displays the login name as tonystark and password as I am Iron Man.
Figure 2.9 Screenshot of PLABWIN10: Showing username and password in the source.
Step 10
Close the Debugger window.
Figure 2.10 Screenshot of PLABWIN10: Showing the hard-coded password in the code.
Step 11
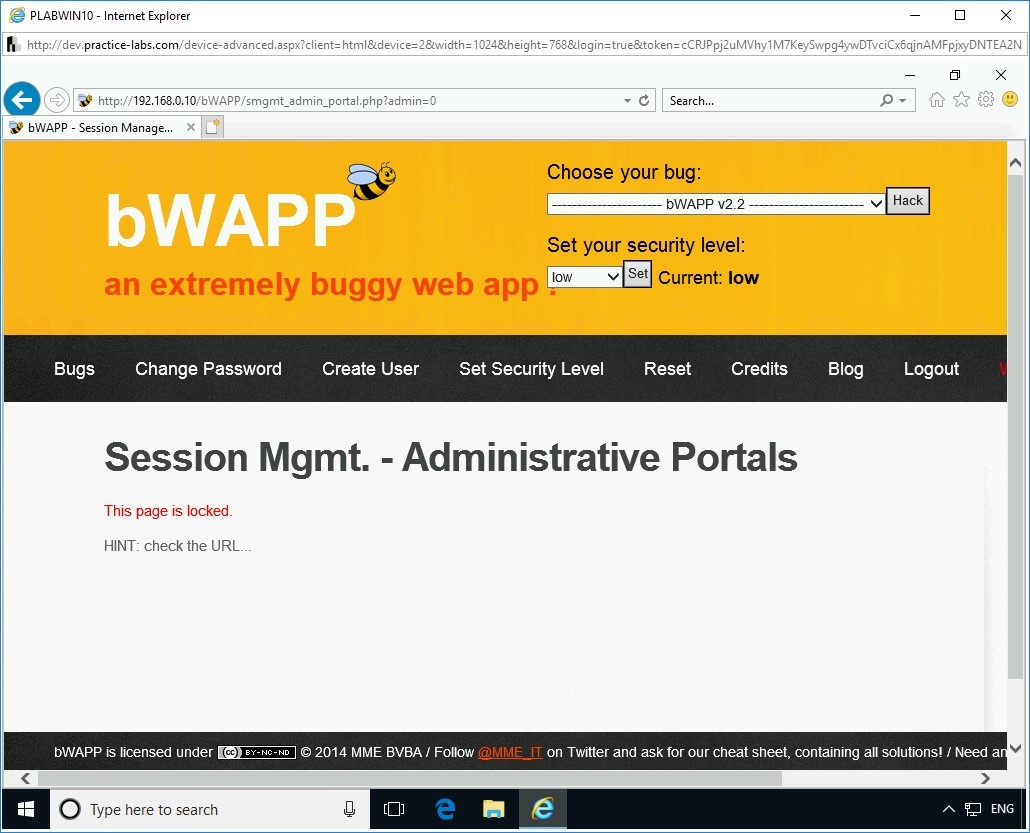
Let’s try another type of Broken Authentication. From the Choose your bug: drop-down, select Session Management - Administrative Portals, and click Hack.
Figure 2.11 Screenshot of PLABWIN10: Selecting Session Management - Administrative Portals and clicking Hack.
Step 12
The Session Mgmt. - Administrative Portals Webpage is now loaded.
Figure 2.12 Screenshot of PLABWIN10: Showing the Session Mgmt. - Administrative Portals Webpage.
Step 13
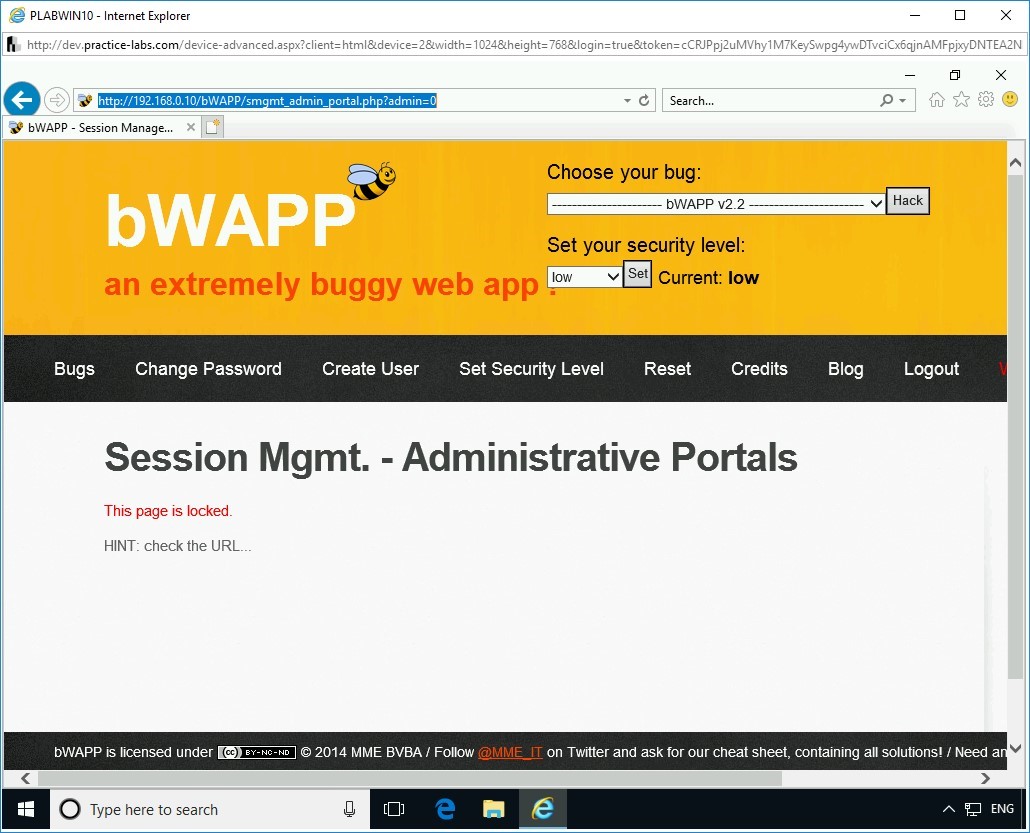
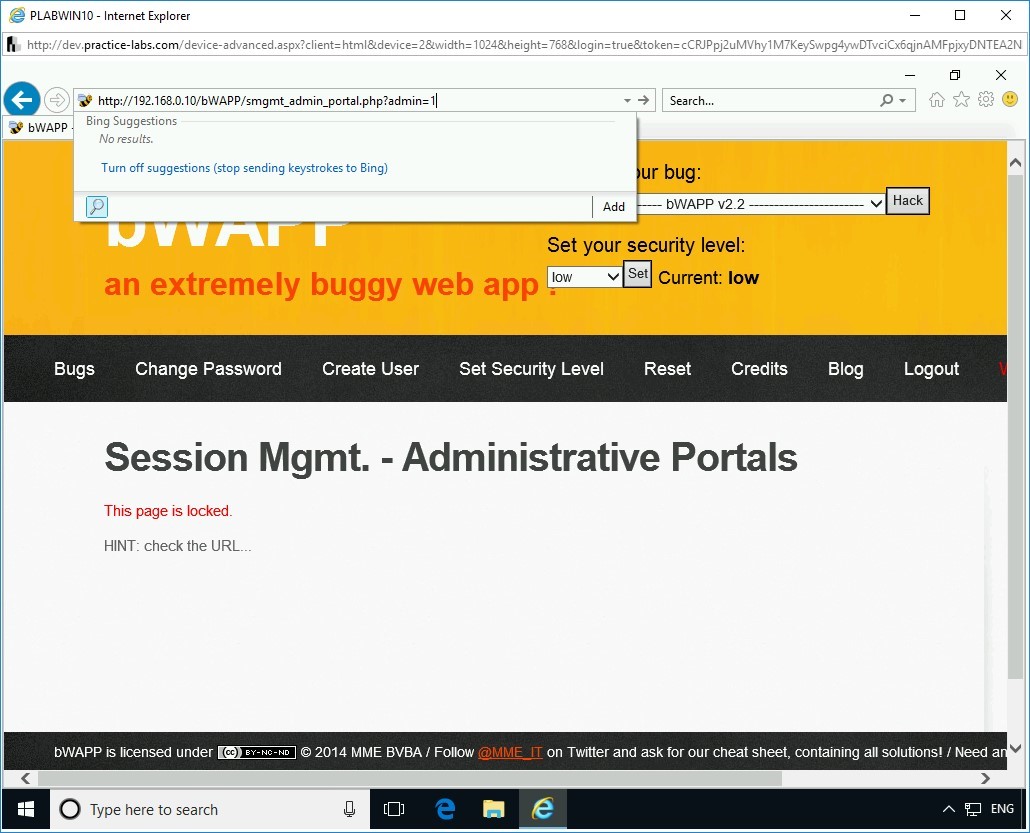
Click on the address bar and notice the last part of the URL. It is mentioning admin=0, which means that a session ID is being passed in the query string.
Figure 2.13 Screenshot of PLABWIN10: Showing the admin=0 as the session ID in the URL
Step 14
Change the admin=0 to admin=1 and press Enter.
Figure 2.14 Screenshot of PLABWIN10: Changing the session ID in the URL.
Step 15
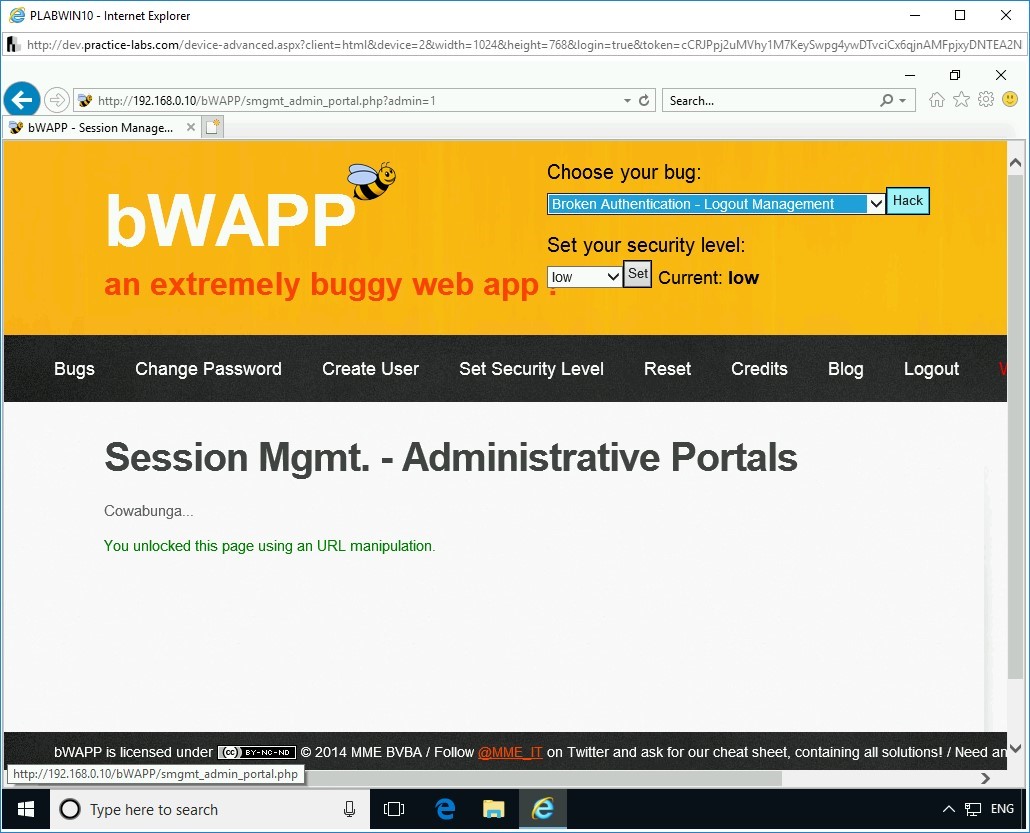
Notice the outcome of the change that you made in the URL. The Webpage now displays a message that you have unlocked the page using URL manipulation.
Figure 2.15 Screenshot of PLABWIN10: Showing the output of changing the session ID.
Step 16
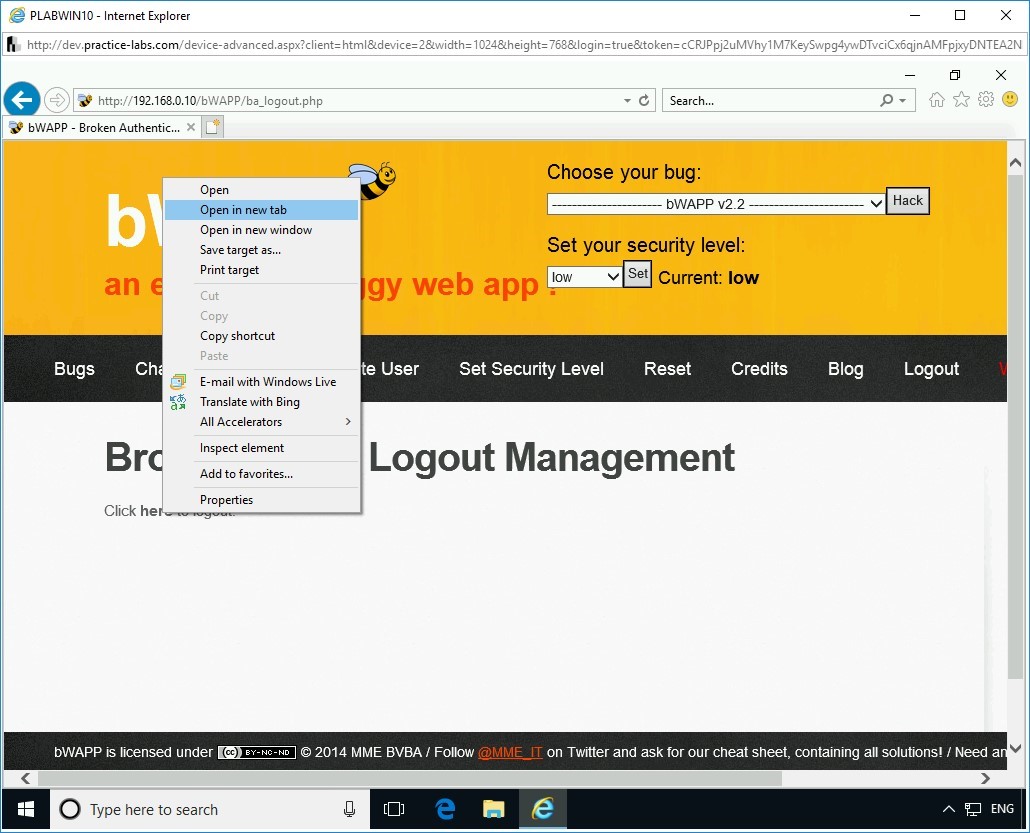
Logout management is one of the common vulnerabilities in Web applications. Even if the user logs out, the user session is still alive. One of the common methods is to click the Back button on the Web browser to get back to the same session after logging out.
Let’s perform a logout management attack on this Web application. From the Choose your bug drop-down, select Broken Authentication - Logout Management and click Hack.
Figure 2.16 Screenshot of PLABWIN10: Selecting Broken Authentication - Logout Management and clicking Hack.
Step 17
The Broken Auth - Logout Management Webpage is loaded. Right-click the here in the Click here to logout statement and select Open in new tab.
Figure 2.17 Screenshot of PLABWIN10: Opening a new tab by right-clicking here in the logout statement.
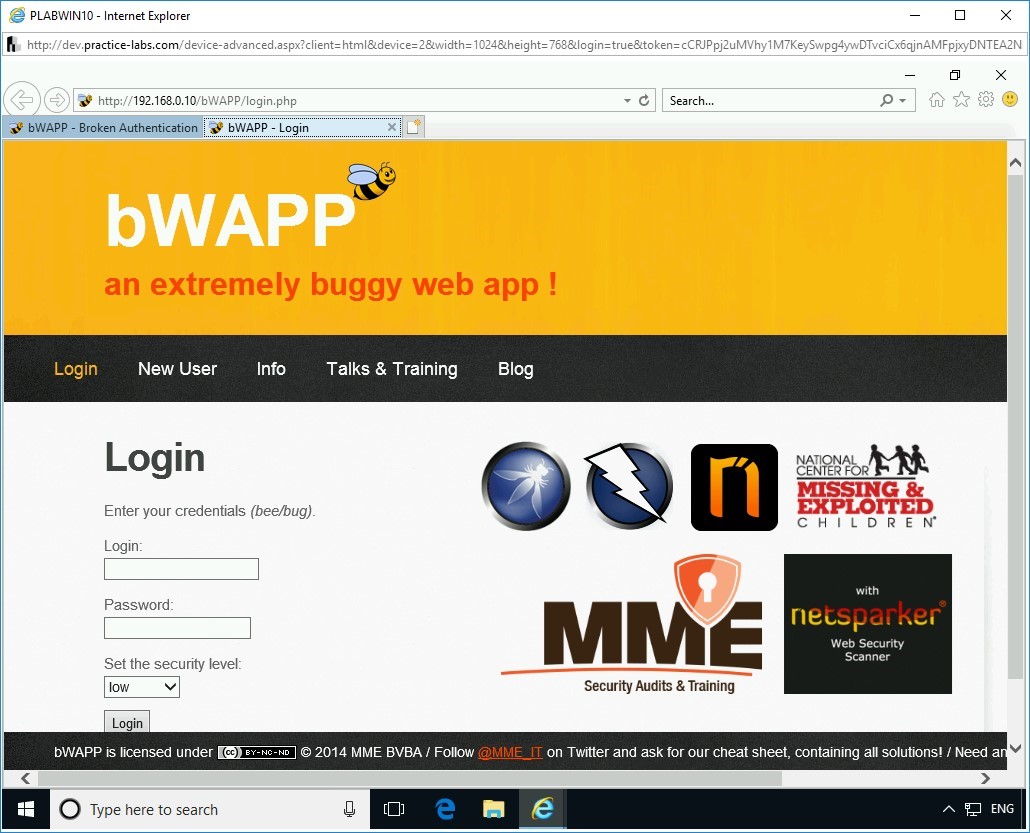
Step 18
The bWAPP - Login tab opens. Click the bWAPP - Login tab. Notice that you are logged out successfully. Close this tab.
Figure 2.18 Screenshot of PLABWIN10: Showing the Login page on the second tab.
Step 19
Notice that you are back on the first original tab. You are still logged in this tab.
Click Bugs.
Figure 2.19 Screenshot of PLABWIN10: Clicking Bugs in the menu bar on the first tab.
Step 20
The Portal Webpage is loaded successfully. This means that you were still able to work within the Web application.
Figure 2.20 Screenshot of PLABWIN10: Showing the Portal Webpage.
Keep the Internet Explorer window open.
Task 2 - View Session ID in URL
One other major vulnerability with the Web application is using the session IDs in the URL. If a session ID is sent in the URL, an attacker can grab the current session, specifically if the session ID is sent in cleartext. The attacker can eavesdrop on the session and capture the current session to impersonate the user. The session ID should be sent to the Web server in the body part of the request. An encrypted connection must be used for sending the request so that it cannot be intercepted by the attacker. In this task, you will learn to view the session ID in a URL. To perform this task, perform the following steps:
Step 1
Ensure you have powered on all the devices listed in the introduction and connect to PLABWIN10. The Internet Explorer window should be open with the bWAPP Web application loaded.
Note: If, for some reason, you had closed the Internet Explorer window or logged out of the current session, ensure that you log back into the bWAPP Web application.
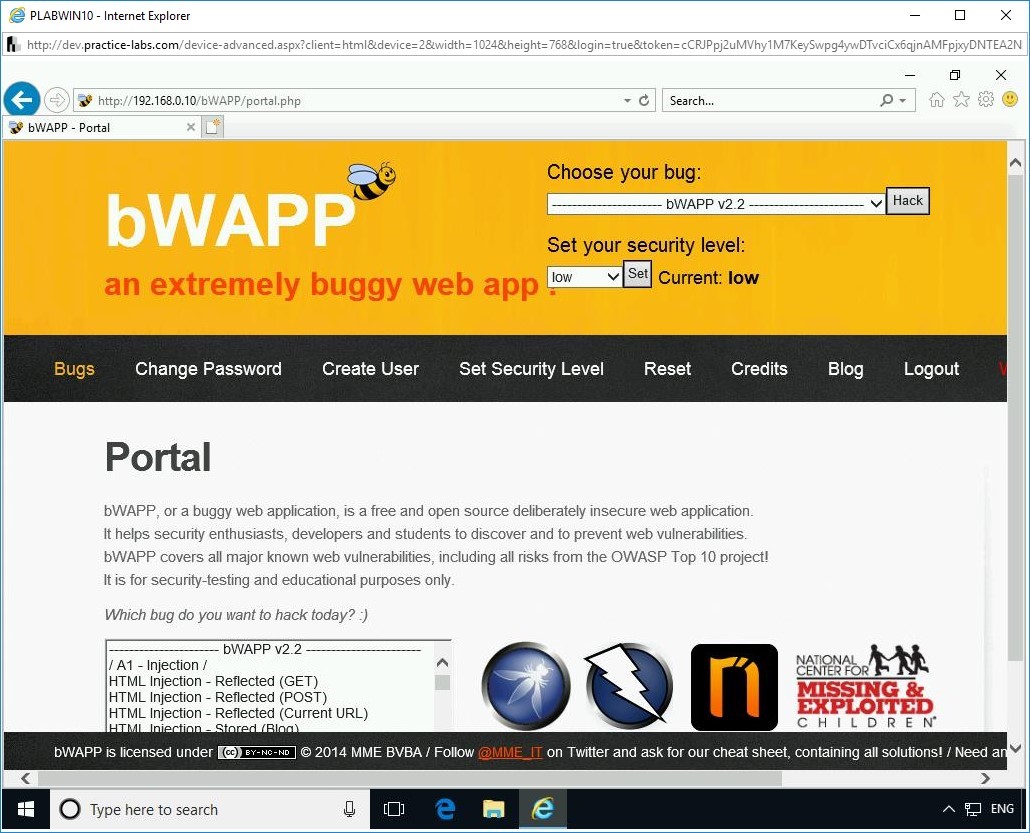
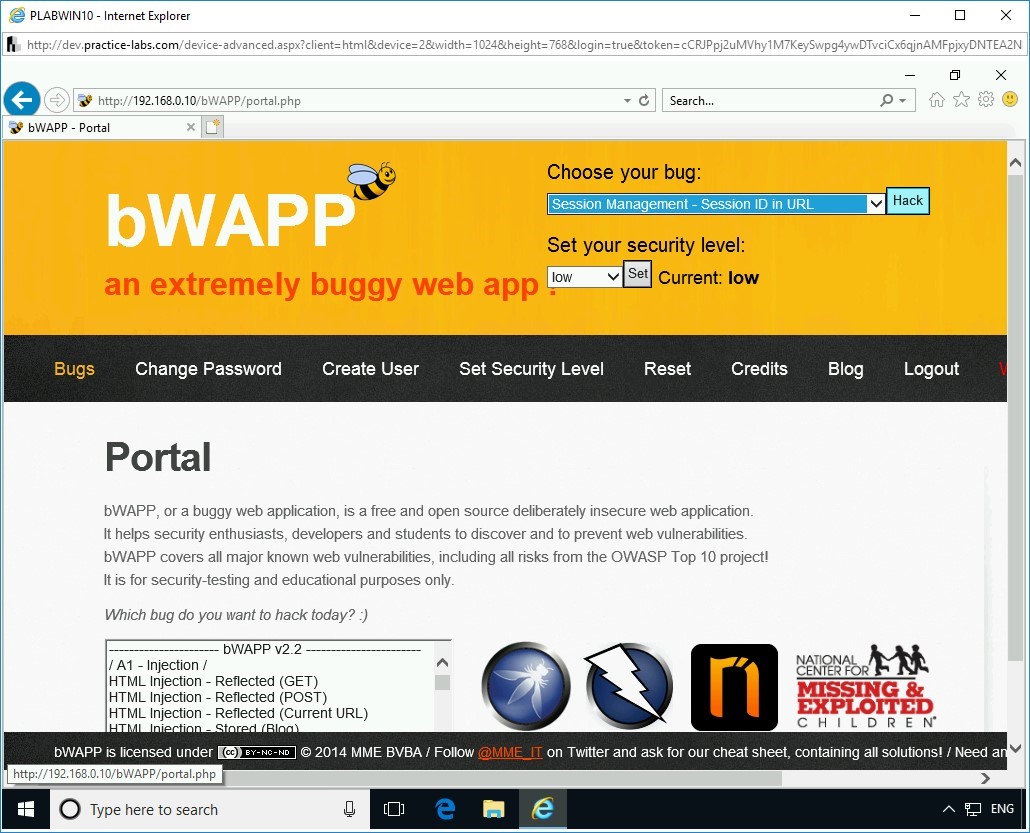
From the Choose your bug drop-down, select Session Management - Session ID in URL and click Hack.
Figure 2.21 Screenshot of PLABWIN10: Selecting Session Management - Session ID in URL and clicking Hack.
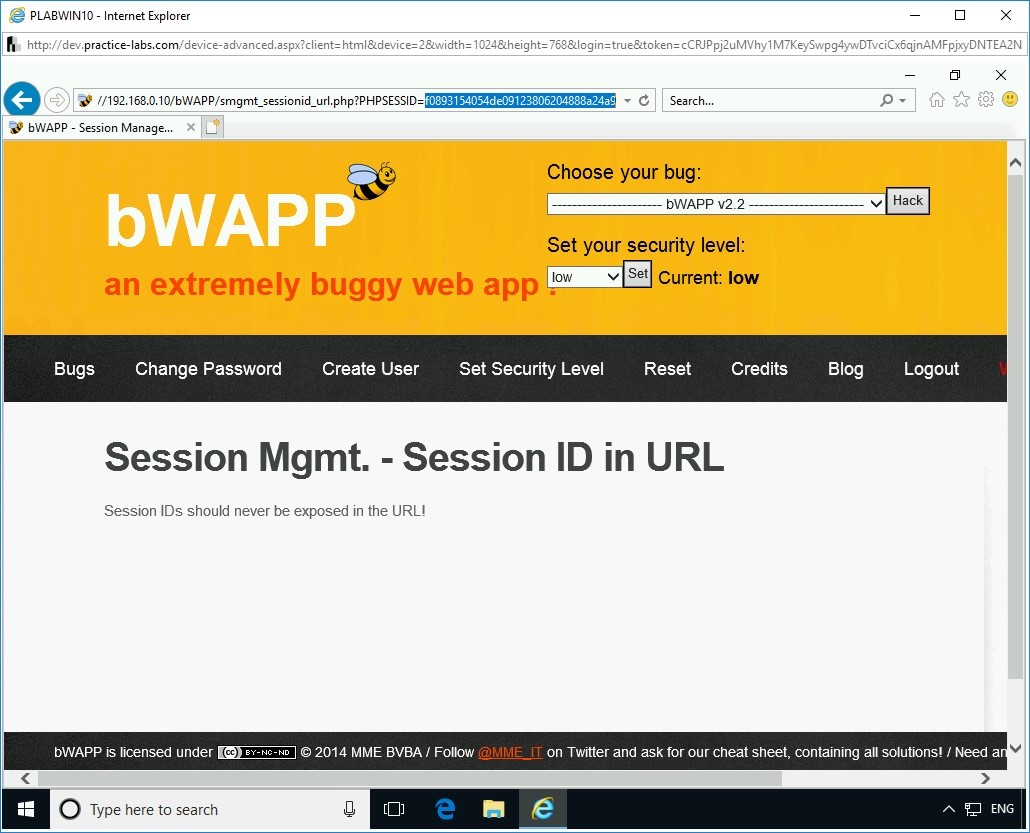
Step 2
The Session Mgmt. - Session ID in URL Webpage is loaded. Pay attention to the last part of the URL - there is a session ID, which is in cleartext. This could lead to an eavesdropping attack by the attacker.
Figure 2.22 Screenshot of PLABWIN10: Showing the session ID in the URL.Keep the Internet Explorer window open.
Task 3 - Conduct OS Command Injection Attack
Command injection is a type of attack in which the attacker executes arbitrary commands through a vulnerable application to the host operating system. When an application allows the unsafe user-supplied data, such as forms, cookies, HTTP headers, to be passed to the host system, the attacker can take advantage of this vulnerability to gain access to the underlying host system. Command injection attacks take place because input fields accept arbitrary data without sufficient input validation.
In this task, you will learn to conduct an OS command injection attack. To do this, perform the following step:
Step 1
Ensure you have powered on all the devices listed in the introduction and connect to PLABWIN10. The Internet Explorer window should be open.
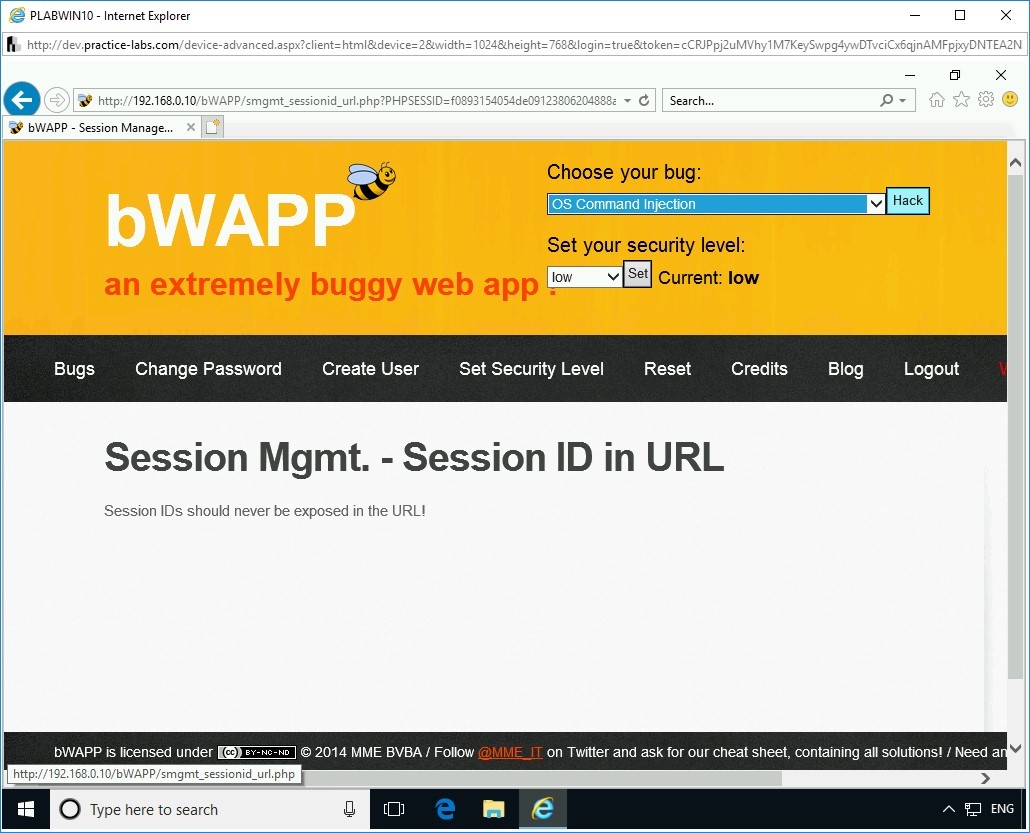
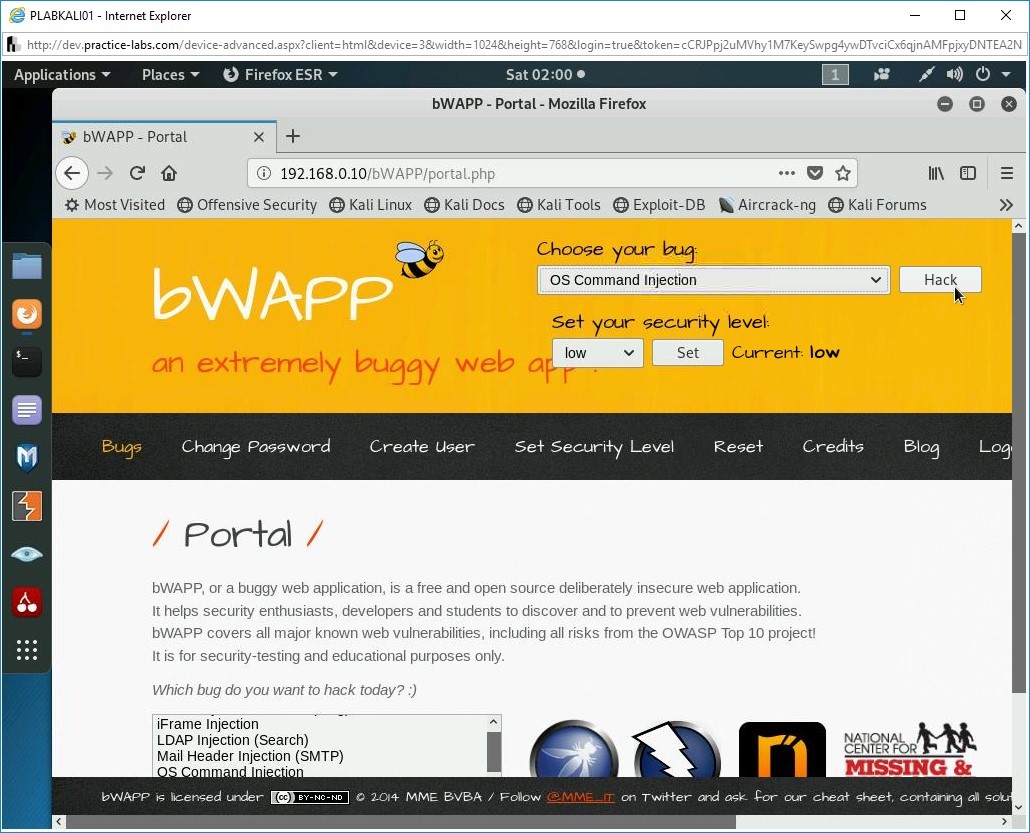
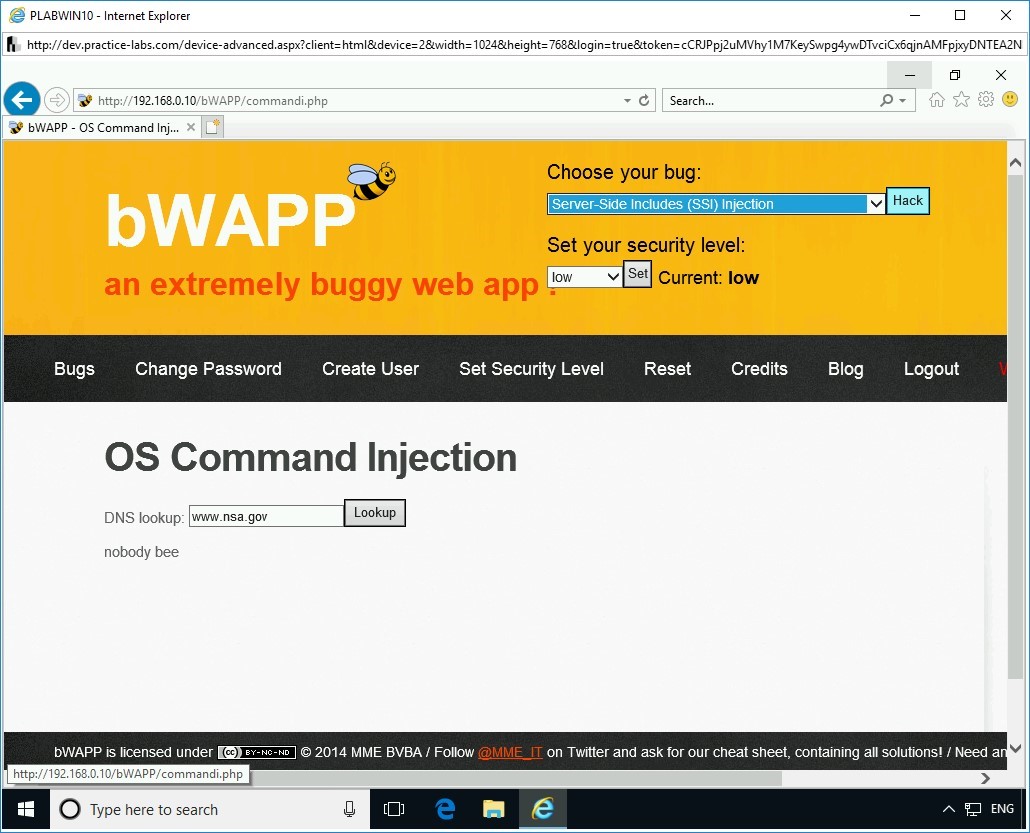
From the Choose your bug drop-down, select OS Command Injection and click Hack.
Figure 2.23 Screenshot of PLABWIN10: Selecting OS Command Injection and clicking Hack.
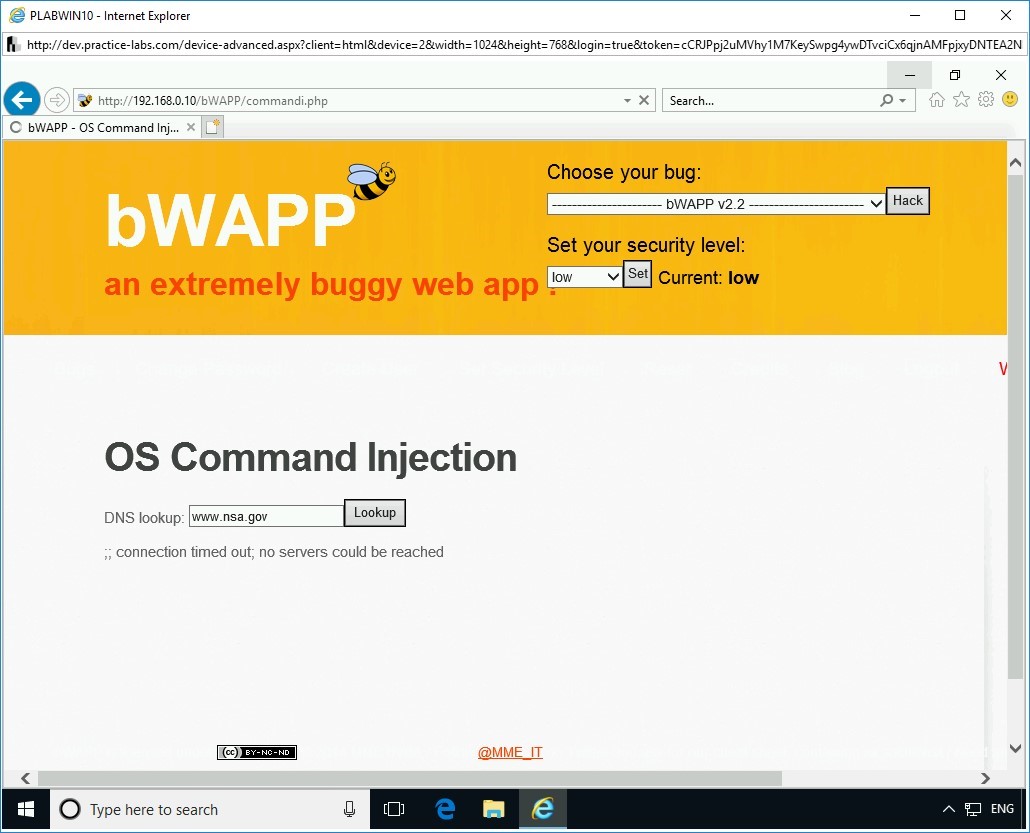
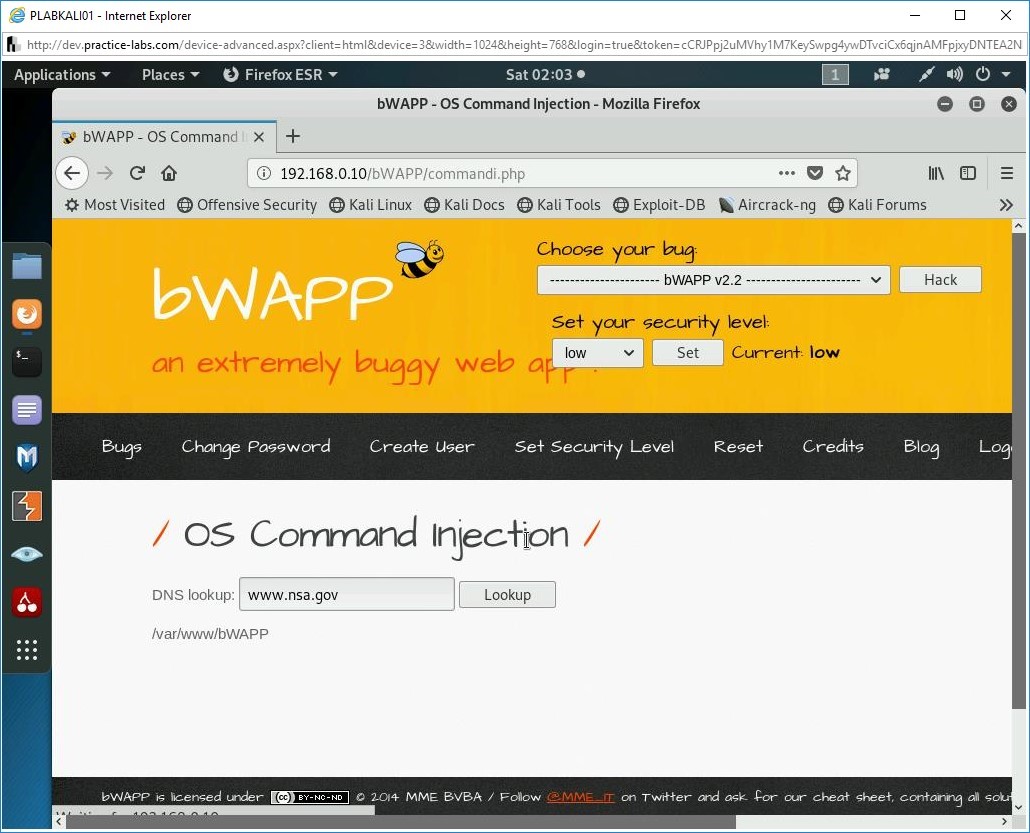
Step 2
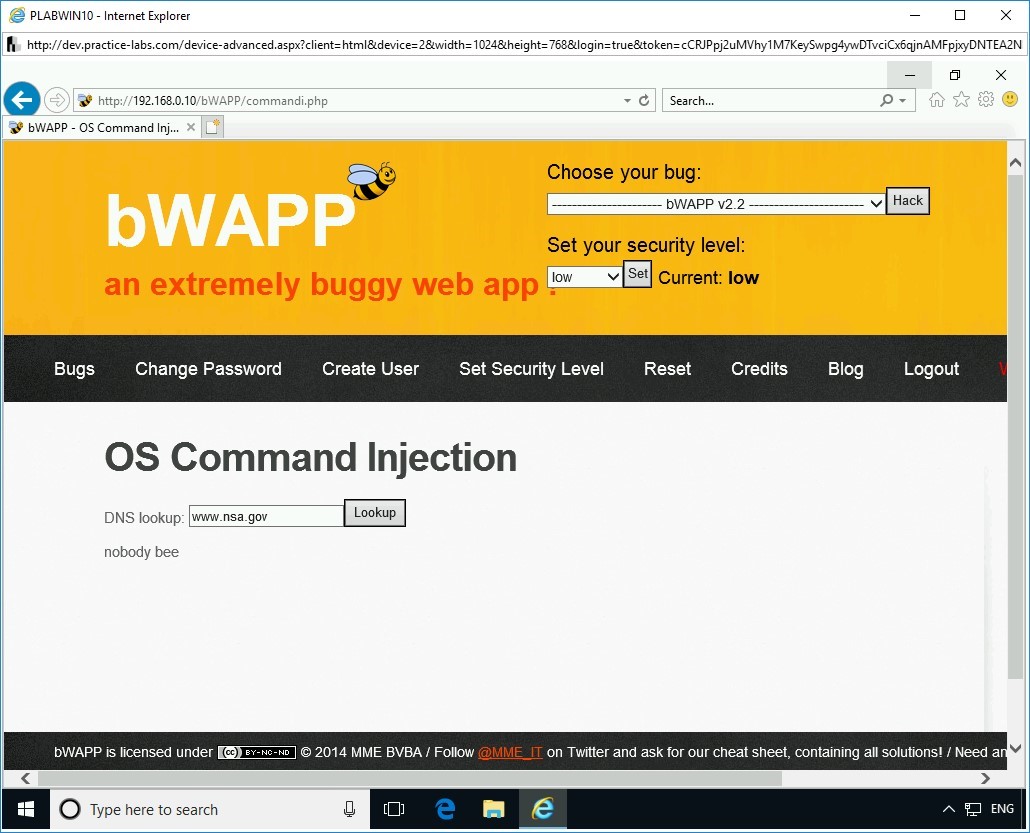
The OS Command Injection Webpage is displayed. Notice that in the DNS Lookup text box, the following text is entered by default:
www.nsa.gov
Click Lookup.
Figure 2.24 Screenshot of PLABWIN10: Clicking Lookup on the OS Command Injection Webpage.
Step 3
Notice the output. The firewall blocks the DNS query to go out of the lab environment, and therefore, you get a connection timed out error.
Figure 2.25 Screenshot of PLABWIN10: Showing the error as the output of Lookup.
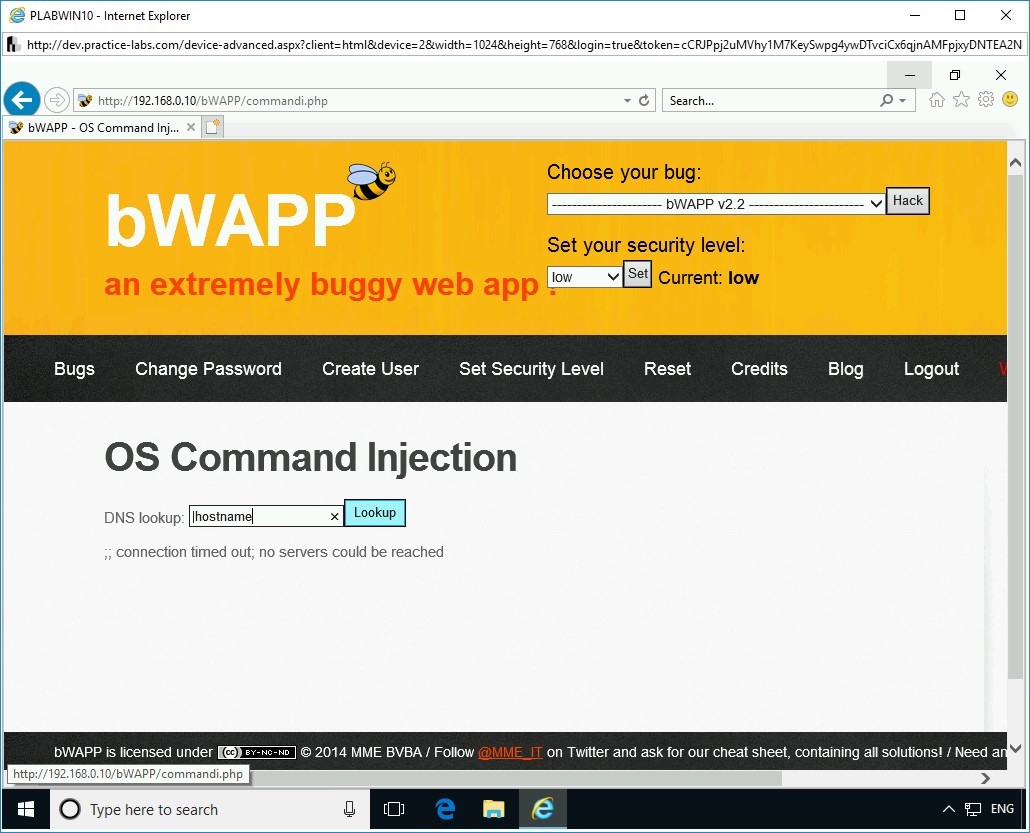
Step 4
Replace the existing text in the DNS lookup text box and type the following:
|hostname
Click Lookup.
Figure 2.26 Screenshot of PLABWIN10: Entering |hostname and clicking Lookup.
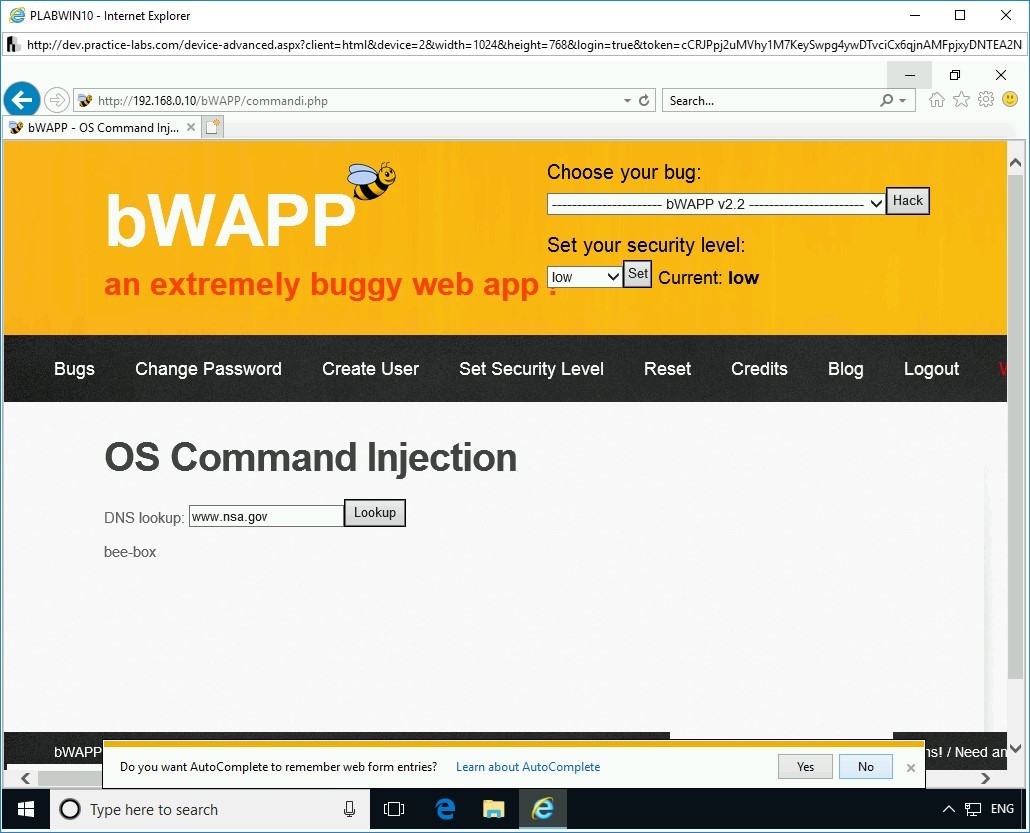
Step 5
The output is now displayed.
In the notification bar regarding AutoComplete to remember Web entries, click No.
Figure 2.27 Screenshot of PLABWIN10: Showing the output of the |hostname command.
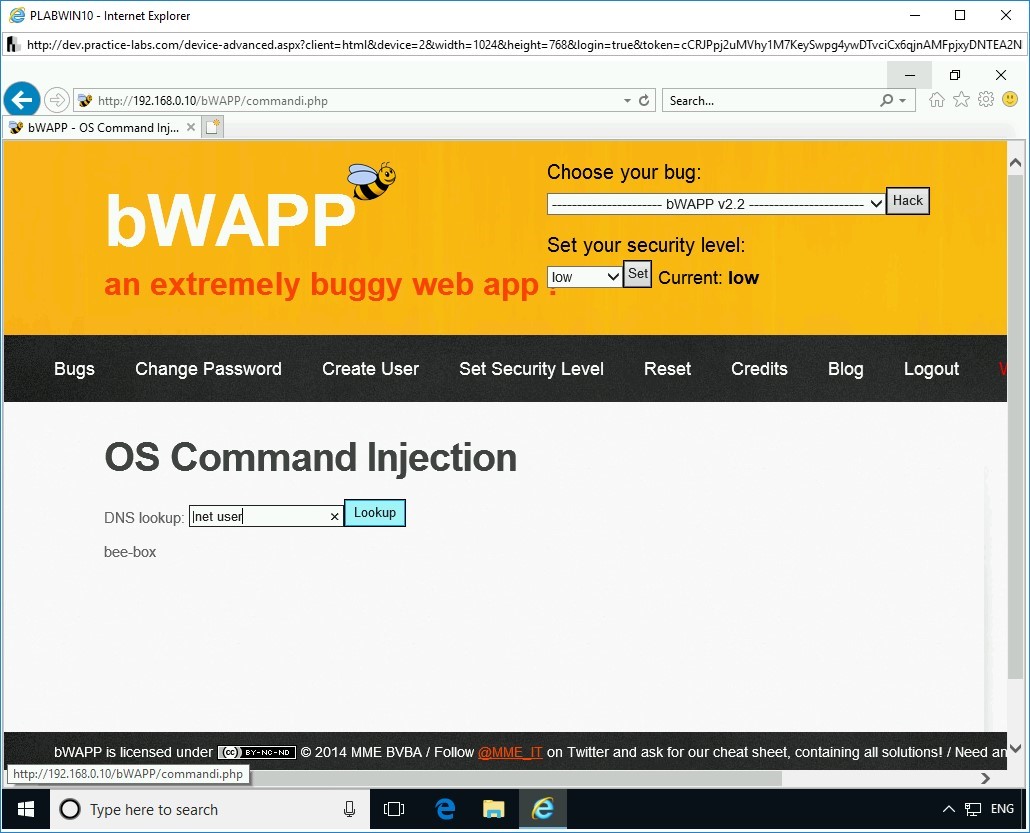
Step 6
Replace the existing text in the DNS lookup text box and type the following:
|net user
Click Lookup.
Figure 2.28 Screenshot of PLABWIN10: Entering |net user and clicking Lookup.
Step 7
The output is now displayed. There are two users, nobody, and bee.
Figure 2.29 Screenshot of PLABWIN10: Showing the output of the |net user command.
Step 8
Switch to PLABKALI01. Invoke Firefox from the left pane and load the following Website:
http://192.168.0.10/bWAPP
On the Login Webpage, use the following credentials:
Login:
bee
Password:
bug
Click Login.
Note: If you get a prompt to save credentials, click Don’t Save.Figure 2.30 Screenshot of PLABKALI01: Entering the user credentials of the Login page.
Step 9
From the Choose your bug drop-down, select OS Command Injection and click Hack.
Figure 2.31 Screenshot of PLABKALI01: Selecting OS Command Injection and clicking Hack.
Step 10
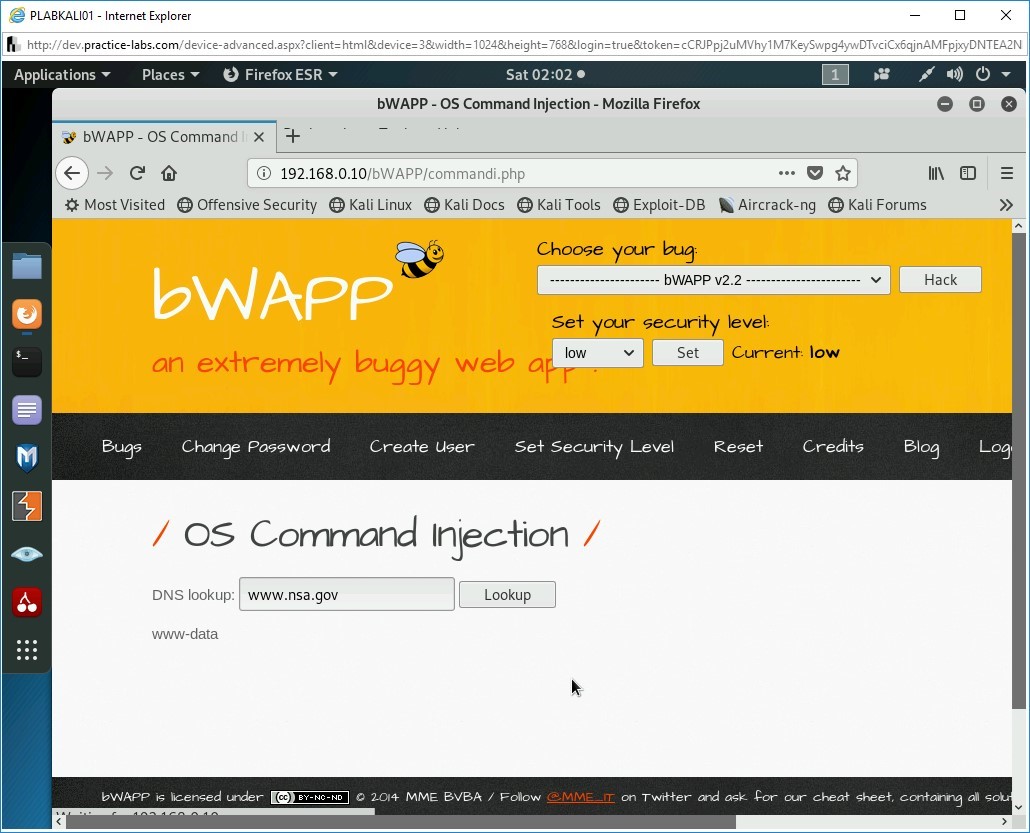
The OS Command Injection Webpage is now loaded.
Replace the existing text in the DNS lookup text box and type the following:
|whoami
Click Lookup.
Figure 2.32 Screenshot of PLABKALI01: Entering |whoami and clicking Lookup.
Step 11
The output of the command is displayed.
Figure 2.33 Screenshot of PLABKALI01: Showing the output of |whoami.
Step 12
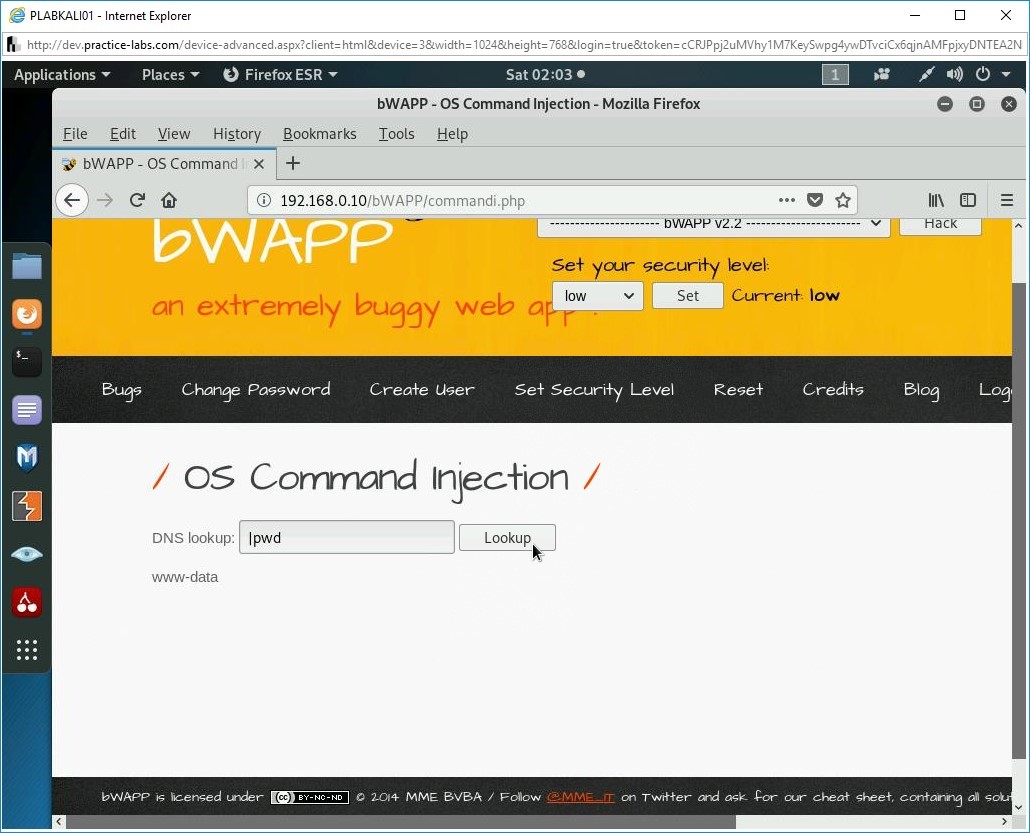
Replace the existing text in the DNS lookup text box and type the following:
|pwd
Click Lookup.
Figure 2.34 Screenshot of PLABKALI01: Entering |pwd and clicking Lookup.
Step 13
The output of the command is displayed. It displays the directory for the current Web application.
Figure 2.35 Screenshot of PLABKALI01: Showing the output of |pwd
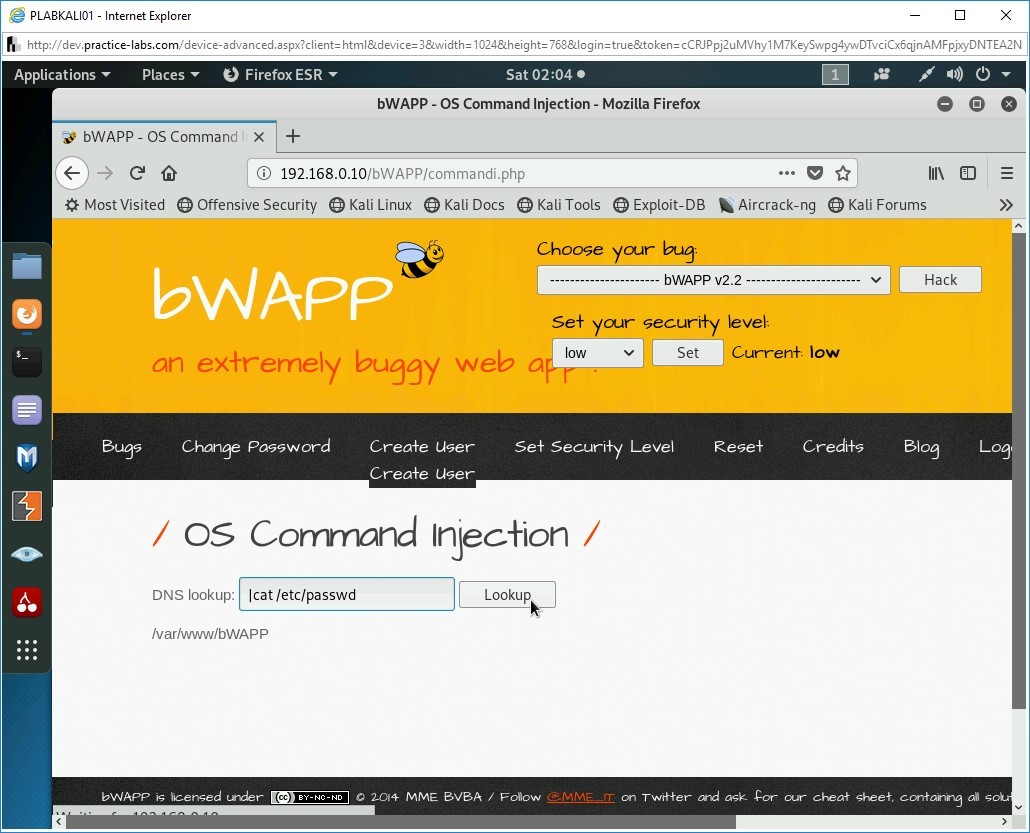
Step 14
You can also read the contents of a file using the command injection attack. Replace the existing text in the DNS lookup text box and type the following:
|cat /etc/passwd
Click Lookup.
Figure 2.36 Screenshot of PLABKALI01: Entering |cat /etc/passwd and clicking Lookup.
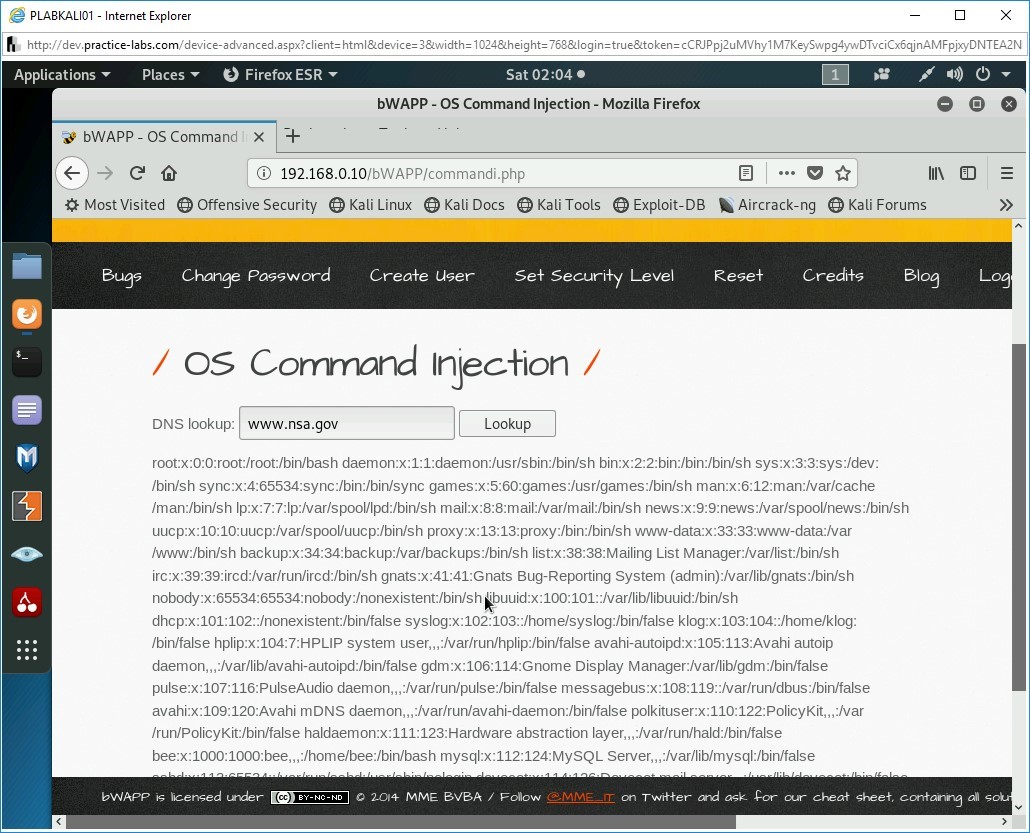
Step 15
Notice the output is displayed. The contents of the /etc/passwd file are displayed.
Figure 2.37 Screenshot of PLABKALI01: Showing the output of the |cat /etc/passwd
Task 4 - Perform Server-side Includes Injection Attack (SSI)
SSI directives are used in Web applications to provide dynamic content to the HTML pages. SSIs execute a set of defined actions before the Webpage is loaded. Therefore, the Web server, which hosts the Web application, analyses the SSI before the HTML page is loaded in the user’s Web browser. The SSIs are mainly injected into the fields that accept inputs. When the field input is submitted, the script, which was added to the input field, is executed. In an SSI attack, the attacker injects malicious scripts into the HTML pages. By injecting the scripts, the attacker can gain access to sensitive information or even execute shell commands. The SSI directives are injected in input fields, and they are sent to the Webserver.
To perform an SSI attack, perform the following steps:
Step 1
Ensure you have powered on all the devices listed in the introduction and connect to PLABWIN10. The Internet Explorer window should be open.
From the Choose your bug drop-down, select Server-side Includes (SSI) Injection and click Hack.
Figure 2.38 Screenshot of PLABWIN10: Selecting Server-side Includes (SSI) Injection and clicking Hack.
Step 2
The Server-Side Includes (SSI) Injection Webpage is loaded. In the First name text box, type the following:
plab
In the Last name text box, type the following:
user
Click Lookup.
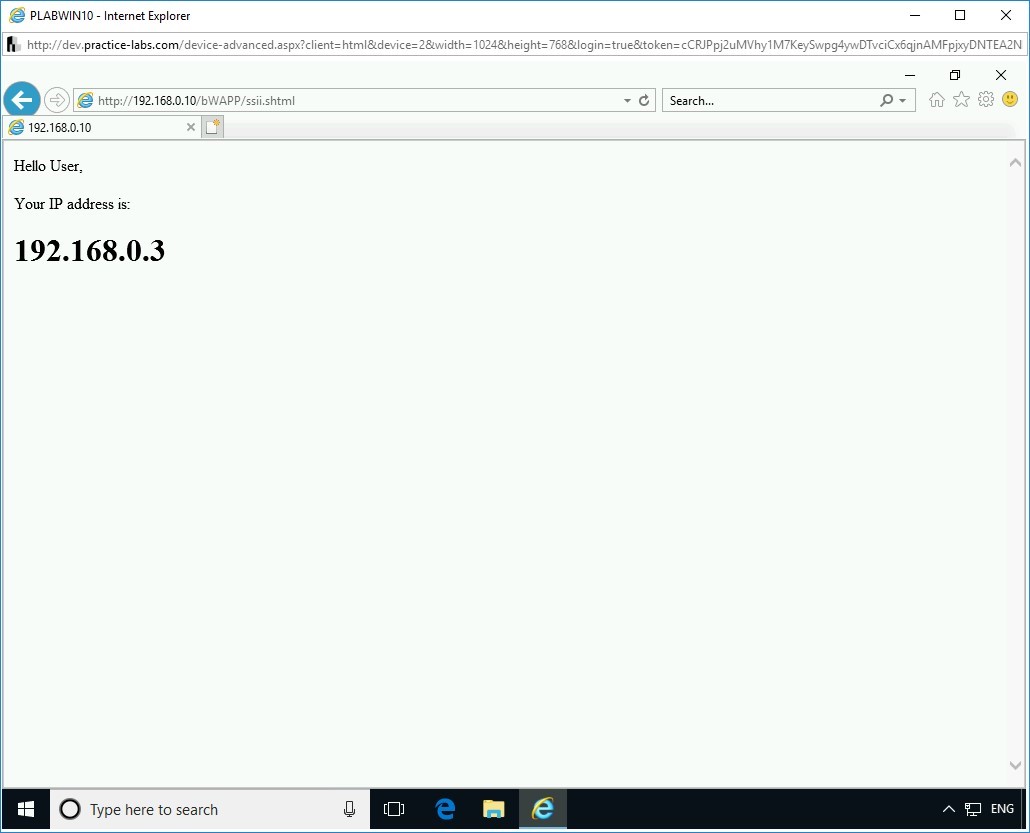
Figure 2.39 Screenshot of PLABWIN10: Entering the user credentials on Server-Side Includes (SSI) Injection page.
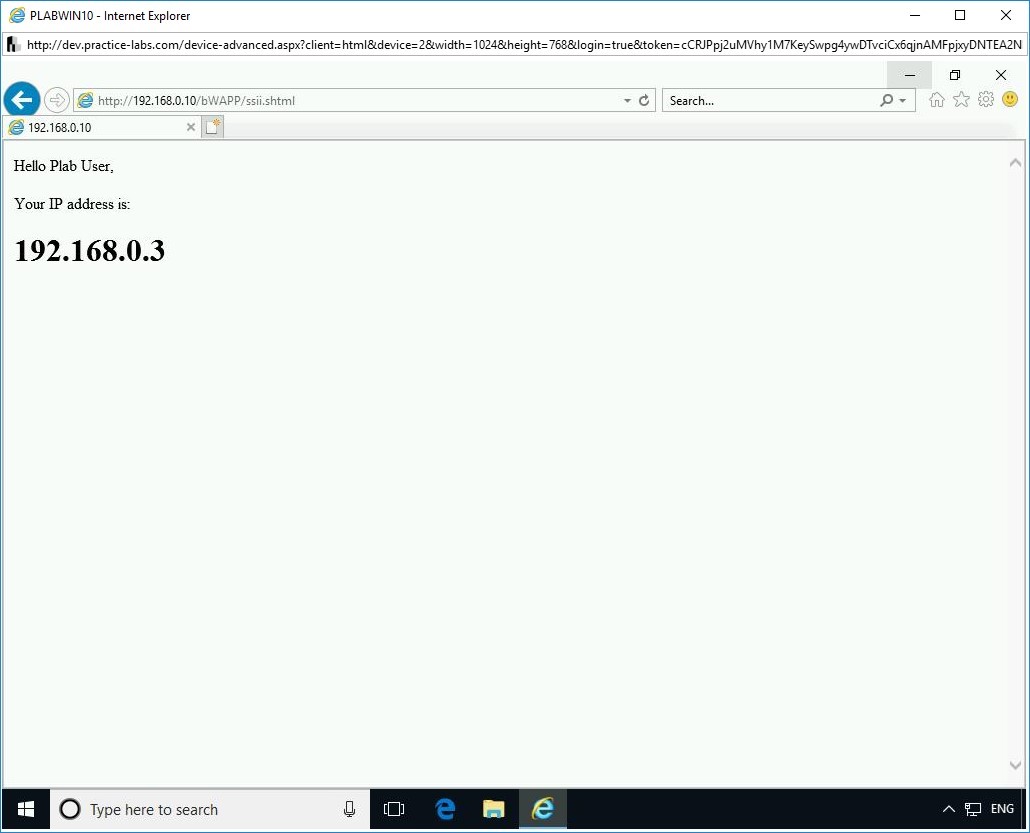
Step 3
Notice that the output is displayed with an IPv4 address.
Figure 2.40 Screenshot of PLABWIN10: Showing the output and clicking the Back button.
Step 4
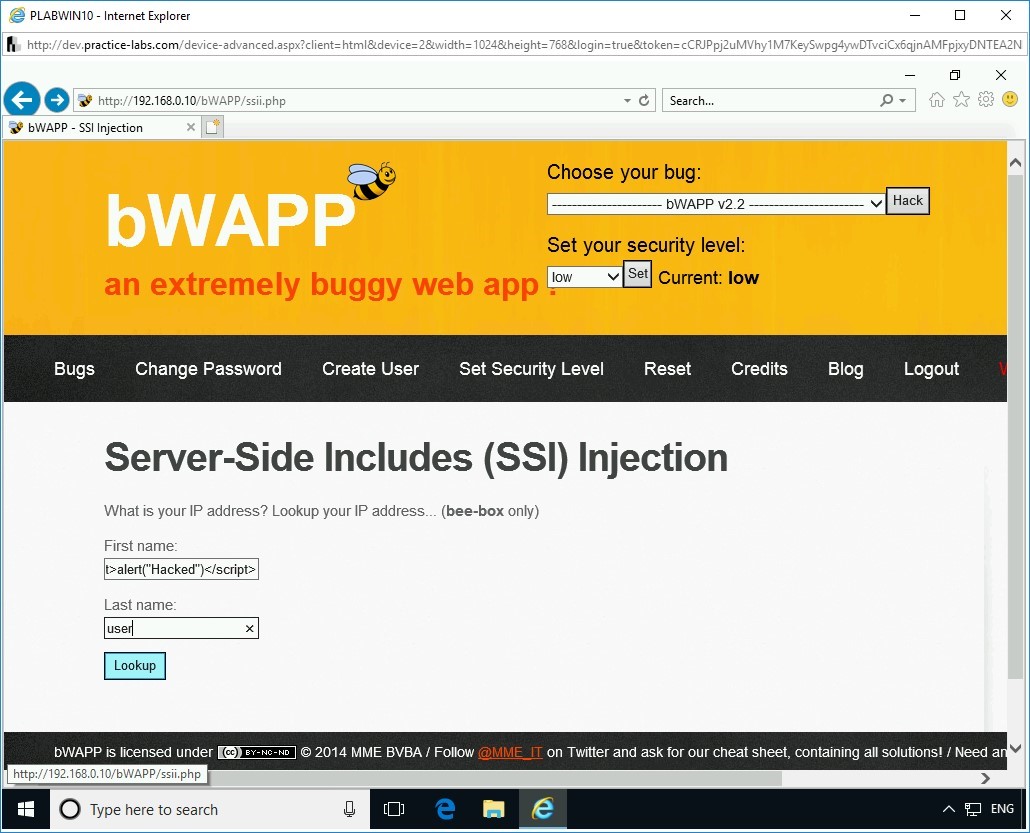
Click the Back arrow to navigate back to the previous page.
Back on the Server-Side Includes (SSI) Injection Webpage, you need to insert the following into the First name text box:
<script>alert("Hacked")</script>
In the Last name text box, type the following:
user
Click Lookup.
Figure 2.41 Screenshot of PLABWIN10: Entering a script in the First name field and user in the Last name field.
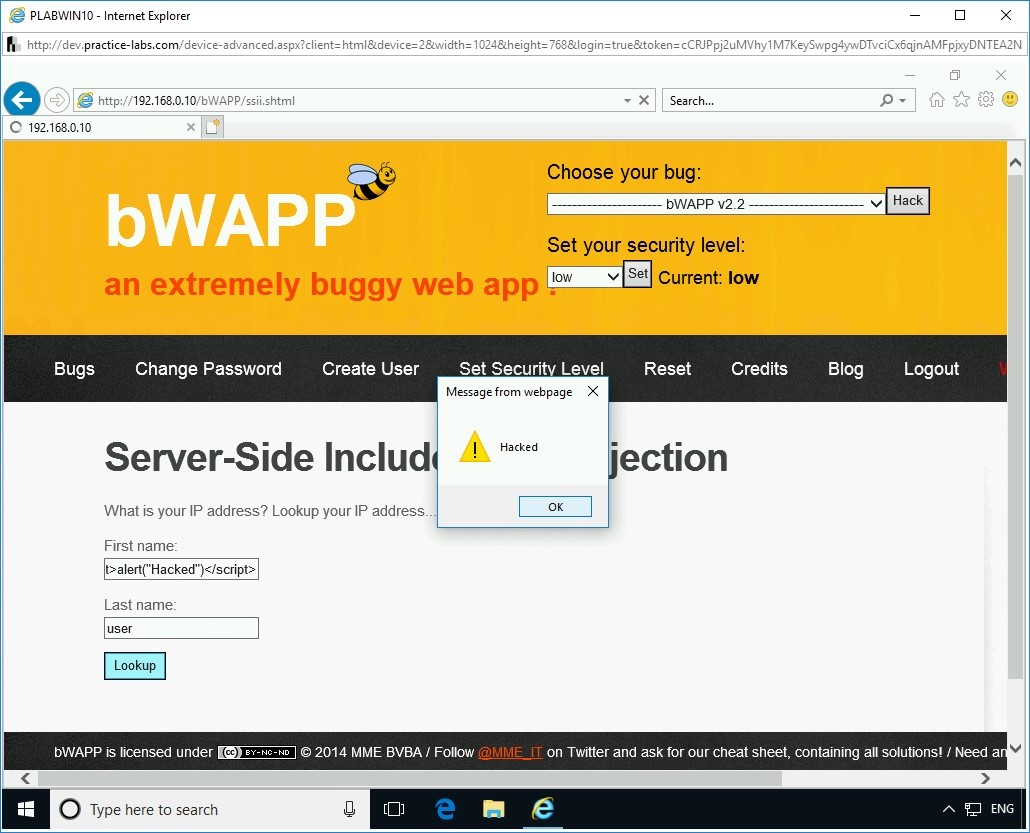
Step 5
Notice the output. The script embedded in the First name text box has been executed successfully.
Click OK.
Figure 2.42 Screenshot of PLABWIN10: Showing the output of the entered script as prompt.
Step 6
Again, the text on the Webpage is changed to the IPv4 address. Click the Back button on the Web browser.
Figure 2.43 Screenshot of PLABWIN10: Showing the output and clicking the Back button.
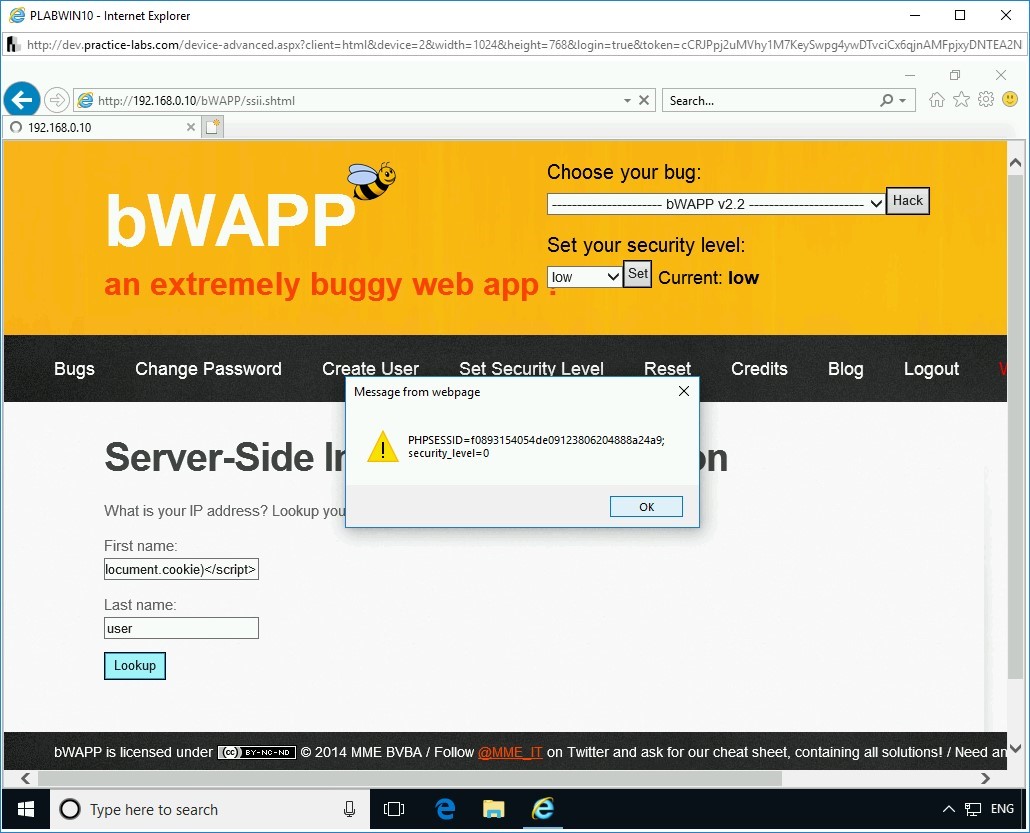
Step 7
Back on the Server-Side Includes (SSI) Injection Webpage, you can also fetch the cookie from the Web server. you need to insert the following into the First name text box:
<script>alert(document.cookie)</script>
In the Last name text box, type the following:
user
Click Lookup.
Figure 2.44 Screenshot of PLABWIN10: Fetching the cookie from the Web server by using a script in the First name text box.
Step 8
Notice the output. The script embedded in the First name text box has been executed successfully. The cookie is being displayed in the dialog box. Click OK.
Figure 2.45 Screenshot of PLABWIN10: Showing the cookie in the dialog box.
Step 9
Again, the text on the Webpage is changed to the IPv4 address. Click the Back button on the Web browser.
Figure 2.46 Screenshot of PLABWIN10: Showing the output and clicking the Back button.
Step 10
Back on the Server-Side Includes (SSI) Injection Webpage, you can show the current document name. you need to insert the following into the First name text box:
<!--#echo var="DOCUMENT_NAME" -->
In the Last name text box, type the following:
plab
Click Lookup.
Figure 2.47 Screenshot of PLABWIN10: Entering a script in the First name text box.
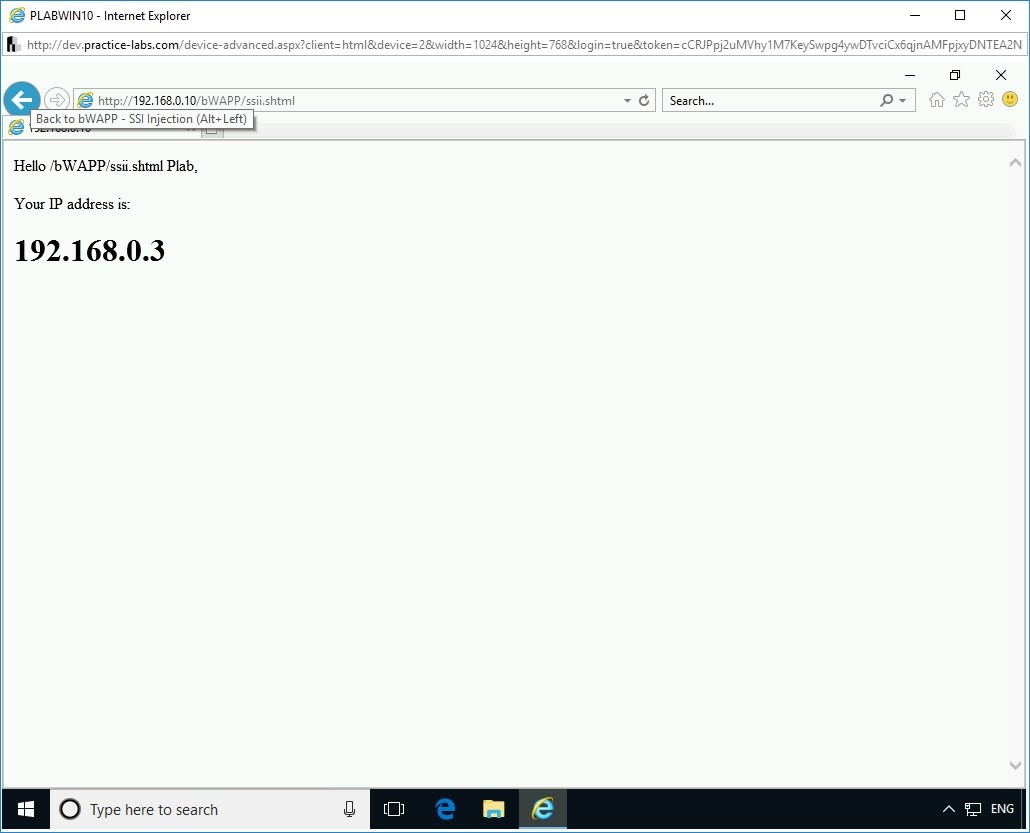
Step 11
Notice the output. It displays the current document name before the last name, which is plab. Click the Back button on the Web browser window.
Figure 2.48 Screenshot of PLABWIN10: Showing the output and clicking the Back button.
Step 12
Back on the Server-Side Includes (SSI) Injection Webpage, you can show the virtual path and filename. To do this, you need to insert the following into the First name text box:
<!--#echo var="DOCUMENT_URI" -->
In the Last name text box, type the following:
plab
Click Lookup.
Figure 2.49 Screenshot of PLABWIN10: Entering a script in the First name text box.
Step 13
Notice that the output shows the virtual path and the file name. Click the Back button on the Web browser.
Note: Try the following command: <!--#echo var="DATE_LOCAL" --> and note the output.Figure 2.50 Screenshot of PLABWIN10: Showing the output and clicking the Back button.
Step 14
Click the Back button on the Web browser window.
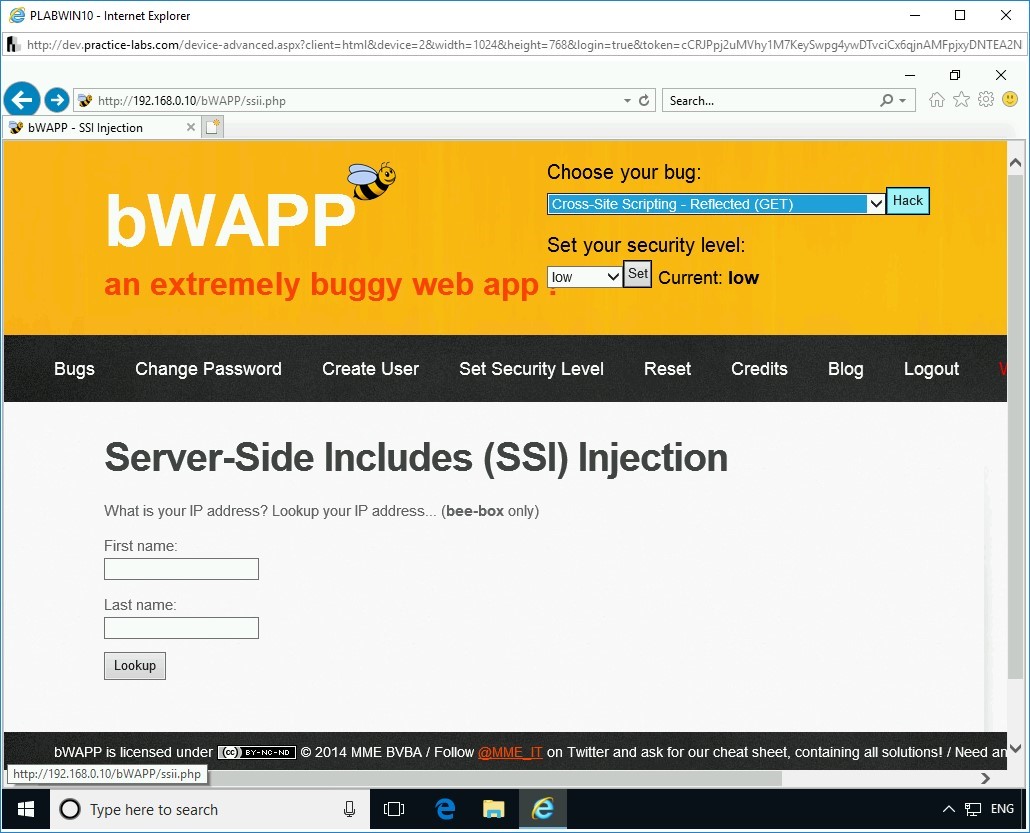
You should be back on the Server-Side Includes (SSI) Injection Webpage.
Figure 2.51 Screenshot of PLABWIN10: Clicking the Back button and then showing the Server-Side Includes (SSI) Injection page.Keep the Web browser window open.
Task 5 - Perform Cross-site Scripting Attack
Cross-site scripting (XSS) is a type of attack where the attacker injects malicious scripts into vulnerable web applications, thereby causing serious damage to the applications. The malicious script is executed in the victim’s web browser when the victim visits the infected page. JavaScript is the most common scripting language used for developing malicious codes. There are two broad categories of cross-site scripting attacks. These are as follows:
Reflected XSS
Stored XSS
A reflected XSS attack is also known as the non-persistent XSS attack. In this type of attack, the attacker sends the malicious code as a link in an email or posts it on the website. The victim clicks the link. The malicious script embedded within the link gets executed and is reflected back on the victim’s web browser. The browser then sends the cookie information of the victim’s session to the attacker. Thus, a reflected XSS attack occurs if the victim clicks the malicious links. Malicious links are generally found in unknown emails and comments section of less secure websites.
A stored XSS attack is also known as the persistent XSS attack. In this type of attack, the attacker injects the malicious script directly into a vulnerable web application. The malicious script steals the cookie information from the victim’s sessions and sends it to the attacker. Therefore, in stored XSS attack, the damage is more as the malicious script executes on every visit to the web application.
In this task, you will perform cross-site scripting attacks on the bWAPP application.
Step 1
Ensure you have powered on all the devices listed in the introduction and connect to PLABWIN10. The Internet Explorer window should be open.
To begin reflected cross-site scripting attack, from the Choose your bug drop-down, click Cross-site Scripting - Reflected (GET) and click Hack.
Figure 2.52 Screenshot of PLABWIN10: Clicking Cross-site Scripting - Reflected (GET) and clicking Hack.
Step 2
On the XSS - Reflected (GET) Webpage, In the First name text box, type the following name:
Plab
In the Last name text box, type the following name:
User
Click Go.
Figure 2.53 Screenshot of PLABWIN10: Entering user credentials on the XSS - Reflected (GET) page.
Step 3
Observe the output displayed in the address bar.
The input passed to the server is reflected in the application. This indicates a good entry point for reflected XSS attacks as the response is getting reflected.
Figure 2.54 Screenshot of PLABWIN10: Showing the input passed to the server is reflected in the application.
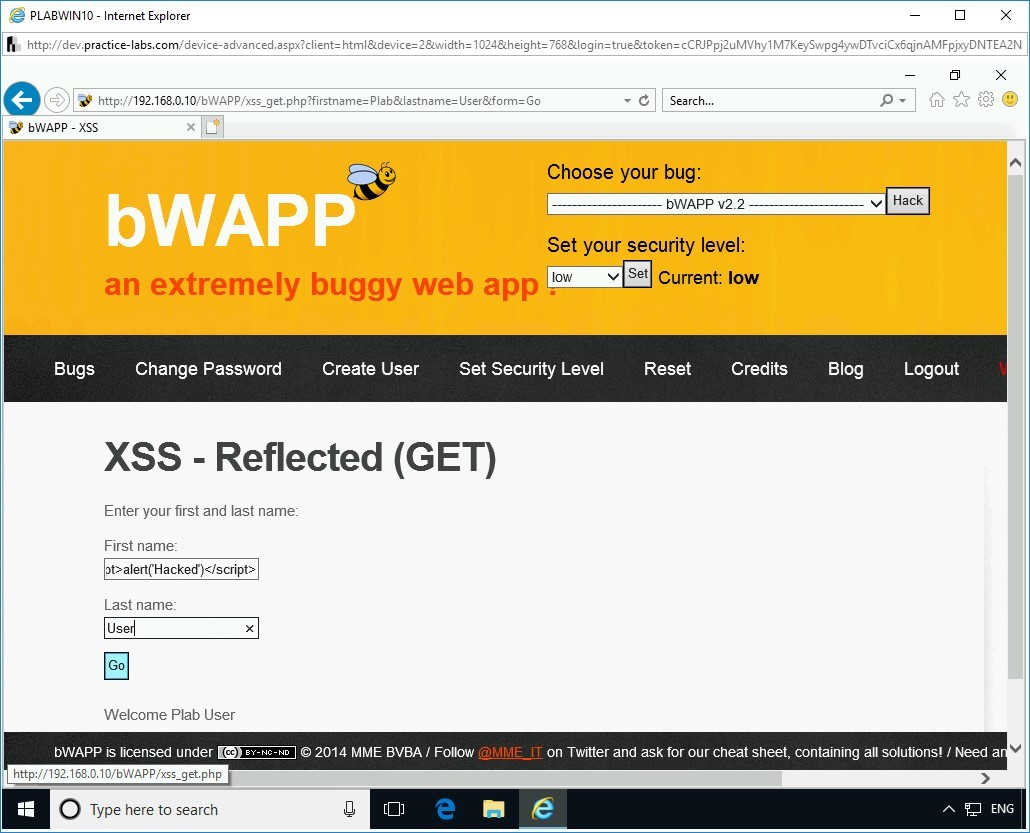
Step 4
On the XSS - Reflected (GET) Webpage, In the First name text box, inject a JavaScript code by typing the following:
<script>alert(‘Hacked’)</script>
In the Last name text box, type the following name:
User
Click Go.
Note: The script contains the following tags:<script>: This tag determines the start of JavaScript, alert: This will display an alert box on script execution, Hacked: This is the text to be displayed in the alert box, </script>: This tag determines the end of JavaScript.Figure 2.55 Screenshot of PLABWIN10: Entering the JavaScript code in the First name text box.
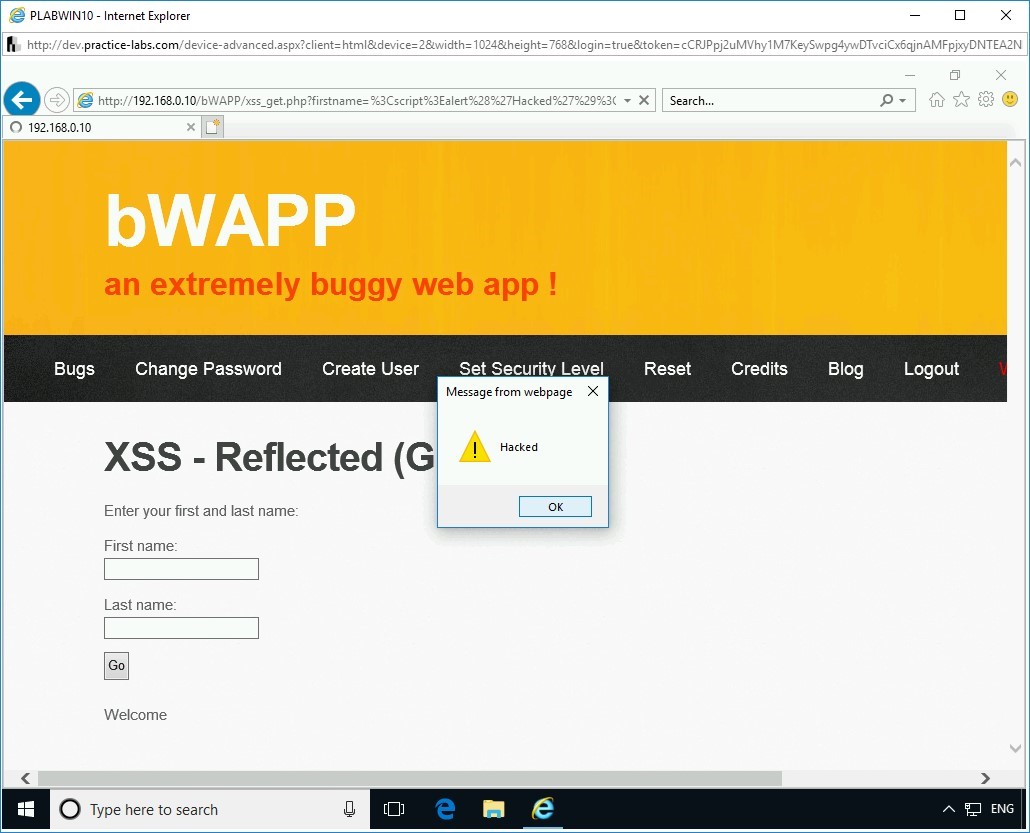
Step 5
The server processes the script and displays the alert message box.
Click OK.
Note: The script is executed and reflected back in the server response, which is a vulnerability. Using this vulnerability in a real-time environment, an attacker can inject malicious scripts in less secure applications to steal cookies, learn about the document location, and so on.Figure 2.56 Screenshot of PLABWIN10: Showing the output of the injected script.
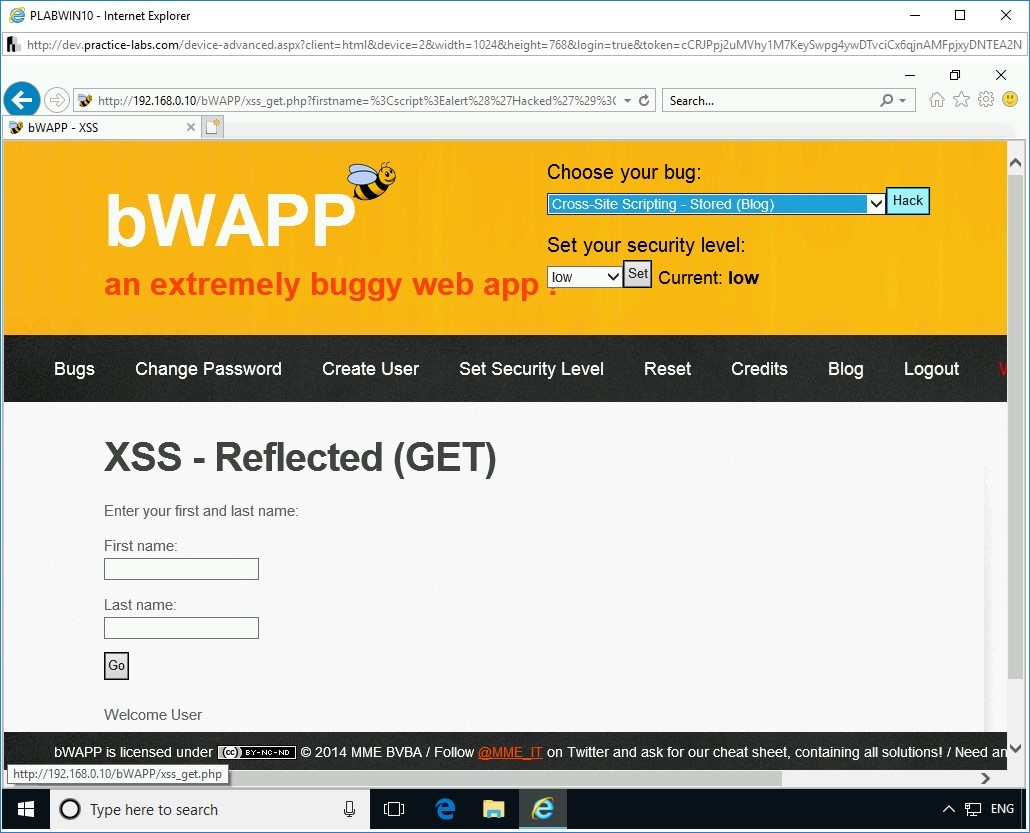
Step 6
You are back on the XSS - Reflected (GET) Webpage. From the Choose your bug drop-down, select Cross-Site Scripting - Stored (Blog) and click Hack.
Figure 2.57 Screenshot of PLABWIN10: Selecting Cross-Site Scripting - Stored (Blog) and clicking Hack.
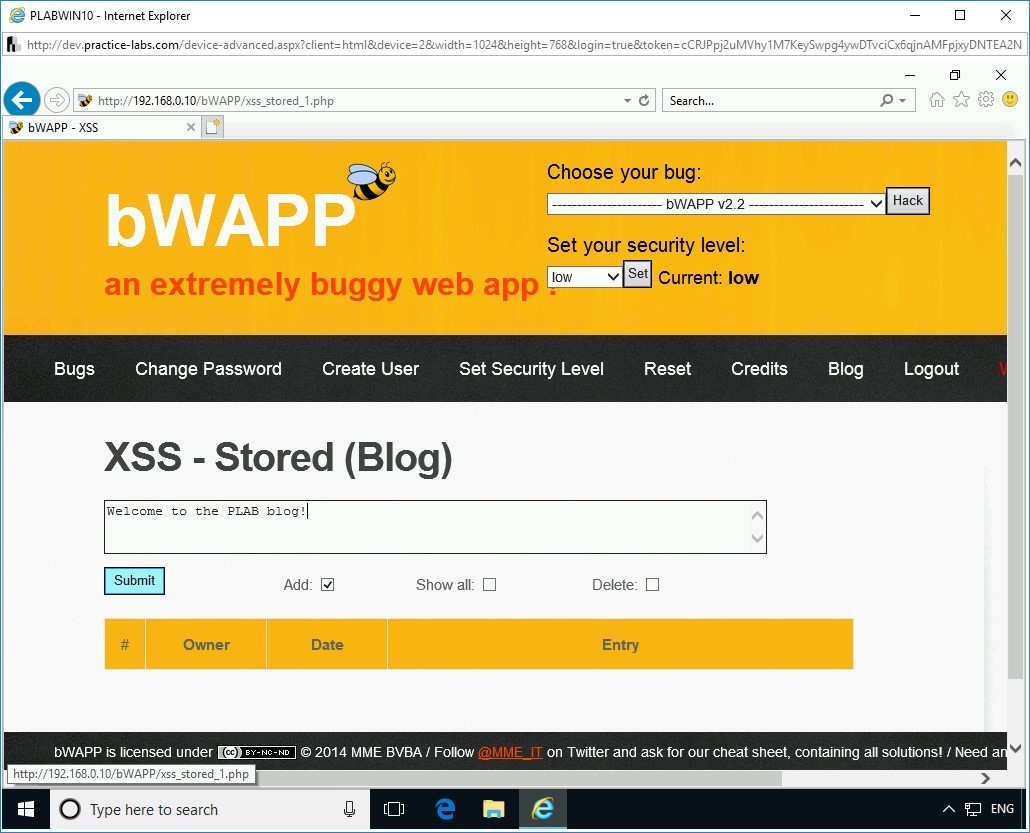
Step 7
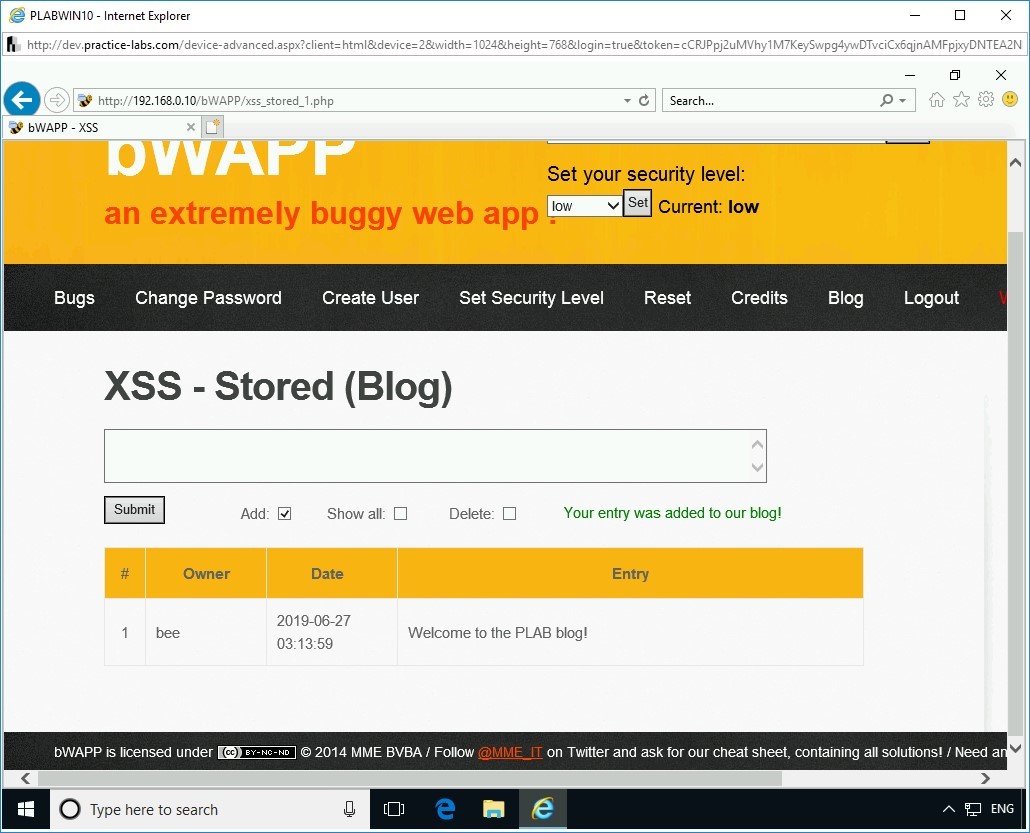
On the XSS - Stored (Blog) Webpage, type the following message in the text box:
Welcome to the PLAB blog!
Click Submit.
Figure 2.58 Screenshot of PLABWIN10: Entering statement in the text box on the XSS - Stored (Blog) page.
Step 8
Observe the output displayed on the screen.
The entered values are stored in the application’s database and are displayed permanently in the application’s XSS - Stored (Blog) page. This could be a potential entry point for stored XSS attacks.
Figure 2.59 Screenshot of PLABWIN10: Showing the stored statement that had been entered in the text box.
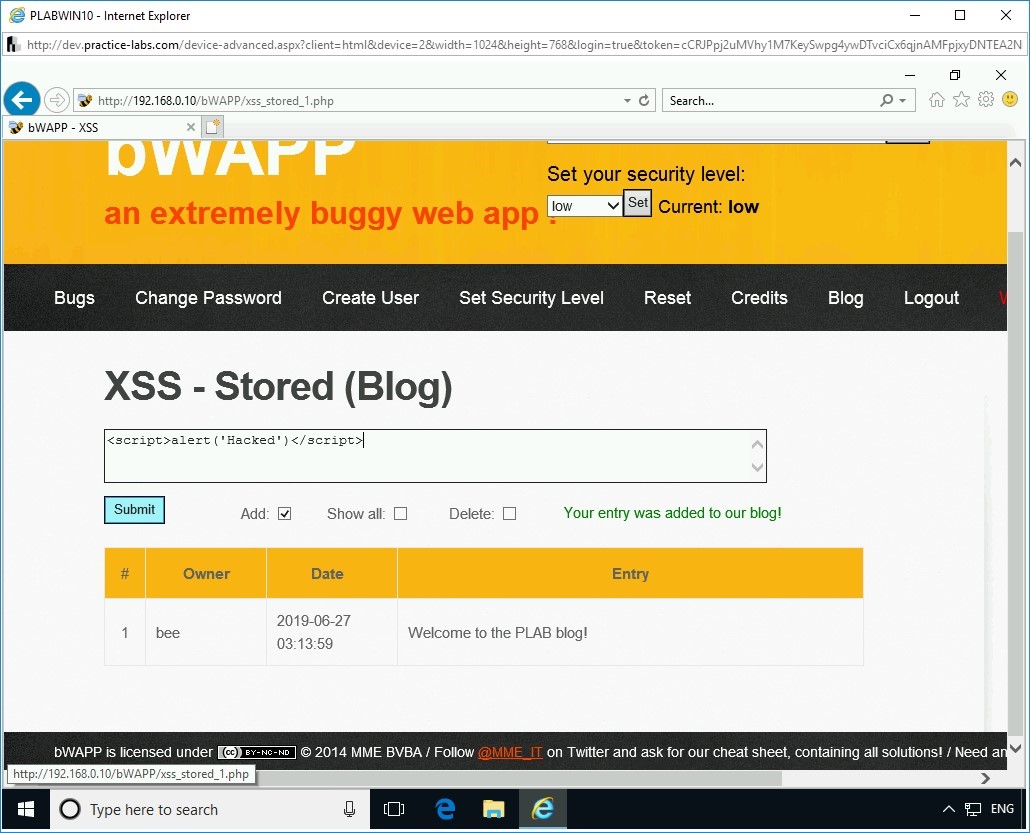
Step 9
On the XSS - Stored (Blog) Webpage, type the following message in the text box:
<script>alert(‘Hacked’)</script>
Click Submit.
Figure 2.60 Screenshot of PLABWIN10: Entering a script in the text box on the XSS - Stored (Blog) page.
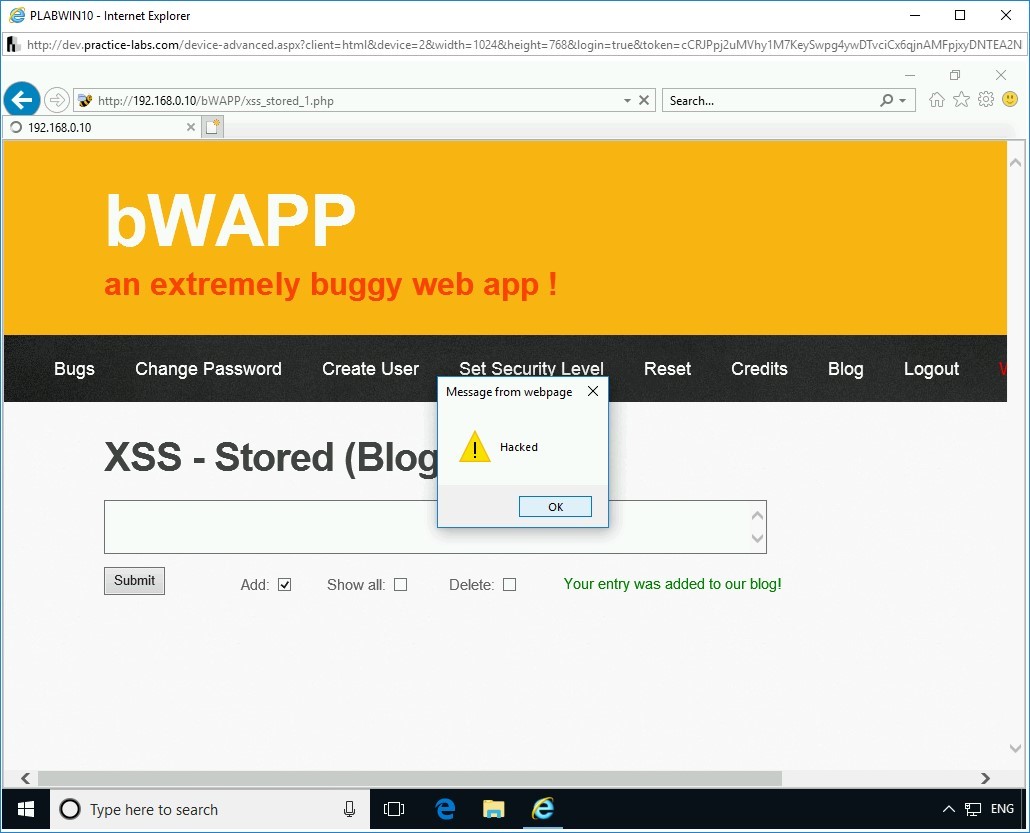
Step 10
The server processes the script and displays the alert message box.
Click OK.
Figure 2.61 Screenshot of PLABWIN10: Showing the prompt as the output of the entered script.
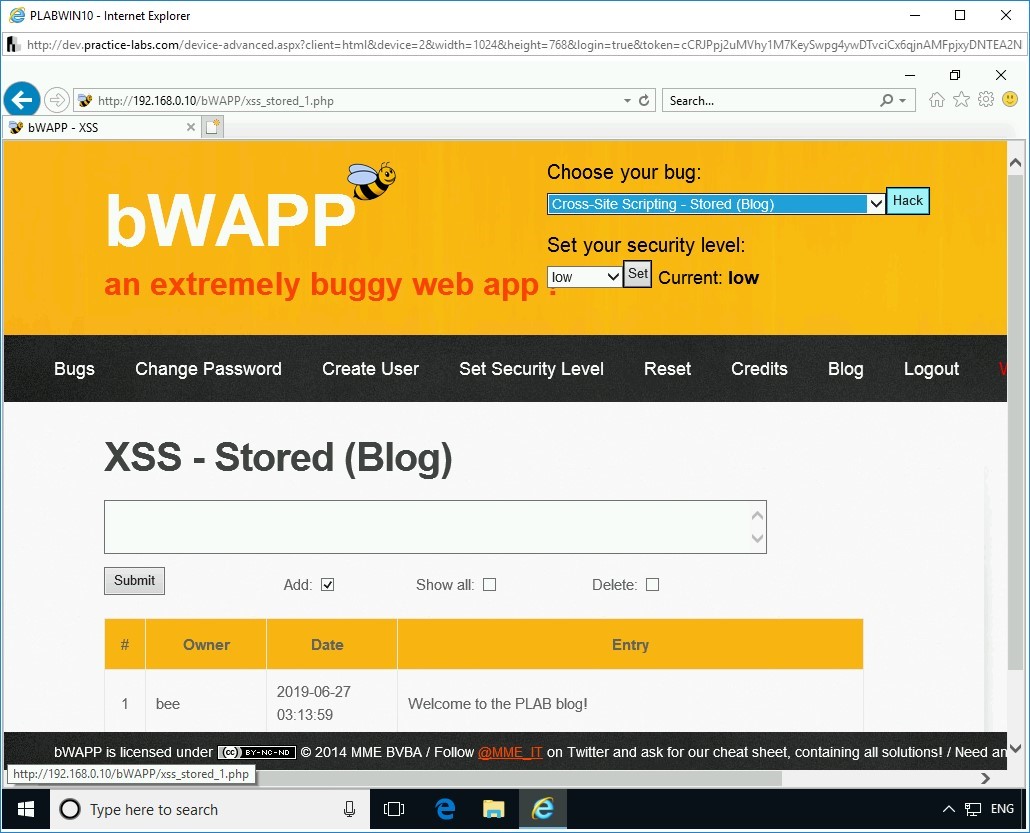
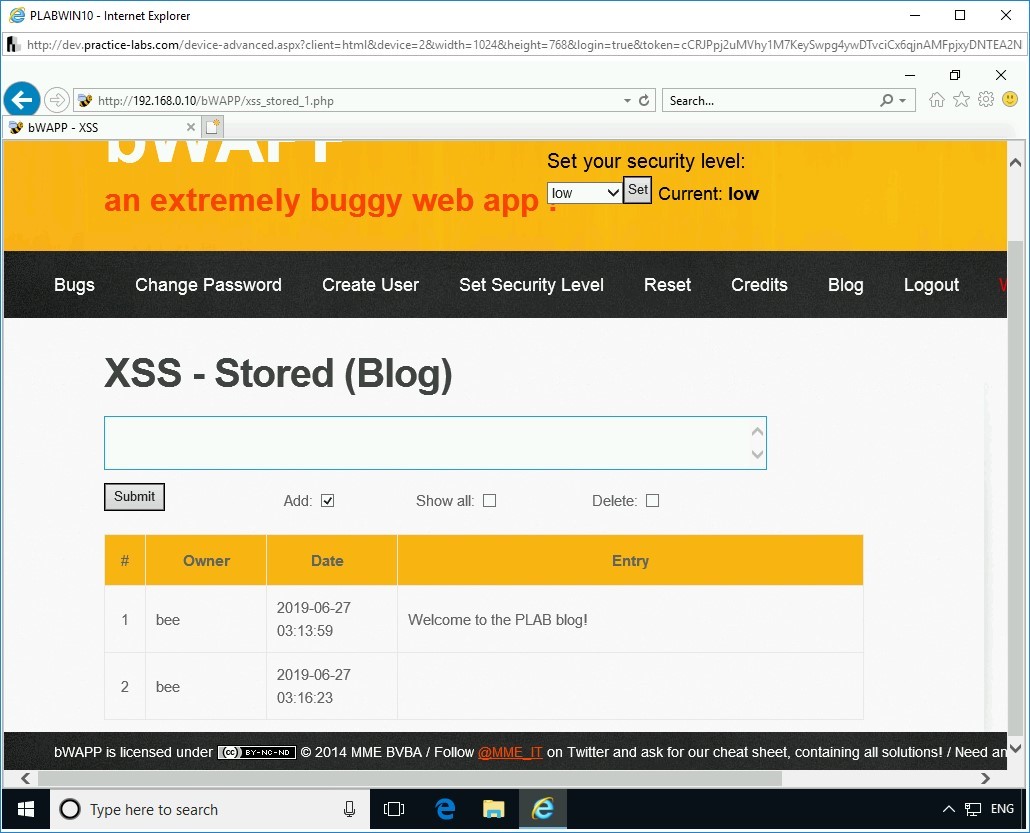
Step 11
You are back on the XSS - Stored (Blog) Webpage. Notice that there is a second entry on the list, but it is empty. The entered JavaScript gets reflected in the stored XSS section of the web page. Unlike reflected XSS, stored XSS is permanent since the entered values are stored in the application’s database.
Therefore, attackers could use this vulnerability to deface any website by displaying an image using stored XSS, steal cookies of users, and so on.
Figure 2.62 Screenshot of PLABWIN10: Showing the entries in the list box.
Step 12
Once again, select Cross-Site Scripting - Stored (Blog) from the Choose your bug drop-down and click Hack.
Figure 2.63 Screenshot of PLABWIN10: Selecting Cross-Site Scripting - Stored (Blog) and clicking Hack.
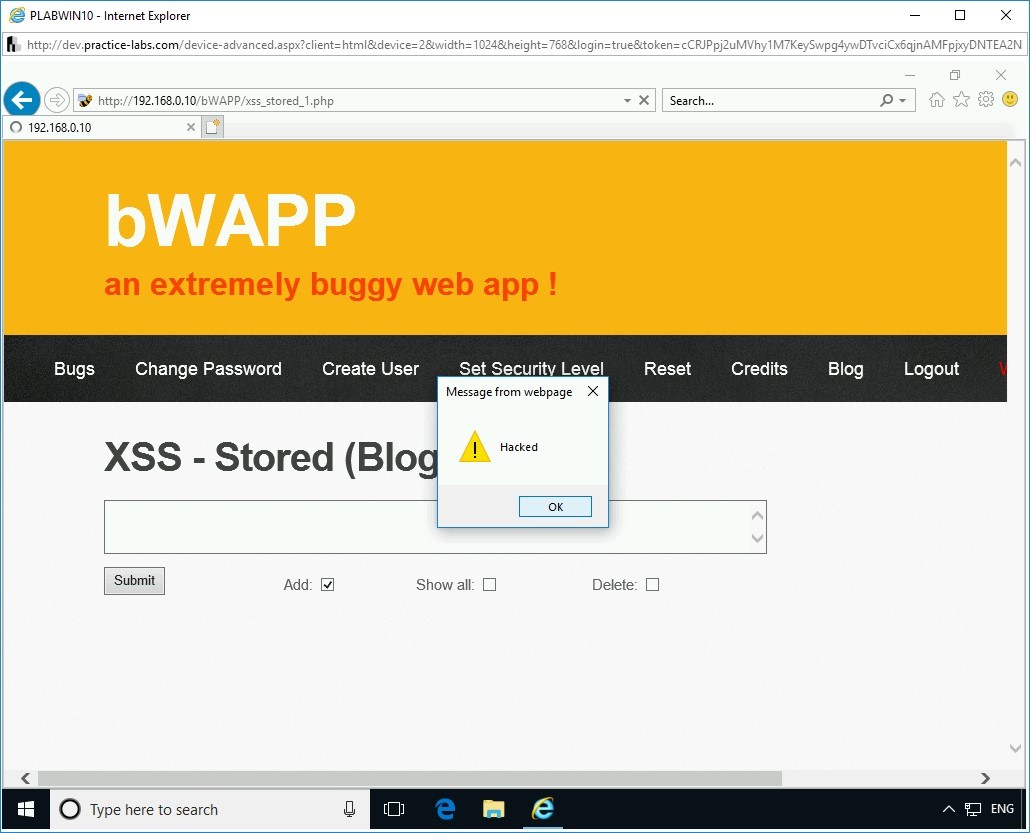
Step 13
The stored XSS script that you used on this page is displayed back again automatically.
Click OK in the alert message box.
This is because the injected JavaScript is stored in the database, and it gets executed every time you navigate to the stored XSS section.
However, in reflected XSS, this does not happen since the values are not stored in the application’s database.
Figure 2.64 Screenshot of PLABWIN10: Showing the Hacked prompt on the XSS - Stored (Blog) page.
Step 14
The XSS - Stored (Blog) Webpage is now displayed.
Figure 2.65 Screenshot of PLABWIN10: Showing the list of entries on the XSS - Stored (Blog) page.Keep the Internet Explorer window open.
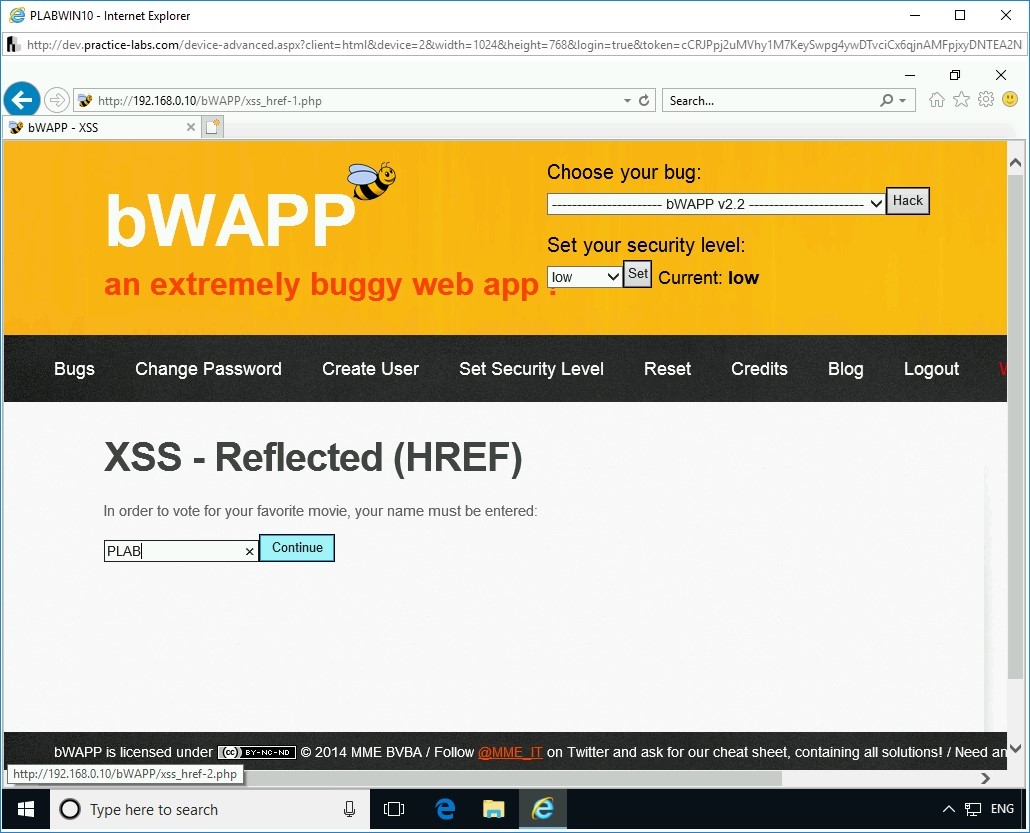
In the Reflected (HREF) attack, the attacker is able to insert a malicious script in the URL itself. This problem occurs when a Webpage requests for a string of information, such as a username, and displays it in the URL. If the input is not sanitized, the attacker can leverage this vulnerability to run a malicious script.
In this task, you will perform an XSS - Reflected (HREF) attack. To do this, perform the following steps:
Step 1
Ensure you have powered on all the devices listed in the introduction and connect to PLABWIN10. The Internet Explorer window should be open.
To begin reflected cross-site scripting attack, from the Choose your bug drop-down, click Cross-site Scripting - Reflected (HREF) and click Hack.
Figure 2.66 Screenshot of PLABWIN10: Selecting the Cross-Site Scripting - Reflected (HREF) and clicking the Hack button.
Step 2
The XSS - Reflected (HREF) Webpage is displayed. In the text box, type the following:
PLAB
Click Continue.
Figure 2.67 Screenshot of PLABWIN10: Entering PLAB in the text box and clicking Continue.
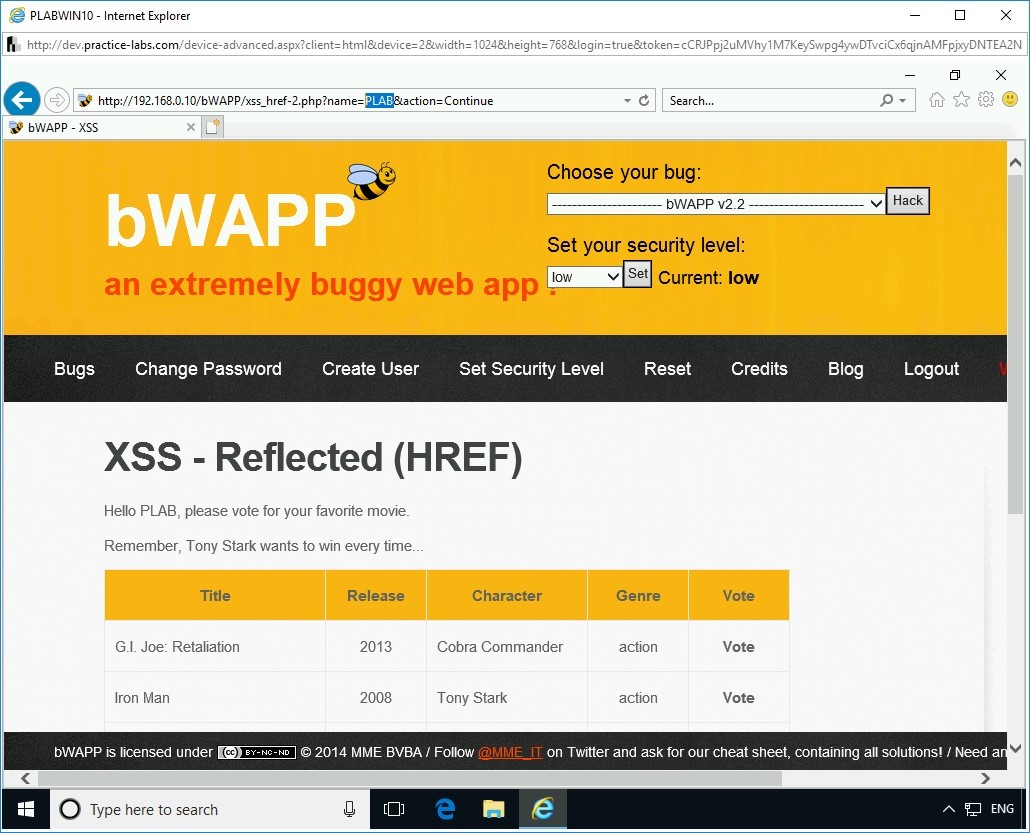
Step 3
Notice that the entered name is now embedded in the URL as well as displayed on the Webpage.
Figure 2.68 Screenshot of PLABWIN10: Showing the PLAB name in the URL and on the Webpage.
Step 4
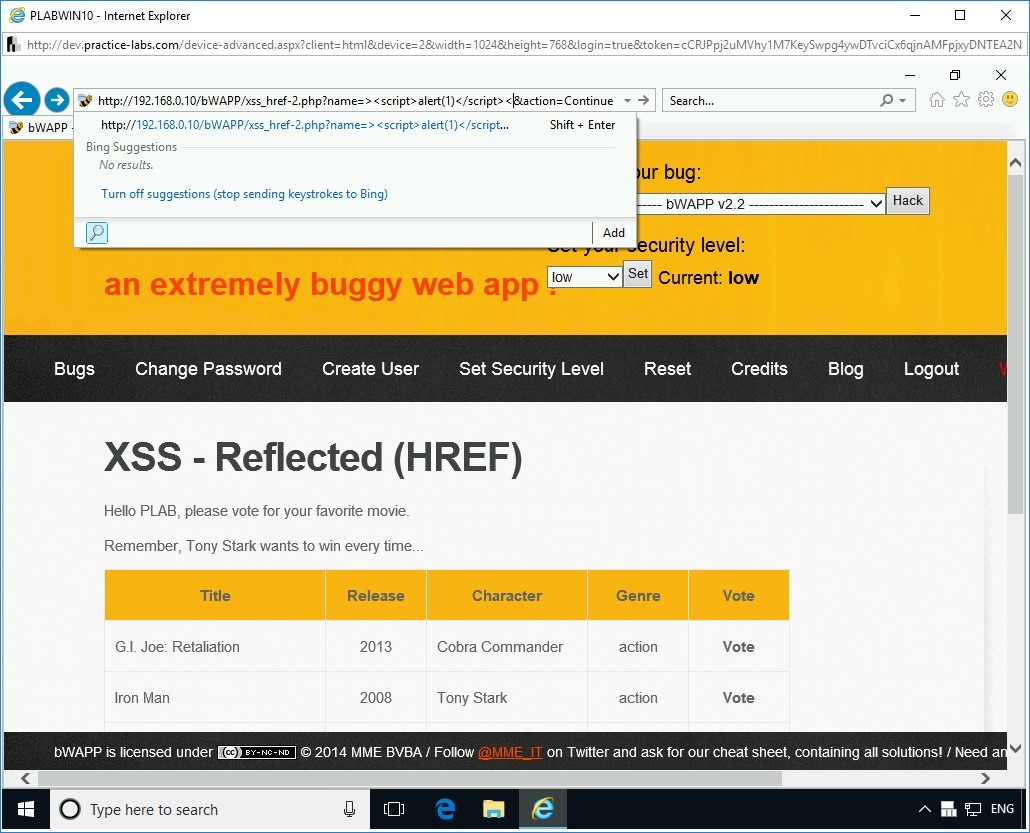
In the URL, replace the name PLAB with the following script:
><script>alert(1)</script><
Press Enter.
Figure 2.69 Screenshot of PLABWIN10: Replacing the PLAB word with a script.
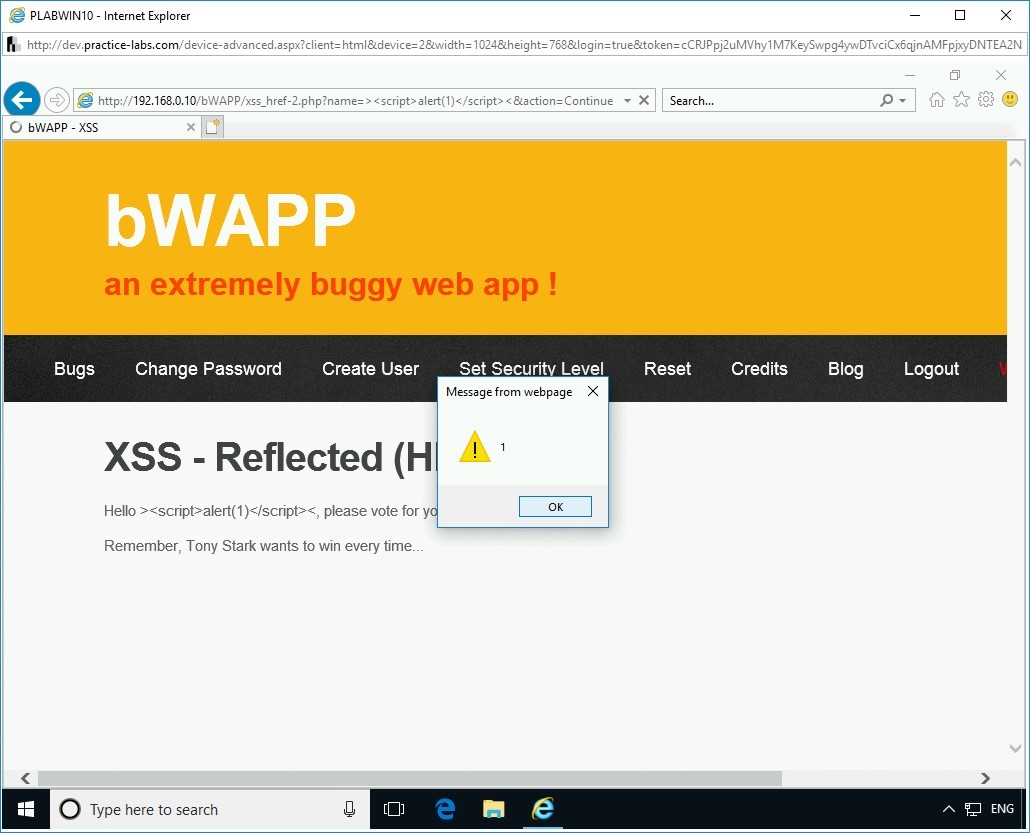
Step 5
You are navigated to another page. An alert is displayed with the value 1. Click OK.
Figure 2.70 Screenshot of PLABWIN10: Showing an alert as the output of the script.
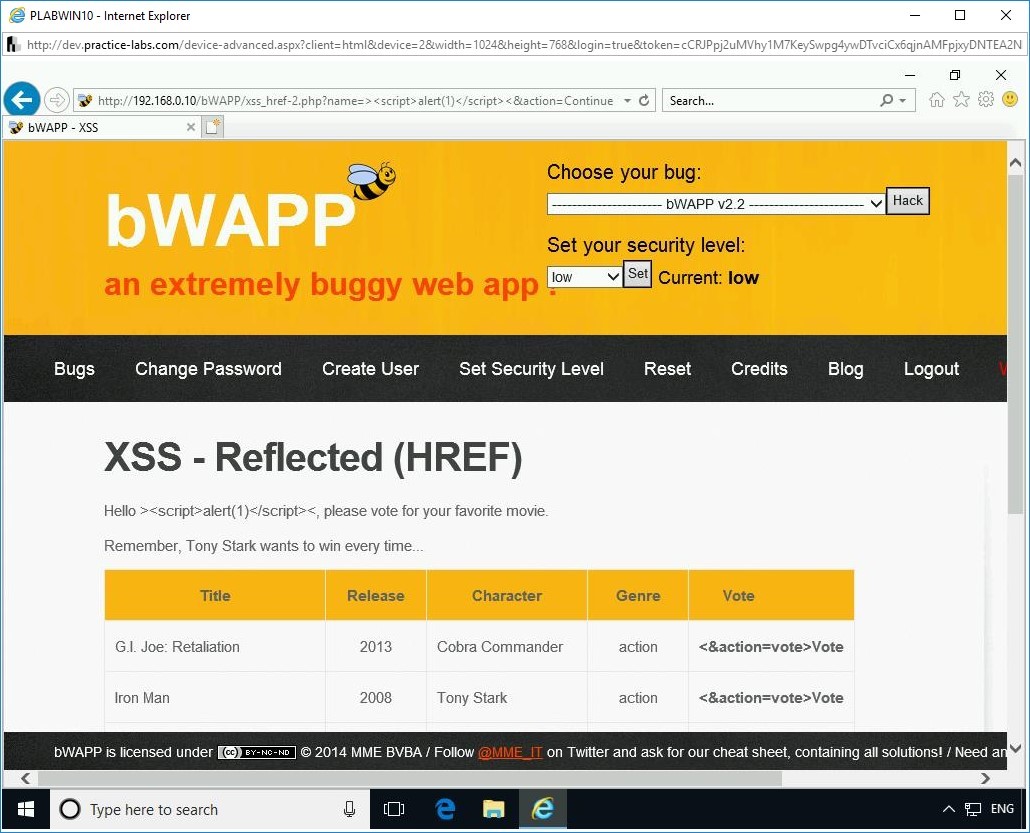
Step 6
The alert box will continue to display even after you click OK. You need to click OK and quickly click the Back button on the Web browser window. You may have to try a few times. The XSS - Reflected (HREF) Webpage with the movie listing and Hello <script> should be displayed.
Figure 2.71 Screenshot of PLABWIN10: Showing the XSS - Reflected (HREF) page with the output of the script.


Comments
Post a Comment